


You can learn how to print stronger parts by adjusting a few key factors. First, choose the right material for your print. Next, consider how to place the part on the print bed. Using proper printing settings is essential. Additionally, you can improve parts after printing. If you want to understand how to print stronger parts, watch out for these common issues:
- Incorrect printer settings
- Poor bed adhesion
- A blocked nozzle
- Wet filament
- Fluctuating room temperature
Follow each step carefully to ensure your parts come out stronger.
Key Takeaways
- Pick the best filament for strong prints. Materials like PEEK and Nylon are tough and bend easily.
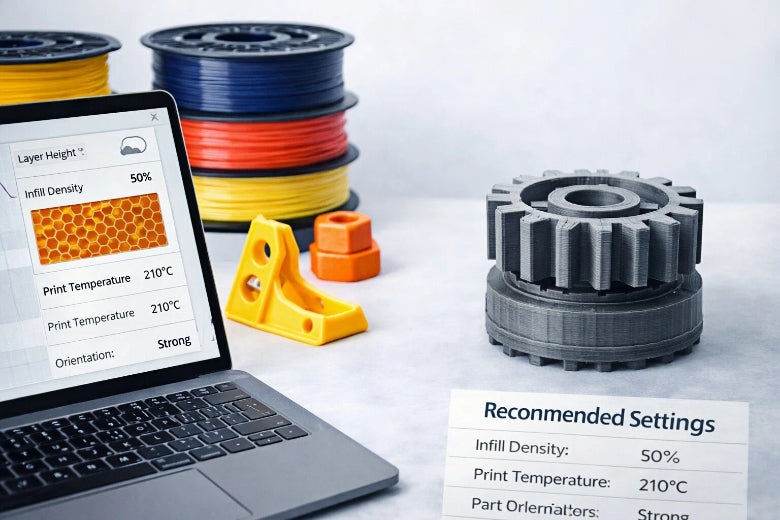
- Change print settings to make parts stronger. Use at least 50% infill density. Set wall thickness between 1.5 and 2 mm for more support.
- Finish your prints to make them even stronger. You can use annealing or put on epoxy coatings to help them last longer.
How to Print Stronger Parts: Material and Orientation
Strong Filament Choices
Picking the right material helps make your 3d prints stronger. Some filaments are tougher and last longer than others. The table below lists how strong each filament is and what makes them special:
|
Filament Type |
Notes |
|
|---|---|---|
|
PEEK |
~7,250 |
Top choice for strong parts, high durability |
|
Nylon |
~7,000 |
Good balance of strength and flexibility |
|
Carbon Fiber Infused |
6,000 - 8,000 |
Extra stiffness, great for reinforcement |
|
Polycarbonate |
High |
High strength, impact and heat resistance |
Polycarbonate and nylon are known for being strong and tough. Carbon fiber filament makes parts even stiffer and stronger. If you want your 3d prints to be strong, pick the best material for your project.
Best Print Orientation for Strength
How you place your part on the print bed changes its strength. Printing in the same direction as the force makes parts stronger. You should:
- Turn your part so it faces the main force.
- Do not use a 90° angle, because it makes parts weaker.
- FDM parts are anisotropic, which means they are stronger in the XY plane than in the Z direction.
You can make your prints stronger by choosing the best orientation.
Design for Stronger 3D Printed Parts
You can make your prints last longer by designing them well. Try these ideas:
- Add fillets or chamfers to round off sharp corners and lower stress.
- Use ribs, gussets, or make some areas thicker for extra support.
- Pick infill patterns like gyroid or cubic for more strength.
- Set infill density between 30% and 70% for working parts.
- Add more perimeters and make the walls thicker.
These tips help your 3d prints stay strong and last a long time. Good design, the right material, and smart orientation all help make your parts tougher.
3D Printing Settings for Strength
You can make your 3d prints much stronger by adjusting a few important 3d printing settings. The right choices for infill, wall thickness, layer height, and temperature will help you get the best results. Use the table below as a quick guide for the best settings for strong prints:
|
Setting |
Recommended Value |
Why It Matters |
|---|---|---|
|
Infill Density |
50% or higher |
More material inside means more strength |
|
Gyroid, Cubic, or Triangular |
These patterns spread force in all directions |
|
|
Wall Thickness |
1.5 – 2 mm (3–5 perimeters) |
Thick walls hold parts together |
|
Layer Height |
0.2 – 0.24 mm |
Good balance of speed and layer adhesion |
|
Line Width |
0.6 mm or more |
Wider lines stick together better |
|
Print Temperature |
220 – 240 °C (check material) |
Hotter temperatures improve layer bonding |
|
Cooling Fan Speed |
Low to medium (ABS/PETG: low) |
Less cooling helps layers stick together |
Infill Density and Pattern for Stronger Prints
Infill in 3d printing is the structure inside your part. It acts like the bones in your body. If you want stronger 3d prints, you need to pick the right infill density and pattern. Infill density means how much of the inside is filled with material. A higher infill percentage gives more strength, but also uses more material and takes longer to print.
Here is a quick look at the best infill density for different materials:
|
Material |
Notes |
|
|---|---|---|
|
PLA |
20 – 30 % |
Brittle; softens at about 60 °C |
|
PETG |
25 – 40 % |
Tough; heat-resistant to about 80 °C |
|
ABS |
30 – 50 % |
Needs enclosure; handles higher temperatures |
|
Nylon |
35 – 50 % |
Great impact strength; keep filament dry |
|
Carbon-fiber blends |
15 – 25 % |
Stiff fibers allow lower density |
If you want the strongest parts, set your infill density to at least 50%. For most projects, 30–50% works well. For maximum strength, you can go up to 85%, but this uses much more material.
The infill pattern also matters. Some patterns make your parts stronger in all directions. Try these patterns for the best results:
- Gyroid: Gives even strength in every direction and works fast.
- Cubic: Handles force from all sides and is good for load-bearing parts.
- Triangular: Very strong against pulling and pushing forces.
- Honeycomb: Good for horizontal strength.
- Grid: Great for vertical compression.
Gyroid and cubic patterns are the best for most strong 3d prints. They help spread force and keep your parts from breaking.
Tip: Use a higher infill density for working parts and choose gyroid or cubic patterns for the best strength.
Wall Thickness and Perimeters
Wall thickness is how thick the outside of your part is. Perimeters are the number of times the printer goes around the edge. If you want to print stronger parts, you should focus on these settings.
- Use at least 3–5 perimeters for strong walls.
- Make walls at least 1.5–2 mm thick.
- For unsupported walls, never go thinner than 1 mm.
- Thicker walls help your part stay stiff and resist breaking.
Adding more perimeters makes a bigger difference than just increasing infill. If you want to improve adhesion between layers, thick walls and more perimeters are key. For example, a hook with 4 perimeters can hold much more weight than one with only 2.
Note: If you design parts with ribs or gussets and use thick walls, you will get even more strength.
Layer Height and Line Width
Layer height is how tall each printed layer is. Line width is how wide each line of melted material is. Both settings affect how well the layers stick together.
- Use a layer height of 0.2–0.24 mm for the best mix of speed and strength.
- Thicker layers (up to 0.24 mm) can make parts stronger, but too thick can reduce detail.
- Thicker walls help if you use smaller layer heights.
- Use a line width of 0.6 mm or more for strong prints.
Wider lines help layers bond better. This means your parts will not break as easily. If you want to adjust print settings for strength, start by making your line width bigger.
Tip: Thicker extrusions not only make your parts stronger, but also reduce print time.
Print Temperature and Cooling
Temperature is one of the most important 3d printing settings for strong parts. If you print too cold, layers will not stick. If you print too hot, your part can get messy or lose shape.
- Set your nozzle temperature between 220–240 °C for most materials.
- Always check the recommended temperature for your filament.
- Higher temperatures improve adhesion and make layers fuse better.
- Too much heat can cause over-extrusion or make your part droop.
Cooling also matters. If you use too much cooling, your part can become brittle and weak. If you use too little, your part may warp.
- Use low to medium cooling for most materials.
- For ABS and PETG, use low cooling to keep layers sticking together.
- For PLA, you can use more cooling, but not at the highest setting.
Tip: Print at the high end of the recommended temperature range and reduce cooling for better layer adhesion.
By following these 3d printing settings, you can make your parts much stronger. Always test your settings with your material and printer to find what works best for you.
Post-Processing for Stronger 3D Prints
Annealing and Heat Treatment
You can make your 3d printed parts stronger by annealing them. This means you heat the parts to a certain temperature and let them cool down slowly. Annealing works best with thermoplastics like PLA and ABS. When you heat the parts, the polymer chains move and line up better. This helps the layers stick together and lowers stress inside the part. Your parts become stronger and can handle heat and impacts better. For PLA, annealing at 80–100°C makes it stronger and helps it last longer. You can use an oven or a heat gun for this. Always check what temperature is best for your material.
Tip: Annealing lets your parts stand up to more heat and makes them harder to break.
|
Method |
Description |
|---|---|
|
Annealing |
Heating parts to lower stress inside and help layers stick, which makes them stronger and more heat resistant. |
Surface Coatings and Bonding
Adding coatings to your 3d prints makes them tougher and last longer. Epoxy or polyurethane coatings keep out water and protect from damage. Epoxy fills small spaces inside and makes the part stronger. This is very helpful if your part has low infill density. For example, epoxy can make parts up to 13% stronger at 20% infill. You can also use glue like cyanoacrylate or two-part epoxy to stick parts together. Solvent welding works well with ABS and makes a strong join.
|
Method |
Description |
|---|---|
|
Coatings |
Putting on layers like epoxy or polyurethane to make parts last longer and protect from damage. |
|
Bonding Agents |
Glues and welding that help hold parts together and make them stronger. |
If you want your parts even stronger, use both annealing and coatings together.
You can boost the strength of your 3d prints by choosing the right material, adjusting print orientation, and using the best settings for strong prints. Try different 3d printing settings, like infill and wall thickness. Small changes in 3d printing can lead to stronger 3d parts. Experiment for the best results.
FAQ
What are common mistakes when trying to print stronger parts?
You might use low infill, thin walls, or wrong temperature. Fix weak prints by increasing infill, adding perimeters, and checking your print settings.
How can you fix weak prints after printing?
You can use epoxy coatings, anneal your parts, or glue broken pieces. These steps help make your stronger 3D prints last longer.
What are the best settings for strong prints?
Set infill density to 50% or higher, use 3–5 perimeters, and print at the recommended temperature for your filament. These settings improve strength.


