


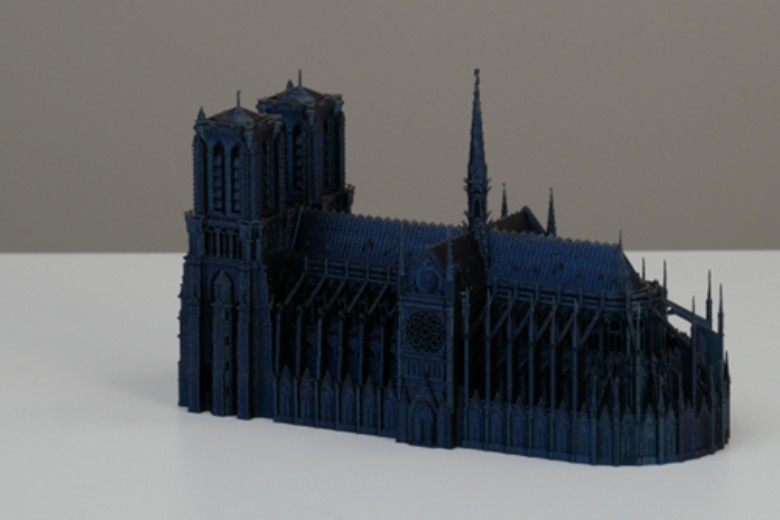
FDM 3D printing offers endless possibilities for creating visually stunning objects. Achieving better aesthetic results depends on how effectively you optimize your printer and materials. Focus on fine-tuning settings, maintaining your equipment, and using quality filament. These adjustments ensure smoother surfaces and elevate the overall appearance of your prints.
Key Takeaways
- Leveling the print bed correctly helps make smooth prints. Use tools like feeler gauges to keep it even and stop warping.
- Pick good-quality filament for better-looking prints. Keep filament dry to avoid moisture, which can cause problems.
- Clean and take care of your printer often to prevent extrusion troubles. A clean printer gives steady and nice prints.
Preparing for Better Aesthetic Results
Proper Bed Leveling and Calibration
Achieving better aesthetic results starts with proper bed leveling and calibration. A well-leveled bed ensures consistent first-layer adhesion, which is critical for smooth prints. Use tools like feeler gauges or a dial indicator to measure and adjust the bed's evenness. Verify the nozzle height to maintain the correct gap between the nozzle and the print bed. This step prevents issues like warping or uneven layers.
For precise calibration, consider using digital calipers or micrometers to check dimensions and layer heights. Regularly inspect the printer's Z-axis alignment to avoid deviations that can affect surface quality. These practices ensure your prints have a solid foundation for aesthetic excellence.
|
Tool |
Purpose |
|---|---|
|
Feeler Gauges |
Measure small gaps for bed leveling |
|
Dial Indicator |
Detect deviations in bed leveling |
|
Digital Calipers |
Verify dimensional accuracy |
Choosing High-Quality Filament
The filament you choose significantly impacts the visual quality of your prints. High-quality filaments with stable thermal properties reduce warping and ensure even extrusion. Look for materials with consistent diameter and composition to achieve precise results.
Store your filament in a dry environment to prevent moisture absorption, which can cause defects like bubbling or stringing. Pre-drying filaments, especially hygroscopic ones like nylon, enhances their performance. Investing in premium materials improves bonding, reduces shrinkage, and minimizes imperfections, leading to better aesthetic results.
Cleaning and Maintaining Your Printer
A clean and well-maintained printer is essential for producing visually appealing prints. Residual filament or dust can contaminate the nozzle, causing extrusion issues. Regularly clean the nozzle and print bed to avoid these problems.
Calibrate your printer frequently to maintain alignment and accuracy. Inspect moving parts for wear and lubricate them as needed. Address software errors promptly to prevent operational delays. These maintenance habits ensure your printer operates at peak performance, delivering consistent and high-quality prints.
Optimizing Print Settings for Aesthetics
Adjusting Layer Height for Smooth Finishes
Layer height plays a crucial role in determining the smoothness of your prints. Thinner layers, such as 0.10 mm, are ideal for achieving high detail and smoother surfaces. This is especially true for models with curves or intricate features. By reducing the layer height, you minimize the visible "stair-stepping" effect, resulting in a more polished appearance.
Using variable layer heights can further enhance your results. For example, you can apply thicker layers in less detailed areas and thinner layers in sections requiring precision. This approach balances print quality and efficiency. However, proper calibration is essential when adjusting layer heights. Without it, you risk uneven prints or poor layer adhesion, which can compromise the final look.
Research shows that layer thickness significantly impacts surface roughness. As layer thickness increases, surface roughness also increases due to larger gaps between filaments. To achieve better aesthetic results, prioritize thinner layers and ensure your printer is well-calibrated.
Slowing Print Speed for Better Surface Quality
Reducing print speed can dramatically improve surface quality. When the printer moves slower, it allows the filament to cool and settle more evenly, reducing imperfections like ripples or blobs. Slower speeds also give the extruder more time to deposit material accurately, enhancing the overall finish.
For best results, experiment with different speeds based on your filament type and model complexity. For example, printing at 40-60 mm/s often yields smoother surfaces compared to higher speeds. Keep in mind that slower speeds may increase print time, but the improved aesthetics are worth the trade-off.
Minimizing Support Marks with Smart Settings
Supports are often necessary for complex models, but they can leave unsightly marks on your prints. To minimize these marks, adjust your support settings carefully. Lowering the support density reduces the contact area, making it easier to remove supports without damaging the surface.
Another effective strategy is to use a higher support Z-distance. This creates a small gap between the support and the model, preventing the support from fusing with the print. Additionally, consider using tree supports or custom support structures. These options provide adequate support while reducing the risk of visible marks.
Post-processing can further enhance your results. Sanding or chemical smoothing can remove any remaining imperfections, leaving your print with a clean, professional finish.
Using Retraction to Prevent Stringing
Stringing occurs when filament oozes from the nozzle during travel moves, leaving thin strands across your print. Retraction settings help combat this issue by pulling the filament back into the nozzle before moving to a new location.
To optimize retraction, start by adjusting the retraction distance and speed. A retraction distance of 4-6 mm and a speed of 40-60 mm/s works well for most filaments. However, these values may vary depending on your printer and material. Conduct test prints to find the ideal settings for your setup.
Enabling features like coasting or wiping can further reduce stringing. Coasting stops extrusion slightly before the end of a print move, while wiping moves the nozzle across the print to clean up excess filament. These techniques, combined with proper retraction settings, ensure cleaner prints with fewer imperfections.
By fine-tuning these print settings, you can achieve better aesthetic results and elevate the quality of your 3D prints.
Post-Processing Techniques to Enhance Aesthetics
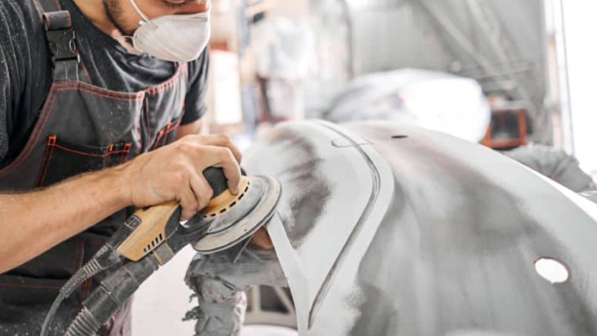
Sanding for a Polished Surface
Sanding is one of the most effective ways to achieve a polished surface on your 3D prints. By smoothing out layer lines and imperfections, you can significantly enhance the visual appeal of your models. Start with coarse-grit sandpaper (e.g., 100-200 grit) to remove larger imperfections, then gradually move to finer grits (e.g., 400-1000 grit) for a smoother finish. Wet sanding, which involves using water to reduce friction and prevent dust, can further improve the results.
Empirical data highlights the effectiveness of sanding in reducing surface roughness. For example:
|
Treatment Method |
Notes |
|
|---|---|---|
|
Mechanical Polishing |
Below 0.2 μm |
Yields smoother surfaces compared to glazing |
|
Glazing |
Increased surface roughness |
Noted significant increase in roughness across groups |
|
Sandblasting |
Contributes to surface finish |
Used in conjunction with silicon carbide application |
To achieve better aesthetic results, focus on even pressure and consistent motion while sanding. This ensures a uniform finish and prevents over-sanding, which could damage the model's details.
Painting and Priming for a Professional Look
Painting and priming can transform a basic 3D print into a professional-looking masterpiece. Priming prepares the surface by filling small imperfections and creating a uniform base for paint application. Use a spray primer for even coverage, and sand lightly between coats to maintain a smooth surface.
Once primed, apply paint in thin, even layers. Acrylic paints work well for most filaments, offering vibrant colors and durability. For added protection and a polished finish, consider sealing your model with a clear varnish.
Painting and priming offer several advantages over other finishing techniques:
- An isolation coat protects the paint film during varnish removal, preserving the model's integrity.
- It corrects matte or uneven gloss surfaces, ensuring a uniform finish.
- The two-layer system allows flexibility in varnish choices, enhancing both protection and aesthetics.
These steps not only improve the appearance of your prints but also add durability, making them suitable for display or functional use.
Chemical Smoothing for Certain Materials
Chemical smoothing is a powerful technique for achieving a glossy, professional finish on specific materials like ABS or ASA. This method involves exposing the print to a solvent, such as acetone, which melts the outermost layer of the material. The result is a smooth, glass-like surface that eliminates visible layer lines.
To perform chemical smoothing, place your print in a sealed chamber with a small amount of solvent. The vapor will evenly coat the model, smoothing the surface without compromising structural integrity. Always follow safety precautions, as solvents can be hazardous.
This technique works best for materials that react well to solvents. For PLA or PETG, alternative methods like sanding or painting may be more effective. Chemical smoothing is ideal for achieving better aesthetic results on models requiring a sleek, polished appearance.
Filling Imperfections with Putty
Filling imperfections with putty is a crucial step in preparing your 3D prints for finishing. Layer lines, gaps, and small defects can detract from the overall look of your model. Applying putty allows you to repair these imperfections and create a flawless surface.
Use modeling putty or spot putty to fill visible holes and cracks. Spot putty is particularly effective for maintaining fine details while addressing gaps. Apply the putty with a small scraper or your fingertip, ensuring a smooth and even surface. Once the putty dries, sand the area to blend it seamlessly with the rest of the model.
The process typically involves three steps:
|
Step |
Description |
|---|---|
|
1 |
Filling and applying putty are crucial for preparing a 3D printed part. |
|
2 |
It addresses defects and fills in recesses left by layer lines. |
|
3 |
Effective application ensures a flawless finish, improving aesthetic appeal. |
For models with significant imperfections, this technique is indispensable. It ensures a smooth surface, which is essential for achieving a high-quality finish before painting. By incorporating putty into your post-processing routine, you can elevate the overall appearance of your 3D prints.
Advanced Tips for Superior Aesthetic Results
Upgrading to Hardened Nozzles for Exotic Filaments
Using exotic filaments like carbon fiber or metal-filled materials can elevate the aesthetics of your prints. However, these materials are abrasive and can wear down standard brass nozzles quickly. Upgrading to hardened steel or ruby-tipped nozzles ensures durability and consistent extrusion. Hardened nozzles resist wear, maintaining their diameter over time, which is crucial for precise layer deposition.
When selecting a nozzle, consider the filament's abrasiveness and your desired layer height. For example, a 0.4 mm hardened nozzle works well for most applications, balancing detail and print speed. Regularly inspect your nozzle for signs of wear, as even hardened nozzles can degrade with prolonged use. This upgrade not only improves print quality but also extends the lifespan of your printer components.
Using Direct Drive Extruders for Flexible Materials
Flexible filaments like TPU or TPE require precise control to achieve high-quality prints. A direct drive extruder provides this control by positioning the extruder directly on the print head. This setup minimizes the filament path, reducing the risk of bending or feeding issues. Bowden setups, with their longer paths, often struggle with flexible materials, leading to jams or inconsistent extrusion.
Direct drive extruders also enhance material control, allowing for smoother prints with fewer imperfections. While they add weight to the print head, the benefits outweigh the drawbacks for flexible filaments. This configuration ensures stable performance, making it an essential upgrade for printing with specialty materials.
Selecting Models Designed for Aesthetic Printing
Not all 3D models are created equal when it comes to aesthetics. Choosing designs optimized for FDM printing can significantly impact the final appearance. Look for models with fewer overhangs, as these reduce the need for supports and minimize post-processing. Designs with smooth curves and well-defined details translate better into high-quality prints.
You can also use slicer software to analyze models before printing. Tools like mesh repair and overhang detection help identify potential issues, allowing you to make adjustments. By selecting the right models, you set yourself up for success in achieving superior aesthetic results.
Experimenting with Multi-Color or Multi-Material Printing
Multi-color and multi-material printing open up new possibilities for creating visually stunning prints. These techniques allow you to combine different colors or materials in a single model, enhancing both aesthetics and functionality. For example, you can print a model with a rigid frame and flexible joints, or add vibrant color accents to a design.
Studies have shown the benefits of multi-material printing in various fields:
|
Study |
Technique |
Findings |
|---|---|---|
|
Laumer et al. (2012) |
SLS |
Enhanced properties through functional gradient multimaterial (FGM) method. |
|
Sigmarsson et al. (2006) |
SLS |
Fabricated multilayer microelectronic components with varying properties. |
|
Stichel et al. (2018) |
Electrophotographic powder transfer |
Improved surface finish and mechanical resistance through uniform powder distribution. |
These advancements demonstrate the potential of multi-material printing to elevate your projects. Experimenting with these techniques can help you achieve unique and professional-looking results.
Achieving better aesthetic results in FDM 3D printing depends on your commitment to refining every step of the process. From preparation to post-processing, each adjustment contributes to smoother surfaces and sharper details. Experiment with these techniques to discover the best combination for your projects. Consistent practice will elevate your prints to a professional level.
FAQ
What is the best layer height for aesthetic 3D prints?
A layer height of 0.1 mm works well for smooth finishes. It reduces visible layer lines and enhances the overall appearance of your prints.
How can you prevent warping during printing?
Ensure proper bed leveling and use a heated bed. Apply adhesives like glue sticks or painter’s tape to improve first-layer adhesion and reduce warping.
Which post-processing method works best for PLA prints?
Sanding and painting are ideal for PLA. Start with coarse-grit sandpaper, then move to finer grits. Apply primer and paint for a polished, professional finish.


Αφήστε ένα σχόλιο
Όλα τα σχόλια συντονίζονται πριν δημοσιευθούν.
Αυτή η τοποθεσία προστατεύεται από το hCAPTCHA και ισχύουν η Πολιτική απορρήτου και οι Όροι Παροχής Υπηρεσιών του hCaptcha.