Yes, you can build an efficient filament dryer box at home using easy-to-find materials. You just need a good container, some silica gel, and a bit of creativity. Check out how much you can save:
|
Approximate Cost |
Assembly Time |
|
|---|---|---|
|
Heated DIY Filament Dry Box |
As low as $20 |
30 minutes to 1 hour |
|
3D Printed DIY Filament Dry Box |
$80 - $100 |
50 hours (printing) + 1-2 hours (assembly) |
A dry box keeps your filament ready and helps you avoid print failures. The numbers below show how much moisture you can remove:
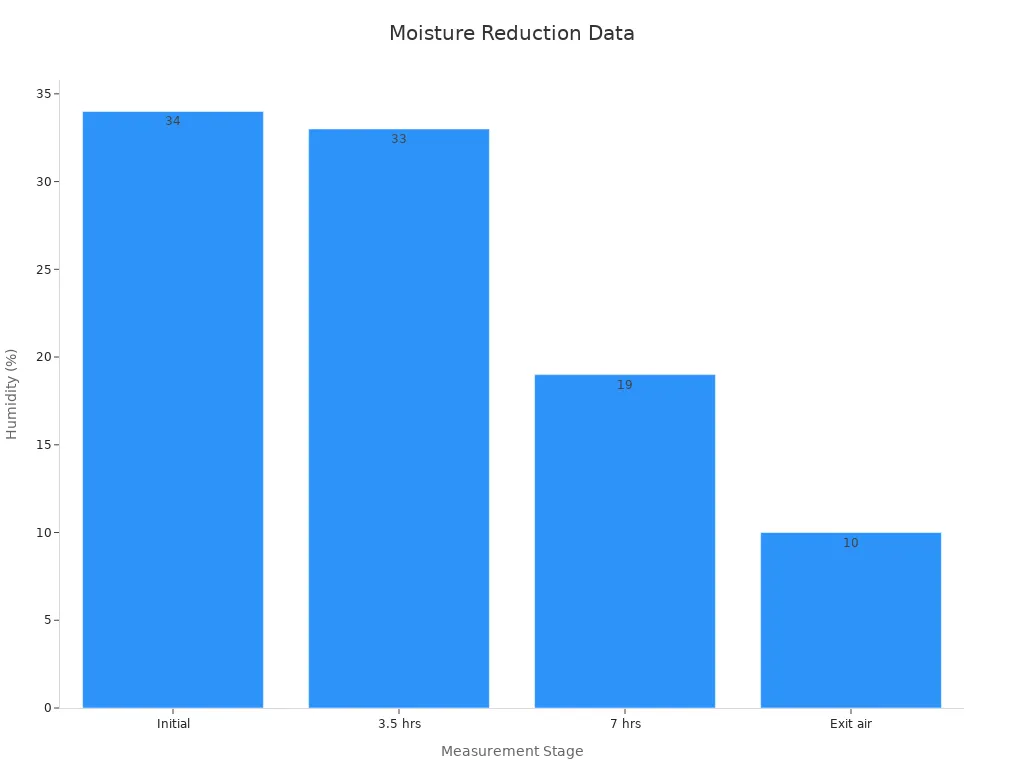
You can also pick a ready-made SH01 dryer box if you want something simple and fast. This project is quick, fun, and perfect for any skill level.
Key Takeaways
- Keep your 3D printing filament dry to avoid print defects like stringing, bubbles, and weak layers.
- Build a DIY filament dryer box using a clear, airtight container, silica gel, and simple tools to save money and improve print quality.
- Use airtight seals and monitor humidity inside the box with a hygrometer to ensure effective drying and storage.
- Consider adding a small heater or fan to speed up drying, but keep temperatures below 60°C to protect your filament.
- If you want a hassle-free option, the SH01 dryer box offers easy setup, real-time monitoring, and reliable drying for multiple spools.
Why Use a Filament Dryer Box
Moisture and 3D Printing
If you have ever seen your 3D prints come out stringy, bubbly, or weak, moisture might be the reason. Filament acts like a sponge and soaks up water from the air. PLA, PETG, and other common filaments can all get wet. When you print with wet filament, the water inside turns to steam. This causes bubbles, popping sounds, and even dust during printing. Your prints may look rough, have gaps, or break easily.
Tip: Keeping your filament dry is one of the easiest ways to get better prints and save money on wasted material.
Researchers found that when filament moisture goes up, dust emissions during printing also rise. For example, PLA filament with just 0.18% humidity gives off about 59-270 µg/m³ of dust. When humidity jumps to 0.83%, dust can reach 284-325 µg/m³. That means more particles in the air and more problems for your prints. Moisture also changes the smell and the way the filament melts, which can make printing less safe and less fun.
You can see how packaging makes a difference in keeping filament dry:
|
Indicator |
Siraya Tech Multi-layer Packaging |
Ordinary Packaging |
|---|---|---|
|
Packaging layers |
Multi-layer composite |
Single layer |
|
Sealing performance |
Resealable |
Disposable |
|
Humidity protection level |
Professional protection |
Basic protection |
|
Water vapor transmission rate |
0.13 g |
5 g |
Multi-layer packaging keeps out over 38 times more moisture than regular bags. But once you open the package, you need a good storage solution—like a filament dryer box.
Signs Filament Needs Drying
How do you know when your filament needs drying? Here are some signs you can watch for:
- Your prints have lots of stringing or tiny hairs between parts.
- You hear popping or sizzling sounds while printing.
- The filament looks cloudy or has bubbles.
- You notice weak layer bonding or parts that break easily.
- Humidity inside your storage box stays above 19% for hours, even with desiccant.
Sometimes, you might see your print quality drop after using the same spool for a while. PETG, for example, can start stringing more if it sits out in the open. If your storage humidity goes above 30%, you will likely see more print defects. Tools like hygrometers or color-changing cards help you check the humidity. If you spot these warning signs, it is time to dry your filament overnight or store it with fresh desiccant.
Note: Many users report that after drying their filament, prints look sharper and have fewer problems. Even a small drop in moisture can make a big difference in your results.
DIY Filament Dry Box Components
Container Options
When you start to build ikea samla filament box, you want a container that keeps moisture out and lets you see your filament. Not all boxes work the same. Here’s what you’ll find if you look around:
- Vacuum bags cost less, but you can’t stack them or see your filament color easily.
- Large bins hold a lot, but they’re hard to move and usually only let you peek inside.
- Cheap round pie boxes save money, but they often leak air and don’t protect your filament well.
- Walmart’s Sterilite 20Q gasketed plastic container is under $10 and fits five spools, but the seal isn’t perfect.
- Some 18L clear latch totes with rubber seals (about $8-$10) give you a tight seal, clear view, and easy stacking. These are great for a diy filament dry box and last longer than the cheapest options.
- Some containers on Amazon claim to be airtight but only keep out dust, not moisture.
If you want the best mix of price and performance, low-cost ikea samla boxes with rubber seals work well. They’re easy to stack, see-through, and keep your filament dry for longer.
Essential Materials
You don’t need fancy stuff to build ikea samla filament box. Here’s a quick list:
- Low-cost ikea samla boxes or another clear, gasketed plastic container
- Silica gel or rechargeable desiccant packs
- PTFE tubing for smooth filament feed
- Spool holders (you can print these or use dowels)
- Hygrometer to check humidity
- Optional: small heater or light bulb for extra drying power
Many users say a diy filament dry box made with a sealed plastic tote, desiccant, and a simple heater works just as well as expensive commercial boxes.
Tools Needed
You’ll need a few basic tools to build ikea samla filament box:
- Drill (for making holes for PTFE tubes)
- 3.5mm Allen key and M4x65 screws (these hold spools steady, even when it gets warm inside)
- Scissors or utility knife (for cutting tubing or tape)
- Screwdriver
- Sealant (to make sure your box stays airtight)
A 3d filament dry box works best when you use screws instead of zip ties. Screws stay strong at higher temperatures and keep your spools safe.
Build the Filament Box
Building your own filament dryer box is easier than you might think. You can follow these simple steps to create a dry box that keeps your filament in top shape and ready for printing. Let’s walk through the process together.
Prepare the Container
Start with a sturdy, clear plastic container. Look for one with a rubber gasket or tight-fitting lid. This will help you create an airtight storage box. Before you begin, wipe the inside clean and dry. If your spools have cardboard cores, consider swapping them for plastic ones or drying them first. Cardboard holds a lot of moisture and can make drying harder.
- Choose a container large enough for your spools and tools.
- Make sure the lid closes tightly.
- If you want to go the extra mile, you can use an ion membrane dehumidifier. These devices work better than regular silica gel, especially if you store several spools at once. They use very little power and keep humidity low for a long time.
- Pre-dry your filament with gentle heat before putting it in the box. Lowering air humidity alone won’t pull all the moisture out of the filament.
Tip: Some makers combine a little heat with a cold surface inside the box. This helps moisture leave the filament and then condense on the cold part, speeding up drying.
Add Spool Holders
Now, you need a way to keep your spools organized and spinning smoothly. You have a few options:
- Use a wooden dowel or metal rod across the width of the box. Rest your spools on this so they can turn freely.
- Print simple spool holders if you have access to a 3D printer.
- Use M4 screws and a 3.5mm Allen key to secure the holders. Screws work better than zip ties because they stay strong, even if the box gets warm inside.
Arrange your spools so they don’t touch the sides. This helps air flow around them and makes drying more effective.
Seal for Airtightness
A good seal is the secret to a great filament dryer box. If air leaks in, moisture will too. Here’s how you can make your box airtight:
- Use weatherproof tape or PU-foam around the lid and any holes you make. Scientific tests show that these materials keep air leakage almost at zero, even after lots of use.
- Press the tape down firmly and check for gaps.
- If you drill holes for PTFE tubing, seal around the edges with silicone or more tape.
Note: The way you install the seal matters. If you rush or leave bumps, air can sneak in. Take your time and make sure everything is smooth.
Install Drying Elements
Now it’s time to add the parts that keep your filament dry. You have a few choices, depending on your budget and needs:
- Place silica gel packs or rechargeable desiccant inside the box. Spread them out for best results.
- For faster drying, add a small heater or a low-wattage heating pad. Keep the temperature below 60°C to avoid damaging your filament.
- If you want to get fancy, try an ion membrane dehumidifier. It uses about 4 watts and keeps humidity low, even with lots of spools.
Here’s a quick look at how different drying elements perform:
|
Dryer Model |
Temperature Range (°C) |
Actual Temp Achieved (°C) |
Moisture Removal Effectiveness (%) |
Environmental Conditions (°C, %RH) |
|---|---|---|---|---|
|
Sunlu S2 (fan) |
Up to 70 |
50 |
Significant weight loss (~3g in 8h) |
23°C, 50% RH |
|
Sunlu S2 (fanless) |
Up to 70 |
Lower than fan version |
Similar moisture removal but requires 30-50% more time |
23°C, 50% RH |
|
Eibos Easdry |
40-65 |
57 |
Moderate moisture removal |
22°C, 51% RH |
|
Eryone Snail |
40-55 |
55 |
Moderate moisture removal |
23°C, 52% RH |
|
Fixdry |
45-70 |
45.1 |
Poor moisture removal, underperformed |
N/A |

Fan-assisted models dry filament faster and more evenly. If you want to upgrade your dry box, adding a small fan can help circulate air and speed up drying.
Set Up Filament Feed
To use your filament dryer box while printing, you need a way to feed the filament out without letting in moisture.
- Drill a hole in the side or lid of your box, just big enough for PTFE tubing.
- Insert the tubing so it sticks out a little on both sides.
- Seal around the hole with silicone or tape to keep it airtight.
- Thread your filament through the tube and into your printer.
This setup lets you print straight from the dry box, keeping your filament protected the whole time.
Add Humidity Monitoring
You want to know if your box is doing its job. Add a hygrometer or humidity sensor inside the box. Many affordable models show the humidity on a small LCD screen.
- Place the sensor where you can see it through the lid.
- Check the reading before and after drying to see how well your setup works.
Some advanced systems, like the Drywise or Easdry, use built-in sensors to track humidity in real time. These sensors cover a wide range (10% to 99%) and update you instantly if conditions change. Real-time monitoring helps you catch problems early and keep your filament in perfect shape.
Pro Tip: If you want to go high-tech, add a digital display or connect your sensor to a smart home system for alerts.
By following these instructions to build, you can create a filament box tailored to your needs. Many users find that a DIY dry box made from budget materials works just as well as expensive commercial options. You get to control the features, save money, and enjoy better print results.
3D Printer Filament Dry Box Tips
Storage Environment
You want your filament storage to work as hard as you do. The right environment keeps your spools dry and ready for action. Here are some things you should remember:
- Keep humidity below 20% for most filaments. This stops moisture from sneaking in.
- Use airtight containers with gaskets or resealable bags. These keep air and water out.
- Add silica gel packs or other desiccants to soak up any extra moisture.
- Store your spools in a cool, dark place. Avoid sunlight and big temperature swings.
- Check the temperature range for your filament type. For example, ABS likes 15°C to 25°C, while most filaments stay safe between -20°C and +30°C.
A well-sealed 3d printer filament dry box can even reach humidity as low as 0.01%. That’s 100 times drier than most setups! This level of control helps you cut filament waste and avoid repairs.
Humidity Monitoring
You can’t fix what you can’t see. That’s why you need to keep an eye on humidity inside your filament storage. A simple hygrometer or digital sensor works great. Place it where you can check the numbers easily.
- High humidity makes filaments like ABS and PC weak and brittle.
- Even a small jump in moisture can make your filament swell, clogging your printer.
- Moisture can change the way your prints stick to the bed, sometimes by as much as 68%.
Tip: Advanced dry boxes use smart sensors and air loops to keep humidity low without overheating your spools. This helps you avoid overdrying and keeps your filament in top shape.
Common Mistakes
Many people make the same mistakes with their 3d printer filament dry box and filament storage:
- Forgetting to check or replace desiccant packs.
- Leaving the lid open for too long.
- Storing spools in rooms with sunlight or big temperature changes.
- Not sealing holes for filament feed, which lets in moisture.
- Ignoring the humidity readings and hoping for the best.
Stay alert and check your setup often. A little attention now saves you from failed prints later!
Filament Storage Alternatives
When you look for ways to keep your filament dry, you have more options than just a DIY dry box. Let’s check out some other filament storage methods that work well for many makers.
Plastic Bags with Silica Gel
You can use plastic bags with silica gel packs for simple and cheap filament storage. This method works well if you want to store a few spools or need a quick fix. Here’s why many people trust this setup:
- A user with lots of experience tested how well silica gel and rice absorb moisture inside sealed bags with filament spools.
- Silica gel can soak up to 40% of its weight in water. It works faster than rice and you can use it again after heating.
- You can measure humidity inside the bag with a small hygrometer.
- Silica gel gives you steady and quick moisture control. It’s also easy to handle if you use sachets to keep dust away.
- You can dry out silica gel at about 120°C and use it again.
Tip: Always seal the bag tightly and check the silica gel color. If it changes, it’s time to dry it out.
This method helps you keep your filament storage dry and safe, especially if you don’t have space for a big box.
Camera Dry Cabinets
Camera dry cabinets work great for filament storage. These cabinets keep the air inside dry and let you control the humidity. You just set the level you want and the cabinet does the rest. Many photographers use them for lenses, but you can use them for filament too.
- You can see your spools through the glass door.
- The cabinet keeps humidity low without much work.
- Some cabinets have digital displays so you always know the humidity level.
If you want a neat and easy way to store lots of spools, a camera dry cabinet is a smart choice. It costs more than bags, but you get steady results and less hassle.
Oven Drying
Sometimes, you need to dry out filament fast. Oven drying is a strong option. You put your spools in a regular oven and set it to a low temperature. This method pulls out moisture better than just storing filament with desiccant.
Here’s how oven drying compares to other methods:
|
Parameter |
Oven Drying (Hot-Air Oven) |
Microwave Drying |
Desiccator Storage (Traditional) |
|---|---|---|---|
|
Mechanical Properties |
Big improvement |
Some improvement |
No change |
|
Moisture Content |
Lowest |
Higher than oven |
No big change |
|
Printability Timing |
Ready next day |
Ready same day |
Wait about a week |
|
Drug Release Profile |
Most consistent |
More variable |
Less consistent |
|
Thermal Stability |
More stable |
Less stable |
Not specified |
|
Drying Mechanism |
Surface to core |
Core to surface |
Passive, slow |
Oven drying gives you the driest filament storage and the best print results. Just remember to keep the temperature low (around 50°C) so you don’t melt your spools.
Note: Always watch your filament in the oven. Never leave it unattended.
With these filament storage alternatives, you can pick what fits your space, budget, and needs. Each method helps you fight moisture and keep your prints looking sharp.
SH01 Filament Dryer Box Option
SH01 Features
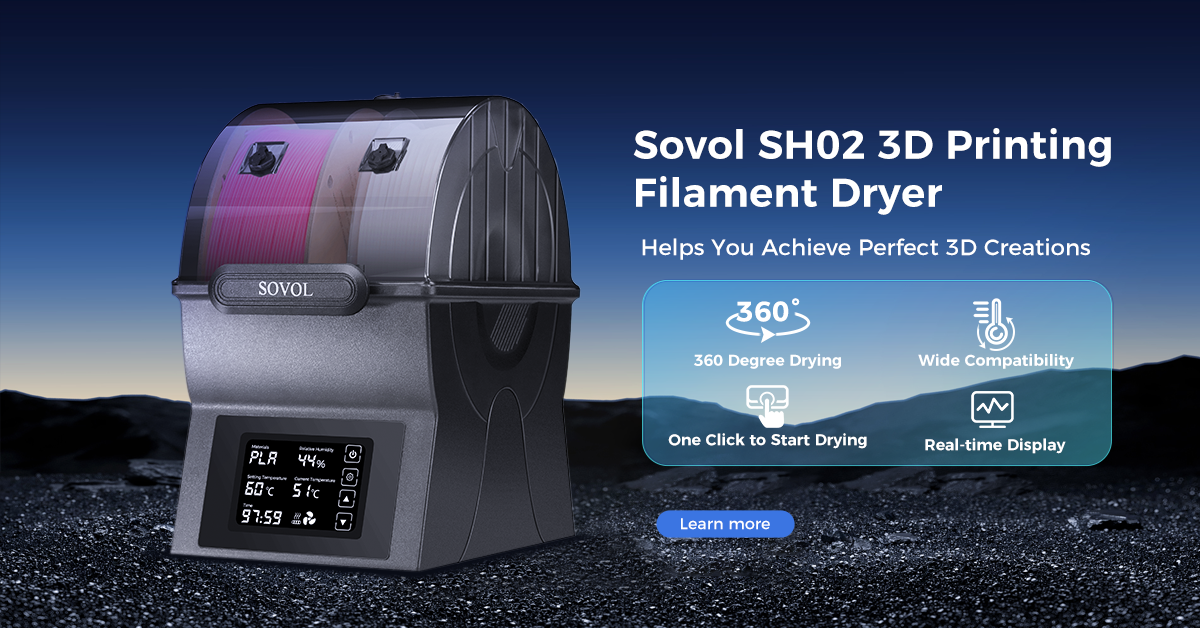
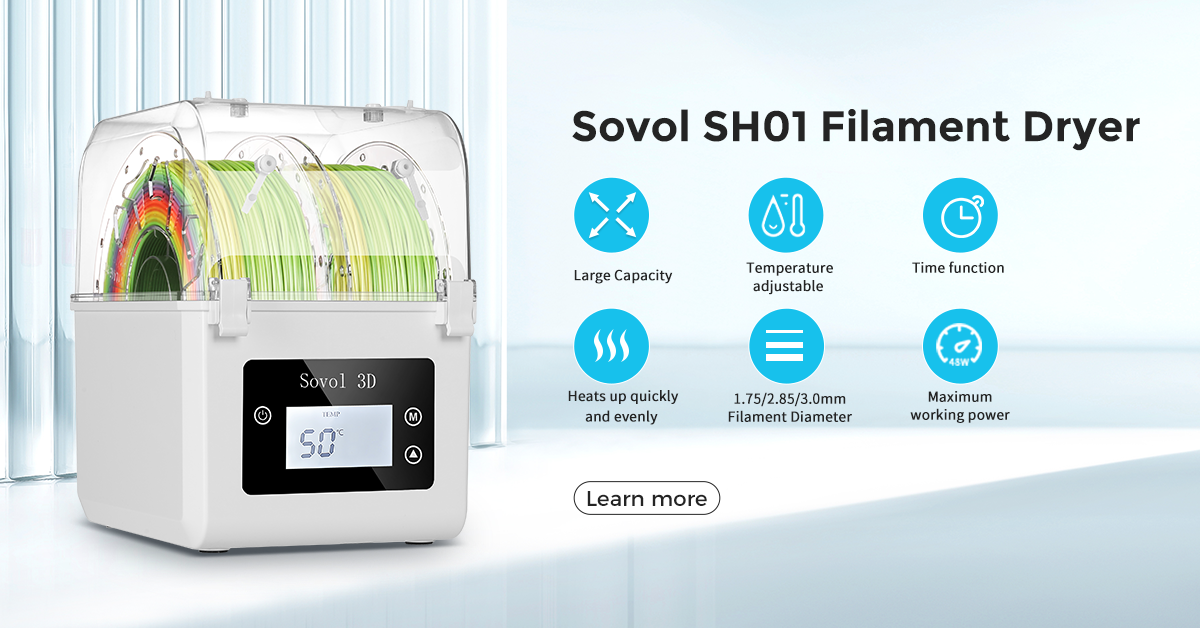
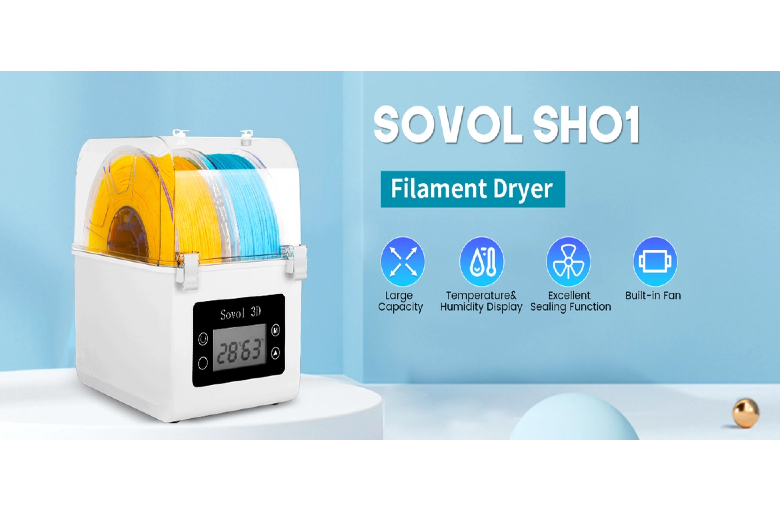
If you want a plug-and-play solution for drying your 3D printing filament, the SH01 dryer box stands out. You get a ready-to-use box with smart features that make filament care easy. The SH01 supports drying two spools at once, so you can save space and keep more filament ready for printing. Its transparent container lets you check your spools without opening the lid.
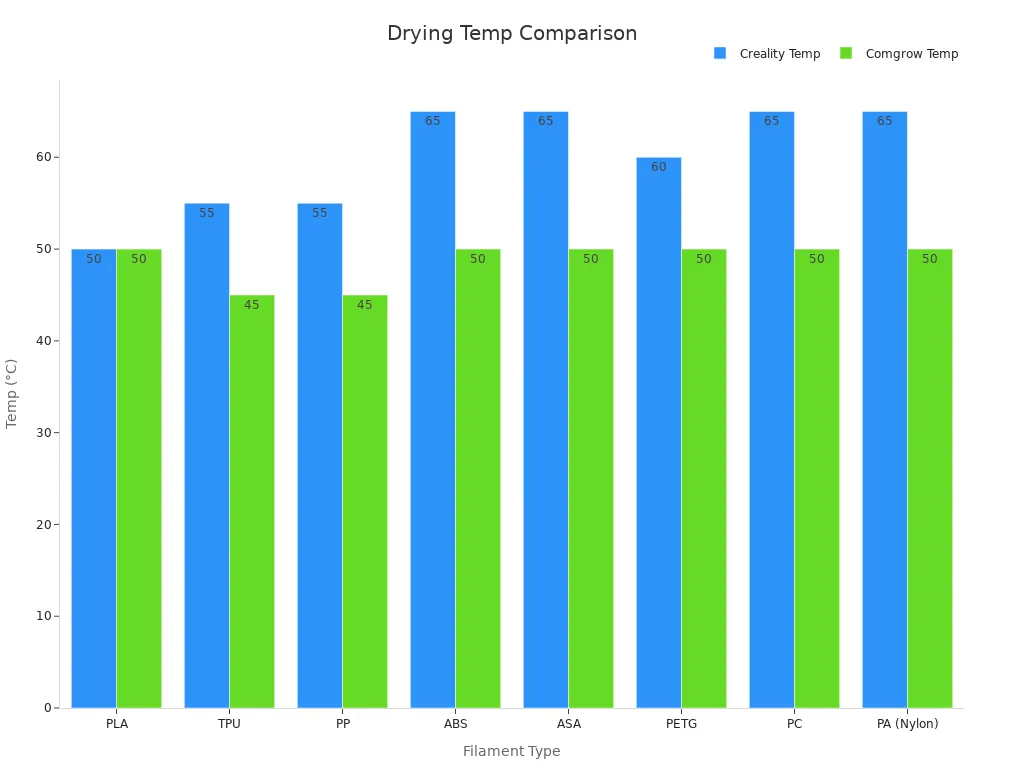
You control the drying temperature with simple front panel buttons. The built-in heater keeps the temperature steady between 40°C and 50°C, but you can adjust it up to 65°C if needed. This means you can dry different filament types, like PLA, PETG, TPU, or ABS, with just one device. The SH01 works with both 1.75mm and 2.85mm filament sizes, making it flexible for most printers.
Here’s what makes the SH01 a favorite among users:
- Real-time temperature and humidity monitoring on a digital display
- Sealed, dust-proof, and damp-resistant design for safe storage
- Built-in fan for even hot air circulation and faster drying
- Space for 2-3 spools, perfect for home or small workshop use
- Filament feeds directly from the box, so you never expose it to moisture
Users love how easy it is to set up and use. Many say their print quality improved right away after switching to the SH01. You get peace of mind knowing your filament stays dry and ready.
When to Buy Instead of DIY
Building your own filament dryer box is fun and budget-friendly. You get to customize every part. But sometimes, you might want a solution that just works—no tools, no tinkering, no worries.
You should consider the SH01 dryer box if:
- You want reliable drying without the hassle of building or maintaining a DIY setup
- You need to dry multiple spools at once and want to save space
- You prefer real-time monitoring and easy temperature control
- You want to avoid common DIY mistakes, like air leaks or uneven heating
- You value convenience and want to focus on printing, not box maintenance
The SH01 is a great choice for beginners, busy makers, or anyone who wants a professional result with zero guesswork. While DIY options are perfect for hands-on users, the SH01 gives you a stable, efficient, and worry-free way to protect your filament. If you want to spend more time printing and less time troubleshooting, this commercial dryer box could be your best friend in the workshop.
Building your own filament dryer box gives you real control over your 3D printing results. You save money, keep your filament dry, and enjoy better prints. Here’s what you get with a DIY filament dryer box:
- Low cost using everyday materials like silica gel and PTFE tubes
- Flexible design that fits your space and needs
- Direct filament feed to your printer for less hassle
Keep your box sealed, check humidity often, and swap out desiccant when needed. Try making your own and share your setup with others! If you want a plug-and-play solution, the SH01 dryer box offers easy, reliable drying for any skill level.
FAQ
How long should I dry my filament in a DIY filament dryer box?
Most filaments need 4–8 hours in a dryer box at 45–55°C. PLA dries faster, while PETG or nylon may need more time. Always check your filament’s label for the best results.
Can I use rice instead of silica gel as a desiccant?
You can use rice, but silica gel works much better. Silica gel absorbs more moisture and you can reuse it after heating. Rice is a quick fix, but it won’t keep your filament as dry.
What if my DIY filament dryer box isn’t airtight?
If your box leaks air, moisture sneaks in and ruins your hard work.
Try these quick fixes:
- Add weatherproof tape around the lid
- Seal holes with silicone
- Check for gaps after every use
Is the SH01 dryer box worth it for beginners?
Absolutely! 😊 If you want a plug-and-play solution, the SH01 dryer box saves time and effort. You get steady drying, real-time humidity checks, and space for two spools. It’s perfect if you want to skip the DIY steps and focus on printing.







Leave a comment
All comments are moderated before being published.
This site is protected by hCaptcha and the hCaptcha Privacy Policy and Terms of Service apply.