


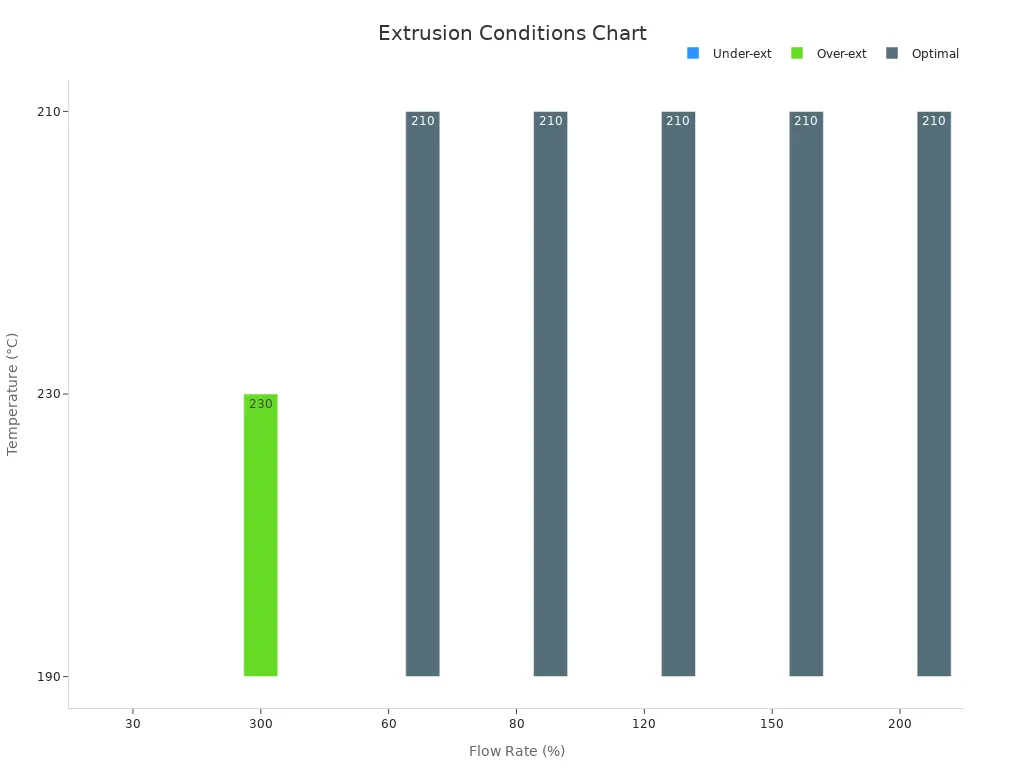
Inconsistent extrusion 3D printing occurs when a 3D printer fails to distribute material evenly. This can lead to gaps, bumpy layers, or excessive material application. Such issues negatively impact print quality and compromise the accuracy and strength of designs. For instance, adjusting the extrusion multiplier (k) between 97% and 105% can reduce gaps from 5.82% to 0.05%. This adjustment also enhances heat distribution. However, if k is set too high (≥1.03), it may result in shape inaccuracies, weak points, and diminished strength. Addressing these inconsistent extrusion 3D printing problems is crucial for maintaining the precision and durability of prints. Resolving extrusion challenges ensures you achieve consistent and reliable results in your 3D printing endeavors.
Key Takeaways
- Look for signs like rough spots or gaps early to save time and materials.
- Clean your printer's nozzle often to stop clogs and keep the filament flowing smoothly.
- Choose good-quality filament with even thickness to avoid gaps or weak spots in your prints.
- Adjust slicer settings for width and layer height to make prints better and fix problems.
- Test settings on small prints before big ones to find issues early and get good results.
Identifying Inconsistent Extrusion in 3D Printing
Common signs of inconsistent extrusions
When a 3D printer has extrusion problems, it leaves clues. Spotting these signs early saves time and material. Here are some common signs:
|
Indicator |
Description |
|---|---|
|
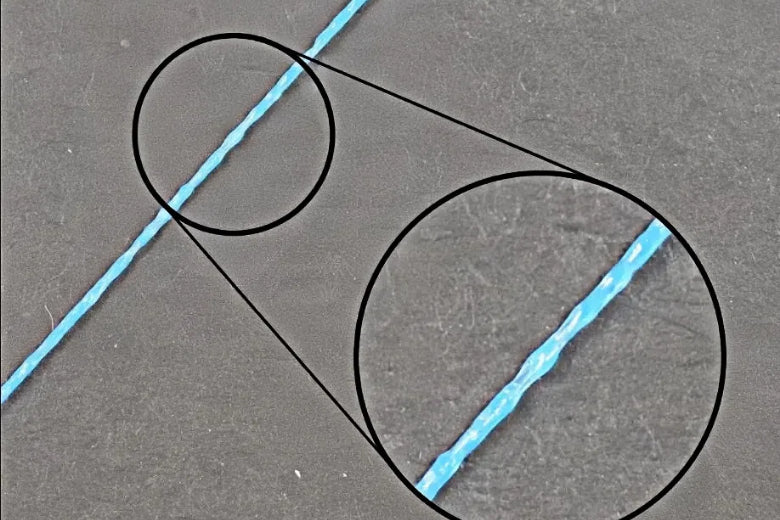
Inconsistent filament shape |
Filament that changes shape during the printing process. |
|
Rough surface finish |
A bumpy or uneven surface, showing extrusion problems. |
|
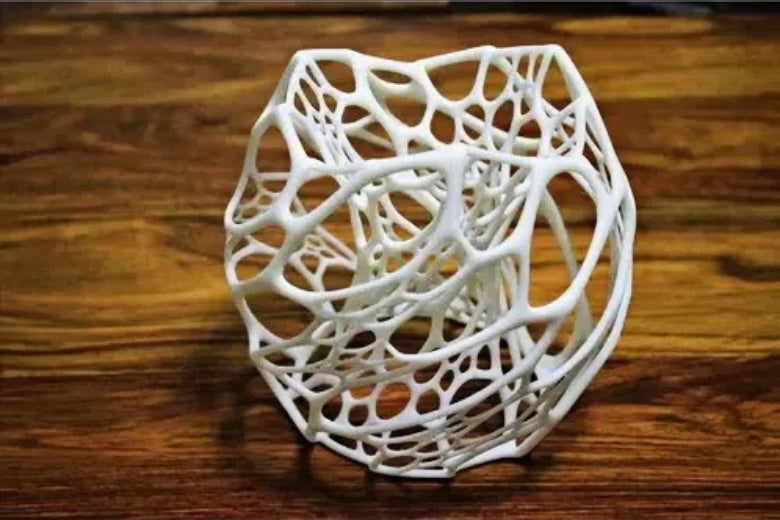
Air gaps between layers |
Small spaces between layers that weaken the printed object. |
For example, air gaps can make your print too weak to use. A rough surface can make your model look messy or unfinished. These signs show extrusion issues that need fixing right away.
Tip: Keep a good print as a sample. Compare it to new prints to spot problems quickly.
How to diagnose extrusion issues effectively
Finding extrusion problems needs careful checking. Start by looking at the filament. See if it’s tangled, uneven, or has absorbed moisture. Moist filament may bubble while printing.
Next, check the nozzle. A clogged nozzle often causes uneven extrusion. Remove and clean it with a needle or cleaning tool. If cleaning doesn’t work, replace the nozzle.
Also, check your slicer settings. Wrong settings, like layer height or extrusion width, can cause bad prints. Test with a small print before starting a big project.
Lastly, check the printer’s parts. Loose belts or worn gears can mess up extrusion. Tighten or replace them to keep the printer working well.
Note: Regular printer care stops many extrusion problems. Make a schedule to clean and check important parts.
Causes and Solutions for Inconsistent Extrusion
Filament-related issues
The filament you use affects how well your printer works. Bad filament can cause uneven flow, missing layers, or weak connections between layers. Problems like moisture, uneven thickness, or tangles are common.
Moisture is a big problem for some filaments. Materials like TPU and nylon soak up water from the air. Wet filament can bubble or crackle while printing, leading to poor results. For example, TPU can absorb up to 2% of its weight in water in just hours. This makes prints look bad and causes uneven extrusion.
Another issue is uneven filament thickness. If the diameter changes, the flow rate gets messed up. This can cause weak layers or gaps in your print. Tangled filament can also stop the printer suddenly, leaving holes in your design.
Solution: Use high-quality filament and check for tangles
Good filament solves many problems. High-quality filaments are made with care, so they have even thickness and fewer impurities. Before printing, check your filament for bumps or uneven spots. Use a caliper to measure its thickness at different points.
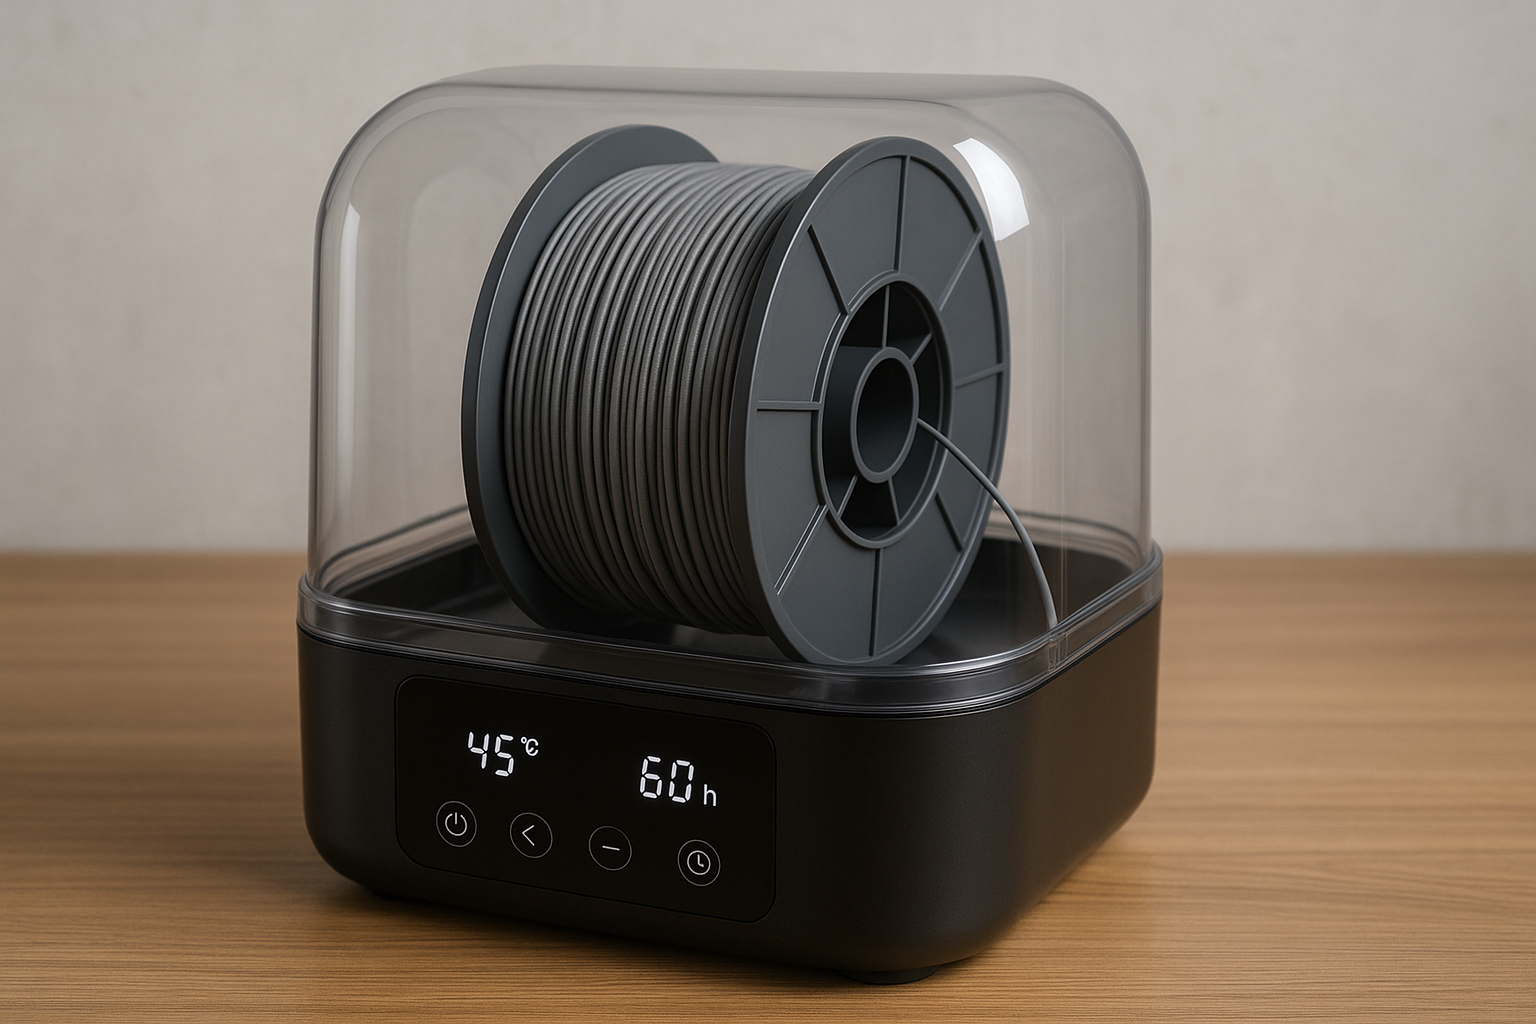
Store filament in airtight containers with drying packs to keep it dry. If your filament is already wet, dry it in a filament dryer or a low-heat oven. Dry filament makes better prints, as tests show dried filaments create stronger designs.
To stop tangles, make sure the spool unwinds smoothly. Use a guide to keep the filament clean and untangled. Print a small test object first to check for problems. Adjust settings like temperature and speed for better results, especially with special filaments.
Clogged or partially blocked nozzle
A clogged nozzle is another reason for uneven extrusion. Old material, dust, or dirt can block the nozzle. This stops the flow and causes gaps or jams. Cleaning the nozzle often helps avoid these problems.
Signs of a clogged nozzle include uneven flow or missing layers. If your print has lines that spread out over time, the nozzle might be blocked. A clogged nozzle can also mess up the first layer, making it stick poorly to the bed.
To fix a clogged nozzle, heat it to the melting point of your filament. Use a cleaning needle or tool to clear out debris. If the clog doesn’t go away, try the cold pull method. Heat the nozzle, insert filament, let it cool, then pull it out. This removes stuck material. If nothing works, replace the nozzle.
Tip: Clean your nozzle regularly to avoid clogs. Using high-quality filament also helps reduce buildup, making your prints smoother and more reliable.
Solution: Clean or replace the nozzle regularly
Keeping the nozzle clean stops jams and ensures smooth printing. Over time, leftover filament, dust, or dirt can block the nozzle. This causes uneven flow or full clogs. Cleaning often prevents these problems and keeps printing steady.
To clean, heat the nozzle to melt the filament. Use a cleaning needle or brass brush to clear buildup. For tough clogs, try the cold pull method. Heat the nozzle, push in filament, let it cool, then pull it out. This removes stuck material. If cleaning fails, replace the nozzle. Always have spare nozzles ready to avoid delays.
Tip: Follow these steps to prevent nozzle clogs:
- Clean the nozzle often.
- Keep the printer area free of dust.
- Use the right solvent for your filament.
- Check the print bed and belts regularly.
A clean nozzle avoids problems like missing layers or weak prints. This simple habit improves results and helps your printer last longer.
Incorrect slicer settings
Wrong slicer settings can cause bad extrusion and poor prints. Settings like flow rate, layer height, and extrusion width affect how filament is laid down. For example, wrong flow rates can cause too much or too little filament, leading to gaps or weak spots.
One common issue is uneven layer heights. If slicer settings don’t match the printer, layers may not stick well. This makes prints weak. Another problem is infill overlap. Without enough overlap, the infill won’t connect to the walls, causing gaps and less strength.
To fix slicer issues, start by adjusting the flow rate. Print a test object and measure its wall thickness. Change the flow rate until the walls are the right size. For infill overlap, set it to 10-20% to help it stick to the walls. These changes improve print quality and reduce extrusion problems.
Solution: Optimize slicer settings for extrusion width and layer height
Fixing slicer settings helps solve extrusion problems. Extrusion width and layer height affect print quality and strength. Adjusting these can balance speed and detail.
Set extrusion width slightly bigger than the nozzle size. This helps layers stick better and reduces gaps. For example, with a 0.4mm nozzle, set the width to 0.45mm. This improves adhesion and makes smoother layers. Layer height also matters. Smaller heights give more detail but take longer. Bigger heights print faster but may lower quality.
Using variable layer heights (VLH) is another good idea. VLH uses thin layers for details and thick ones for simple areas. This saves time without losing quality. Test these settings on a small print before starting a big project.
Note: Good slicer settings improve prints and lower the chance of clogs or uneven flow. Try different settings to find what works best for your printer and filament.
Temperature fluctuations
Changes in temperature can mess up the extrusion process. If the printer's heat shifts suddenly, the filament might not melt evenly. This can lead to problems like under-extrusion, over-extrusion, or nozzle clogs. For example, if the nozzle gets too cool, the filament won’t flow well, causing gaps or weak layers. Too much heat can also cause over-extrusion, where extra material creates rough surfaces or poor layer bonding.
Studies on printing with PEEK show how steady temperature affects results. Tests with 130 samples showed that even small heat changes impacted strength and density. This proves that keeping the temperature stable is key for good prints. Stable heat helps avoid defects and keeps layer heights consistent.
Tip: Watch your printer's temperature during printing. Sudden changes may mean hardware issues, like a broken thermistor or heater.
Solution: Keep printing temperatures steady
To keep temperature steady, check your printer's heating parts. Look at the thermistor and heating element for damage. Replace them if they can’t hold consistent heat. Use tools like a thermal camera to confirm the nozzle and bed stay at the right temperature.
Using a printer enclosure helps too. It blocks drafts and room heat changes that affect the nozzle. For materials like ABS or PEEK, enclosures are extra helpful. They keep the area warm and stop warping or uneven extrusion.
Preheating filament is another good idea. Some types, like nylon or TPU, work better when warmed before printing. Use a filament dryer or heated spool holder for this. Preheating helps the filament melt evenly and avoids jams or under-extrusion.
Note: Always check slicer settings for temperature. Set nozzle and bed heat based on the filament maker’s advice.
Inconsistent filament diameter
Uneven filament thickness often causes extrusion problems. If the filament diameter changes, the flow rate becomes unpredictable. This can create gaps, weak spots, or uneven layers in your print. For example, thicker filament sections may cause over-extrusion, while thinner ones lead to under-extrusion. These changes make it hard to get smooth and accurate prints.
To spot this issue, measure the filament diameter at different points with a caliper. Compare the numbers to the maker’s specs. If the thickness varies too much, the filament may not be good for detailed printing. Even small changes can mess up the extrusion process and lower print quality.
Tip: Write down which filament brands and batches work well. This helps you avoid bad materials later.
Solution: Use even filament and test before printing
Using high-quality filament with even thickness prevents this problem. Trusted brands make filaments with strict size rules, ensuring uniform diameter. Look for filament labeled with a tolerance of ±0.02mm or better. These are more reliable and reduce defects.
Before big projects, test the filament with a small print. This helps find diameter or extrusion issues early. If problems appear, adjust the slicer flow rate slightly. For example, lowering the flow rate can help if the filament is a bit thicker than expected.
Proper storage matters too. Wet filament can swell and change thickness. Keep filament in airtight containers with drying packs to avoid moisture. Dry filament stays stable and prints better.
Callout: Even filament thickness improves prints and lowers nozzle clogs. Investing in good materials saves time and effort later.
Solution: Use filament with consistent diameter and test before printing
Using filament with the same thickness helps avoid extrusion problems. Uneven filament can cause gaps or extra material in prints. To prevent this, check and adjust your filament before printing.
Steps to Test Filament Thickness
Follow these simple steps to check filament thickness and improve prints:
- Test your printer’s settings to ensure they are correct.
- Write down any changes to your printer’s E-steps for later use.
- Look for under-extrusion or over-extrusion by checking filament quality.
- Find a calibration pattern that matches your printer and filament.
- Download the G-code file to test different K-factor values.
- Print a single-layer design with multiple lines and check for gaps.
- Pick the line that looks best and note its K-factor.
- Update the K-factor in your slicer software for better extrusion.
Testing helps your filament work well during printing. It also spots problems early, saving time and materials.
Tips for Storing and Using Filament
Keep filament in sealed containers with drying packs to stop moisture. Wet filament can change size and cause printing issues. Use a caliper to measure filament thickness at several points. If the size changes too much, switch to better-quality filament.
Before printing big projects, make a small test object first. Adjust slicer settings like flow rate based on how the filament performs. These steps help avoid clogs and uneven layers.
Callout: Buying high-quality filament with strict size rules (±0.02mm or better) improves prints and saves troubleshooting time.
Mechanical issues with the printer
Mechanical problems in your printer can cause uneven extrusion. Issues with parts like belts, gears, or the extruder can affect filament flow and ruin prints. Fixing these problems keeps your printer working well.
Common Mechanical Problems
- The extruder can get clogged or jammed, causing uneven extrusion.
- Gears or parts in the print head may break, disrupting filament flow.
- If the nozzle is too close to the bed, it can block filament flow.
- A broken gear on the motor can cause serious extrusion problems.
These issues can lead to gaps, extra material, or weak layers. Regular checks help catch problems early.
Solution: Check and fix belts, gears, and other parts
Start by looking at belts and gears for damage or looseness. Tighten loose belts to keep the print head moving smoothly. Replace broken gears right away to avoid more problems.
Check the nozzle’s distance from the bed. If it’s too close, adjust the bed leveling to fix it. Use a feeler gauge to set the right gap between the nozzle and bed. This helps avoid first-layer defects and improves extrusion.
Clean the extruder often to remove dirt or stuck filament. Lubricate moving parts to keep them working well. If the motor gear is cracked, replace it quickly. These steps keep your printer running smoothly and reduce extrusion problems.
Tip: Inspect your printer every month to find problems early. Regular care makes your printer last longer and improves print quality.
Preventive Tips for Avoiding Inconsistent Extrusion
Keep your 3D printer in good shape
Taking care of your 3D printer helps it work well. Clean the nozzle every week to avoid clogs. Check the extruder each month to spot small issues early. Dust or old filament in the nozzle can block the flow. This may cause too much or too little filament to come out. Cleaning removes these problems and keeps the filament flowing smoothly. Lubricate moving parts like belts and gears to reduce wear. This makes your printer last longer.
Plan regular maintenance tasks to keep your printer reliable. Tighten loose belts and check if the nozzle is aligned properly. These steps improve print quality and prevent breakdowns. A well-maintained printer saves time and money while giving better results.
Tip: Make a checklist for maintenance. Add tasks like cleaning the nozzle, checking belts, and lubricating parts.
Store filament properly to keep it dry
Keeping filament dry is important for good printing. Some filaments, like nylon, absorb water from the air. Wet filament can bubble, string, or stick poorly between layers. This causes uneven prints and weak designs. Dry filament avoids these problems and gives better results.
Use airtight containers with drying packs to store filament. If the filament feels wet, dry it in a filament dryer or low-heat oven. This is especially helpful for materials that soak up water easily. Storing filament the right way improves print quality and makes it last longer.
Note: Dry filament makes stronger and more reliable prints, especially for materials that absorb moisture.
Clean and check the nozzle often
The nozzle is key to smooth printing. Over time, it can get dirty or clogged with old filament. This blocks the flow and causes uneven extrusion. Clean the nozzle often to avoid these problems. Use a cleaning needle or brush to remove dirt. For tough clogs, try the cold pull method. Heat the nozzle, push in filament, let it cool, then pull it out to clear stuck material.
Check the nozzle for damage when cleaning. A worn nozzle can mess up the flow and lower print quality. Replace it if it looks damaged. Keeping the nozzle in good shape helps avoid extrusion problems and gives consistent results.
Tip: Always have extra nozzles ready. This way, you can quickly replace a damaged one and keep printing without delays.
Use a filament guide or cleaner to stop dirt buildup
Dirt can mess up printing and make prints look bad. Dust or small particles stick to the filament as it moves into the printer. This can block the nozzle or cause uneven layers, leaving gaps or rough spots. A filament guide or cleaner helps stop these problems.
A filament guide keeps the filament moving straight and smooth. It stops tangles and reduces wear on the filament. A filament cleaner removes dust before the filament reaches the extruder. It’s usually a sponge or foam that wraps around the filament. As the filament passes through, the cleaner catches dirt, keeping the nozzle clean.
To use a cleaner, place it near the spool or along the filament path. Replace the sponge or foam often to keep it working well. For a guide, install it between the spool and extruder. You can even print your own guide to fit your printer.
Tip: Use both a guide and cleaner together. This keeps the filament clean and ensures smooth printing every time.
Test print settings before big projects
Testing settings before big prints saves time and materials. A small test print shows problems like bad extrusion or weak layers. Fixing these early makes sure your printer works well for the main project.
For example, during a workshop, 24 printers were set up in one day. Teachers learned how test prints help find problems fast. These tests showed the printers worked well and saved time. Without testing, mistakes could have wasted materials and effort.
Pick a simple design like a cube for your test print. This helps spot issues like uneven layers or wrong flow rates. Adjust slicer settings based on the test. Change things like nozzle heat or flow rate for better results.
Callout: Test prints are great when using new filament or switching materials. They help you find the best settings for smooth and reliable prints.
Spending a few minutes testing avoids big mistakes. It ensures your large projects go smoothly and turn out great.
Fixing uneven extrusion is key to great 3D prints. Problems like under-extrusion leave gaps and weak areas. Over-extrusion makes rough surfaces. Calibrating and leveling your printer helps layers stick well. Cleaning the nozzle and checking filament often stops issues. Store filament in dry places to keep it working right. Test your settings before big prints to avoid mistakes. These steps make prints better and save time and materials.
FAQ
How can you stop nozzle clogs?
Clean the nozzle often with a needle or cold pull method. Use good-quality filament and keep the printer area clean. A filament cleaner removes dirt before it reaches the nozzle.
Tip: Keep extra nozzles handy for quick replacements.
How do you tell if filament is wet?
Wet filament makes popping noises while printing. It can also cause stringy or bubbly prints. Look for these signs before printing. Dry the filament using a dryer or low-heat oven to fix it.
Why does filament get tangled, and how can you stop it?
Filament tangles when it unwinds unevenly from the spool. Use a guide to keep it straight. Make sure the spool spins smoothly while printing. Store filament properly to avoid tangles when not in use.
What should you do if extrusion stops during printing?
Pause the print and check for clogs or tangled filament. Look at the extruder for jams or broken parts. Fix the issue, then restart the print. Regular care helps prevent sudden extrusion problems.
Note: Test small prints first to find issues early.
How can you make layers stick better in 3D prints?
Raise the nozzle temperature slightly to improve bonding. Level the bed so the first layer sticks well. Use a heated bed or glue sticks for materials that warp easily.
Callout: Correct slicer settings are important for better adhesion.


发表评论
在发布之前,所有评论都会进行调节。
此站点受 hCaptcha 保护,并且 hCaptcha 隐私政策和服务条款适用。