


You might wonder how to use a 3d printer as a beginner. Just start with the right tools, follow a simple 3d printing guide, and enjoy the process. Recent years show a big jump in people learning to 3d print, thanks to easier machines and affordable materials.
Many students now master 3d printing quickly. About 76% make real progress with modeling, and 69% turn their designs into a print. Mistakes will happen, but every print teaches you more. This 3d printing guide helps you practice, have fun, and see your ideas come to life.
Key Takeaways
- Put your 3D printer on a strong table in a room with fresh air. Always follow safety rules to keep yourself safe.
- Use easy materials like PLA filament. Use basic tools like digital calipers and spatulas to help you print better.
- Get your design ready by picking or making a 3D model. Slice it the right way and save the correct file. This helps stop printing mistakes.
- Set up your printer the right way before you print. This stops most problems. Check the bed level, nozzle height, and filament flow for good prints.
- Watch the first layers as the printer works. This helps you find problems early. Clean and finish your prints well for a smooth and strong result.
What Do You Need to 3D Print

3D Printer and Workspace
You need a good setup before you start. Put your 3D printer on a strong table. Make sure the room has fresh air. This helps keep the air clean. 3d printing can make small bits and smells. Try to use a fan or a box with a filter. Do not put your printer near food or where you sleep. Always read the safety guide that comes with your printer. Wear safety glasses and gloves when you touch hot or sharp things.
Tip: Training and easy safety steps help keep you safe. They also make your 3d printing time better.
Materials and Tools
You need some basic tools and materials to begin. PLA 3d printing filament is best for beginners. It is simple to use and not expensive. It works with most printers. Check that your material fits your printer’s needs. Look at things like nozzle heat and bed type. Keep your 3d printing filament dry. Use a dry box or a bag with desiccant.
Here is a quick look at some toolkits:
|
Toolkit Name |
Key Features |
Best For |
Pros |
Cons |
|---|---|---|---|---|
|
Creality 3D Printer Tools Kit (74 pcs) |
74 tools, screwdriver bits, cleaning needles, brushes |
Beginners & pros |
Complete set, organized |
May feel overwhelming |
|
3D Printer Tools Kit (34 pcs) |
Cleaning needles, scrapers, files, warranty |
Beginners & hobbyists |
Affordable, covers basics |
Not for heavy-duty use |
|
Essential Kit (50 pcs) |
Deburring tools, cutters, sandpaper |
Enthusiasts |
High-quality, great for finishing |
Some tools may be extra |
You should have digital calipers to measure things. Tweezers help you clean small parts. Use spatulas to take prints off the bed. Sandpaper makes prints smooth. Adhesion sheets and glue sticks help prints stay on the bed. Lubricants help your printer work well. Good tools make 3d printing easier and help you get better prints.
Software for 3D Printing
You need software to get your 3D model ready to print. Cura is a great choice for beginners. It works with over 200 printers. It has many plugins to help you. Bambu Studio and OrcaSlicer are also good. They have more features if you want to try new things. You can find free models on sites like Thingiverse. These tools help you turn ideas into real prints.
Picking the right material and software helps a lot. Start with easy things and you will learn quickly!
Prepare Your Design
Before you start your 3d print, you need to prepare your design. This step helps you avoid mistakes and makes your print look better. Many companies and startups use careful design steps to save time and money. They try different shapes, sizes, and materials before they print. You can do the same at home!
Find or Create a 3D Model
You have two main choices. You can download a ready-made model or make your own. Many beginners start by downloading models from sites like Thingiverse. These sites have thousands of free designs. If you want to create something unique, try beginner-friendly software. TinkerCAD is a great place to start. It uses simple shapes like blocks and cylinders. You can drag and drop them to build your model. Other easy tools include BlocksCAD, SketchUp, and Morphi. These programs let you practice and learn new skills. Many guides suggest starting with simple projects like a chess pawn or a flower pot.
Tip: Join online groups to share your models and get advice from others. You will learn faster and have more fun.
Slicing the Model
Now you need to get your model ready for the printer. This step is called slicing. Slicing software takes your 3D model and cuts it into thin layers. Each layer tells the printer what to do. Cura and Bambu Studio are popular choices for slicing. You can change settings like layer height, print speed, and support structures. Studies show that correct slicing helps your print match the digital model. If you slice wrong, your print may not look right or fit together. Slicing also affects how smooth your print feels and how strong it is. Many experts use slicing to test different settings and improve their results.
Exporting for 3D Print
After slicing, you need to send your file to the printer. Most printers use a file called G-code. Your slicing software will export this file for you. Save it to an SD card, USB stick, or send it over Wi-Fi. Make sure you pick the right settings before you export. Double-check your file to avoid mistakes. When you print, the machine will follow the instructions in your file. This step is the last part of prepare your design. Now you are ready to print and see your idea come to life!
How to Use a 3D Printer

Learning how to use a 3d printer can feel like a big task, but you can break it down into simple steps. This part will guide you through the 3d printing procedure, from setting up your machine to watching the first layers come to life. Let’s get started!
Set Up and Calibrate
You need to start with a solid 3d printer setup. Place your printer on a sturdy table. Make sure nothing wobbles. Plug in your machine and check that all cables are secure. Many beginners skip calibration, but this step is key. About 70% of print failures happen because of poor calibration. You want your prints to look good and stick to the bed.
Here’s a quick table to help you understand why calibration matters:
|
Aspect |
Key Takeaway |
|---|---|
|
Importance of Calibration |
70% of print failures come from miscalibrated machines. Calibration gives you precision and reliability. |
|
Essential Tools |
Use digital calipers, calibration squares, and thermometers for accurate adjustments. |
|
Calibration Steps |
Level the bed, set nozzle height, and calibrate extruder steps/mm for smooth filament flow. |
|
Common Errors |
Uneven bed leveling and extrusion problems cause most issues. |
|
Maintaining Calibration |
Clean, monitor, and use auto tools to keep your printer accurate. |
|
When to Recalibrate |
Recalibrate after hardware changes or if your print quality drops. |
|
Software Support |
Some software gives real-time feedback and guides you through calibration. |
To follow the 3d printing procedure, you should:
- Level the bed using a piece of paper or a feeler gauge. Move the nozzle close to the bed and check the gap at several points.
- Adjust the Z-axis height so the nozzle is just right—not too close, not too far.
- Calibrate the extruder by measuring how much filament comes out. Adjust the steps/mm if needed.
- Set the right temperature for the hot end and bed. Use a thermometer to check.
- Save your settings in the printer’s menu or software.
- Print a small test cube to check your work.
- Clean and check belts, pulleys, and moving parts often.
- Recalibrate if you change filament, move your printer, or see problems with your prints.
Tip: Many printers have auto bed leveling, but you still need to check things by hand. Manual fine-tuning helps you avoid common mistakes.
Load Filament
Now you need to load the filament. This step is part of every 3d printing procedure. Turn on your printer and preheat the nozzle to the right temperature for your filament. PLA usually needs about 200°C. Open the extruder latch and gently push the filament in until you feel it reach the nozzle. Close the latch and use the control panel to feed a little filament through. You should see melted plastic come out of the nozzle.
If you ever wonder how to connect a 3d printer to your computer or network, check your printer’s manual. Some printers use USB, SD card, or Wi-Fi. Pick the method that works best for you.
If the filament does not feed smoothly, cut the end at an angle and try again. Always keep your filament dry for the best results.
Start the 3D Print
You are ready to start your 3d print! Insert your SD card or USB stick with the G-code file. On the printer’s screen, select your file and press print. Some printers let you send files over Wi-Fi. This step is a big part of the 3d printing procedure.
Watch the printer as it heats up. The bed and nozzle will reach the set temperatures. The printer will move to its home position and begin printing the first layer. If you see the filament sticking to the bed and forming a smooth line, you did a great job with your 3d printer setup.
Note: If you hear strange noises or see the nozzle dragging, pause the print and check your calibration.
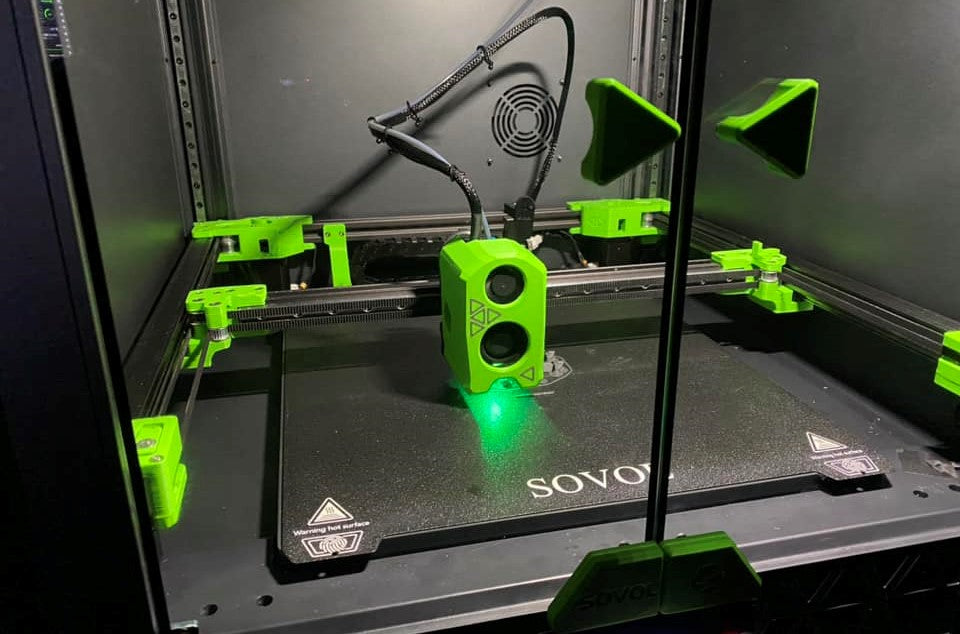
Monitor the First Layers
The first few layers decide if your print will succeed. Many 3d printing troubleshooting guides say that most problems start here. Studies show that early layer defects waste time and material. About 20% of PLA prints fail, and human error causes over a quarter of all failures. If you catch problems early, you save yourself a lot of trouble.
Here are some things to watch for in the first layers:
- The filament should stick to the bed without curling or lifting.
- Lines should look even and smooth, not squished or too thin.
- The nozzle should not drag or dig into the bed.
- If you see gaps, blobs, or warping, stop the print and fix the issue.
Some advanced printers use sensors to watch the print in real time. These can catch problems fast, but most home printers do not have this feature. You need to keep an eye on things yourself. If you spot trouble, pause the print and check your 3d printing procedure. Adjust the bed, clean the nozzle, or reload the filament if needed.
Troubleshooting Tip: If your print does not stick, clean the bed and try a glue stick or adhesion sheet. If you see stringing or blobs, lower the temperature or slow down the print speed.
You will get better at troubleshooting with practice. Each print teaches you something new about how to use a 3d printer. Keep notes on what works and what does not. Soon, you will solve problems before they ruin your prints.
3D Printing Post-Processing

Remove the Print
When your print finishes, let it cool down before you try to take it off the bed. Most experts say you should wait at least 10-15 minutes for PLA. If you rush, you might damage your print or the printer. Try the "wiggle method" first. Gently rock the print back and forth to loosen it. If it still sticks, use a spatula or a special print removal tool with a thin blade. Always wear gloves and safety glasses to protect your hands and eyes.
Tip: If your print is stubborn, you can cool the bed with an ice pack. This helps the print pop off more easily.
Here are some safe removal tools and tips:
- Use tweezers or pliers for small parts.
- Try dental floss for delicate prints.
- Avoid using too much force or sharp tools that can scratch the bed.
Clean and Finish
After you remove your print, you might see extra bits or rough spots. You can use sandpaper or a deburring tool to smooth the surface. For prints with supports, gently twist or pry them off. Some supports dissolve in water, which makes cleaning easier and keeps your print looking sharp. Sandblasting and vapor smoothing can also help you get a glossy, smooth finish. Tumbling machines work well if you have many prints to clean at once. Laser polishing can make your print stronger and reduce roughness by more than half. These finishing steps make your 3d printing projects look and feel better.
Proper cleaning and finishing can boost both the look and strength of your print.
Maintenance Tips
Keeping your printer in good shape means you get better prints every time. Here’s a quick checklist:
- Tighten belts, screws, and pulleys often.
- Clean the nozzle and build plate after each print.
- Check cables and replace worn parts.
- Lubricate rods and rails with the right oil.
- Update your printer’s firmware when needed.
- Write down your maintenance work in a notebook.
Using a maintenance schedule can cut downtime by up to 20%. Real-time monitoring helps you spot problems early and saves money. If you take care of your printer, you will enjoy smoother 3d printing and fewer surprises with your material or prints.
You have learned the basics in this 3d printing guide. Keep practicing and try new projects. Mistakes will happen, but each one helps you grow. Many experts say regular feedback and open sharing make you better at 3D printing. You can join online groups, ask questions, and share your work.
- Peer review helps you spot small issues and improve your prints.
- Learning from others keeps your skills sharp and your ideas fresh.
This 3d printing guide is just the start. Your creativity can turn simple ideas into amazing prints! 🚀
FAQ
How long does a 3D print usually take?
Print time depends on the size and detail of your model. Small objects can finish in under an hour. Large or detailed prints might take several hours or even overnight. Always check your slicer’s time estimate before you start.
What should I do if my print does not stick to the bed?
Try cleaning the bed with isopropyl alcohol. You can use a glue stick or painter’s tape for better grip. Make sure the bed is level and the nozzle is at the right height. Good first-layer adhesion helps every print.
Can I leave my 3D printer running overnight?
You can, but it’s safer to watch your printer, especially as a beginner. If you must leave it, use a smoke detector nearby and keep the area clear. Many users check their prints with a camera for peace of mind.
What is the best filament for beginners?
PLA works best for most beginners. It’s easy to use, affordable, and safe for home use. You don’t need a heated bed for PLA. You can find it in many colors and sizes.


