


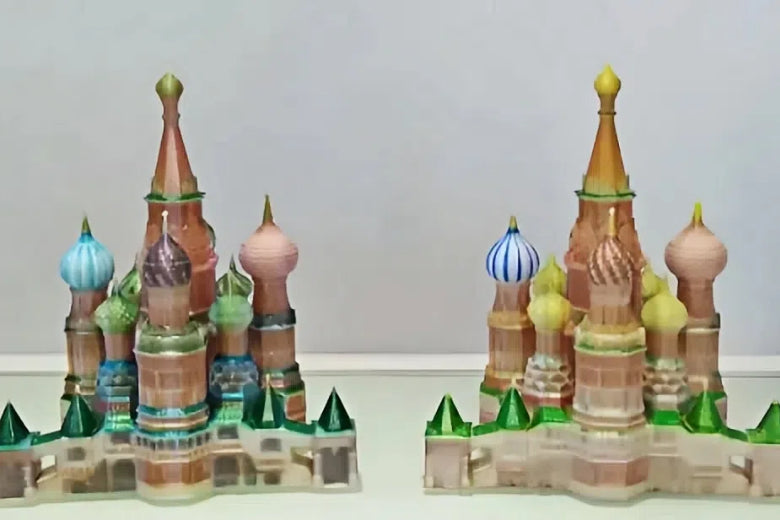
Post-processing turns your 3D prints into amazing creations, and incorporating 3D print painting adds an extra layer of vibrancy. Adding color makes your models look lively and exciting, helping to give them depth, brightness, and character. Whether you print figures or useful parts, good techniques matter. Tools like sanding or 3D print painting smooth surfaces and make them look neat. The best thing? These methods are easy for beginners and useful for experts. So, get your tools and start creating!
Key Takeaways
- Sanding and priming make 3D prints smooth and neat. This helps the paint stick better and improves the final look.
- Acrylic paints are simple to use and very flexible. You can add layers and customize your models easily.
- Spray painting is fast and covers evenly. It works great for big models and avoids brush marks.
Sanding and Priming for a Smooth Base
Why Preparing the Surface Matters
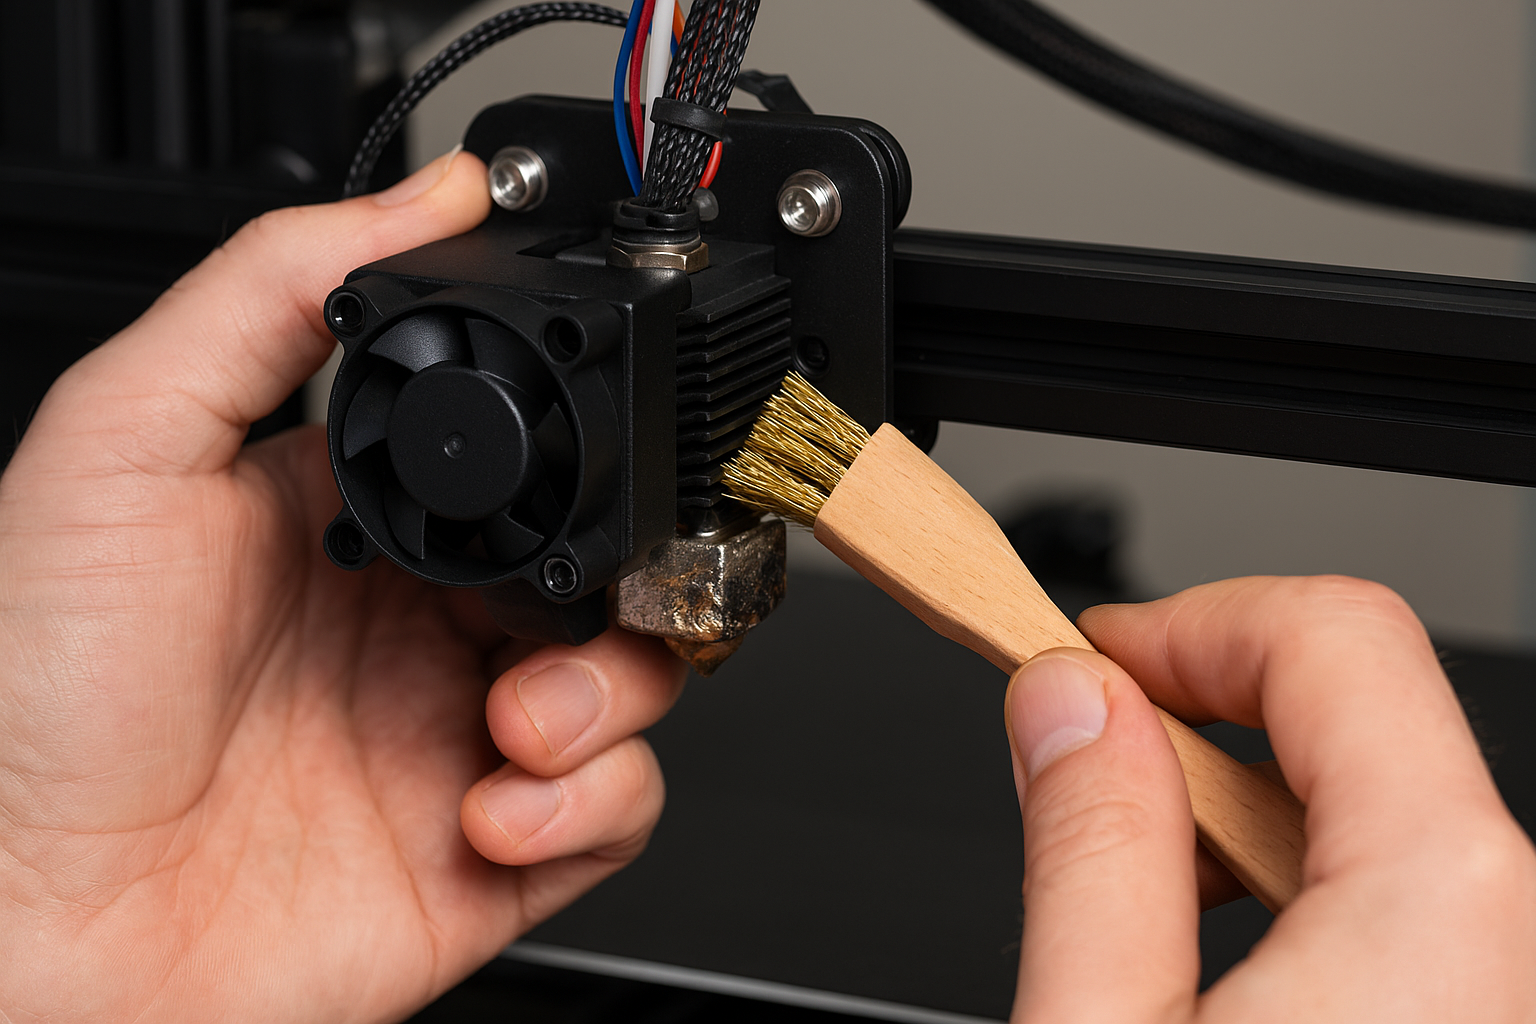
Before painting your 3D prints, prepare the surface first. A smooth surface makes your model look neat and professional. Sanding and priming remove flaws like rough spots and layer lines. This is especially helpful for detailed designs or figures where small details stand out.
Research shows that surface prep improves strength and accuracy of prints. For example:
|
Study |
Findings |
|---|---|
|
Arnold C, Monsees D, Hey J, Schweyen R |
|
|
Lohfeld S, Belnap B, Retrouvey JM, Walker MP |
Print angle affects accuracy, so prep is key. |
|
Demirel M, Diken Türksayar AA, Donmez MB, Yilmaz B |
Smoothing helps prosthetic models last longer. |
By sanding and priming, you’ll get a smooth surface ready for painting.
Tools and Materials You’ll Need
To make your prints look polished, gather these tools:
|
Tool/Material |
What It’s For |
|---|---|
|
Wet/Dry Sandpaper |
Smooths surfaces (grit: 320-1200) |
|
Sanding Block |
Best for flat areas |
|
Paint & Primer |
Try brands like Krylon |
|
UV Resistant Clearcoat |
Protects the paint finish |
|
Paint Respirator |
Keeps you safe (R95/P95 rated) |
|
Microfiber Cloth |
Cleans surfaces perfectly |
These tools make sanding and priming much easier.
Easy Steps for Sanding and Priming
Here’s how to prepare your 3D prints for painting:
- Start sanding with 150 grit sandpaper for smooth results. Use 100 grit for rough spots.
- Gradually switch to finer grits: 220, 400, 600, 1000, and finish with 2000 grit.
- Wet sand to avoid heat and get a smoother finish.
- Clean the print between sanding steps with soapy water and a toothbrush.
- Apply a thin primer coat after sanding. This helps paint stick better and creates an even base.
- Let the primer dry fully before painting.
Sanding and priming take time but are worth it. Your 3D prints will look smoother, brighter, and ready for more advanced techniques like polishing or coloring.
Acrylic Hand Painting for Customization
Why Acrylic Paints Are Ideal for 3D Prints
Acrylic paints are a fantastic choice for coloring your 3D printed parts. They’re versatile, easy to use, and come in a wide range of colors. Whether you’re working on detailed models or larger pieces, acrylics let you layer pigments to add depth and realism. Plus, they dry quickly, so you can move on to the next step without waiting too long.
To get the best results, surface preparation is key. Sanding your model and applying a primer will help the paint stick better and last longer. This extra step ensures your final part has a polished look and vibrant colors that won’t fade over time. Acrylic paints also work well for both beginners and experienced creators, making them a go-to option for 3D print painting.
Tools and Techniques for Acrylic Painting
Before you start painting, gather the right tools. You’ll need high-quality brushes in various sizes, a palette for mixing colors, and, of course, acrylic paints. For intricate details, fine-tipped brushes are a must. If you’re covering larger areas, a flat brush or sponge can save time.
Here are some techniques to try:
- Layering: Apply thin coats of paint to build up color gradually.
- Dry Brushing: Use a small amount of paint to highlight raised surfaces.
- Washing: Thin your paint with water to add shadows and depth to recessed areas.
- Masking: Use tape or liquid masking fluid to create clean lines and protect certain parts of your model.
Experimenting with these techniques will help you achieve unique effects and bring your models to life.
Tips for Achieving Professional Results
Want your 3D printed parts to look like they came straight from a professional studio? Follow these tips:
|
Technique |
Description |
|---|---|
|
Hand Painting |
Use high-quality brushes and apply multiple thin coats for a smooth finish. |
|
Dry Brushing |
Highlight raised areas by lightly dragging a brush with minimal paint. |
|
Washing |
Add depth by applying thinned paint into crevices and wiping away excess. |
|
Clear Coat Sealer |
Protect your work with a clear coat. Choose from gloss, matte, or satin finishes to match your desired look. |
Take your time and let each layer dry completely before moving on. This patience will pay off with a polished look that stands out. Don’t forget to seal your work with a clear coat to protect the colors and give your model a professional finish.
Spray Painting for Even Coverage
Benefits of Spray Painting in Post-Processing
Spray painting is one of the most efficient post-processing techniques for coloring your 3D printed parts. It offers smooth, even coverage, making it ideal for larger models or designs with intricate details. Unlike hand painting, spray painting minimizes brush strokes and creates a professional finish with less effort.
Here’s why it works so well:
- Spray painting evenly coats the surface of your model, giving it a polished look.
- It’s quick and perfect for achieving consistent color across multiple parts.
- You can layer colors to create gradients, highlights, or shadows, adding depth to your design.
However, keep in mind that spray paint only covers the surface. If the model gets scratched, the original material color might show through. This makes proper preparation, like sanding and priming, even more important.
Tools and Materials for Spray Painting
Before you start, gather these essentials:
|
Tool/Material |
Purpose |
|---|---|
|
Spray Paint |
Choose high-quality paint for durability |
|
Primer |
Helps the paint stick and smooths flaws |
|
Sandpaper (various grits) |
Prepares the surface for painting |
|
Masking Tape |
Protects areas you don’t want to paint |
|
Respirator Mask |
Keeps you safe from fumes |
|
Drop Cloth or Cardboard |
Protects your workspace |
These tools make the process easier and ensure your parts look their best.
How to Spray Paint 3D Printed Models
Follow these steps to get a flawless finish:
- Clean your model thoroughly and sand it to remove imperfections.
- Apply a primer to create a smooth base for the paint.
- Shake the spray paint can for at least a minute to mix it well.
- Hold the can about 8-12 inches away from the model and spray in light, even strokes.
- Start with a base coat, then layer additional colors for highlights or shadows.
- Let each layer dry completely before adding the next.
- Once finished, seal your work with a clear coat for added protection.
Take your time and work in a well-ventilated area. This ensures a clean, vibrant finish that lasts.
Alcohol Inks for Bright and Bold Colors
Why Alcohol Inks Are Special
Alcohol inks are great for making 3D prints colorful. They dry fast because they are alcohol-based. This keeps the colors bright and bold. These inks also work well with resin prints. They don’t mess up the curing process. When mixed with epoxy resin, they create cool effects. This adds depth and makes your designs stand out. If you want your prints to look amazing, try alcohol inks.
Tools and How to Use Them
Here’s a simple guide to tools and methods:
|
Method |
Tools Needed |
Good Things |
Challenges |
|---|---|---|---|
|
Dying SLA Parts After Printing |
- Clear or Flexible Printed Model |
Can color many parts at once |
Can get a bit messy |
|
|
No dye in the Form Wash |
|
|
|
|
- 20 mL Alcohol Ink : 1 L IPA for dark colors |
Doesn’t waste resin cartridges |
|
|
|
- Finish Kit |
|
|
|
|
- Gloves |
|
|
|
Printing With Dyed Resin |
- 10 mL Alcohol Ink |
Easy to set up |
Must use all dyed resin at once |
|
|
- One Liter of Clear Resin |
Evenly colored parts |
Only one color per print |
|
|
- Syringe |
No extra steps after printing |
|
|
|
- Gloves |
|
|
|
Coloring Hollow Parts |
- Multi-material acrylic paint |
Can see inside hollow areas |
A bit harder to do |
|
|
- Syringe or Pipette |
|
|
|
|
- Gloves |
|
|
These tools help you try different ways to use alcohol inks.
How to Get Amazing Results
Start by cleaning your 3D prints to remove dust. For dying, mix alcohol ink with isopropyl alcohol (IPA). Use 10 mL ink per liter of IPA for light colors. For darker colors, use 20 mL ink per liter. Soak your parts in the mix until the color sets. For hollow parts, use a syringe or pipette to spread the ink inside evenly.
Once the ink dries, your parts will look bright and full of life. The colors will have a rich and deep look. To keep them looking great, seal them with a clear coat. This will protect the colors and make them last longer.
Electroplating for Metallic Finishes
Electroplating is a great way to make 3D prints look metallic. It not only improves how they look but also makes them stronger and more useful. If you want shiny, professional-looking parts, this method is worth trying.
Why Electroplating is Useful for 3D Prints
Electroplating has many benefits that make it special:
- It makes 3D prints stronger, almost like real metal. For example, electroplated plastic can handle nearly twice the weight of 3D printed aluminum.
- It gives a shiny, mirror-like surface that looks amazing.
- The metal layer protects against scratches, rust, and heat. This is perfect for parts used in tough conditions or high temperatures.
Whether for decoration or practical use, electroplating adds beauty and strength to your designs.
What You Need for Electroplating
To start electroplating, gather these items:
- Clean and sand your 3D print to make it smooth.
- Cover the surface with conductive paint to prepare it for plating.
- Set up a plating bath with a solution for your chosen metal, like copper or nickel.
- Attach your print to the negative terminal of a power source and place it in the solution.
- Rinse and polish the plated part to make it shine.
These tools will help you achieve a professional metallic finish.
Steps to Electroplate Your 3D Prints
Follow these simple steps to electroplate your prints:
- Clean the Surface: Sand and polish your print to remove flaws.
- Add Conductive Paint: Apply a layer of conductive paint and let it dry.
- Prepare the Bath: Mix the plating solution for your chosen metal.
- Connect the Electrode: Attach your print to the negative terminal of a power source.
- Start Plating: Dip the print in the solution and turn on the power. Metal will coat the surface.
- Rinse and Polish: Wash the part with water and polish it for a shiny finish.
Electroplating takes practice, but the results are worth it. Your prints will look amazing and last longer, making this technique very rewarding.
Post-processing makes your 3D prints look amazing. Methods like sanding, painting, and electroplating improve their appearance and strength. Sanding removes rough spots, and alcohol inks add bright colors. Fun fact: 93% of companies say these methods give them an advantage.
Try these techniques to make your models stand out. Sovol 3D printers help by creating smooth prints and working with many materials. Whether you're just starting or experienced, these methods will make your prints even better.
FAQ
How can I pick the best way to color my 3D prints?
The choice depends on the material and look you want. Use alcohol inks for bright colors. For strong finishes, electroplating is a great option.
Tip: Always test on a small part first to avoid errors.
Is it possible to use more than one technique on a model?
Yes, you can mix methods! For example, smooth your model with sanding and priming before spray painting. You can also add alcohol inks after acrylic painting for cool effects.
How can I keep the colors on my 3D prints safe?
Protect your model with a clear coat. Pick a finish—glossy, matte, or satin—that fits your design. This step keeps colors bright and stops them from fading.


Laisser un commentaire
Tous les commentaires sont modérés avant d'être publiés.
Ce site est protégé par hCaptcha, et la Politique de confidentialité et les Conditions de service de hCaptcha s’appliquent.