


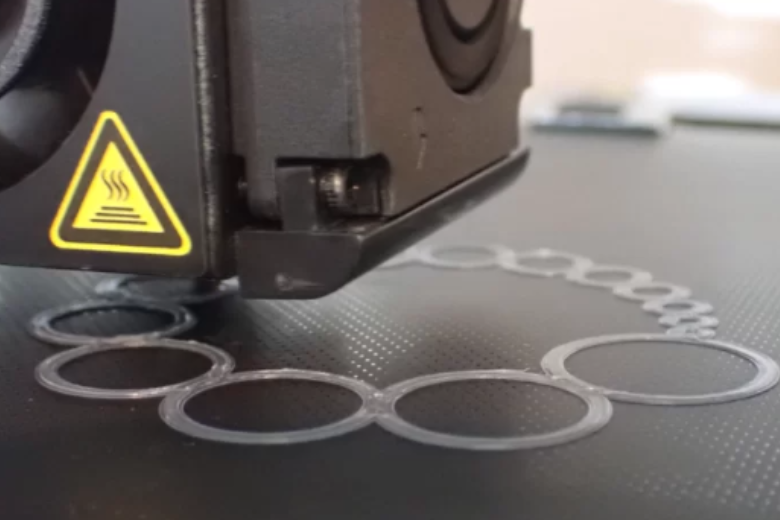
Getting good bed stickiness is key to improve 3D printing success. Bad stickiness can lead to warping, failed prints, or parts falling off. Issues like dirt, incorrect settings, or poor surfaces can create these problems. Implementing simple fixes can greatly improve bed stickiness and ensure the first layer adheres well.
Key Takeaways
- Make sure the build plate is flat and even. This helps the nozzle press evenly and avoids warping.
- Set the nozzle height (Z-offset) correctly for better sticking. A proper gap makes the first layer stick well and prevents problems.
- Clean the print bed often to improve stickiness. Cleaning removes dust and grease that can stop things from sticking.
Level the Build Plate

Why Proper Bed Leveling Improves Adhesion
Leveling the bed correctly helps improve 3D printing results. If the bed is uneven, the nozzle might press too hard or stay too far. This can cause poor stickiness, leading to warping, detachment, or failed prints.
For instance, one person found their prints lost 1mm in height. The bottom layers were squished or missing. After fixing the bed height, their prints became accurate, showing how important leveling is for good quality.
Studies show that a well-leveled bed helps the first layer stick better. Tools like paper or gauges can check if the bed is even. A level bed is key for smooth prints and fewer adhesion problems.
Step-by-Step Guide to Leveling Your Build Plate
Follow these steps to level your build plate and improve bed stickiness:
- Clean the bed: Remove any dirt or leftover glue.
- Heat the bed: Set it to the printing temperature. This makes sure it expands like during printing.
- Use a leveling tool: Place paper or a gauge between the nozzle and bed.
- Adjust screws: Turn the screws until the nozzle just touches the paper. Do this for all corners.
- Check the center: Move the nozzle to the middle and repeat the process.
By following these steps, you can improve bed stickiness and avoid printing problems.
Adjust the Nozzle Height
Why Z-Offset Matters for Bed Stickiness
The Z-offset is important for good stickiness between the nozzle and bed. It adjusts the gap so the nozzle isn’t too high or too low. If the nozzle is too high, the filament won’t stick well to the bed. If it’s too low, the filament gets squished too much and spreads unevenly.
Different materials need different Z-offset settings. For example, PLA sticks better with a little compression on the bed. But PETG works best when the nozzle is slightly higher. Setting the right Z-offset helps the first layer stick better and avoids problems like warping or parts coming loose.
Steps to Set the Right Nozzle Height
Fixing the nozzle height is easy and helps improve printing. Follow these steps to set it correctly:
- Level the bed first: Make sure the bed is flat before adjusting the nozzle.
- Heat the bed and nozzle: Warm them to printing temperature to match real conditions.
- Use a paper or gauge: Place it between the nozzle and bed to check the gap.
- Adjust the Z-offset: Lower the nozzle until it just touches the paper. The paper should move with slight resistance.
- Test with a print: Print a small pattern to see if the first layer sticks well. Adjust more if needed.
By setting the nozzle height properly, you can fix stickiness issues. This simple step makes sure the filament stays on the bed and prints come out better.
Clean the Build Surface
How Contaminants Affect Adhesion
Dirt on the bed can cause bad stickiness. This leads to problems like warping or parts falling off. Dust, hand oils, and old print leftovers block the filament from sticking well. This weakens the first layer's grip on the bed.
Studies show that tiny particles and gases from printing hurt adhesion. These make prints weaker and lower their quality. A dirty bed not only ruins the first layer but also affects the whole print. Keeping the bed clean is very important for good results.
Effective Cleaning Techniques for Your Print Bed
Cleaning your print bed helps improve stickiness and print quality. Follow these steps to keep it clean:
- Precleaning: Use a soft cloth or brush to remove dust. This clears visible dirt that stops good stickiness.
- Abrasion: Gently sand the bed with fine sandpaper if allowed. This roughens the surface, helping the filament stick better.
- Post-cleaning: Wipe the bed with rubbing alcohol to remove oils. This step clears hidden dirt and makes the surface ready for printing.
A clean bed helps the filament stick better by improving surface grip. Skipping this step can cause bad stickiness and failed prints. By cleaning well, you can get better adhesion and great print results.
Use the Right Bed Temperature
How Temperature Affects 3D Printer Bed Stickiness
Setting the right bed temperature is very important for printing. A heated bed helps the filament stick better and prevents problems. It stops issues like warping or parts coming loose during printing. The first layer sticks well, creating a strong base for the print.
Different filaments need different heat levels to stick properly. For example, PETG and TPU need higher heat to bond well. Nylon works best with medium heat for good stickiness. Using the wrong temperature can cause prints to fail or bend.
Always match the bed temperature to the filament you are using. This simple change improves stickiness and reduces the need for glue or tape.
Best Bed Temperatures for Popular Filaments
The right bed temperature depends on the filament and surface type. Below are some helpful temperature ranges for better stickiness:
Suggested Bed Temperatures by Surface Type:
|
Surface Type |
Bed Temperature (°C) |
|---|---|
|
Glass |
80 - 90 |
|
PEI |
70 - 80 |
|
General |
70 - 90 |
Suggested Bed Temperatures by Filament Type:
|
Filament |
Bed Temperature (°C) |
|---|---|
|
PETG |
70 - 90 (best around 80) |
|
NylonX |
60 |
|
NylonG |
65 |
|
Nylon |
55 - 65 |
|
TPU |
70 - 80 |
For surfaces like Kapton tape, match the heat to the filament type. Kapton works well with materials needing high heat, making it great for tough prints. Following these tips helps avoid stickiness problems and gives better results.
Apply Adhesive Solutions
Best Adhesives for Better 3D Printing Bed Stickiness
The right adhesive helps prints stick better and stay in place. Glue sticks and unscented hairsprays are easy to use and work well. Special adhesives like Magigoo are made for certain filaments, giving a strong hold between the first layer and the bed.
Adhesives make the bed surface sticky, helping tricky materials like ABS and PETG stick better. A heated bed works with adhesives to stop quick cooling, which can cause warping. Kapton tape is heat-resistant and works great with high-heat filaments, making it a good choice for tough prints.
How to Use Adhesives the Right Way
Using adhesives properly makes them work better. First, clean the bed to remove dust and oils. Spread a thin, even layer of adhesive on the bed. Don’t use too much, as thick layers can cause problems. Let the adhesive dry or get sticky before printing.
For special adhesives, follow the maker’s directions to match it with your filament. Clean the bed often to avoid leftover adhesive messing up prints. Test your adhesive by printing small parts to see how well it works.
Using adhesives the right way helps prints stick better, stops warping, and improves print quality.
Choose the Right Build Surface
Comparing Build Plate Materials for Better Adhesion
The build plate material is important for good stickiness. Different surfaces work differently with filaments. Glass plates are smooth and great for PLA. But they may not work well for filaments needing more grip. PEI sheets have a slight texture, helping more filaments stick better.
Studies show rougher surfaces can improve stickiness. For example, aluminum and wood have different textures and bond strengths. Smooth surfaces often stick less, while balanced textures hold better. In 3D printing, the right surface texture helps the first layer stick well.
Weather also affects stickiness. Humidity can change how materials like wood perform. Picking the right build plate for your filament and environment gives better results.
Matching Build Surfaces to Filament Types
Choosing the right surface for your filament is very important. Glass plates work well with PLA because they are smooth and easy to use. For PETG, PEI sheets or textured surfaces are better. They stop the filament from sticking too much and make removal easier.
Kapton tape is great for high-heat filaments like ABS. It handles heat well and keeps prints from warping. TPU, a flexible filament, sticks better to textured surfaces like PEI. These surfaces give the grip needed for good prints.
Using the right surface for your filament avoids extra adhesives or fixes. This simple choice improves stickiness and reduces print problems.
Optimize Print Settings
Change Print Speed and Flow Rate for Better Stickiness
Changing print speed and flow rate helps improve stickiness. Slower speeds let the filament stick better to the bed. Lower flow rates stop too much filament from coming out. This avoids uneven layers and bad stickiness.
Start by slowing the first layer's print speed. Speeds of 20–30 mm/s work well. Set the flow rate to 95–100% for even spreading. This keeps the filament from being squished too much. These changes help the filament stick and keep layers smooth.
These settings work best with a heated bed. Controlled speed, flow rate, and heat together improve stickiness. Some printers adjust these settings automatically for better results. This reduces print problems and failures.
Use Brims and Rafts to Fix Stickiness Problems
Brims and rafts help prints stick better, especially tricky ones. A brim adds extra filament around the model's base. This increases the area touching the bed, stopping warping or detachment.
Rafts make a separate base layer under the model. This layer sticks well to the bed and supports the print. Rafts are great for materials like ABS that need high heat and often have stickiness issues.
To use brims or rafts, turn them on in your slicer software. Adjust the brim size or raft thickness based on your model and filament. For high-heat materials, use kapton tape with these methods for better stickiness.
By changing print settings and using brims or rafts, you can fix stickiness issues and get better prints.
Making 3D prints stick better needs seven simple steps. These are leveling the bed, fixing nozzle height, cleaning the surface, setting the right bed heat, using adhesives, picking the best build surface, and changing print settings. These steps make prints stick stronger, as shown below:
Try these tips to see what works for your printer and filament. Good stickiness gives better prints and fewer problems, making it very important for 3D printing success.
FAQ
What if your print won’t stick to the bed?
Look for dirt or oil on the bed. Clean it well. Check the nozzle height and set the bed temperature for your filament.
Can adhesives on the bed be reused?
Yes, but only if the adhesive is smooth and clean. Add a thin layer again if stickiness gets weak or uneven.
How often should you level the bed?
Level the bed before each print or if sticking fails. Regular leveling keeps the first layer good and avoids failed prints.


发表评论
在发布之前,所有评论都会进行调节。
此站点受 hCaptcha 保护,并且 hCaptcha 隐私政策和服务条款适用。