


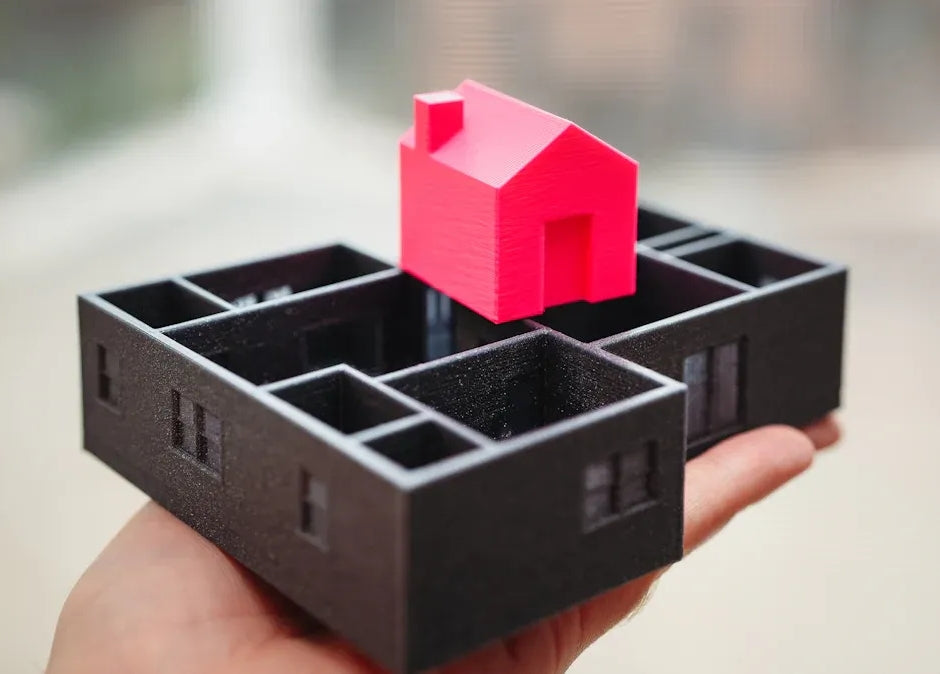
Imagine making a small model of your dream house at home. That’s the cool thing about 3D printed house models! They mix creativity and accuracy, helping you create detailed designs. Did you know the 3D printed house market is growing fast? It’s expected to grow by 70% every year! This isn’t shocking—these models combine art and technology perfectly. Whether you’re building modern or old-style designs, 3D printing makes your ideas real with amazing detail.
Key Takeaways
- 3D printing helps make accurate and custom building models. It turns your design ideas into real objects.
- It saves time and money compared to old modeling methods. This makes it great for architects with small budgets.
- Picking the right 3D printer and materials is important. Look for good print quality, easy use, and material choices.
- Fixing your design before printing makes it better. Think about wall thickness and overhangs to make it strong and look nice.
- Adding final touches like sanding, painting, and details improves your model. These steps make it look amazing and more attractive.
Why Use 3D Printing for Architectural Models?
Precision and Customization in 3D Printing Architectural Models
Accuracy is very important when making architectural models. With 3D printing, you can turn your CAD designs into exact physical models. This method is faster and captures every detail perfectly. Complicated designs, like fancy facades or tricky shapes, are now easy to make. You can also adjust your 3D-printed houses to fit your ideas without spending too much money.
Tip: If you're a freelancer, 3D printing can make your work unique. It’s affordable and allows you to create designs that old methods can’t handle.
Cost-Effectiveness of 3D Printed House Models
Old ways of making models take a long time and need skilled workers, which costs more. 3D printing changes this. It cuts production time to just hours or days, saving both money and effort. As technology improves, the cost per model keeps dropping, making it great for architects with small budgets.
Here’s why 3D-printed homes save money:
- They need less manual work.
- Changing designs is fast and cheap.
- Materials are flexible and affordable.
If you want eco-friendly and low-cost options, 3D printing is a big help.
Versatility in Materials and Design Options
3D printing gives you many choices for materials and designs. You can use simple plastics or eco-friendly materials. Want a see-through or bendable model? That’s easy. Additive manufacturing lets you try new creative ideas.
|
Aspect |
Traditional Modeling |
3D Printing |
|---|---|---|
|
Time to Create |
Takes weeks or months |
|
|
Precision |
Depends on skill |
Always accurate |
|
Material Flexibility |
Limited options |
Many materials available |
|
Cost per Model |
Expensive |
Getting cheaper |
|
Design Iteration |
Slow and hard |
Fast and easy |
|
Complexity Handling |
Hard for detailed designs |
Great for complex shapes |
With 3D printing, you can make models that look amazing and work well. Architects can now try designs that were impossible with older methods.
Selecting the Right Tools for 3D Printed House Models
Making a great 3D-printed house starts with picking good tools. The tools you use can either help or ruin your project. That’s why it’s important to choose ones that work well together. Let’s look at what matters most when picking tools for your 3D-printed houses.
Picking the Best 3D Printer for House Models
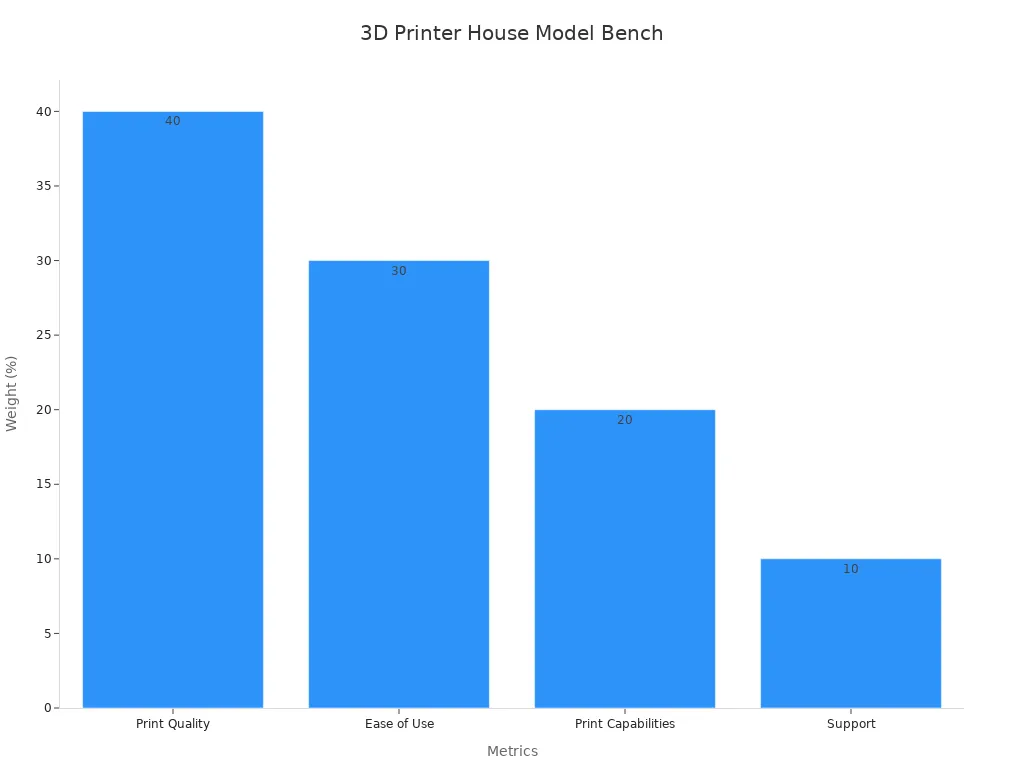
Not all 3D printers are the same, especially for house models. You need one that is precise, handles tricky designs, and works with different materials. Here’s what to check:
- Print Quality: A good printer shows tiny details like windows and roofs.
- Ease of Use: Pick one that’s simple to set up and use.
- Print Capabilities: Look at the size it can print and material options.
- Support: Good customer help is useful if problems happen.
Here’s a quick table comparing what to look for in printers:
|
Metric |
Weighting |
Description |
|---|---|---|
|
Print Quality |
40% |
Checks how well it makes small details and shapes. |
|
Ease of Use |
30% |
Rates how easy it is to set up and use. |
|
Print Capabilities |
20% |
Looks at size limits and material choices for models. |
|
Support |
10% |
Measures how helpful customer service is when needed. |
Choosing a printer with these features helps you make professional-looking models.
Best Materials for 3D Printing Architectural Models
The material you pick affects how strong and nice your model looks. Some materials are better for details, while others are stronger or more flexible. Here are some top picks:
- Carbon Fiber Nylon PA12-CF: Very strong because of carbon fiber.
- PETG: Tough and resists breaking, great for building models.
- TPU 90A: Flexible and good for bendable parts.
- ABS: Strong and resists impacts.
- ASA: Perfect for outdoor models since it resists sunlight.
- PC (Polycarbonate): Super strong and lasts a long time.
- Nylon PA6: Great for strength and resisting impacts.
Your model’s strength also depends on settings like temperature, layer height, and infill. Try different settings to find the best mix of strength and detail.
Important Things to Think About When Choosing Tools
Picking tools isn’t just about the printer and materials. You also need to think about software, slicing tools, and other details. Here’s a list of key points:
|
Key Factor |
Description |
|---|---|
|
Wall Thickness |
Makes sure the model is strong and doesn’t break. |
|
Overhangs |
Needs careful design to avoid sagging during printing. |
|
Warping |
Can change the shape; fix it with good materials and settings. |
|
Software |
Turns designs into files your printer can use. |
|
Material Selection |
Affects how strong, flexible, or heat-resistant your model is. |
Follow these steps to make the process easier:
- Design: Use special software to draw your house’s shape.
- Data Alteration: Change the design into a file your printer understands.
- Slicing: Use slicing software to create the G-code for printing.
- Material Selection: Pick materials based on how strong or flexible you want it.
- Printing: Start printing using the G-code.
- Post-Processing: Clean and put together the printed parts.
- Quality Control: Check the model to make sure it looks like your design.
By focusing on these steps, you can make amazing architectural models.
Designing Your 3D Printed House Model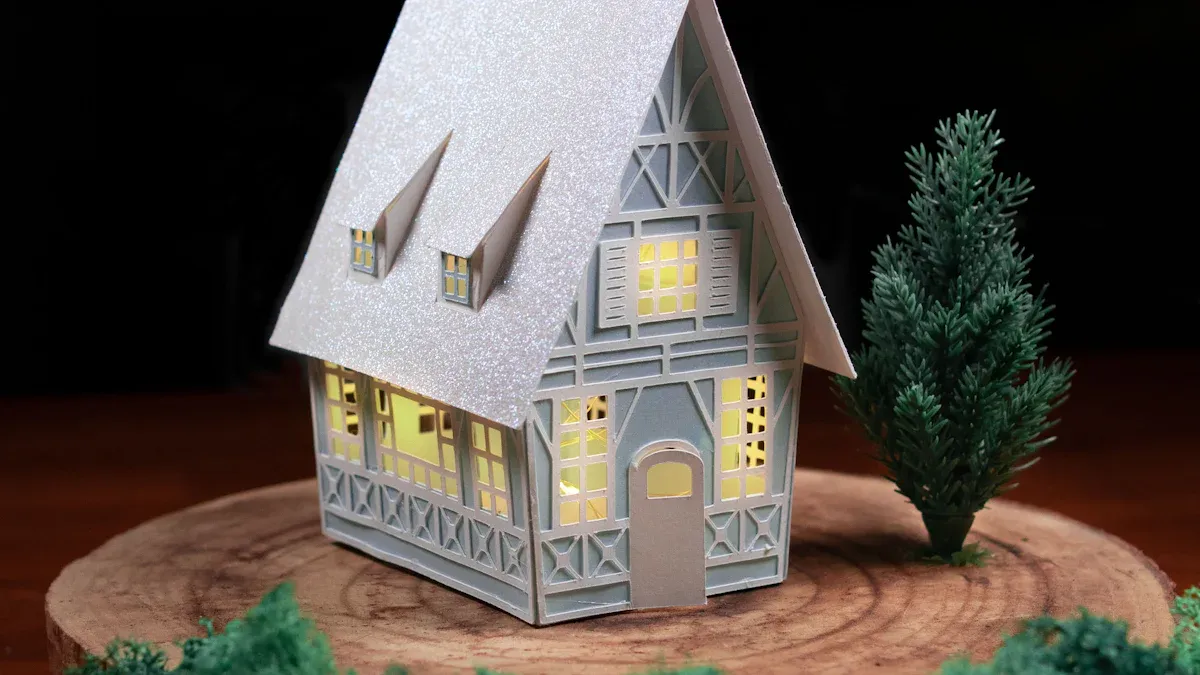
Making your 3D-printed house is where ideas meet accuracy. This step turns your thoughts into a digital plan for your printer. Whether you’re a pro architect or a hobbyist, using the right tools makes a big difference.
Best Software for 3D Printing Architectural Models
Picking the right software is like choosing the best tool. It helps you succeed. For 3D printing, you need software that’s easy to use but powerful. Here are some great options:
- SketchUp: Perfect for beginners, it’s simple and has many tutorials.
- AutoCAD: Loved by architects, it’s great for detailed designs.
- Revit: Best for houses, it lets you design whole buildings.
- Blender: Free and advanced, it’s good for complex shapes.
- Fusion 360: Great for adjusting sizes and details easily.
Tip: If you’re new, try SketchUp or Blender. They’re easy to learn and still powerful for making cool models.
Creating or Downloading 3D Models for 3D-Printed Houses
Not everyone wants to start from nothing, and that’s fine! You can make your own models or download ready-made ones. Here’s how to do both:
Creating Your Own Models
Making your own model gives you full control. Start by drawing your idea on paper. Then, use software to turn it into a digital design. Focus on key parts like walls, roofs, and windows. Keep it simple if you’re just starting out.
Downloading Pre-Made Models
If you’re short on time, downloading models is a good choice. Websites like Thingiverse, GrabCAD, and MyMiniFactory have free and paid designs. Look for ones marked “ready for 3D printing” to avoid problems.
Note: Check the rules when downloading models. Some need credit or can’t be used for business.
Optimizing Designs for 3D Printing
Making your design better is the key to success. It helps your model print well and look great. Here’s how to improve your designs:
- Polish Your Digital Design: Use software to smooth edges, fix sizes, and add details. This makes your model look its best.
- Save Materials: Make the inside simpler to use less material but keep it strong. This saves money and helps the planet.
- Use Less Energy: Change settings like layer height to print faster and save energy.
Steps to Optimize Your Design
- Set Limits: Decide on things like wall thickness and overhang angles.
- Use Tools: Try algorithms to find the best settings.
- Test and Fix: Print small versions to check and improve your design.
This process makes your 3D-printed houses stronger, lighter, and better. It’s helpful for both architects and hobbyists.
Pro Tip: Always print a small test model first. It helps you find problems early and saves time.
Exporting Files in the Correct Format
Once your design is ready, the next step is exporting it in a format your 3D printer can understand. This might sound tricky, but don’t worry—it’s simpler than you think. Let’s break it down step by step.
Why File Format Matters
Your 3D printer doesn’t just magically know what to do. It needs clear instructions, and the file format you choose acts as the translator. If you pick the wrong format, your printer might not work properly, or your model could lose important details. That’s why getting this step right is so important.
Tip: Always double-check your printer’s manual or specifications to see which file formats it supports. This saves you from unnecessary headaches later.
Common File Formats for 3D Printing
Here are the most popular file formats you’ll encounter when exporting your 3D models:
- STL (Stereolithography): The most widely used format. It’s great for simple designs and works with almost all 3D printers.
- OBJ (Object File): This format supports color and texture, making it ideal for more detailed models.
- 3MF (3D Manufacturing Format): A newer format that’s gaining popularity. It’s compact and includes additional data like material and color information.
- AMF (Additive Manufacturing File): Similar to 3MF but less common. It supports advanced features like multiple materials.
Each format has its strengths. For most house models, STL or OBJ will do the job perfectly.
Steps to Export Your File
Exporting your file is a straightforward process. Follow these steps to ensure success:
- Finalize Your Design: Before exporting, double-check your model for errors. Look for gaps, overlapping parts, or other issues that could cause printing problems.
- Choose the Right Format: Decide which file format suits your project. STL is a safe choice for beginners.
- Adjust Export Settings: Most software lets you tweak settings like resolution. Higher resolution means more detail but larger file sizes.
- Save Your File: Use a clear and descriptive name for your file. This makes it easier to find later.
Pro Tip: If your software offers a “repair” tool, use it before exporting. This fixes common issues and ensures your file is ready for printing.
Export Settings to Consider
When exporting your file, you’ll often see options for settings like resolution and scale. Here’s what you need to know:
|
Setting |
What It Does |
Recommendation |
|---|---|---|
|
Resolution |
Controls the level of detail in your model. Higher resolution = more detail. |
Use medium to high for house models. |
|
Scale |
Ensures your model prints at the correct size. |
Double-check dimensions before saving. |
|
File Units |
Determines the measurement system (e.g., millimeters, inches). |
Use millimeters for most printers. |
These settings might seem small, but they can make a big difference in the final result.
Testing Your Exported File
Before you hit “print,” it’s a good idea to test your file. Here’s how:
- Preview the File: Use a slicer program to view your model layer by layer. This helps you spot any issues.
- Run a Test Print: If you’re unsure, print a smaller version of your model first. This saves time and materials.
Note: If your file doesn’t look right in the slicer, go back to your design software and check for errors. It’s better to fix problems now than waste time later.
By following these steps, you’ll ensure your 3D-printed house model turns out exactly as you imagined. Exporting files might seem like a small step, but it’s one of the most important parts of the process. Take your time, and you’ll set yourself up for success.
Emoji Reminder: 🖨️ Always remember—great prints start with great files!
Printing and Finishing Your 3D-Printed Home
Making a 3D-printed home is fun and creative. The printing and finishing steps are where your ideas become real. Let’s learn how to set up your printer, fix problems, and make your model look amazing.
Preparing Your Printer for Great Results
Setting up your printer correctly is very important. A good setup helps your 3D-printed houses look strong and detailed. Focus on these steps:
- Calibration: Adjust the bed level and nozzle height. This stops uneven layers and makes prints more accurate.
- Material Selection: Pick strong materials like carbon fiber nylon or PETG. These are durable and reliable.
- Temperature Settings: Use the right temperature for your material. For example, ABS needs high heat to work well.
Tip: Always read your printer’s manual for the best settings. It saves time and avoids mistakes.
Here’s a table of key settings that help your prints succeed:
|
Evidence Type |
Description |
|---|---|
|
Compressive Strength |
|
|
UL 3401 Compliance |
Ensures materials and printers meet building standards. |
|
Fire Safety Standards |
Meets fire rules like UL 263 for faster approvals. |
These settings make your models better and safer for building projects.
Fixing Common 3D Printing Problems
Even good printers can have issues. Knowing how to fix them keeps your project moving. Here are some common problems and fixes:
- Warping: If edges curl, raise the bed temperature or use tape.
- Layer Shifting: Tighten loose belts or screws to align layers.
- Under-Extrusion: Clean the nozzle or increase extrusion to fix thin layers.
Pro Tip: Print a small test model first. This helps you find problems early.
Remember, construction 3D printing is still improving. Current printers may have size or material limits. Rules and approvals can also slow things down, but staying updated helps you manage these challenges.
Finishing Touches for 3D Printed House Models
After printing, it’s time to make your model look great. Finishing steps add details that make your models stand out. Try these techniques:
- Sanding: Use sandpaper to smooth rough spots. Start with rough grit, then use fine grit for a shiny finish.
- Painting: Add color with acrylic paints. This makes your model look more real.
- Assembly: If your model has parts, glue them together carefully. Use clamps to hold pieces while they dry.
Note: For outdoor models, use paints and sealants that resist weather.
Finishing improves how your models look and last. Architects use these steps to make professional and durable prototypes.
Adding Finishing Touches for a Professional Look
Your 3D-printed house model is almost ready, but the finishing touches can take it from good to stunning. This step is all about adding those small details that make your model look polished and professional. Here’s how you can do it.
Smooth Out Rough Edges
Printed models often have tiny imperfections. Sanding is your best friend here. Start with coarse sandpaper to remove bumps, then switch to finer grit for a smooth finish.
Tip: Use a sanding block for flat surfaces and small files for tricky corners. This keeps your model looking clean and sharp.
Add Color and Texture
Painting brings your model to life. Acrylic paints work well for most materials. You can use a brush for detailed areas or spray paint for even coverage. Want to add texture? Try using textured paint or decals for brick walls, wood panels, or roof tiles.
-
Steps for Painting:
- Clean the model to remove dust.
- Apply a primer for better paint adhesion.
- Paint in thin layers to avoid streaks.
🎨 Pro Tip: Use masking tape to protect areas you don’t want painted.
Assemble and Seal
If your model has separate parts, glue them together carefully. Use a strong adhesive that matches your material. Once assembled, apply a clear sealant to protect the paint and give your model a polished look.
|
Material |
Recommended Sealant |
|---|---|
|
PLA |
Acrylic spray |
|
ABS |
Polyurethane |
|
PETG |
Epoxy resin |
Showcase Your Model
Lighting can make a big difference. Add LED lights inside or around your model to highlight details. You can even create a base or stand to display your masterpiece.
Emoji Reminder: ✨ A little extra effort goes a long way in making your model shine!
By following these steps, you’ll turn your 3D-printed house into a professional-looking piece that’s ready to impress.
Tips for Creating Stunning 3D Printed House Models
Using High-Resolution Settings for Detailed Results
To make your 3D-printed house models look great, use high-resolution settings. These settings help create smooth surfaces and show tiny details like windows and walls. Resolution in 3D printing is measured in microns (µm). Smaller numbers mean better detail. For example, home printers can print at 50µm, while industrial ones can go as low as 30µm. This level of detail is ideal for complex designs.
High resolution takes longer to print, but the results are worth it. Your model will have fewer visible lines and look more polished. Always check your printer’s settings and adjust them for the best results. Taking extra time during printing can make a big difference in how your model turns out.
|
Aspect |
Details |
|---|---|
|
Why It Matters |
High resolution creates smooth surfaces and fine details. |
|
How It’s Measured |
Microns (µm); smaller numbers mean better precision. |
|
Printer Examples |
Home printers: 50µm; industrial printers: 30µm for advanced designs. |
Experimenting with Textures and Colors
Textures and colors can make your model look amazing. Adding textures like brick or stone makes walls look real. Bright colors can highlight parts like doors or roofs. This makes your model stand out and feel more lifelike.
Trying different textures and colors also helps you learn what works best. Rough textures might look good on outside walls, while smooth finishes fit modern interiors. Mixing textures and colors can lead to creative and unique designs. Don’t be afraid to try new ideas—it’s a great way to improve your skills.
- Textures and colors make models look realistic and interesting.
- Testing different styles helps you find the best look for each part.
- Creativity leads to better designs for both learning and professional projects.
Incorporating Lighting and Additional Features
Adding lights to your model makes it look even cooler. LED lights are small, easy to use, and save energy. You can put them inside to light up windows or around the base for a dramatic effect. Lights make your model look more detailed and eye-catching.
You can also add fun extras like tiny furniture, gardens, or moving parts. These features make your model interactive and lifelike. For example, a spinning windmill or a small yard adds charm. Projects like TECLA show how creative features can improve both design and sustainability.
Combining lights and extras turns your model into more than just a display—it tells a story. Use your imagination to make something truly special.
Learning from Mistakes and Improving Designs
Mistakes happen, especially when you're working on something as detailed as a 3D-printed house model. But here's the good news: every mistake is a chance to learn and improve your skills. Let’s talk about how you can turn those errors into better designs.
Review Your Process
Start by looking at what went wrong. Did the walls collapse? Were the details too blurry? Maybe the printer settings weren’t quite right. Write down what you notice. This helps you avoid making the same mistake twice.
Tip: Keep a notebook or digital file to track your printing experiences. Over time, this becomes a valuable guide for improving your architectural models.
Test Small Before Going Big
Printing a full model takes time and materials. Instead, print a small section first. This lets you check for issues like weak spots or uneven layers. Fixing problems on a small scale saves you from wasting resources on a larger print.
Experiment and Adjust
Don’t be afraid to try new things. Change the layer height, adjust the temperature, or use a different material. Each tweak teaches you something new about your printer and your design. Over time, you’ll figure out what works best for your architectural projects.
Ask for Feedback
Sometimes, a fresh pair of eyes can spot things you missed. Share your model with friends, family, or online communities. Their feedback can help you see areas for improvement.
Pro Tip: Join 3D printing forums or groups. You’ll find plenty of advice and inspiration from people who’ve faced similar challenges.
Mistakes aren’t failures—they’re stepping stones to better designs. Embrace them, learn from them, and watch your skills grow.
Making a cool 3D-printed house model is simple with the right steps. Begin with a strong design, pick good materials, and use smart building methods. These steps help your model look great and last longer.
Don’t be scared to try new ideas or methods. Use different textures, bright colors, or add lights to make your model special. Each project helps you learn and get better.
Why wait? Jump into 3D printing and turn your ideas into reality. Your next 3D-printed house could be the amazing creation you’ve always dreamed of!
FAQ
What is the best material for 3D-printed house models?
You can use materials like PLA, ABS, or PETG. Each has unique strengths. PLA is easy to print, ABS is durable, and PETG resists impact. Choose based on your project’s needs.
Can I create a 3D-printed tiny house model at home?
Yes, you can! With a good 3D printer and design software, making a 3D-printed tiny house model is simple. Start with a basic design and experiment as you learn.
How long does it take to print a house model?
The time depends on the model’s size and detail. Small models may take a few hours, while larger, detailed ones could take a day or more. Always plan ahead.
Are 3D-printed concrete dwellings possible?
Yes, they are! While this blog focuses on smaller models, 3D-printed concrete dwellings are a growing trend in real construction. They’re efficient, eco-friendly, and cost-effective.
Do I need special software for 3D printing?
Yes, you’ll need design software like SketchUp or Blender to create your model. You’ll also need slicing software to prepare the file for printing. Both are easy to learn.


发表评论
在发布之前,所有评论都会进行调节。
此站点受 hCaptcha 保护,并且 hCaptcha 隐私政策和服务条款适用。