


The first layer is the most critical part of a successful 3D print, and addressing 3D printing problems at this stage is essential. When it fails, you’ll likely face issues like poor adhesion or uneven layers. A high Z offset or low flow rate can cause the extruded material to separate, leading to detachment from the print bed. Fixing these early 3D printing problems makes all the difference.
Key Takeaways
- The first layer is very important for a good 3D print. Make sure the bed is level and the nozzle is at the right height to help it stick well.
- Watch the first layer carefully while it prints. Fixing problems early saves both time and materials.
- Try using glue sticks or painter's tape to make it stick better, especially with tricky materials like ABS.
Common 3D Printing First Layer Problems
Poor Adhesion: Not Sticking to the Bed
One of the most frustrating 3D printing problems is when your first layer refuses to stick to the bed. You might notice the filament curling up or detaching entirely, leaving you with a failed print. This issue often stems from poor first layer adhesion, which can result in blurry or congealed designs.
Here’s why this happens:
- The print bed might not be level, causing uneven pressure on the filament.
- The nozzle height could be too high, preventing the filament from properly bonding with the bed.
- Incorrect bed temperature settings can also make the surface less sticky.
To tackle this, start by leveling your bed and adjusting the nozzle height. You can also use adhesion aids like glue sticks or painter’s tape to improve stickiness.
Uneven or Inconsistent Layers
Uneven layers can ruin the look and strength of your print. If the first layer isn’t smooth, the rest of the print will likely suffer. This problem often occurs when the nozzle and bed aren’t properly aligned. You might see wavy lines or gaps in the first layer, which are clear signs of alignment issues.
Empirical studies have shown that factors like extrusion temperature and printing speed significantly impact layer consistency. For example:
|
Key Parameters |
Mechanical Properties Evaluated |
Methodology |
|---|---|---|
|
Extrusion temperature |
Elastic modulus (E) |
Full factorial design coupled with machine learning techniques |
|
Printing speed |
Strain at maximum stress (ε_d) |
Predictive accuracy validated through complex relationships in FDM 3D printing process parameters |
To fix this, double-check your printer’s settings and ensure the bed is clean and level. Slowing down the first layer print speed can also help achieve smoother results.
Warping or Curling of the First Layer
Warping happens when the edges of your first layer curl up, making it impossible for the print to stay flat. This is one of the most common first layer problems, especially when printing with materials like ABS. Warping usually occurs due to rapid cooling or uneven heat distribution across the bed.
To prevent warping, make sure your bed temperature is set correctly for the filament you’re using. Adding a brim or raft to your design can also help anchor the edges and reduce curling.
Gaps, Holes, or Incomplete Coverage
Have you ever started a print and noticed gaps or holes in the first layer? These first layer challenges can lead to structural weaknesses in your final print. Gaps often occur when the nozzle height is too high or the extrusion rate is too low.
To fix this, lower the nozzle slightly and increase the flow rate in your slicer settings. Regularly cleaning your nozzle can also prevent blockages that cause incomplete coverage.
Tip: Always monitor the first layer during printing. Catching these issues early can save you time and filament.
Causes of 3D Printing First Layer Problems
Incorrect Bed Leveling
If your first layer isn’t sticking or looks uneven, the culprit might be an improperly leveled print bed. When the build platform is not level, the nozzle can’t maintain consistent pressure across the surface. This leads to areas where the filament either squishes too much or doesn’t stick at all.
Inaccurate bed leveling often causes the Z-axis to misalign. For example, on printers like the Elegoo Mars, the leadscrew and spring washer can create a discrepancy in the Z=0 position. This misalignment prevents the bed from returning to the correct height, resulting in uneven first layers.
To fix this, you need to level the print bed carefully. Most printers have manual or automatic leveling options. Take your time to ensure the nozzle is at the right distance from the bed across all points. A properly leveled bed sets the stage for a flawless first layer.
Improper Bed or Nozzle Temperature
Temperature plays a huge role in first layer success. If the bed or nozzle temperature is off, you’ll likely face adhesion issues. A bed that’s too cold won’t allow the filament to stick, while a nozzle that’s too hot can cause the filament to ooze or deform.
Different materials require different temperature settings. For instance, PLA typically works well with a bed temperature of 60°C, while ABS might need 100°C or more. Always check the recommended settings for your filament and adjust accordingly.
If you’re unsure, start with the manufacturer’s guidelines and tweak the settings based on your results. A small adjustment can make a big difference in adhesion and layer quality.
Nozzle Height Too High or Low
When the nozzle starts too far away from bed, the filament won’t adhere properly. On the other hand, if it’s too close, the filament gets squished, creating an uneven or messy first layer.
To get the perfect nozzle height, use a piece of paper as a spacer. Slide it between the nozzle and the bed while adjusting the height. You should feel slight resistance when moving the paper. This simple trick helps you find the sweet spot for optimal adhesion.
Regularly check your nozzle height, especially after moving your printer or changing the bed. Even a small shift can throw off your first layer.
Slicer Settings Errors
Your slicer software controls how your printer lays down the first layer. If the settings are off, you might see gaps, poor adhesion, or uneven layers. Common slicer mistakes include setting the first layer speed too high or using the wrong extrusion width.
To avoid these issues, double-check your slicer settings before starting a print. Slow down the first layer speed to give the filament more time to bond with the bed. Also, ensure the extrusion width matches your nozzle size. These small adjustments can significantly improve your first layer.
Dirty or Damaged Print Bed
A dirty print bed is one of the most overlooked causes of first layer problems. Dust, grease, or leftover filament can prevent the new layer from sticking.
Here are some common contaminants that affect adhesion:
- Fingerprints or oils from handling the bed.
- Dust or debris from the environment.
- Residue from previous prints.
To clean your bed, use isopropyl alcohol and a lint-free cloth. For stubborn residue, a scraper or warm soapy water can help. Keeping your bed clean ensures a smooth surface for the filament to adhere to.
Clogged or Dirty Nozzle
A clogged nozzle can ruin your first layer by causing inconsistent extrusion. Dirt or leftover filament inside the nozzle blocks the flow, leading to gaps or incomplete coverage.
To prevent clogs, clean your nozzle regularly. You can use a needle or a cleaning filament to remove debris. If the clog persists, heat the nozzle and carefully clear it out. A clean nozzle ensures smooth and consistent extrusion, which is crucial for a perfect first layer.
Tip: Always inspect your nozzle before starting a print. Catching clogs early saves you time and frustration later.
Step-by-Step Solutions to Fix First Layer Problems
How to Properly Level Your Print Bed
Leveling your print bed is the first step to achieving a flawless first layer. If the bed isn’t level, you’ll struggle with uneven layers and poor adhesion. Here’s how you can do it:
- Install a probe: If your printer doesn’t have an automatic leveling sensor, consider adding one like a BLTouch or inductive sensor.
- Enable mesh leveling: Use firmware such as Marlin to activate mesh bed leveling. Configure it properly to ensure accurate measurements.
-
Start the leveling process: Use your printer’s interface or commands like
G29to initiate the mesh leveling procedure. The probe will measure multiple points across the bed. -
Save the mesh data: Once the mesh is generated, save it to your printer’s memory using commands like
M500. - Perform a test print: Print a simple calibration model to verify that the first layer is consistent across the bed.
If your printer doesn’t support automatic leveling, you can manually level the bed:
- Preheat the bed to account for thermal expansion.
- Move the nozzle to each corner and adjust the screws using a feeler gauge (typically 0.1mm).
- Repeat the process for all corners and check the center for fine adjustments.
Taking the time to level your bed properly ensures your filament adheres evenly, setting the stage for perfect first layer settings.
Adjusting the Z-Height for Optimal Adhesion
The Z-height determines how close the nozzle is to the print bed. If the nozzle is too high, the filament won’t stick. If it’s too low, the filament gets squished, creating an uneven surface.
To find the ideal Z-height:
- Use a piece of paper as a spacer. Slide it between the nozzle and the bed while adjusting the height. You should feel slight resistance when moving the paper.
- Test different layer heights to see what works best. For example:
|
Failure Load (kg) |
Observations |
|
|---|---|---|
|
0.05 |
80 |
Best adhesion strength |
|
0.15 |
80 |
Strongest overall performance |
|
0.2 |
80 |
Adequate adhesion |
|
0.3 |
< 40 |
Reduced strength |
|
0.4 |
< 20 |
Very poor adhesion |
Adjusting the Z-height is one of the simplest ways to improve first layer adhesion. Regularly check it, especially after moving your printer or changing the bed.
Cleaning the Print Bed for Better Adhesion
A clean print bed is essential for first layer adhesion. Dust, grease, or leftover filament can prevent the filament from sticking properly.
Here’s how to clean the print bed:
- Use isopropyl alcohol and a lint-free cloth to remove fingerprints and oils.
- For stubborn residue, use warm soapy water or a scraper.
- Avoid touching the bed with bare hands after cleaning to keep it free of contaminants.
When you clean the print bed regularly, you’ll notice fewer adhesion issues and smoother first layers.
Optimizing Bed and Nozzle Temperature Settings
Temperature settings play a huge role in first layer quality. If the bed is too cold, the filament won’t stick. If the nozzle is too hot, the filament may deform.
Here are some tips for optimizing temperatures:
- For PLA, set the bed temperature to 60°C and the nozzle temperature to 210-215°C.
- Adjust the bed temperature in increments of 5°C to find the sweet spot for your filament.
- Avoid setting the bed temperature too high, as it can cause warping.
Proper temperature settings ensure the filament bonds well with the bed, improving first layer adhesion.
Slowing Down the First Layer Print Speed
If your first layer is printing too fast, the filament won’t have enough time to bond with the bed. Slowing down the first layer print speed can make a big difference.
Benefits of reducing print speed:
- Enhanced bed adhesion, ensuring the first layer sticks well.
- Improved inter-layer bonding, leading to stronger prints.
- Better dimensional accuracy and part strength.
Start with a slower speed for the first layer, then gradually increase it for subsequent layers. This simple adjustment can solve many 3D printing problems.
Using Adhesion Aids (e.g., glue stick, tape, or sprays)
Adhesion aids can help stabilize the first layer, especially when printing with tricky materials like ABS.
|
Effectiveness in First Layer Stability |
Notes |
|
|---|---|---|
|
Glue Stick |
High |
Effective for ABS, reduces warping |
|
Hairspray |
Moderate |
Commonly used, but less effective than PEI |
|
PEI Sheet |
Very High |
Preferred by users for various filaments |
|
Blue Painter’s Tape |
Moderate |
Works well for PLA, provides stable surface |
Using a glue stick or PEI sheet can significantly improve first layer adhesion. Combine these aids with proper bed temperature settings for the best results.
Testing and Calibrating the First Layer
Calibration is key to refining your first layer settings. Use calibration models to test and adjust your printer’s parameters.
Popular calibration tools include:
- AmeraLabs Town model: Helps identify optimal exposure settings and troubleshoot print quality issues.
- Photonsters Validation Matrix: Validates exposure times and layer consistency.
Testing and calibrating the first layer ensures your printer is set up for success, reducing failed prints and improving overall quality.
Tips for Preventing First Layer Problems
Regular Maintenance of Your 3D Printer
Keeping your 3D printer in top shape is one of the easiest ways to avoid first layer problems. Regularly check for loose screws, worn belts, or misaligned components. These small issues can throw off your printer’s precision. Clean the print bed and nozzle frequently to remove dust or filament residue. A well-maintained printer ensures consistent performance and fewer headaches during printing.
Tip: Create a maintenance schedule. A quick inspection before each print can save you from bigger problems later.
Choosing the Right Filament for Your Print
Not all filaments are created equal. Some materials stick better to the print bed than others. PLA is beginner-friendly and adheres well at lower temperatures, while ABS requires a heated bed to prevent warping.
|
Recommendation Type |
Details |
|---|---|
|
Bed Adhesion |
Use PVA-based glue stick, PVP, or specialized adhesives like Magigoo. |
|
Bed Adhesion Techniques |
Employ a heated bed or adhesive like glue sticks to enhance adhesion. |
|
Bed Temperature |
Maintain temperatures between 30-60°C to improve adhesion and reduce warping. |
Choose a filament that matches your project and printer setup. Following these guidelines can make a big difference in your first layer quality.
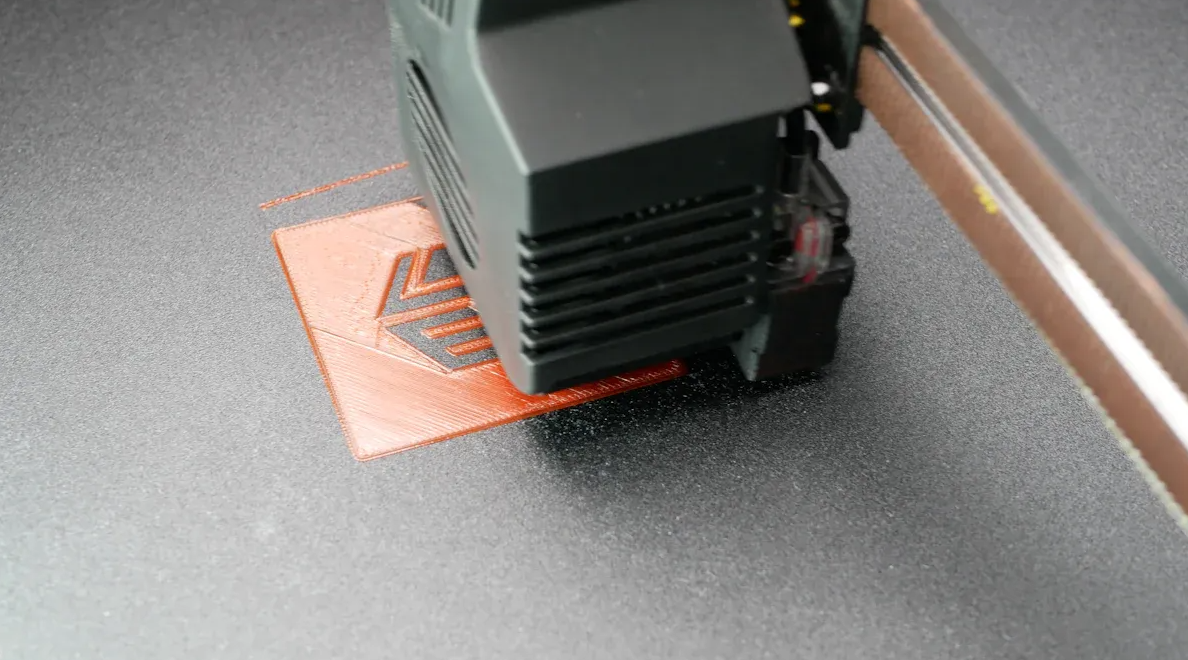
Monitoring the First Layer During Printing
The first layer sets the tone for the entire print. Watch it closely as it prints. Look for signs of poor adhesion, gaps, or uneven extrusion. If something seems off, pause the print and make adjustments. Catching issues early can save you time and filament.
Using Rafts, Skirts, or Brims for Better Adhesion
Rafts, skirts, and brims are great tools for improving first layer adhesion. A raft creates a solid base under your print, while a brim adds extra surface area around the edges. Skirts help prime the nozzle and ensure smooth extrusion before the main print starts. Experiment with these options to see what works best for your project.
Performing Routine Nozzle Cleaning and Maintenance
A clean nozzle is essential for smooth extrusion. Over time, filament residue can clog the nozzle, causing uneven layers or gaps. Use a cleaning filament or a needle to clear blockages. Regular nozzle maintenance ensures consistent flow and better first layer adhesion.
Note: Always heat the nozzle before cleaning to make the process easier and safer.
The first layer is the backbone of every successful 3D print. Addressing common issues like poor adhesion or uneven layers saves time and materials.
- Tools like the Nozzle Ninja system detect first layer problems early, preventing wasted filament and failed prints.
- Real-time notifications and detailed reports help you refine your process for future projects.
|
Benefit Type |
Description |
|---|---|
|
Material Savings |
Uses 30% less material with optimized settings. |
|
Reduced Print Time |
Cuts print time by 25%, boosting efficiency. |
|
Cost Efficiency |
Lowers production costs through smarter printing. |
By applying these solutions, you’ll achieve smoother, more reliable first layers every time.
FAQ
What should I do if my first layer keeps failing?
Start by checking the bed leveling and nozzle height. Clean the print bed and adjust the temperature settings for your filament.
Tip: Use a calibration print to test your adjustments.
Can I fix adhesion issues without using glue or tape?
Yes! Try adjusting the bed temperature, slowing the first layer speed, or using a PEI sheet. These methods often improve adhesion without extra materials.
How often should I clean my print bed and nozzle?
Clean the print bed after every few prints. Inspect and clean the nozzle weekly or whenever you notice extrusion issues.
Note: Regular maintenance prevents clogs and adhesion problems.


