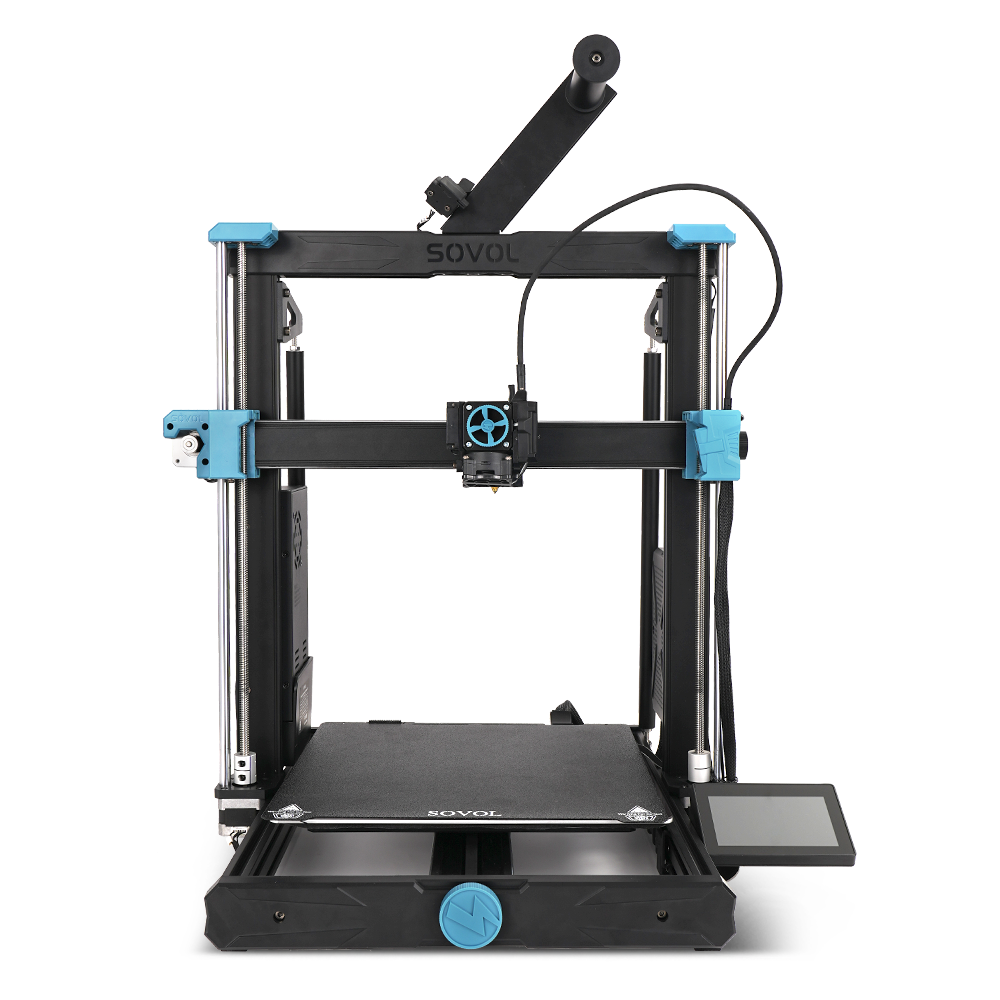
Infill percentage in 3D printing determines how solid the interior of a 3D print will be. It plays a key role in the strength of the object, the amount of material consumed, and the overall printing time. A higher infill percentage in 3D printing results in stronger prints, while a lower percentage saves both time and material. You can adjust the infill percentage in your slicing software to meet specific requirements. For functional parts, a higher infill percentage in 3D printing may be necessary, whereas for decorative items, a lower percentage is usually sufficient. Understanding infill percentage in 3D printing helps you strike the right balance between strength, efficiency, and cost.
Key Takeaways
- Pick infill percentage based on what you’re printing. Use 20-30% for regular items and 40-60% for stronger parts.
- Select the right infill pattern to make prints tougher. Triangular and hexagonal shapes are stronger than simple ones.
- Start with medium infill settings. Test prints and change them if needed to save material.
- Use slicing software to see how infill looks. This helps balance strength, speed, and filament use.
- Think about wall thickness with infill. Thicker walls can lower infill needs and save filament.
Infill Percentage and 3D Print Strength
Impact of Infill Density on Durability
Infill density affects how tough your 3D prints are. Higher infill percentages make prints stronger by improving their internal structure. Increasing density makes objects less likely to bend or break under pressure. For instance, a print with 50% infill can handle more force than one with 10%. But higher density uses more material and takes longer to print.
If you need strong parts, balance durability with efficiency. Lower infill percentages, like 15%, are fine for decorative items that don’t need strength. For mechanical parts, higher infill percentages, such as 40% or more, are better.
Tip: Use slicing software to see how infill density changes the inside of your model. This helps you decide between strength and saving material.
Choosing Infill Patterns for Maximum Strength
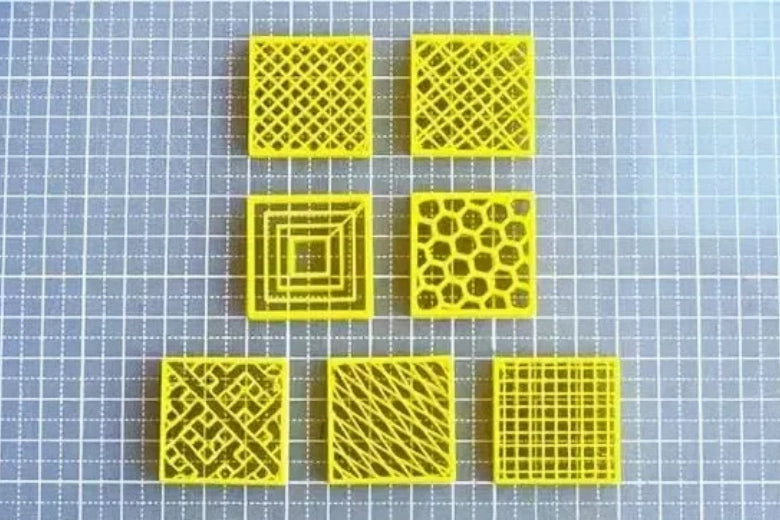
The infill pattern you pick affects how sturdy your 3D prints are. Different patterns offer various levels of strength, speed, and material use. Below is a comparison of common infill patterns:
|
Infill Type |
Strength Features |
Printing Speed |
|---|---|---|
|
Very strong due to triangle shapes; resists bending; great support. |
Fairly fast |
|
|
Rectangular Infill |
Can reach full density; uses a grid-like structure. |
Fast |
|
Hexagonal Infill |
Best strength-to-weight ratio; made of hexagon shapes. |
Slowest to print |
Triangular infill works well for heavy-duty parts needing extra strength. Hexagonal infill is great for lightweight but durable designs. Rectangular infill is fast and flexible, ideal for testing prototypes.
For even tougher prints, try adding fiber reinforcement. This method boosts strength beyond regular plastic. Kevlar reinforcement, for example, resists wear and is good for parts facing heavy use.
Note: Test different infill patterns to find the best one for your project. Patterns like hexagonal take longer but offer better strength.
Recommended Infill Percentages for Load-Bearing Parts
Choosing the right infill percentage is important for parts that carry weight. These parts must handle stress without breaking. For most load-bearing designs, 40% to 60% infill gives a good mix of strength and material use.
For very high-stress parts, use 80% to 100% infill for maximum toughness. This takes more time and filament but ensures durability. Parts with medium stress can work well with 30% to 40% infill.
Tip: If you’re unsure about the best infill percentage, start at 50%. Test your design and adjust based on results. Use slicing software to check stress points and improve settings.
Avoiding Common Mistakes in Strength Optimization
When setting up infill for strength, mistakes can weaken your 3D prints. Fixing these problems helps your designs stay strong and efficient. Watch out for these common errors:
1. Using Excessively High Infill Percentages
You might think 100% infill makes prints the strongest. It does make them solid but wastes filament and time. Most designs are strong enough with 40% to 60% infill. Save higher percentages for parts under heavy stress.
Tip: Start with moderate infill. Increase it only if your part breaks under pressure.
2. Ignoring the Role of Infill Patterns
Picking the wrong infill pattern can make prints weaker. Fast patterns like lines don’t work well for load-bearing parts. Strong patterns like triangles or hexagons spread force better, making prints tougher.
|
Pattern |
Best Use Case |
Strength Level |
|---|---|---|
|
Triangular |
Heavy-duty parts |
High |
|
Rectangular |
Prototypes and general use |
Medium |
|
Hexagonal |
Lightweight yet durable designs |
High |
Note: Choose an infill pattern that fits your print’s purpose. Stronger patterns take longer but last longer.
3. Overlooking Wall Thickness
Thin walls with high infill can make prints brittle. Wall thickness is key for strength. Adding thicker walls reduces the need for too much infill.
Tip: Use at least two or three wall layers for strong parts. This boosts durability without wasting filament.
4. Failing to Consider Stress Points
Stress points can cause prints to break unexpectedly. If you don’t check these areas, even high infill won’t stop failures. Use slicing software to find weak spots and adjust infill or patterns.
Tip: Add denser infill or extra wall layers to stress points. This helps your print handle pressure where it’s needed most.
5. Neglecting Material Properties
Not all filaments are equally strong. Weak materials like PLA limit durability, even with high infill. Stronger filaments like ABS or PETG work better for functional parts.
Tip: Pick filament based on your project’s needs. Combine strong materials with good infill settings for the best results.
Avoiding these mistakes helps you balance strength, efficiency, and filament use. Try different infill percentages, patterns, and materials to improve your prints.
Infill Percentage and Printing Speed
How Infill Density Affects Print Time
Infill density changes how long a 3D print takes. Higher density means the printer fills more space inside. This makes the printing process take longer. For example, 80% infill takes much more time than 20%. The printer spends extra time adding material for a denser structure.
If you want faster prints, use lower infill density. This uses less material and speeds up the process. But remember, lower density can make your print weaker. For decorative items or test models, this trade-off is usually fine. For strong, functional parts, you’ll need to balance speed and strength.
Balancing Speed and Strength in 3D Printing
To balance speed and strength, think about infill patterns and density. Some patterns, like gyroid, are strong but still efficient. The table below shows how to balance these factors:
|
Aspect |
Description |
|---|---|
|
Infill Pattern |
|
|
Strength Characteristics |
Graphene can be 10 times stronger than steel at 5% density. |
|
Material Efficiency |
Uses less material while staying strong, saving time and cost. |
For most prints, start with 30% to 50% infill density. Test your print to see if it works well. Adjust the settings if needed to get the best results.
Tips for Faster Printing Without Compromising Quality
You can print faster without losing quality by changing some settings. Try these tips:
- Only use supports when absolutely needed. Supports slow printing and add extra work later.
- Watch the extruder at the start to avoid filament clumps. Clumps can ruin prints and waste time.
- Skip supports for walls angled at 45 degrees or higher. This saves time and improves efficiency.
- Keep your print bed clean and smooth. Good bed adhesion helps the print start correctly and avoids mistakes.
By following these tips, you can print faster while keeping good quality and saving time.
Ideal Infill Settings for Quick Prototyping
When making prototypes, speed is often more important than strength. Picking the right infill settings helps you print faster and save material. Here’s how to set up your infill for quick prototyping:
-
Lower the Infill Percentage
Use 5% to 15% infill for lightweight prototypes. This makes the printer fill less space inside the model. Lower percentages speed up printing and use less filament. -
Choose Simple Infill Patterns
Fast patterns like lines or zigzag work best for prototypes. These patterns need fewer movements, so they print quickly. Avoid complex patterns like gyroid or hexagonal, as they take longer. -
Change Layer Height and Wall Thickness
Use thicker layers with low infill density to save time. Thinner walls also print faster. Two wall layers are usually enough for prototypes. -
Turn On Draft Mode in Your Slicer
Draft mode in slicing software adjusts settings for faster printing. It lowers infill density and changes other options to save time. Use this mode for quick results.
Tip: Test your prototype with the chosen infill settings first. This ensures it works well without wasting time or material.
By following these steps, you can make prototypes quickly and keep costs low.
Infill Percentage and Filament Use
How Infill Affects Filament Usage
The infill percentage changes how much filament your printer uses. Higher infill means more material inside the print, using more filament. For example, 80% infill uses much more filament than 20%. This is because denser prints need more material to fill the inside.
For decorative items or prototypes, low infill like 10% or 15% works well. These settings save filament and reduce waste. But for strong, functional parts, higher infill is needed, which uses more material. Finding the right balance between strength and material use is important.
Tip: Use slicing software to check filament use at different infill levels. This helps you plan how much material you’ll need.
Saving Money on Filament
You can save filament without lowering print quality by using smart strategies. First, pick the right infill percentage for your project. For parts that don’t carry weight, use lower infill to save material and print faster.
Choose simple infill patterns like lines or zigzag. These patterns use less filament than stronger ones like triangles or hexagons. While they aren’t as strong, they work fine for lightweight or decorative prints.
Adjusting other settings can also save filament. Thinner walls or lower layer heights use less material. Just make sure these changes don’t weaken your print too much.
Note: Try draft mode in your slicing software for quick, low-cost prints. This mode adjusts settings to use less filament and print faster.
Budget-Friendly Infill Tips
To keep printing costs low, optimize your infill settings. Think about what your print is for. For prototypes or display models, use 5% to 15% infill. This keeps filament use low while keeping the print’s shape.
For functional parts, focus on using material efficiently. Patterns like gyroid or cubic are strong but use less filament than solid infill. These patterns give strength where it’s needed most.
You can also try variable infill settings. Some slicing software lets you add more infill only in areas that need extra strength. This saves material while keeping the print strong.
Tip: Test your settings on a small part of your model first. This helps you adjust infill and avoid wasting filament.
Comparing Filament Use Across Infill Settings
Changing infill settings in slicing software changes filament use. Knowing how infill percentages affect material helps you plan better and avoid waste.
Low Infill Percentages: Use Less Filament
Low infill, like 10% or 15%, uses the least filament. These settings make a light internal structure, good for decorative items or prototypes. For example, a vase with 10% infill will be mostly hollow but still hold its shape. This saves material and prints faster.
Tip: Use low infill for items that don’t need strength. This keeps prints light and saves money.
Medium Infill Percentages: Balance Strength and Filament
Medium infill, between 30% and 50%, balances strength and material use. These settings work for parts needing moderate durability. For example, a tool handle with 40% infill will be strong but not waste material. This range is great for most everyday prints.
High Infill Percentages: Use More Filament
High infill, like 70% or more, uses the most filament. These settings make a dense structure, making prints very strong. They’re best for parts that carry weight or face stress. But they take more time and material to print.
Note: Use high infill only for parts needing maximum strength. Medium infill is usually strong enough for most projects.
Comparing Filament Use by Infill
The table below shows how filament use changes with infill:
|
Infill Percentage |
Filament Use |
Best For |
|---|---|---|
|
10% |
Very low |
Decorative items, light models |
|
30% |
Moderate |
Functional parts, general prints |
|
70% |
High |
Heavy-duty parts, stressed objects |
Lower infill saves filament but weakens prints. Higher infill strengthens prints but uses more material. Medium infill often gives the best mix of both.
Testing and Improving Filament Use
To save filament, test settings on small models first. This shows how infill affects material and print quality. Use slicing software to check filament estimates before printing. This helps you plan and avoid surprises.
Tip: Try variable infill settings. Some slicers let you add more infill only where needed. This saves material while keeping strength in key areas.
By learning how infill affects filament, you can make smarter choices. Whether you want to save money, print faster, or make strong parts, adjusting infill helps you meet your goals.
Knowing how infill affects strength, speed, and filament use is important. More infill makes prints stronger by holding layers together better. It also helps prevent cracks. Starting with 20-30% infill is good for most prints. You can change this based on what your model needs. Research shows higher infill makes parts much tougher. This is great for parts that need to hold weight.
To get the best results, try using gradient infill or special patterns like gyroid. These options save material while keeping parts strong. Use slicing software to test different settings. Adjust the infill to match your goals. By choosing the right infill, you can make prints that are strong and fit your budget.
FAQ
What infill percentage works best for everyday prints?
For most prints, 20% to 30% infill is a good choice. This range gives enough strength without wasting material. It’s great for items that don’t need to hold heavy weight but still need to be sturdy.
Can I switch infill patterns during a print?
Yes, some advanced slicers let you change infill patterns in one print. This helps make certain areas stronger while using less material in other parts.
Does infill affect how heavy a 3D print is?
Yes, higher infill makes prints heavier because more material is used. Lower infill makes lighter prints, which is better for decorations or test models where weight doesn’t matter.
Which infill pattern is the strongest?
Triangular and hexagonal patterns are very strong. They spread out force evenly, making them great for parts that carry weight. But they take longer to print than simpler patterns like lines or grids.
How can I use less filament but keep prints strong?
Use 30%-50% infill with smart patterns like gyroid or cubic. These patterns give strength where it’s needed while saving material. You can also use variable infill to add strength only in key areas.


