


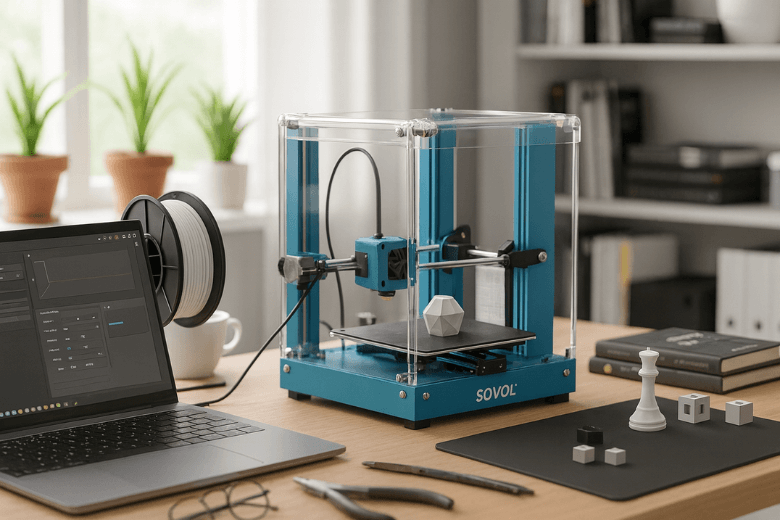
You want your Sovol Zero printer to deliver smooth and precise results. The Best Cura Profile makes a difference because recent community efforts and Cura updates have improved print quality. Many users now share optimized settings and downloadable profiles online. Layer heights like 0.153 or 0.158 mm can change how your prints look and feel. You can follow step-by-step guides to set up and troubleshoot your profile for the best results.
Key Takeaways
- Start with the Best Cura Profile to ensure high-quality prints. Use recommended settings for nozzle size, layer height, and retraction to achieve smooth surfaces and strong parts.
- Choose the right layer height for your project. A height of 0.2 mm balances speed and quality, while thinner layers enhance detail and thicker layers speed up printing.
- Download and import community-shared profiles to save time. Follow simple steps to apply these profiles in Cura, ensuring they match your printer and filament type.
- Adjust print speed for better detail. Slower speeds yield sharper details, especially for intricate models. Test different speeds to find what works best for your prints.
- Regular maintenance is key to optimal performance. Clean your printer, check settings, and update software to keep your Sovol Zero running smoothly.
Best Cura Profile Overview
When you want the best results from your Sovol Zero, you need to start with the right settings. The Best Cura Profile gives you a strong foundation for high-quality prints. Many users in the Sovol community have tested and shared their favorite settings. Cura 5.3.0-beta1 also brings new features that help you get even better prints.
Key Settings
You should pay close attention to the main settings that affect your print quality. These include nozzle size, layer height, retraction, and initial layer line width. The table below shows the most recommended settings from community forums and expert guides:
|
Nozzle Size |
Nozzle Diameter |
Min Layer Height |
Max Layer Height |
Retraction Length |
Initial Layer Line Width |
|---|---|---|---|---|---|
|
0.6 mm |
0.6 |
0.12 |
0.42 |
1.8 |
0.42 |
|
0.8 mm |
0.8 |
0.16 |
0.56 |
3.0 |
0.5 |
Layer height is one of the most important settings. You can choose between 0.153 mm and 0.158 mm for a balance of speed and detail. The table below explains how different layer heights affect your prints:
|
Aspect |
Explanation |
|---|---|
|
Surface Finish |
Thinner layers make smoother surfaces and better curves. |
|
Strength |
Smaller layer heights help layers stick better, making parts stronger. |
|
Print Time |
Larger layer heights print faster because there are fewer layers. |
|
Z-axis Resolution |
Thinner layers improve details along the Z-axis for precise models. |
You can see that the Best Cura Profile uses these settings to help you get smooth surfaces, strong parts, and detailed models. You can also adjust these settings to match your project.
Download Best Cura Profile
Many Sovol Zero users share their profiles online. These profiles have been downloaded over 7,200 times, showing that many people trust and use them. You can find these profiles on popular 3D printing forums and Sovol community pages.
To use a shared profile, follow these steps:
- Download the Cura profile file from a trusted source.
- Open Cura and go to the "Profile" section.
- Select "Import" and choose the downloaded file.
- Apply the profile to your Sovol Zero printer.
Tip: Always check the profile details before using it. Make sure it matches your Sovol Zero hardware and filament type.
You can also explore the latest updates in Cura 5.3.0-beta1. This version supports new features that improve print quality and make it easier to use community profiles. By starting with the Best Cura Profile, you set yourself up for success and can fine-tune your prints for even better results.
Profile Settings
Layer Height Options
You can choose from several layer height options for your Sovol Zero. The right choice depends on your project and the level of detail you want.
- For most prints, a layer height of 0.2mm gives you a good balance between speed and quality.
- If you want more detail, try lowering the layer height to 0.1mm or 0.15mm.
- For faster prints, especially with larger models, you can increase the layer height to 0.3mm.
- Always match your layer height to your nozzle size. A good rule is to use a layer height between 25% and 75% of your nozzle width.
- Start with 0.2mm and test with small models before making changes.
- Avoid using layer heights below 0.05mm or above 0.4mm, as these extremes can cause problems.
Tip: Adjusting your layer height can make a big difference in surface finish and print time.
Print Speed
Print speed affects both the quality and success rate of your prints. Slower speeds help you get sharper details, especially for miniatures or models with fine features.
- Use 30 mm/s for very detailed parts to ensure precision.
- For most miniatures, a speed between 40 mm/s and 60 mm/s works well.
- Test different speeds with sample models to find what works best for your needs.
|
Print Speed (mm/s) |
Effect on Detail and Finish |
|---|---|
|
30 |
Best for very detailed parts, ensures precision |
|
40 - 60 |
Maintains sharp details, avoids stringing or shifting layers |
|
Up to 120 |
Fast, but may reduce detail and increase print issues |
Temperature Settings
You should set the nozzle and bed temperatures based on your filament type. PLA usually prints well at 200°C for the nozzle and 60°C for the bed. For PETG, try 230°C for the nozzle and 70°C for the bed. Always check the filament manufacturer’s recommendations and adjust as needed.
Retraction & Flow
Retraction and flow settings help you avoid stringing and ensure smooth extrusion.
- Stringing happens when melted filament leaks during travel moves.
- Lowering the retraction length to 2-2.5mm and setting the speed to 30mm/s can reduce stringing.
- For some PETG brands, you may need to lower the retraction length even more, sometimes to 0.4mm.
- Enable the "wipe" setting in Cura to help clean the nozzle before travel moves.
- Keep your flow rate between 60% and 200% at 210°C for best results.
Cooling & Fan
Cooling settings play a big role in layer adhesion and warping.
- Lower the fan speed for better adhesion, especially on the first few layers.
- For ABS, turn off the fan to prevent warping.
- For PLA, use 100% fan speed after the first few layers to ensure proper cooling.
- Turn off the fan for the first few layers to avoid rapid cooling and warping.
Support & Adhesion
You can improve print success by using the right support and adhesion settings.
- Use a brim or raft for better bed adhesion, especially for small or tall models.
- Enable supports only when your model has overhangs or bridges.
- Adjust support density and pattern to make removal easier and reduce marks on your print.
The Best Cura Profile for Sovol Zero uses these settings as a starting point. You can fine-tune each option to match your filament and project needs.
Setup Guide
Importing Profiles
You can import a profile for your Sovol Zero printer in Cura by following a few simple steps. This process helps you start with the Best Cura Profile and saves you time on manual setup. Here is how you do it:
- Download the zip folder that contains the configuration files for Sovol Zero.
- Extract the folder so you can access its contents.
- Open Cura on your computer.
- Go to the Help menu and select Show Configuration Folder.
- Move the extracted folder into the Cura configuration directory.
- Copy the necessary files into their correct folders inside the Cura configuration.
- Restart Cura to load the new settings.
- Add a new Sovol SV06 Plus printer from the printer settings.
Tip: Restarting Cura after moving the files ensures that all changes take effect.
Manual Configuration
If you want to set up your profile manually, you need to adjust several settings. Many users face challenges when Cura does not include a specific Sovol Zero profile. You might see confusion about which printer to select or which settings to change. Here are some common issues and solutions:
- You may not find a Sovol Zero profile in Cura. Try downloading the correct profile from Sovol’s website or adjust an existing profile to match your printer.
- Incorrect temperature settings often cause print failures. Always check your filament’s recommended temperatures.
- Layer alignment problems can appear during prints. Make sure you set the layer height and speed according to your nozzle size.
Note: Double-check each setting before you start a print. Small mistakes can lead to failed prints or poor quality.
Saving & Applying
After you finish importing or manually configuring your profile, you need to save and apply it. Cura’s profile manager lets you name and store your custom settings. You can switch between profiles for different filaments or projects.
- Save your profile by clicking the “Custom” button and choosing “Create Profile.”
- Give your profile a clear name, such as “Sovol Zero PLA 0.2mm.”
- Apply the profile before slicing your model to make sure Cura uses your chosen settings.
Tip: Keep a backup of your profiles. You can export them for future use or share them with other Sovol Zero users.
By following these steps, you set up your Sovol Zero for reliable and high-quality prints. You can always adjust your settings to improve results and match your printing needs.
Optimization Tips
Filament Adjustments
You can improve your Sovol Zero prints by adjusting your Cura profile for each filament type. PLA, PETG, and ABS all need different temperatures and cooling settings. Always check the filament label for recommended nozzle and bed temperatures. Try lowering the print speed for flexible filaments to prevent jams. If you see stringing, increase retraction distance or speed. For high-performance materials, use a high-temperature hotend and adjust the cooling fan to avoid warping.
Tip: Use high-quality filament to reduce the risk of clogs and uneven extrusion.
Print Type Tuning
You can tune your Sovol Zero for different print types by using features that boost accuracy and detail. The table below shows how each feature helps your prints:
|
Feature |
Contribution to Print Detail and Surface Finish |
|---|---|
|
Next-Gen 3.0 Auto-Leveling |
Guarantees accurate first layer adhesion and foundation, critical for fine details. |
|
XYZ Full Linear Rails |
Reduces motion artifacts, enhancing print quality and surface smoothness. |
|
Input Shaping |
Minimizes surface defects during high-speed printing, preserving detail. |
|
Pressure Advance |
Prevents over- or under-extrusion, improving accuracy and surface finish. |
|
Silicone Damping Pad |
Enhances stability, resulting in smoother prints with better surface quality. |
|
High-Temperature Hotend |
Allows use of high-performance materials that can produce finer details. |
|
AC Heated Bed |
Ensures consistent adhesion and reduces warping, aiding detailed prints. |
|
Adaptive Area Detection |
Improves accuracy in detailed areas by adjusting extrusion precisely. |
You can enable or adjust these features in Cura to match your print type, whether you want speed or fine detail.
Troubleshooting
If you face issues with your Sovol Zero, try these steps:
- Adjust belt tension to reduce ringing in prints.
- Experiment with print speed to find the best balance.
- Check and adjust bed leveling for proper first layer adhesion.
- Perform probe and bed mesh calibrations for better accuracy.
- Use manual baby-stepping to fine-tune nozzle height during printing.
Note: Many guides for Voron-type machines also help with Sovol Zero troubleshooting.
Maintenance
Regular maintenance keeps your Sovol Zero running smoothly:
- Clean dust and debris from the printer.
- Check and tighten bolts, belts, and bearings.
- Replace worn parts like nozzles or belts when needed.
- Update software and firmware for new features.
- Lubricate moving parts to reduce friction.
- Keep your printer in a stable, low-dust environment.
- Balance your printing schedule to avoid overuse.
- Record all maintenance and part changes.
- Use quality filament for consistent results.
You can also find community resources and profile libraries online. Sovol and other users share Cura profiles, configuration files, and troubleshooting tips on forums and download pages. These resources help you get the most from the Best Cura Profile and keep your Sovol Zero in top shape.
Advanced Customization
Special Materials
You can unlock new possibilities by printing with special materials on your Sovol Zero. Materials like TPU, Nylon, and Polycarbonate require unique settings in Cura. You must adjust the nozzle temperature and bed temperature for each type. For example, TPU needs a lower print speed and higher bed temperature to prevent warping. Nylon works best with a dry filament and a heated enclosure. Polycarbonate demands a high nozzle temperature and slow cooling.
|
Material |
Nozzle Temp (°C) |
Bed Temp (°C) |
Print Speed (mm/s) |
Notes |
|---|---|---|---|---|
|
TPU |
220-240 |
60-80 |
20-30 |
Use direct drive extruder |
|
Nylon |
240-260 |
70-90 |
30-50 |
Keep filament dry |
|
Polycarbonate |
260-280 |
90-110 |
20-40 |
Use enclosure |
Tip: Always check the manufacturer's guidelines for each filament. You can avoid jams and failed prints by matching your settings to the material.
You can also experiment with infill patterns and density. Changing these settings helps you create prints that are strong or lightweight. For example, a higher infill density makes your part more durable. A unique infill pattern can improve flexibility or appearance.
- Adjust infill patterns for strength or aesthetics.
- Increase infill density for functional parts.
- Use lower density for faster, lighter prints.
Experimental Features
Cura offers experimental features that help you push the limits of your Sovol Zero. You can enable adaptive layer heights to balance speed and quality. This feature lets Cura use thinner layers for detailed sections and thicker layers for larger areas. Your prints will show more detail where it matters and finish faster overall.
You can also try new infill types. Cura lets you select patterns like gyroid, cubic, or concentric. Each pattern changes how your print handles stress and looks. You can test different patterns to find the best fit for your project.
Note: Experimental features may not work perfectly with every model. You should test them on small prints before using them for important projects.
You can use custom scripts in Cura for advanced control. For example, you can add a post-processing script to pause the print for filament changes. You can enter scripts in the "Extensions" menu under "Post-Processing."
You can explore these advanced options to make your Sovol Zero prints unique and high-performing. Experiment with settings and features to discover what works best for your needs.
You can achieve better Sovol Zero prints by using the Best Cura Profile. Many users have seen smoother surfaces and stronger parts after adjusting settings like bed temperature and adhesion methods. You should join Sovol Zero forums, Discord, Reddit, or Facebook to share your results and ask questions. Try new settings and learn from others. Your feedback helps the community improve profiles and guides.
FAQ
What layer height works best for Sovol Zero?
You get the best results with a layer height between 0.15 mm and 0.2 mm. Thinner layers improve surface finish. Thicker layers print faster. Match the layer height to your nozzle size for optimal performance.
How do you fix stringing issues in Cura?
Increase retraction distance and speed in Cura. Lower the print temperature if you see excess stringing. Test with small models to find the best settings for your filament.
Can you use ABS or PETG with the Sovol Zero profile?
Yes, you can print ABS and PETG. Adjust the nozzle and bed temperatures in Cura. Use an enclosure for ABS to prevent warping. Set the cooling fan lower for PETG.
Where do you find Sovol Zero Cura profiles?
You find profiles on Sovol forums, Reddit, and Facebook groups. Download profiles from trusted sources. Import them into Cura using the profile manager.
Why does your first layer not stick to the bed?
Check bed leveling and clean the build surface. Increase bed temperature slightly. Use a brim or raft in Cura for better adhesion. Make sure you use the correct Z offset.


