


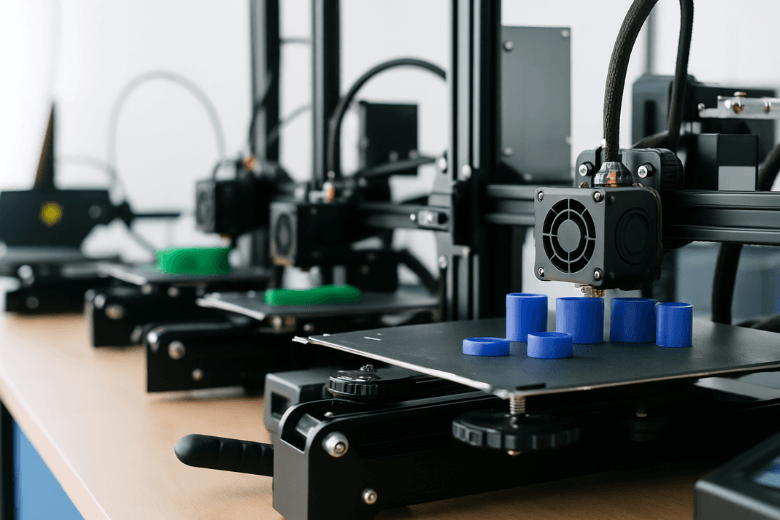
You can improve print quality on your Sovol Zero by focusing on calibration and using the right settings. This high-resolution printer achieves precise details and stable printing, thanks to its advanced auto-leveling and chamber monitoring. As a miniature 3d printer, it delivers impressive quality, especially when you check the printer’s details and adjust printing settings for each project. Calibration ensures your high-resolution printer produces consistent details. The Sovol Zero stands out as a miniature 3d printer with fast printing and advanced features. By reviewing details and adjusting settings, you unlock the full potential of this high-resolution printer. You experience better printing and sharper details with the right calibration. The miniature 3d printer maintains quality, and its printing settings help capture every detail.
Key Takeaways
- Regularly calibrate your Sovol Zero to ensure consistent print quality and sharp details.
- Adjust print settings like layer height and speed to enhance resolution and detail in your prints.
- Perform routine maintenance checks on the nozzle and bed to prevent issues and maintain high-quality output.
Calibration for Quality Prints
You unlock the full potential of your Sovol Zero by focusing on calibration. This process ensures your printer delivers consistent quality and sharp details with every print. Proper calibration improves accuracy, reduces failed prints, and helps you achieve a perfect first layer. Sovol Zero’s advanced features make calibration straightforward, but attention to each step is essential for reliable printing.
Auto-Leveling Setup
Sovol Zero uses a dual auto-leveling system that combines eddy current scanning and pressure sensing. This technology gives you precise accuracy and strong first layers. You start by initiating the auto-leveling sequence from the printer’s touchscreen. The process takes about 80 seconds and achieves an accuracy of ≤0.02 mm. This level of detail means fewer failed prints and better overall quality.
Tip: Always run auto-leveling before starting a new project or after moving your printer.
The table below compares dual auto-leveling with single auto-leveling systems:
|
Feature |
Dual Auto-Leveling |
Single Auto-Leveling |
|---|---|---|
|
Layer Height Consistency |
Ensures consistent layer height across the entire bed |
May have inconsistencies depending on manual calibration |
|
Adaptation to Surface Changes |
Automatically adjusts for surface irregularities |
Requires manual adjustments |
|
First Layer Quality |
Fewer first-layer issues |
More prone to first-layer problems |
|
Print Quality |
Improved overall print quality, especially for complex models |
Varies based on user calibration |
You see the difference in accuracy and quality when you use Sovol Zero’s dual auto-leveling. This step helps you capture fine details and maintain consistent printing results.
Belt Tension Adjustment
Belt tension plays a key role in print accuracy and quality. Loose or uneven belts can cause layer shifts and reduce the details in your prints. Sovol Zero’s design makes belt adjustment simple. Follow these steps for optimal results:
- Loosen the screw of the tensioner about 2-3 turns. Tighten the belt and move the fixed end of the Z-axis belt to 150mm away from the top idler.
- Open the Sovol app and select 'Motorcycle Mode'. Align your mobile phone recorder with the Z4 synchronization belt. Vertically move the 150mm synchronization belt with appropriate force. The optimal frequency of the Z-axis synchronization belt is 140Hz, with a deviation range of not more than 10Hz (135Hz-145Hz).
- Adjust the Z1, Z2, and Z3 belts in turn until the frequency of each synchronization belt is about 140Hz.
Note: Weekly belt tension checks help you maintain accuracy and print quality.
Correct belt tension ensures your printer moves smoothly and prints with high accuracy. You notice sharper details and improved printing consistency when you keep the belts properly adjusted.
Nozzle and Bed Checks
Regular nozzle and bed checks keep your printer in top condition. These checks prevent debris buildup and maintain the accuracy of your prints. You should inspect the nozzle and print bed daily for debris. Clean the print bed and check belt tension weekly. Every two weeks, perform a thorough nozzle cleaning and lubricate moving parts. Disassemble and clean the hot end every quarter.
|
Frequency |
Task |
|---|---|
|
Daily |
Inspect nozzle and print bed for debris |
|
Weekly |
Clean print bed and check belt tension |
|
Bi-weekly |
Thorough nozzle cleaning and lubrication |
|
Quarterly |
Disassemble and clean the hot end thoroughly |
Tip: Recalibrate your Sovol Zero once a month or after any hardware changes to maintain optimal print quality.
You improve the accuracy and quality of your printing by following these maintenance routines. Consistent checks help you capture fine details and prevent issues before they affect your prints.
Model Preparation and Resolution
Design for 3D Printing Resolution
You can maximize 3d printing resolution on your Sovol Zero by focusing on a few essential design features. High 3d printing resolution starts with frequent calibration. You should always check that your print bed is level and your extruder works smoothly. Sovol Zero provides tools that make calibration easy. Use your slicer software to adjust wall thickness, infill, and supports. Cura works well with Sovol Zero and helps you fine-tune 3d printing resolution. Keep your printer on a stable surface to reduce vibrations. This step improves layer alignment and overall print quality. Try different combinations of layer height, speed, and temperature to find the best 3d printing resolution for your project.
- Calibrate often for consistent 3d printing resolution.
- Adjust slicer settings to improve 3d printing resolution and quality.
- Place your Sovol Zero on a steady table for better 3d printing resolution.
- Experiment with settings to achieve the highest 3d printing resolution.
Wall Thickness and Infill
Wall thickness and infill play a big role in 3d printing resolution and print quality. For reliable prints, use a minimum wall thickness of 1.5 mm with PLA. You can print as thin as 0.6 mm, but this may reduce quality. Infill percentage affects both strength and 3d printing resolution. Higher infill gives stronger prints and better quality. Lower infill saves time and material, which works for decorative items. Adjusting infill helps you balance strength, efficiency, and 3d printing resolution.
- Minimum wall thickness for quality: 1.5 mm (PLA)
- Higher infill = stronger prints and better 3d printing resolution
- Lower infill = faster prints, less material, but lower quality
Print Orientation Tips
Print orientation impacts 3d printing resolution and surface quality. You can use the table below to compare different orientations:
|
Orientation |
Support Density |
Dimensional Accuracy |
Distortion |
Surface Finish |
|---|---|---|---|---|
|
0° |
High |
Low |
High |
Poor |
|
45° |
Moderate |
High |
Low |
Good |
|
90° |
Low |
Moderate |
Moderate |
Fair |
You should orient your model to reduce overhangs and unsupported spans. Use custom support blockers in your slicer to target only critical areas. Adjust support interface layers to balance adhesion and removability.
Pro Tip: The 45-degree rule helps you achieve the best 3d printing resolution and quality. This orientation reduces support needs and improves both surface finish and structural strength.
Print Settings to Improve Quality
Fine-tuning your Sovol Zero’s settings unlocks high resolution and quality in every print. You control the outcome by adjusting layer height, print speed, temperature, cooling, retraction, and flow rate. Each parameter affects the precision, detail, and dimensional accuracy of your detailed prints. Understanding how these settings interact with your material and nozzle size helps you achieve optimal printing parameters for high-quality printing.
Layer Height and Resolution
Layer height determines the thickness of each layer in your print. Adjusting layer height directly impacts resolution, detail, and surface smoothness. Smaller layer heights produce more layers, resulting in better detail and smoother surfaces. Larger heights reduce detail and strength, but speed up printing.
You should match layer height to your printer’s nozzle size for the best results. For a 0.4mm nozzle size, set layer height between 0.1mm and 0.3mm. When you want fine details, use a layer height of 0.1mm to 0.15mm. This range is ideal for figurines and models that require high resolution. A layer height of 0.15mm balances speed and quality, especially for overhangs and bridges. Avoid going below 0.05mm, as this can cause color issues and increase print time. For general prints, start with a layer height of 0.2mm and adjust as needed.
- Match layer height to nozzle size for optimal resolution.
- Use 0.1mm to 0.15mm layer height for detailed prints and fine details.
- Start with 0.2mm layer height for general printing and adjust for quality.
Tip: Adjusting layer height for each project helps you capture fine details and maintain high resolution.
Print Speed and Acceleration
Print speed and acceleration affect the quality, resolution, and accuracy of your prints. Sovol Zero’s advanced design supports high-speed printing, but you should balance speed with precision for the best results. As print speed increases, the printer’s movements can become less precise, leading to rough surfaces and weak spots. Slower speeds allow for enhanced detail and stronger layer adhesion, which are crucial for high-quality printing.
|
Print Speed Setting |
Quality |
Resolution |
Detail |
Precision |
Notes |
|---|---|---|---|---|---|
|
40-60 mm/s |
High |
High |
Fine |
Strong |
Best for detailed prints |
|
80-120 mm/s |
Good |
Moderate |
Moderate |
Good |
Use for larger models |
|
200-1200 mm/s |
Fast |
Lower |
Less |
Moderate |
Use Sovol Zero’s speed for prototypes |
You should slow down print speed for high resolution and fine details. For general prints, use 60 mm/s. For models with complex geometry, reduce speed to 40 mm/s. Sovol Zero’s technology compensates for high speeds, maintaining quality and preventing under-extrusion. Always check your material and nozzle size before adjusting speed.
- Lower print speed improves detail, resolution, and layer adhesion.
- Higher speed is suitable for rapid prototyping with less focus on fine details.
Note: Many users notice improved quality and resolution when slowing down print speed, especially for detailed prints.
Temperature and Cooling
Temperature and cooling settings play a vital role in print quality, resolution, and material performance. You must set the nozzle temperature according to your filament type and nozzle size. Sovol Zero supports a wide range of materials, including PLA, PETG, TPU, PA, and PC. Each material requires specific temperature settings for optimal results.
- PLA: 190°C–220°C
- PETG: 220°C–250°C
- TPU: 220°C–240°C
- PA/PC: 260°C–350°C
Cooling fan speed influences layer adhesion and surface quality. Lower fan speeds keep layers warmer longer, improving inter-layer adhesion and minimizing delamination. For PETG, set fan speed between 30-50%. Turn off the fan for the first few layers to establish a strong foundation, then increase speed for better surface finish and resolution.
Tip: Adjust cooling for each material and nozzle size to maintain high resolution and quality.
Retraction and Flow Rate
Retraction and flow rate settings help you avoid stringing, blobs, and extrusion inconsistencies. You should enable retraction to prevent unwanted filament oozing. Start with a retraction distance of 3 mm and adjust between 0.5 mm to 5 mm based on your material and nozzle size. Set retraction speed at 25 mm/s, and adjust between 20–100 mm/s for different filaments. Enable wipe and Z-hop features to further reduce stringing and protect fine details.
|
Setting |
Recommendation |
|---|---|
|
Retraction Distance |
3 mm (adjust 0.5–5 mm) |
|
Retraction Speed |
25 mm/s (adjust 20–100 mm/s) |
|
Wipe Feature |
Enable |
|
Z-hop Feature |
Enable |
Flow rate adjustment ensures consistent extrusion for every layer. If you notice under-extrusion or over-extrusion, modify the flow rate. Optimal flow rates range between 60% and 200% at 210°C, depending on your material and nozzle size. Regular calibration helps maintain consistent filament output and high resolution.
- Adjust retraction distance and speed to minimize stringing and blobs.
- Enable wipe and Z-hop for cleaner detailed prints.
- Modify flow rate to avoid under-extrusion and over-extrusion, ensuring high-quality printing.
Pro Tip: Regularly calibrate retraction and flow rate settings for each material and nozzle size to maintain accuracy and resolution.
Troubleshooting Print Quality Issues
Layer Shifts and Ringing
You may notice shifts in your print layers or ringing patterns that reduce resolution and quality. These issues often come from mechanical problems in your printer. The table below shows frequent causes:
|
Cause |
Description |
|---|---|
|
Debris on the Z Rod |
Can cause shifts at the same point in the print. |
|
Loose Y Belt tension |
Leads to shifts in the Y-axis and affects layer alignment. |
|
Nozzle collision |
The nozzle hitting infill disrupts layer positioning. |
You should also check for collisions with the nozzle or fan duct. If the belt skips a tooth or the motor loses position, you will see layer misalignment. Regularly inspect these details to maintain high resolution.
Stringing and Blobs
Stringing and blobs lower the quality of your prints and blur fine details. You can reduce these by adjusting retraction distance and speed in your settings. Lowering the nozzle temperature also helps prevent excess filament from oozing between layers. These steps improve resolution and keep your prints clean.
Warping and Adhesion
Warping and poor layer adhesion can ruin the first layer and lower print quality. To prevent this, make sure your print bed is flat and clean. Adjust the Z-offset for the correct nozzle height. Set the bed temperature for your filament type and use adhesives if needed. These actions help each layer stick and improve overall resolution.
Tip: Clean your print bed with rubbing alcohol before every print to remove dust and oils.
Under-Extrusion Solutions
Under-extrusion causes gaps in layers and reduces resolution. You should inspect the nozzle for clogs and check the filament path. Adjust bed leveling and Z-offset to ensure the first layer sticks. Set the correct temperatures and watch the first layer closely. Check extruder tension and listen for grinding or clicking. Make sure the nozzle is not too close or too far from the bed. These steps help you fix under-extrusion and restore print quality.
By focusing on these details and fixing common printing problems, you maintain high resolution and quality in every print. Regular checks and adjustments to your printer and settings keep your printing results sharp and reliable.
Post-Processing for Better Quality
Support Removal
You can improve the resolution and quality of your Sovol Zero prints by removing supports with care. Start by identifying the most accessible supports and remove them first. Work gradually toward intricate areas to protect the fine details of your model. Avoid pulling or twisting supports, as this can damage the surface and reduce the overall quality. Use flush cutters for larger structures and a precision hobby knife for detailed spots. Tweezers help you remove small fragments without harming the layer lines or the surface.
- Soak your model in warm water to soften supports, especially for complex prints.
- Adjust your slicer settings to create a small Z-gap between the model and supports. This makes removal easier and preserves the resolution of the details.
- Use fewer supports by leveraging the Sovol Zero’s high-heat nozzle and smooth rails. Add supports only where necessary, such as under overhangs.
- Opt for lower-density supports in your settings to minimize marks and make removal simpler.
After support removal, use sanding tools to smooth rough spots and restore the surface finish. This step helps you maintain high resolution and sharp details across every layer.
Smoothing Techniques
You can achieve smooth surfaces and enhance the resolution of your prints with a few effective techniques. Begin by sanding rough spots with 150–220 grit sandpaper. For a shiny finish, switch to finer grits like 400 or 600. Wet sanding works well for plastic models and prevents warping, giving you better control over the surface quality.
- Sanding removes imperfections and improves the feel of each layer.
- Chemical smoothing, such as using acetone vapor for ABS, melts the outer layer and creates a glossy surface. Always use this method in a well-ventilated area.
- Apply a filler primer to fill in small gaps and layer lines, then sand again for a flawless finish.
- Painting adds vibrancy and depth, making your models visually appealing and highlighting the resolution of the details.
Tip: Take your time with each step to protect the fine details and maintain the quality of your printing. Careful post-processing ensures every layer and surface looks its best.
You can improve print quality on your Sovol Zero by focusing on regular calibration, adjusting settings, and maintaining your printer.
- Clean the bed, check nozzle details, and inspect filament for tangles.
- Use advanced features like chamber monitoring and high-speed printing for better results.
- Experiment with settings to capture every detail in your printing projects.
|
Description |
|
|---|---|
|
Chamber Temp Monitoring |
Maintains optimal temperatures for printing various filaments. |
|
Max Printing Speed |
Delivers fast, precise printing and sharp details. |
|
Input Shaping |
Reduces artifacts, improving print quality at higher speeds. |
Tip: Always level the bed and set the nozzle height before each print to improve print quality and ensure your printer captures all details.
FAQ
How often should you calibrate your Sovol Zero printer?
You should calibrate your printer once a month or after any hardware change. Regular calibration helps you maintain consistent print quality and reliable performance.
What filaments work best with the Sovol Zero printer?
You can use PLA, PETG, TPU, PA, and PC with your printer. The high-temperature nozzle supports a wide range of materials for different projects.
Why does your printer need chamber temperature monitoring?
Chamber temperature monitoring keeps your printer at optimal conditions. This feature helps you print with advanced filaments and improves layer adhesion for better results.
Tip: Always check your printer’s chamber temperature before starting a new print.
|
Feature |
Benefit |
|---|---|
|
Chamber Monitoring |
Stable printing environment |
|
High-Speed Printing |
Faster project completion |
|
Auto-Leveling |
Accurate first layers |


