


Cleaning your 3D print platform is the key to achieving perfect prints. When you clean 3d print platform surfaces, you remove dust, oils, and glue that lower stickiness and cause adhesion problems.
- Cleaning after each print stops future issues and keeps your prints smooth.
- Regular cleaning helps you spot cracks or pits that may hurt print quality.
You get better print quality and fewer failures when you make regular cleaning part of your routine. A clean 3d print platform means each print bonds well, reducing warping and layer separation. Simple steps can lead to higher quality and more reliable results.
Key Takeaways
- Clean your 3D print platform often. This helps prints look better. It also stops problems like warping or prints coming off.
- Wait for the print bed to cool before you clean it. Use safe tools like plastic scrapers and microfiber cloths. These tools help you not scratch or break the bed.
- Use mild dish soap or isopropyl alcohol to clean off oils and sticky stuff. Do not use strong chemicals on soft surfaces like PEI or BuildTak.
- Look at your print bed often for leftover stuff, scratches, or damage. Clean it after every print or at least every 10 to 15 prints. This keeps your bed working well.
- Do not make mistakes like cleaning a hot bed or using metal tools. Do not put on too much adhesive. These tips help your bed last longer and give you better prints.
Why Clean Your 3D Printer Bed
Print Quality and Adhesion
You want every print to look sharp and stick well to the build plate. Cleaning your print bed before each print helps you achieve this goal. When you remove dust, grease, and leftover filament, you improve adhesion and make sure your first layer bonds tightly to the surface. This strong first layer adhesion keeps your print from lifting or warping during the process.
- Cleaning the build plate stops prints from failing halfway through.
- You save time and materials because you avoid wasted prints.
- A clean print bed gives you smooth, detailed results and better overall quality.
Tip: Experts suggest cleaning the build plate after every print if you use tough filaments or print often. For lighter use, clean every 5-10 prints or when you notice issues with bed adhesion.
Regular cleaning also extends the life of your build plate. You keep the surface in top shape, which means your printer works better for longer.
Common Problems from a Dirty Bed
If you skip cleaning, you may see several problems. Residue from PLA or other filaments can build up on the print bed. This buildup creates a thin layer that blocks new prints from sticking. When the first layer adhesion fails, your print may peel up, shift, or even detach completely.
|
Problem |
Cause |
Result |
|---|---|---|
|
Warping |
Poor first layer adhesion |
Corners lift, print distorts |
|
Print detachment |
Grease or dust on build plate |
Print moves or fails |
|
Surface defects |
Residue buildup |
Rough or uneven bottom layer |
|
Shorter bed lifespan |
Repeated residue accumulation |
Need to replace build plate |
You can also struggle with quality issues like rough surfaces or missing details. Over time, residue hardens and becomes harder to remove. Heating the print bed to about 90°C softens the plastic, making it easier to scrape off. If you want to improve adhesion, use an adhesion aid like glue stick or hairspray, but always clean the build plate after use.
Note: Using an adhesion aid can help with tricky prints, but too much can cause more residue. Always clean the print bed to keep your quality high.
By making cleaning a habit, you improve adhesion, protect your build plate, and get the best quality from every print.
Essential Steps to Clean 3D Print Platform
Safety and Preparation
Before you start to clean 3D print platform surfaces, always put safety first. You should follow your printer manufacturer’s instructions for cleaning and maintenance. This helps you avoid accidents and keeps your printer in good shape.
- Turn off your 3D printer and unplug it from the power source.
- Let the print bed cool down to room temperature. Cleaning a hot bed can cause burns or damage the surface. Cooling also makes it easier to remove prints and prevents deformation.
- Wear cut-resistant gloves if you use a scraper. Always move the scraper away from your body to prevent injuries.
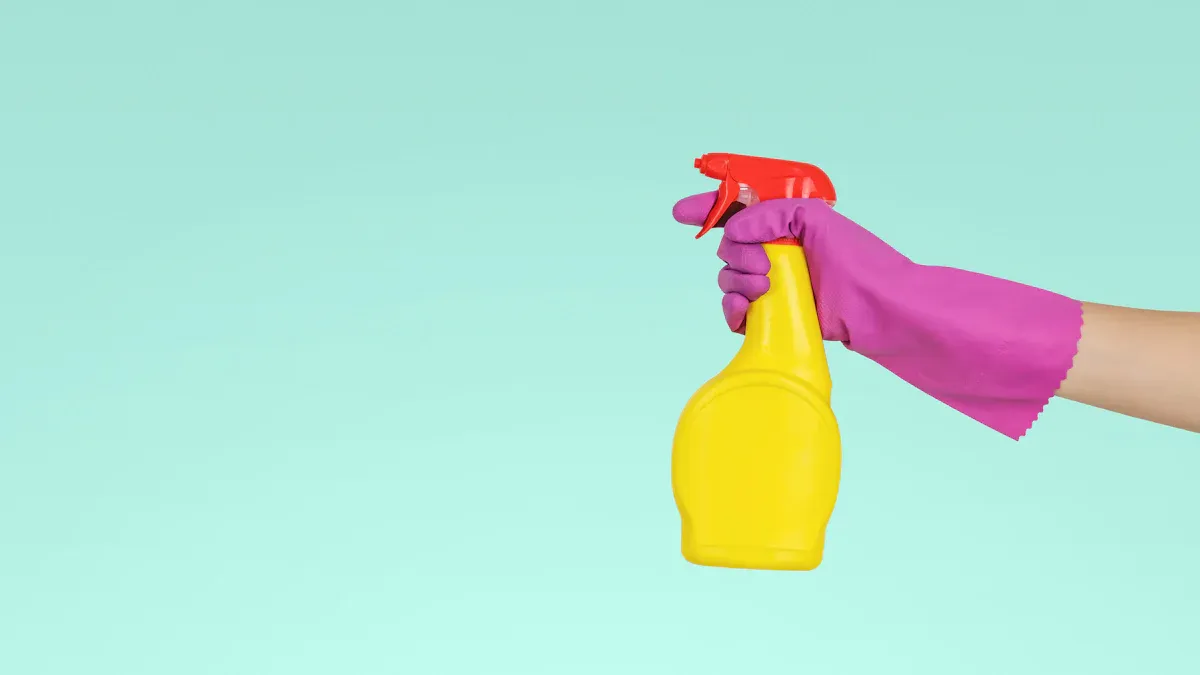
- Work in a well-ventilated area, especially if you use solvents like isopropyl alcohol or acetone.
- Avoid dry sweeping. Use a damp towel to trap dust and particles, or use a vacuum with a HEPA filter to clean around the printer.
- Check the build plate and print bed for any signs of wear or damage before you begin cleaning.
Tip: Only trained users should operate and maintain the printer. Regularly update your training and keep your printer’s software current for the latest safety features.
Removing Loose Debris from Print Bed
Start your print bed cleaning by removing any loose debris. This step helps prevent build-up and makes deeper cleaning more effective.
- Wait until the print bed is cool. Removing prints or debris from a hot bed can damage both the print and the build plate.
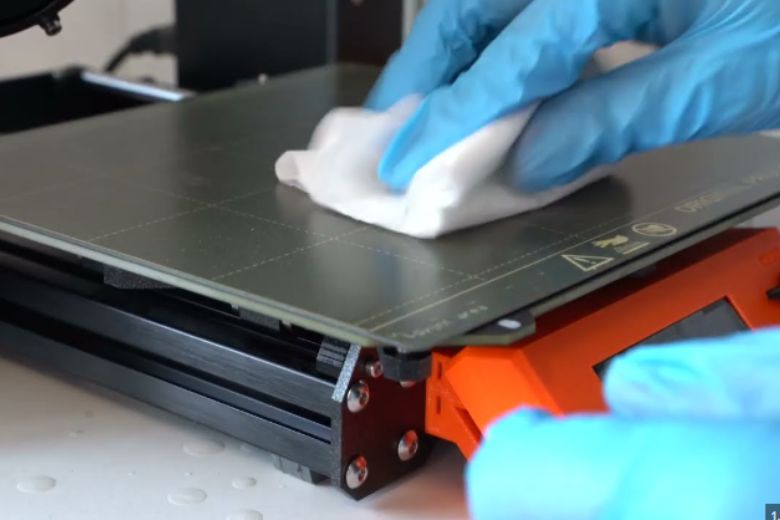
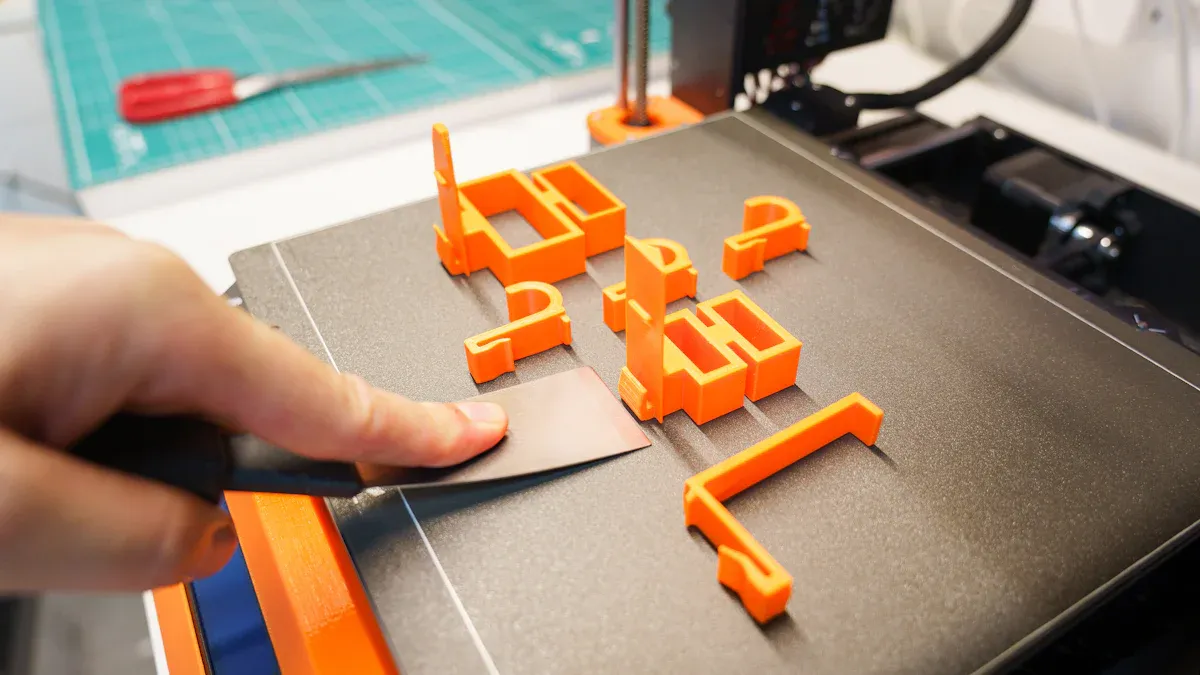
- Use a plastic scraper or spatula to gently lift off large pieces of leftover filament or glue. Avoid metal tools, which can scratch or damage the surface.
- Sweep away smaller particles with a soft brush or a lint-free cloth. This keeps the surface smooth and ready for the next step.
- Inspect the build plate for any stuck-on residue or scratches. Address these areas during the next cleaning stage.
Note: Always secure the printed object before prying it off. Sudden movements can cause injury or damage the print bed.
Cleaning with Isopropyl Alcohol or Soap
After you remove loose debris, you can use cleaning techniques with household materials to clean 3D print platform surfaces thoroughly. Both isopropyl alcohol (IPA) and dish soap work well, but each has its best use.
|
Cleaning Method |
Effectiveness on Oils and Residues |
Risks and Considerations |
|---|---|---|
|
Dish Soap |
Lifts and removes oils and residues; rinses cleanly. |
Safe for all build plates, including textured PEI. Avoid scented or harsh soaps. |
|
Isopropyl Alcohol |
Removes oils and residue quickly; good for deep cleaning. |
Use 70% for glass beds, 99% for PEI. Can leave residue if used improperly. Avoid ethyl alcohol. |
- For most build plates, use a few drops of mild dish soap (like Dawn) with warm water. Wipe the surface with a microfiber cloth, then rinse and dry with a clean towel.
- For glass beds, use at least 70% IPA on a microfiber cloth. For PEI beds, use 99% IPA. Wipe the surface gently to remove oils and fingerprints.
- Avoid acetone on PEI surfaces, as it can cause damage.
- Always dry the clean bed with a lint-free cloth to prevent water spots or streaks.
Tip: For stubborn glue or residue build-up, you can use a small amount of acetone-based nail polish remover on glass or metal beds. Let it soak, then scrape gently with a plastic scraper. Never use acetone on PEI or BuildTak surfaces.
Tools: Microfiber Cloth, Plastic Scraper, Brass Brush
The right tools make print bed cleaning easier and safer. You do not need expensive equipment—common household items work well.
- Microfiber cloth: This soft cloth traps dust and oils without scratching the build plate. Use it with IPA or soapy water for best results.
- Plastic scraper: Use this tool to lift off prints and scrape away stubborn residue. Always use plastic, not metal, to avoid scratching the clean bed.
- Brass brush: For textured or metal build plates, a brass brush can help remove stuck-on debris. Use gentle pressure to avoid damaging the surface.
Other helpful tools include a soft brush for dust, a vacuum with a HEPA filter for fine particles, and a damp towel for wiping down the area around your printer.
Note: Always inspect your tools before use. Replace worn or damaged tools to avoid scratching or damaging the build plate.
By following these cleaning techniques, you keep your build plate in top condition. Regular print bed cleaning helps you prevent residue build-up and ensures every print sticks well. Clean 3D print platform surfaces before each print to get the best results and extend the life of your printer.
Clean 3D Printer Bed by Build Plate Type
Glass Print Bed
You can keep a glass 3d printer build plate in top shape with simple steps. First, remove the glass plate from your printer if possible. This protects other parts during cleaning. Use a dry scraper to lift off large glue or filament pieces. Next, wash the glass with warm soapy water or a window cleaner. A microfiber cloth works best for this job. For stubborn spots, use isopropyl alcohol (IPA) on a cloth. Always wear gloves to avoid leaving fingerprints. Try not to touch the clean bed with bare hands. If glue or residue remains, a small amount of acetone can help, but only use it on glass. Dry the plate fully before putting it back.
Tip: Clean the glass print bed about once a month or whenever you see residue. Wipe with IPA before each print for best results.
PEI Build Plate
PEI build plates need gentle care. Wash the surface with hot water and a grease-cutting dish soap like Dawn. This removes oils and sticky spots. Handle the plate by the edges to avoid leaving fingerprints. For extra cleaning, use a small amount of IPA every few prints to remove PLA residue. Do not use metal scrapers or harsh soaps. These can scratch or damage the PEI layer. Avoid soaps with moisturizers or additives. Never use acetone on PEI. Dry the clean bed with a lint-free towel.
|
Step |
What to Use |
What to Avoid |
|---|---|---|
|
Regular washing |
Hot water, Dawn soap |
Abrasive pads, harsh soaps |
|
Spot cleaning |
IPA (sparingly) |
Acetone, metal scrapers |
BuildTak and Similar Surfaces
BuildTak and similar surfaces need careful print bed cleaning. Use a microfiber cloth to wipe away dust and debris. For sticky spots, use rubbing alcohol, but avoid acetone or strong cleaners. Remove prints with a spatula that has smooth, rounded edges. This keeps the surface from getting scratched. Always check your nozzle height and bed leveling. If the nozzle is too close, it can dig into the BuildTak and cause damage. Replace the surface if it becomes worn or loses adhesion.
Note: Do not use Windex or heavy-duty cleaners on BuildTak. These can ruin the surface and affect print quality.
Magnetic or Flexible Build Plate
Magnetic or flexible build plates make print removal easy, but they need special care. Use a scraper to remove glue or residue. Wipe the plate with a microfiber towel soaked in 99% IPA. Avoid touching the clean bed with your fingers. Do not use hot water or soap, as moisture can cause bubbling under the adhesive. If bubbles appear, heat the plate to 100°C for 10 minutes or let it sit overnight to remove air pockets. For extra adhesion, some users apply a special nanopolymer adhesive.
Cleaning print surfaces often helps maintain strong adhesion and prevents print failures.
Maintenance and Troubleshooting for Print Bed
How Often to Clean
You should make 3d printer maintenance a habit. Most manufacturers suggest cleaning the print bed after every print, especially if you print often or use sticky filaments. For lighter use, clean the bed every week or after 10 to 15 prints. This routine cleaning helps prevent build-up and keeps your prints looking sharp. Regular cleaning also helps you spot problems early and keeps your printer running smoothly.
Signs Your Bed Needs Cleaning
Watch for these signs that your print bed needs attention:
- You see residue build-up from adhesives or leftover filament.
- Prints do not stick well, or you notice issues with print adhesion.
- You use filaments like ABS or carbon fiber, which leave stubborn marks.
- The bed shows visible marks, streaks, or discoloration.
If you spot any of these, start your cleaning routine right away.
Troubleshooting Adhesion Issues
If you still have trouble with first layer adhesion after every print, try these steps:
- Wash the bed with dish soap and rinse well to remove grease.
- Avoid touching the clean bed with your hands to keep oils away.
- Wipe the surface with 91% or higher isopropyl alcohol between prints.
- For PEI beds, use a fine ScotchBrite pad for a gentle buff if needed.
- Calibrate the print bed by adjusting the nozzle height until the filament sticks without gaps.
- Use an adhesion aid only when needed, and apply it evenly.
- Check for scratches or damage and replace the bed if needed.
You can also adjust print settings like bed temperature and print speed to improve adhesion.
Mistakes to Avoid
Many users make simple mistakes during 3d printer maintenance. Avoid these common errors:
- Cleaning the bed while it is hot. Always let it cool first.
- Using metal tools that scratch the surface. Use plastic scrapers instead.
- Applying too much adhesive, which causes residue build-up.
- Skipping regular cleaning and inspection.
- Removing prints with too much force, which can damage the bed.
Tip: Always use a lint-free cloth and isopropyl alcohol for regular cleaning. This keeps your print bed in top shape and helps improve adhesion for every print.
You want your 3D prints to look great every time. Cleaning often helps keep the build plate in good shape. This makes sure prints stick well and do not fall off. Many people see fewer problems when they clean their print bed. A clean bed stops dirt from building up and keeps your printer working longer. This also helps you avoid spending money on repairs. You save time and get good results with each print. Make cleaning a habit so your prints always turn out well. Try cleaning your print bed before you start your next project.
FAQ
How often should you clean your 3D print bed?
You should clean your print bed after every print for best results. If you print less often, clean it every week or after 10 to 15 prints. Regular cleaning keeps your prints sticking well.
Can you use acetone on all build plate surfaces?
No, you should only use acetone on glass or metal beds. Acetone can damage PEI, BuildTak, and magnetic surfaces. Always check your printer’s manual before using any strong cleaner.
What should you do if prints still do not stick after cleaning?
- Check your bed leveling and nozzle height.
- Try washing the bed with dish soap and water.
- Use a fresh microfiber cloth with isopropyl alcohol.
- Inspect the surface for scratches or damage.
Is it safe to use household cleaners on your print bed?
You can use mild dish soap and water on most beds. Avoid scented or harsh cleaners. Do not use glass cleaners with ammonia on PEI or BuildTak. Always rinse and dry the bed well after cleaning.


