


Starting your journey with fused deposition modeling can feel exciting. You want your first FDM 3D printing experience to be smooth and rewarding. The Sovol SV08 makes 3d printer setup simple thanks to its quick assembly and friendly design. When using FDM 3D printer models, you avoid many common mistakes by checking each step. For example, skipping bed leveling or using wet filament can ruin your 3d prints. Good 3d printer setup, regular cleaning, and the right settings make the process easier. This 3d printing guide shows that patience and careful preparation help you succeed in FDM projects. Trust the process and let your 3d ideas come to life.
Tip: Using FDM 3D printer methods with the SV08 gives you a great start in the world of FDM 3d printing. Keep this 3d printing guide handy as you learn the process and explore new 3d designs.
Key Takeaways
- Set up your workspace on a flat, strong table. Make sure there is good airflow. This helps keep your 3D printer safe and steady.
- Do safety checks before you start. Look at the cables and use the right outlets. Wear safety glasses to stop accidents from happening.
- Put together the Sovol SV08 with care. Check all the parts and wires before turning it on. This helps you avoid mistakes during setup.
- Calibrate your printer by leveling the bed. Set the Z-offset and clean the nozzle often. This helps your prints come out strong and smooth.
- Use good filament and keep it dry in containers. Get your 3D models ready with the right slicing settings for the best results.
Using FDM 3D Printer: Workspace & Safety
Workspace Setup
When you use FDM 3D printer models like the Sovol SV08, you need a strong workspace. Put your 3d printer on a flat and sturdy table. The SV08 is big and heavy. A shaky table can cause problems when you print. Make sure the table can hold the printer and your tools.
Keep your workspace clean and neat. Take away anything that could block the printer’s moving parts. Keep filament spools close, but not too near the heated bed or hotend. This stops the filament from getting wet or tangled.
Good airflow is important for fdm 3d printing. Melted filament can make fumes and tiny bits in the air. You can make the air better by:
- Opening windows or doors for fresh air
- Using fans or air purifiers with HEPA and carbon filters
- Setting up a closed box with a vent to outside
- Keeping the printer in a room with few people
Try to get at least six air changes every hour. Clean or change filters often so your air stays fresh.
Safety Checks
Before you use fdm 3d printer equipment, always follow safety rules. Check if your power supply matches the printer’s needs. Use a stable outlet and do not use long extension cords. Look at all cables and wires for damage. Keep liquids away from the printer to stop electrical problems.
Here is a quick table of electrical safety standards:
|
Standard / Code |
Description |
Importance |
|---|---|---|
|
NEC (National Electrical Code) |
US electrical safety standard |
Stops electric shock and damage to equipment |
|
IEC 60364 |
International grounding standard |
Makes sure grounding is safe |
|
IEEE 142 |
Industrial grounding practices |
Protects people and equipment |
Other safety tips for fdm 3d printing are:
- Wear safety glasses when using tools or filament
- Keep wires neat and away from moving parts
- Check all connections before turning on the printer
- Put your 3d printer on a surface that does not burn
- Keep a fire extinguisher close by
- Watch your 3d prints, especially at the start
You should use enclosures to keep safe from hot parts and moving pieces. Store filament in a cool, dry place to stop moisture. Clean and check your printer often to stop fires and keep it working well. If you follow these safety steps, fdm 3d printing will be safer and work better.
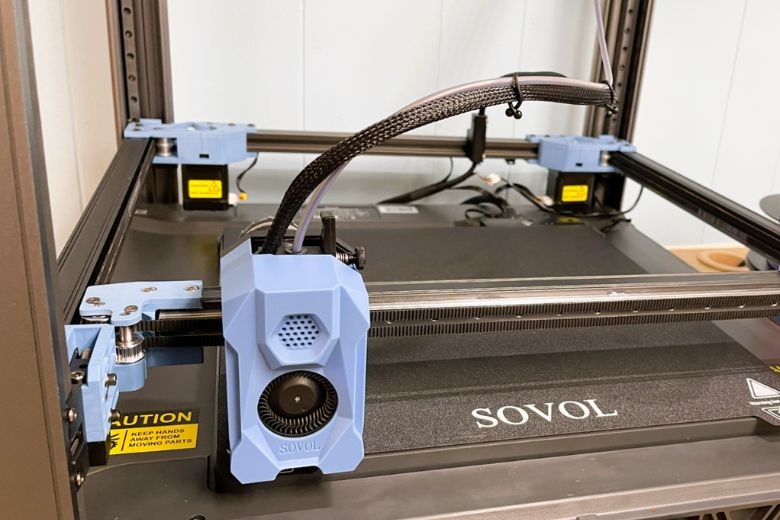
3D Printer Setup: Unboxing & Assembly
Unboxing & Parts Check
Start your 3d printer setup by opening the Sovol SV08 box carefully. Lay out all the parts on a clean table. Use the checklist in the manual to match each part and accessory. This step helps you avoid missing pieces during setup. Many users find that checking every item before assembly prevents mistakes later. You should see the main frame, touchscreen, power supply, cables, tools, and hardware. Keep small parts in a tray or container so nothing gets lost. A good 3d printer setup always begins with a complete inventory.
Tip: Take a photo of your parts before you start. This makes it easier to remember where everything goes during setup.
Quick Assembly
The Sovol SV08 makes 3d printer setup fast and easy. The printer comes 90% pre-assembled. Most users finish setup in about 1 hour. This is much faster than other 3d printers, which can take over a day. You only need to attach the main frame, connect the touchscreen, and secure the power supply. Follow the assembly guide step by step. Make sure the frame sits flat and square on your table. Tighten screws firmly, but do not over-tighten. Many users say the SV08 is perfect for beginners because the setup is simple and clear.
- The SV08 can be assembled in about 1 hour.
- Most features come pre-assembled, making setup easier.
- Users report the assembly is quick and beginner-friendly.
Check your work as you go. A careful 3d printer setup helps you avoid problems like loose frames or missing screws.
Wiring & Initial Power-On
Now you can move to the wiring part of your 3d printer setup. Connect each cable to the correct port as shown in the manual. Keep wires neat and away from moving parts. Use zip ties to hold cables in place. Double-check every connection before you power on the printer. Plug the power cable into a grounded outlet. Make sure the power switch matches your local voltage. Press the power button and watch for the Sovol logo on the touchscreen. If the screen does not light up, turn off the printer and check all cables again.
Note: Always keep your hands dry when working with electrical parts during 3d printer setup.
After you finish the initial 3d printer setup, check for firmware updates on the touchscreen. Updating firmware helps your 3d printer setup run smoothly and gives you the latest features. Set up your printer on a stable surface to prevent movement during printing. A good 3d printer setup leads to better prints and fewer problems.
Calibration for FDM 3D Printing
Calibration is a key part of fdm 3d printing. You need to follow the right calibration steps to get the best results from your Sovol SV08. Good calibration helps you avoid print failures and makes your 3d prints look smooth and strong. In this section, you will learn how to handle bed leveling, Z-offset and gantry leveling, nozzle and extruder cleaning, and in-printer calibration. Each step in the process helps you get better prints and makes your fdm 3d printer last longer.
Bed Leveling
Bed leveling is the first step in the fdm 3d printing calibration process. You want the print bed to be flat and at the right distance from the nozzle. This step is important for first-layer adhesion and overall print quality. If you skip bed leveling, your 3d prints may not stick or may look uneven.
- A well-leveled bed gives you smooth prints and helps the first layer stick.
- You can use tools like feeler gauges or a piece of paper to check the gap between the nozzle and the bed.
- The Sovol SV08 uses four independent Z motors, one at each corner. This quad Z motor system gives you a Quad-Gantry-Leveling (QGL) feature.
- The SV08 can level the bed automatically using sensors. The process takes about 80 seconds and scans the whole build platform.
- The printer uses pressure sensors to find uneven spots and adjust the bed mesh. This makes the first layer even and reduces failed prints.
- Regular bed leveling checks help you keep your 3d prints looking good, especially for large fdm projects.
Tip: Always check bed leveling before a long print or after moving your printer. This keeps your fdm 3d printing setup reliable.
Z-Offset & Gantry Leveling
Z-offset and gantry leveling are the next calibration steps in fdm 3d printing. Z-offset sets the exact gap between the nozzle and the bed. If the gap is too small, the nozzle will scrape the bed. If it is too big, the filament will not stick.
- Many users find that a Z-offset between -0.08 mm and -0.10 mm works well for the Sovol SV08.
- You can use the paper test to set the Z-offset. Move the nozzle close to the bed and slide a piece of paper under it. You should feel slight resistance.
- After setting the Z-offset, the SV08 runs the Quad Gantry Leveling process. The four Z motors adjust the gantry so it is perfectly level.
- The printer then creates a bed mesh to fix small surface bumps. This process takes about five minutes.
- Keeping the gantry level helps you get even layers and stops problems like warping or poor adhesion.
Note: Always redo Z-offset and gantry leveling after changing the nozzle or build surface. This keeps your fdm 3d printing setup accurate.
Nozzle & Extruder Cleaning
Cleaning the nozzle and extruder is a key part of the fdm 3d printing process. If you do not clean these parts, you may get clogs, jams, or poor print quality. You should clean the nozzle after every print to keep your fdm 3d printer working well.
- For PLA, heat the nozzle to about 200°C. Use cleaning filament and a cleaning needle if needed. Brush the outside of the nozzle.
- For ABS, heat the nozzle to about 230°C. Do a cold pull with cleaning filament and wipe with isopropyl alcohol.
- For PETG, heat the nozzle to about 240°C. Run cleaning filament and use a brass brush for tough spots.
- For specialty filaments like TPU or Nylon, heat to the right temperature and do a manual cold pull. Soak the nozzle if needed.
- Always use high-quality filament and store it in airtight containers with desiccants.
- Inspect the nozzle and print bed daily. Do a deep clean every two weeks and take apart the nozzle for a full clean every three months.
Tip: Clean the nozzle and extruder after every print. This simple step keeps your fdm 3d printing setup running smoothly.
In-Printer Calibration
In-printer calibration helps you fine-tune your Sovol SV08 for the best fdm 3d printing results. The printer has built-in tools for calibration, such as PID tuning and input shaping.
|
Calibration Procedure |
Purpose and Effect on Print Quality |
Signs You Need Calibration |
|---|---|---|
|
Makes sure filament flows at the right rate for sharp details and strong layers |
Gaps, blobs, or missing spots in prints |
|
|
PID Tuning |
Keeps hotend and bed temperatures steady for smooth layers |
Uneven layers, temperature swings |
|
Input Shaping |
Reduces vibrations for better layer alignment and less ghosting |
Ghosting, ripples, or vibration marks |
- PID tuning keeps the hotend and bed at the right temperature. This helps layers bond well and gives you a smooth finish.
- Input shaping cuts down on printer vibrations. You get better layer alignment and can print faster without losing quality.
- Extruder calibration makes sure you get the right amount of filament. This stops problems like over-extrusion or under-extrusion.
- Run these calibration steps often, especially if you see print defects or after changing parts.
Note: Keep a record of your calibration settings. This helps you fix problems faster and keeps your fdm 3d printing process consistent.
By following these calibration steps, you make your Sovol SV08 setup ready for high-quality fdm 3d printing. Each step in the process supports better prints and a smoother 3d printing experience. Good calibration is the key to unlocking the full power of fused deposition modeling.
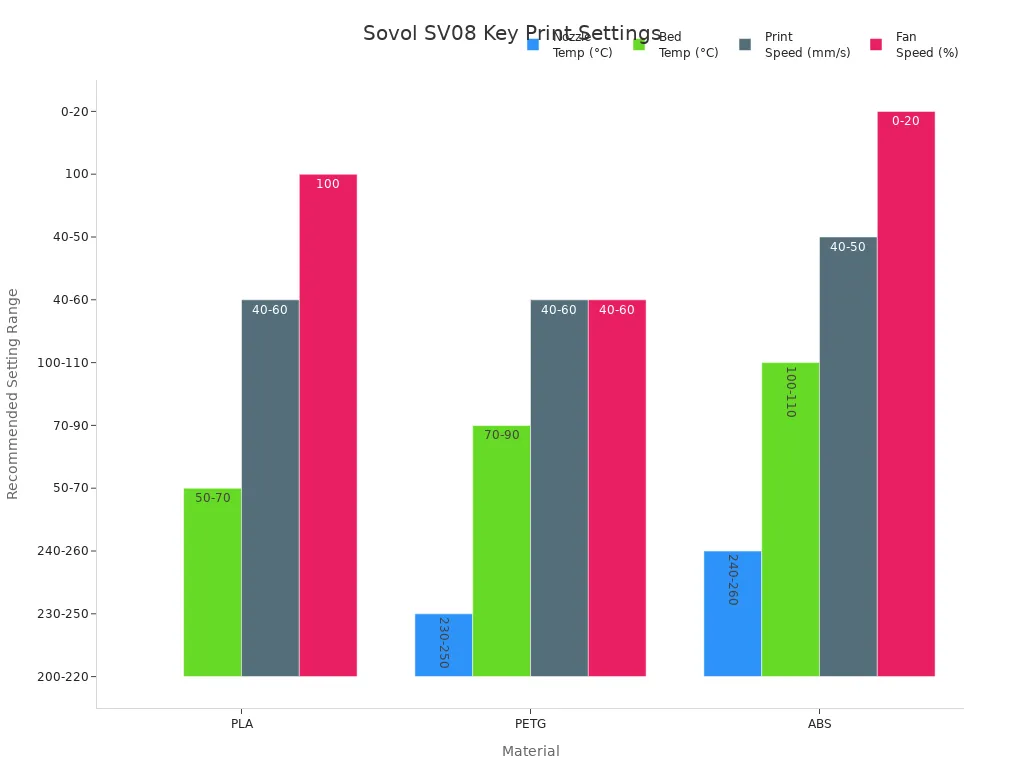
How to Use a 3D Printer: Filament & Slicing
|
Filament Type |
Nozzle Temp (°C) |
Bed Temp (°C) |
|---|---|---|
|
PLA |
190 - 210 |
50 - 60 |
|
PETG |
220 - 240 |
70 - 80 |
|
ABS |
230 - 250 |
90 - 110 |
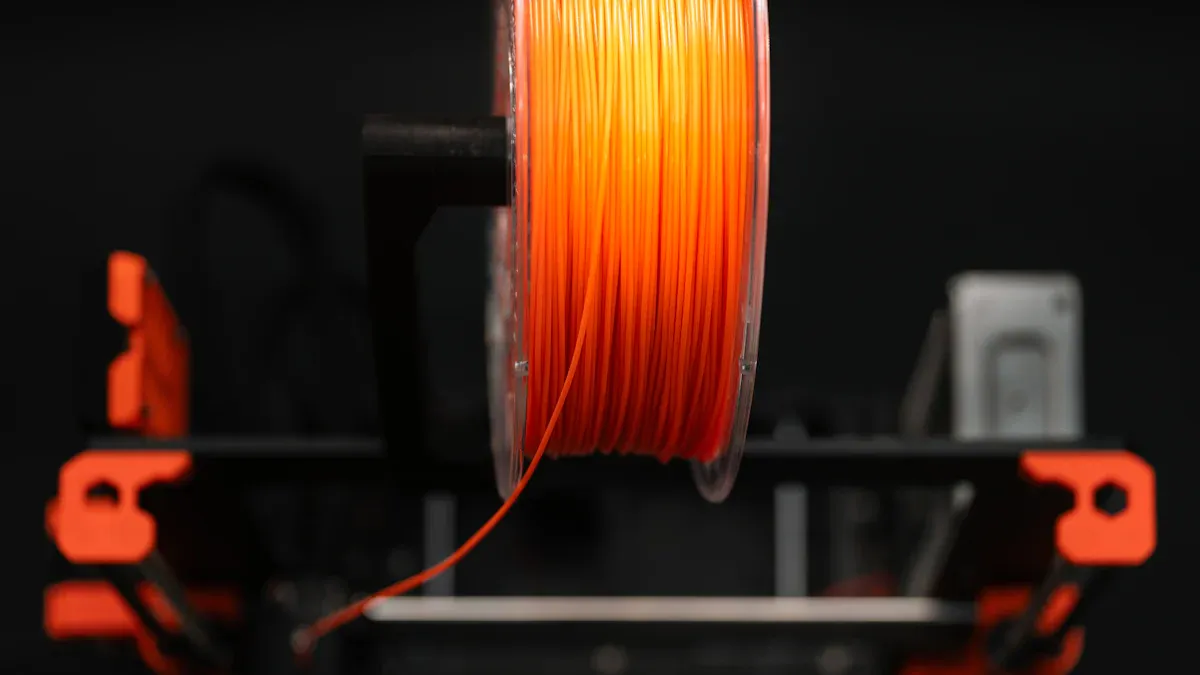
Store your filament in airtight containers with desiccants to keep it dry. When you load filament, feed it through the runout sensor and into the direct drive extruder. The SV08’s extruder works well with flexible materials. Always check that the filament moves smoothly before you start the printing process.
Tip: Use high-quality filament from trusted brands for better 3d prints.
Slicing the Model
You must prepare your design before you print. Slicing software turns your 3d model into instructions for the printer. Popular slicing software options include Cura, PrusaSlicer, and SuperSlicer. When slicing, set the right parameters for your materials. Adjust the nozzle temperature, bed temperature, print speed, and fan speed. For example, PLA prints best at 200°C with a bed at 60°C and 100% fan speed. PETG needs less cooling and a higher nozzle temperature.
You should also set layer height, infill, and supports based on your 3d design. Slicing the model is a key step in how to use a 3d printer. Always prepare your design carefully to get the best results.
File Transfer & Print Start
After slicing, save the G-code file. The Sovol SV08 lets you transfer files by Wi-Fi, Ethernet, or USB. Wi-Fi and Ethernet make the process fast and easy. You can send your 3d print files from your computer or phone. Once the file is on the printer, select it on the touchscreen and start the printing process. Watch the first layer to make sure the filament sticks well. This step completes how to use a 3d printer and starts your 3d creation.
Note: Always double-check your settings before you begin the printing process.
Troubleshooting & Maintenance
Print Issues
When you use the Sovol SV08 for fdm 3d printing, you might have some problems. Most problems are easy to fix with simple steps. Here are some common first print problems and ways to solve them:
|
Recommended Troubleshooting Steps |
|
|---|---|
|
Nozzle clogging and filament extrusion failure |
Clean and unclog nozzle; check filament path; calibrate extruder |
|
Bed leveling problems |
Level bed carefully before every print; use auto-leveling if available |
|
Stringing and blobs |
Increase retraction distance and speed; lower nozzle temperature; ensure cooling fan works well |
|
Warping and adhesion issues |
Clean bed before printing; use brim or raft; adjust bed temperature; slow first layer speed; increase cooling after first layers |
|
Layer shifts |
Tighten belts; check pulleys; stabilize printer frame; reduce print speed; clear rail obstructions |
Always check calibration and leveling before you print. Cleaning the bed and nozzle stops many fdm problems. If you see layers move or prints not sticking, check the belts and frame. Update your firmware to fix bugs and help the printer work better. These tips for fdm 3d printing will help you get good results.
Routine Cleaning
Cleaning your fdm 3d printer often helps it work well. Clean the nozzle every week or after 10-15 prints. Heat the nozzle to the last filament’s temperature. Use a brass brush or cleaning filament to clear out dirt. Clean the print bed each week with isopropyl alcohol and a lint-free cloth. Use a plastic scraper to remove stuck bits. Dust the rails and screws with a microfiber cloth. Use compressed air on fans and electronics. Lubricate rails and screws after cleaning so they move smoothly. Keep a cleaning log to remember when you cleaned. This routine helps stop print fails and keeps calibration and leveling good.
Basic Maintenance
You need to do regular maintenance for your fdm 3d printer to last longer. Tighten belts and screws often to keep the printer steady. Keep the room’s humidity below 50%. Use a dehumidifier if you need to. Check the printer before each use for loose parts or worn belts. Run test prints like calibration cubes to check if it prints right. Clean the nozzle and bed to stop dust and filament from building up. Lubricate moving parts with PTFE or lithium grease. Write down all maintenance in a log. These steps help your printer last longer and make your 3d prints look good. Doing calibration, leveling, and cleaning often will help you avoid problems and enjoy fdm 3d printing. Use troubleshooting guides if you have trouble while printing.
You can get good prints with your Sovol SV08 if you follow a simple 3d printer setup routine. Use this 3d printing guide and checklist before every print. Setting up, calibrating, and leveling the printer helps stop failed prints. These steps also help your machine work well. Many people say they have fewer mistakes and better prints when they focus on calibration and leveling. Doing regular maintenance and getting help from the Sovol community makes 3d printing easier for everyone.
Quick-Access Checklist:
- Finish all setup steps.
- Level the bed and gantry.
- Set Z height and run calibration.
- Clean the bed and nozzle.
- Watch the first layer and pause if needed.
- Keep filament in a dry place.
- Write down calibration and leveling settings.
Remember: Careful calibration and leveling help you get strong, good-looking prints every time.
FAQ
How do you set up your printer for the first time?
Start your initial 3d printer setup by checking all parts. Place the printer on a flat table. Follow the manual for assembly. Connect cables and power on the machine. Update firmware if needed. This 3d printing guide helps you avoid mistakes during setup.
What is the best way to load filament into the Sovol SV08?
To load filament, heat the nozzle to the right temperature for your materials. Feed the filament through the runout sensor and into the extruder. Watch for smooth movement. Filament loading works best when you keep filament dry and clean.
Why is calibration and leveling important in FDM 3D printing?
Calibration steps and leveling help you get strong first-layer adhesion. These steps make sure the nozzle and bed are the right distance apart. Good calibration stops print failures and improves the printing process. Always check calibration before each print.
How do you use slicing software to prepare your design?
Prepare your design by importing the 3d model into slicing software. Adjust print settings for your materials. Slicing the model creates G-code for the printer. Save the file and transfer it to the SV08. This process helps you get the best results.
What should you do if your print fails or has problems?
Use troubleshooting guides to find the cause. Check for clogs, bed adhesion, or loose parts. Clean the nozzle and bed. Review your calibration and leveling. Make sure you follow safety rules during the process. Try a test print after fixing the issue.


