


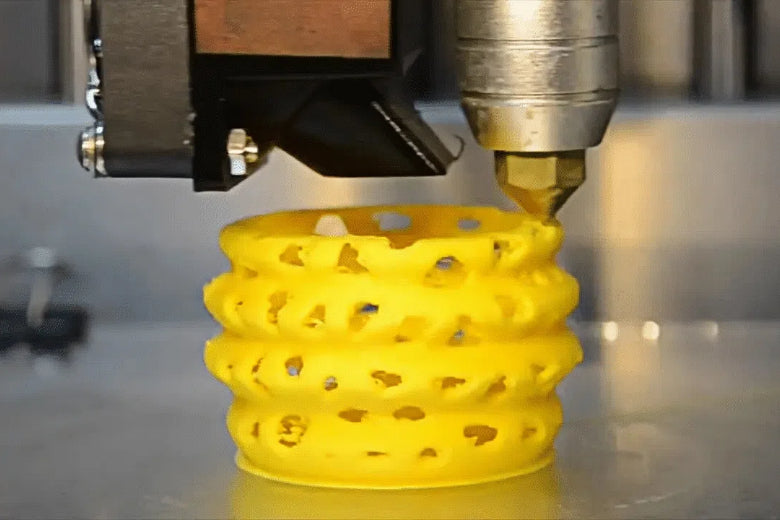
You want your 3d printer to work smoothly every time. When 3D printer clogs happen, you may feel stuck or annoyed. A clogged nozzle can stop your project and waste your time. You do not need special skills to solve this problem. With the right steps, you can get your 3d printer running again and avoid future clogs.
Key Takeaways
- Recognize early signs of a clogged nozzle like weak extrusion, strange noises, or filament buildup to stop problems before they worsen.
- Use simple tools like needles, cleaning filaments, and brass brushes to clear clogs safely, and always wear protective gear.
- Follow a step-by-step cleaning process, starting with external cleaning and moving to cold pulls or soaking for tougher blockages.
- Store filament properly in airtight containers with desiccants to keep it dry and clean, preventing clogs caused by moisture and dust.
- Maintain a regular cleaning and inspection schedule to keep your printer running smoothly and avoid future nozzle clogs.
Check for 3D Printer Clogs
Signs of a Clogged Nozzle
You may notice several warning signs when your 3d printer nozzle starts to clog. Recognizing these symptoms early helps you avoid bigger problems later. Here are some common signs:
- Filament does not come out or only a small amount extrudes during printing.
- The extruder makes grinding or clicking noises.
- The first layer appears weak, spotty, or does not stick to the bed.
- Filament curls up around the nozzle tip instead of sticking to the print bed.
- You see gaps, missing layers, or thin, string-like lines in your prints.
- Burn residue appears on the nozzle.
- Failed prints or unstable print quality become frequent.
Tip: If you see filament curling up or sticking to the nozzle, stop the print and inspect the nozzle right away. This can prevent further damage.
How to Check if Your 3D Printer Nozzle is Clogged
You can follow a few simple steps to check if your 3d printer nozzle is clogged. These steps help you confirm the problem before you start cleaning:
- Watch the printer during a print. If no filament comes out or the extrusion looks thin, suspect a clog.
- Listen for grinding or clicking sounds from the extruder. These noises mean the filament cannot move smoothly.
- Heat the nozzle to the recommended temperature for your filament.
- Try to manually push filament through the hot nozzle. If you need a lot of force or nothing comes out, the nozzle is likely clogged.
- Clean the outside of the nozzle with a brass wire brush. Avoid steel brushes, as they can damage the nozzle.
- Insert a small needle into the nozzle tip to clear any visible debris.
- If these steps do not work, carefully remove the nozzle while it is hot. Wear oven gloves to protect your hands.
- Soak the nozzle in acetone if you use ABS filament. This helps dissolve any leftover material.
By following these steps, you can quickly identify and confirm a clog. This makes it easier to fix the problem and get your 3d printer working again.
Causes of Clogged 3D Printer Nozzle
Understanding why your nozzle clogs helps you prevent future problems. Many factors can lead to a blocked nozzle. The table below shows the most common causes and their effects:
|
Primary Cause |
Description |
Impact on Nozzle Functionality |
|---|---|---|
|
Dirt and Filament Debris |
Dust or debris from filament or environment contamination due to poor storage |
Accumulates inside nozzle, blocking filament flow |
|
Overheating |
Printing above recommended temperatures causing filament degradation |
Residue buildup clogs nozzle, reducing print quality |
|
Incorrect Print Bed Calibration |
Nozzle too close to bed causing filament backup |
Filament forced back, leading to clogs |
|
Heat Creep |
Heat traveling from hot end to cold end, melting filament prematurely |
Filament solidifies inside nozzle, causing blockage |
|
Filament with impurities or moisture absorption |
Expands or leaves residues, increasing clog risk |
|
|
Mechanical problems like worn gears or loose parts |
Uneven filament feed causing clogs |
|
|
Moisture in Filament |
Filament absorbing moisture and expanding when heated |
Expansion causes blockages inside nozzle |
|
Residue Buildup |
Accumulation of filament residue from repeated use without cleaning |
Reduces nozzle diameter over time, causing clogs |
Filament Issues
You may face clogs if you use poor quality filament. Inconsistent diameter and impurities in filament often cause irregular extrusion. This leads to residue buildup inside the nozzle. Moisture in filament also creates problems. When filament absorbs water, it expands during printing and leaves more residue. Always store filament in airtight containers to keep it dry. Premium filament reduces the risk of buildup and keeps your nozzle clear.
Temperature Problems
Temperature settings play a big role in nozzle health. Printing at too low a temperature prevents proper melting, which causes filament to stick and form buildup. Overheating degrades filament, leaving sticky residue inside the nozzle. Heat creep happens when heat travels up the hotend, melting filament too early and causing blockage. Always set the correct temperature for your material. Purge the nozzle when switching between filaments with different temperature needs to avoid leftover buildup.
- Use the right temperature for each filament.
- Increase temperature for faster print speeds.
- Purge old filament at higher temperatures when changing materials.
- Ensure good cooling to prevent heat creep and buildup.
Dust and Debris
Dust and debris can quickly clog your nozzle. Dust sticks to filament if you store it poorly or print in a dusty room. These particles burn inside the nozzle, creating carbonized buildup that blocks flow. Wipe filament before use and keep your workspace clean. Store filament with desiccants to reduce dust and moisture. Regular cleaning prevents buildup and keeps your nozzle working well.
Other Common Causes
Several other factors can lead to nozzle clogs:
- Nozzle too close to the print bed causes filament to back up and create buildup.
- Poor extruder calibration or worn gears lead to uneven feeding and residue buildup.
- Retraction settings that pull filament back too far increase the risk of buildup.
- Cheap or poorly designed nozzles often have inconsistent dimensions, trapping residue.
- Printing in an enclosure without enough cooling can cause heat creep and buildup.
- Mechanical issues, such as loose parts or filament drag, also contribute to clogs.
Tip: Regularly check your printer’s hardware and settings to catch problems before they cause serious buildup in the nozzle.
Tools for Unclogging
Basic Cleaning Tools
You can solve most clogs with a few simple tools. Many users rely on thin wires, acupuncture needles, or small drill bits to clear a blocked nozzle. Specialized extruder cleaning wires, such as piano wire, work well for removing stubborn debris. Dental root canal files also help because their tapered shape matches the nozzle bore and scrapes away residue more effectively than smooth needles. You should heat the nozzle before using these tools for easier removal. Some people use the cold pull method, which involves heating the nozzle, inserting filament, letting it cool, and then pulling out the clog. If you cannot clear the blockage, you may find it easier to replace the nozzle, especially if it is inexpensive.
Tip: Keep a set of basic cleaning tools in your workspace. This makes it easier to handle clogs as soon as they appear.
Advanced Tools
Sometimes, you need more advanced tools needed to unclog a stubborn nozzle. Cleaning filaments are designed to remove residue from inside the nozzle. Fine nozzle needles and nozzle brushes help with both internal and external cleaning. You can use a temperature gun to check if the nozzle reaches the correct heat for cleaning. The cold pull technique remains one of the most effective ways to remove deep clogs. In rare cases, experienced users try specialized tools like tungsten bars for severe blockages that resist standard methods.
|
Advanced Tool |
Purpose |
|---|---|
|
Cleaning filament |
Cleans inside the nozzle |
|
Nozzle brush |
Cleans outside of the nozzle |
|
Temperature gun |
Checks nozzle temperature |
|
Tungsten bar |
Removes severe, stubborn clogs |
Safety Gear
You must protect yourself when working with a hot nozzle or chemicals. Always follow these safety steps:
- Turn off and unplug your 3D printer before starting.
- Let the nozzle cool before touching it to avoid burns.
- Wear safety glasses to shield your eyes from debris.
- Use gloves to protect your hands from heat and chemicals.
- Work in a well-ventilated area to avoid breathing fumes.
Note: Safety gear keeps you safe while you work on your printer. Never skip these steps, even for quick cleaning tasks.
Fixing a Clogged 3D Printer Nozzle
When you face 3d printer clogs, you need a clear plan to get your machine running again. This section guides you through each method for fixing a clogged 3d printer nozzle, from simple cleaning to full nozzle replacement.
External Cleaning
Start with external cleaning before you try more advanced methods. This process removes surface buildup and can solve minor clogs quickly.
- Heat the nozzle to the correct temperature for your filament. For PLA, set it to 200-220°C. For ABS, use up to 240°C. This softens any stuck material.
- Use a brass wire brush to gently scrub the outside of the nozzle. Avoid steel brushes, which can scratch the metal.
- If you see visible debris, use a cleaning needle or a nozzle cleaning kit. Insert the tool carefully into the hot nozzle to dislodge buildup. Do not use excessive force.
- If the clog remains, turn off the printer and let it cool. Remove the nozzle with pliers or a wrench for deeper cleaning.
- Soak the nozzle in acetone (for ABS) or isopropyl alcohol. This helps dissolve any stubborn residue.
- After cleaning, reinstall the nozzle, heat the printer, and run a test print to check for smooth extrusion.
Tip: Always wear gloves and safety glasses when working with hot parts or chemicals.
Needle or Probe Method
The needle or probe method works well for minor 3d printer clogs. Heat the nozzle to a high temperature, around 250°C, and let it sit for a few minutes. This softens the filament inside. Use a fine needle or probe to gently clear the opening. Many users find this method effective for small blockages, saving you from removing the nozzle or disassembling the extruder. If the clog does not clear, you may need to take apart the extruder to remove larger lumps. Regular cleaning with this method helps prevent future buildup and keeps your 3d printer running smoothly.
Cold Pull (Atomic Pull)
The cold pull method, also called the atomic pull, is a popular way to clear a clogged 3d printer nozzle. This technique removes carbonized material and leftover filament from inside the nozzle.
To perform a cold pull:
- Heat the nozzle to the filament’s printing temperature. Insert a piece of nylon or cleaning filament.
- Let the nozzle cool until the filament becomes semi-solid but not fully hard.
- Gently pull the filament out. It should bring out debris, burnt plastic, and stuck material.
- Repeat the process if you see more buildup or discoloration on the filament end.
- Cut off the dirty end and try again until the filament comes out clean.
The cold pull method is effective for most clogs, especially when switching between different filament types. It can take time and may feel tough on your printer, but it often solves stubborn clogs without removing the nozzle.
Soaking and Solvents
If you still have a clogged 3d printer nozzle after trying other methods, soaking and solvents offer a strong solution. Disassemble the hotend and soak the nozzle in a solvent that matches your filament type.
- Acetone works fastest for dissolving PLA clogs. Soak the nozzle for 10-20 minutes.
- Ethyl acetate is almost as effective and less harsh. Soak for 15-25 minutes.
- Isopropyl alcohol is slower but safer. Soak for 30 minutes to an hour.
- For ABS or PETG, acetone is also effective.
After soaking, use a soft brush or cloth to remove any remaining buildup. Always rinse and dry the nozzle completely before reinstalling it. Only soak the nozzle, not the entire hotend, to avoid damaging other parts.
Note: Work in a well-ventilated area and wear gloves when handling solvents.
Heat Gun and Blow Torch
For severe 3d printer clogs, you can use a heat gun or blow torch to clear the nozzle. Hold the nozzle with forceps and apply a blue flame or hot air directly to the metal. This vaporizes stuck filament and burns away residue. Stop heating if the nozzle glows red hot, as overheating can damage the metal, especially if you have aluminum parts. This method works best for brass nozzles. After heating, scrub off any carbon residue before reinstalling.
Caution: Only use this method if you feel comfortable handling open flames and hot metal. Never use a blow torch on aluminum nozzles, as they can melt.
Cleaning Filament
Cleaning filament helps remove partial clogs and leftover buildup. Heat the nozzle to the filament’s extrusion temperature or slightly higher. Feed the cleaning filament through the extruder. Let it cool so it hardens inside the nozzle, gripping debris and burnt plastic. Pull the filament out slowly and firmly. The hardened filament will bring out stuck material. Nylon filament works especially well for this process. Repeat the cold pull method with cleaning filament until the filament comes out clean. This technique keeps your nozzle clear and prevents future 3d printer clogs.
Nozzle Replacement
Sometimes, the best solution for a clogged 3d printer nozzle is replacement. If soaking the nozzle in acetone or using other methods does not clear the blockage, and you cannot see light passing through, it is time to replace the nozzle. Continuing to force tools through the nozzle can cause damage and void your warranty. Nozzle replacement is quick and restores print quality. Always use the correct size and type for your printer.
Troubleshooting Tips
Persistent 3d printer clogs can be frustrating. Use these troubleshooting tips to solve stubborn problems:
- Slow down print speeds to reduce the risk of buildup.
- Avoid excessive retractions, which can cause heat buildup and filament jams.
- Calibrate your first layer with test prints to ensure proper extrusion.
- Perform cold pulls with cleaning filament at higher temperatures to clear stubborn buildup.
- Check and clean extruder gears, teeth, and the PTFE tube for damage or debris.
- Inspect the hotend for jams above the heater block.
- Use high-quality filament and adjust temperature settings when switching materials.
- Maintain slicer settings and start with conservative speeds.
- Save calibration prints for each nozzle size and filament type.
- Upgrade hardware, such as adding collet clips, to secure Bowden tubes and prevent movement.
Common Mistakes to Avoid:
- Do not use excessive force during cold pulls or when pushing filament.
- Avoid using the wrong temperatures for cleaning or cold pulls.
- Do not remove the nozzle without proper tools or knowledge.
- Reduce retraction distances to prevent new clogs.
- Always check extruder gears and use quality filament.
By following these steps and tips, you can fix a clogged 3d printer nozzle and prevent future 3d printer clogs. Regular cleaning and careful maintenance keep your printer running smoothly and extend the life of your nozzle.
Preventing 3D Printer Clogs
Maintenance Tips
You can prevent nozzle clogs by following a regular maintenance schedule. Simple daily and weekly tasks keep your printer in top shape. The table below shows how often you should perform each task and why it matters:
|
Maintenance Frequency |
Recommended Task |
Reason / Benefit |
|---|---|---|
|
Daily |
Inspect nozzle for filament buildup |
Early detection prevents clog formation |
|
Weekly |
Clean print bed and check extrusion quality |
Maintains print surface and identifies issues early |
|
Bi-weekly |
Perform nozzle cleaning and cold pull |
Removes residue and prevents buildup |
|
Monthly |
Soak nozzle in solvent if needed |
Deep cleaning dissolves hardened filament |
|
Quarterly |
Disassemble hotend for full inspection |
Ensures internal parts are free of debris and wear |
|
Every 3-6 months |
Replace nozzle if worn or persistently clogged |
Prevents print quality loss and persistent clogs |
Tip: A consistent nozzle cleaning routine helps you avoid most 3d printer clogs before they start.
Filament Storage
Proper filament storage plays a big role in keeping your nozzle clear. Store filament in a dry, clean place. Use airtight boxes with desiccants to keep out moisture and dust. Humidity and dirt can stick to filament, causing blockages when you print. Hygroscopic filaments like nylon and PETG absorb water quickly, so monitor storage with a hygrometer. Clean filament means fewer 3d printer clogs and better print quality.
- Store filament in airtight containers.
- Add desiccant packs to absorb moisture.
- Wipe filament before loading it into your printer.
Printer Settings
Printer settings affect how well you prevent nozzle clogs. Always calibrate temperature and retraction settings for each filament type. Too high a temperature can burn filament, while too low can cause under-extrusion. Adjust retraction to avoid pulling molten filament into cooler zones. Check filament diameter settings and follow manufacturer guidelines. Regular cleaning and proper settings work together to keep your nozzle clear.
Cleaning Schedule
A regular cleaning schedule keeps your printer running smoothly. Inspect the nozzle and print bed daily for debris. Clean the print bed and check belt tension weekly. Every two weeks, perform a thorough nozzle cleaning and lubricate moving parts. Disassemble and clean the hotend every quarter. Clean the nozzle when switching filaments to avoid residue buildup. These habits help you prevent nozzle clogs and extend your printer’s life.
You can fix a clogged 3d printer nozzle by choosing the right method for the situation. The table below shows how each approach compares:
|
Method |
Effectiveness |
Time Required |
|---|---|---|
|
Cold Pull Method |
Effective for minor blockages |
Fast |
|
Cleaning Needle/Kit |
Effective for more stubborn debris |
Moderate |
|
Full Nozzle Removal & Soaking |
Highly effective for complete blockages |
Most time-intensive |
Regular maintenance keeps your printer reliable and prevents a clogged 3d printer nozzle. Clean, check, and replace parts as needed. Use these tips for smoother prints. 📌 Bookmark or share this guide to help others in your 3D printing community.
FAQ
What should you do if cleaning methods do not fix the clog?
If cleaning does not work, replace the nozzle. Severe clogs sometimes block the nozzle completely. Nozzle replacement restores print quality and prevents further damage. Always use the correct size and type for your printer.
How often should you clean your 3D printer nozzle?
You should clean the nozzle every two weeks if you print often. For light use, monthly cleaning works well. Regular cleaning prevents buildup and keeps your prints smooth.
Can you use any filament for the cold pull method?
Nylon filament works best for cold pulls. Cleaning filament also gives good results. Avoid brittle filaments like PLA, as they may break during the process.
Why does moisture in filament cause clogs?
Moisture in filament turns to steam when heated. This creates bubbles and expands the filament. The extra pressure causes jams and leaves residue inside the nozzle.
Tip: Store filament in airtight containers with desiccant packs to keep it dry and prevent clogs.


