


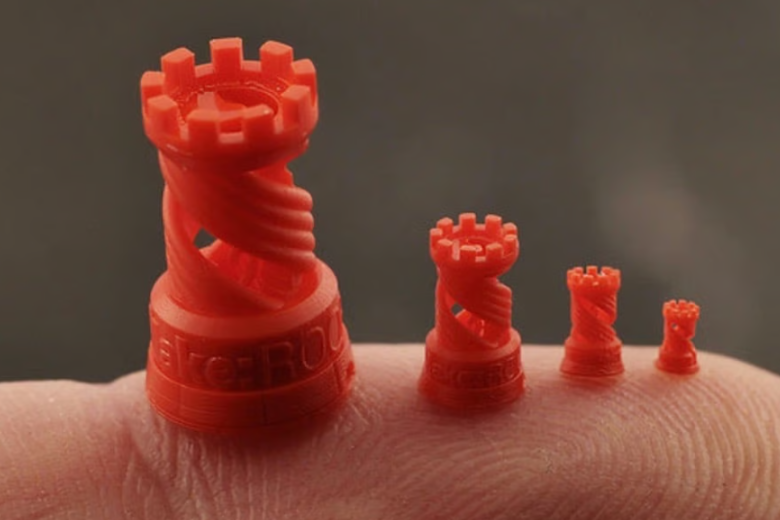
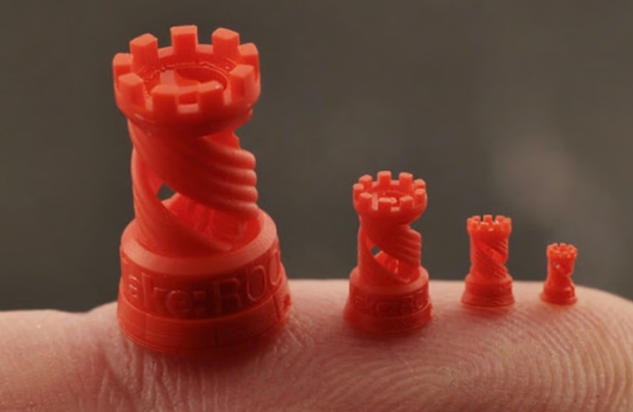
Printing small models demands exceptional attention to detail. With FDM technology, you can achieve high-resolution printing, making it ideal for creating precise models like miniatures for tabletop gaming. However, mastering 3D printing at a small scale involves challenges. Material properties, printer limitations, and achieving high-quality prints require careful adjustments. Whether you’re a beginner or a professional, understanding these intricacies ensures successful prints with high detail and precision. FDM remains the best for beginners and enthusiasts alike, offering quality results at an affordable cost. It’s the perfect choice for printing miniatures and small scale models with remarkable resolution.
Key Takeaways
- Make sure your printer is set up correctly. A flat bed and correct extruder settings help make better prints.
- Pick the best material for your model. PLA works well for small details, while PETG or ABS are stronger for tough models.
- Change support settings to make supports easy to remove. Adjust how thick and what type they are to save material and improve prints.
Understanding Challenges in Printing Small Models
Common Issues
Printing small models often presents unique challenges that can affect the final outcome. One of the most common issues is the loss of detail. When working on miniatures or intricate designs, even minor inaccuracies can lead to distorted features. Warping is another frequent problem, especially when the material cools unevenly during the printing process. This can cause parts of the model to lift off the build plate, compromising precision. Additionally, over-extrusion or under-extrusion can result in uneven layers, which diminishes the overall quality of the print. These issues highlight the importance of fine-tuning your settings to achieve high-quality prints.
FDM Printer Limitations
While FDM technology is versatile, it does have limitations when it comes to printing small models. The relatively thick layer height of FDM printers makes it difficult to capture high detail in miniature designs. Surface finishes are often rough, requiring post-processing to achieve a smoother appearance. Moreover, FDM printing relies heavily on support structures, which can increase material usage and production time. The table below summarizes these limitations:
|
Limitation |
Description |
|---|---|
|
Low Resolution |
FDM printers have a relatively thick layer height, making them unsuitable for parts with small details. |
|
Rough Surface Finishes |
Finished products often have rough surfaces that require post-processing for a smoother finish. |
|
Need for Support Structures |
Printing with FDM necessitates additional material and time for support structures, increasing costs and production timelines. |
Despite these drawbacks, FDM remains the best for beginners and best for enthusiasts, offering an affordable entry point into 3D printing.
Material Properties and Their Impact
The material you choose plays a critical role in the success of your 3D prints. Different filaments have varying mechanical properties that can influence the quality of your models. For instance:
- The ultimate tensile strength of filaments ranges from 9.18 to 38.43 MPa, with Carbon Fiber offering the highest strength and Polyamide (PA) the lowest.
- Compressive stress values vary between 52.12 and 70.13 MPa, with PA demonstrating the highest compressive stress and PMMA the lowest.
These properties affect how well the material can handle the fine details required for printing miniatures. For high-resolution printing, materials like PLA are often preferred due to their ease of use and ability to capture intricate designs. However, experimenting with advanced materials like PETG or Carbon Fiber can yield better results for best for professionals seeking durability and precision.
Optimizing Support Settings for FDM Miniature Printing
When printing small models with FDM, optimizing support settings is essential for achieving high-quality results. Supports provide the necessary foundation for overhangs and intricate features, but improper settings can lead to wasted material, difficult removal, or even damage to your miniatures. By fine-tuning your support settings, you can strike the perfect balance between stability, ease of removal, and preserving fine detail.
Choosing the Right Support Type
Selecting the correct support type is the first step in optimizing your support settings. Different support patterns and configurations can significantly impact the stability of your print and the ease of post-processing. For example, grid and zigzag patterns are commonly used due to their balance of strength and removability. However, the choice depends on the specific requirements of your model.
For instance, the tail of the Kobold model illustrates how an improper print orientation can lead to overhangs that necessitate finely tuned support settings. Rotating the model to reduce reliance on supports can improve the final quality and save material.
The table below highlights key criteria for determining the optimal support type:
|
Support Setting |
Description |
|---|---|
|
Overhang Angle |
Supports are needed for angles exceeding 45° to prevent filament from sagging during printing. |
|
Support Pattern |
Different patterns can affect the stability and ease of removal of supports. |
|
Support Density |
Higher density provides more support but may be harder to remove and use more material. |
By carefully evaluating these factors, you can ensure that your supports provide the necessary foundation without compromising the precision of your miniatures.
Adjusting Support Density
Support density plays a crucial role in balancing structural integrity and material efficiency. A higher density offers better support for complex overhangs but increases material usage and makes removal more challenging. On the other hand, a lower density reduces material consumption but may compromise the stability of your print.
Research suggests that the optimal infill density for dimensional accuracy is around 40%. Accuracy improves significantly when increasing density from 20% to 40%, but further increases beyond 40% yield diminishing returns. Minimal variation in dimensional difference occurs between 40% and 60%, making 40% an ideal starting point for most miniature prints.
Key Tips for Support Density:
- Start with 40% density for models requiring high detail and precision.
- Reduce density for simpler designs to save material and time.
- Test different densities on small sections of your model to find the best balance.
By experimenting with density settings, you can achieve the best results for your specific model while minimizing waste.
Balancing Strength and Removal Ease
The final step in optimizing support settings is finding the right balance between strength and ease of removal. Supports must be strong enough to hold overhangs and intricate features but easy to remove without damaging the model. Achieving this balance requires careful consideration of material properties, support placement, and print orientation.
Practical Tips for Balancing Strength and Removal Ease:
- Use breakaway supports for easier removal without tools.
- Adjust the Z-gap (distance between the support and the model) to make removal smoother.
- Orient the model to minimize the number of supports required, reducing the risk of damage during removal.
Always assess whether your model truly requires supports. Identifying floating parts and adjusting the print orientation can significantly reduce the need for supports, improving the overall quality of your print.
By following these strategies, you can optimize your support settings to achieve the best results for FDM miniature printing. This ensures that your miniatures retain their fine detail while remaining easy to post-process.
Step-by-Step Setup for Printing Small Models
Printer Calibration
Proper calibration is the foundation of successful 3D printing, especially when working on small models. Without accurate calibration, even the best 3D printer for miniatures may struggle to deliver the precision and detail required for intricate designs. Start by ensuring your printer's bed is level. An uneven bed can cause poor adhesion, leading to failed prints or warped layers. Use a piece of paper or a feeler gauge to check the distance between the nozzle and the bed, adjusting until the gap is consistent across all corners.
Next, calibrate the extruder to ensure it delivers the correct amount of filament. Over-extrusion can obscure fine details, while under-extrusion weakens the structure of your miniatures. Measure the filament's actual diameter with calipers and input this value into your slicer software. Additionally, perform an extrusion test to verify that the printer extrudes the exact length of filament specified. These steps will help you achieve the best results for precision and quality.
Finally, check the printer's temperature settings. Different materials require specific nozzle and bed temperatures to print effectively. For example, PLA typically prints well at 190–220°C, while PETG may need 230–250°C. Use a temperature tower test to identify the optimal settings for your filament. Regular calibration ensures your printer operates at peak performance, delivering high-quality results for your miniatures.
Slicer Settings for Miniatures
Configuring your slicer software correctly is crucial for printing miniatures with fine detail. Start by selecting an appropriate layer height. Smaller layer heights, such as 20–30 microns, produce smoother surfaces and capture intricate details, making them ideal for display pieces. For gaming miniatures, a layer height of 50 microns balances quality and print time effectively.
Model orientation also plays a significant role in achieving high-quality prints. Tilting your model at a 30–45 degree angle reduces suction forces and improves resin drainage, which is particularly important for preserving fine details. Additionally, place supports in inconspicuous areas to minimize visible marks after removal. This approach ensures your miniatures maintain their aesthetic appeal.
The table below summarizes recommended slicer settings for miniature printing:
|
Setting Type |
Recommended Value |
Purpose |
|---|---|---|
|
Layer Height |
20–30 microns |
For display pieces requiring a flawless finish |
|
Layer Height |
50 microns |
For gaming pieces, balancing quality and time |
|
Exposure Time |
Optimal based on calibration |
To achieve high-quality miniatures with sharp details |
|
Model Orientation |
30–45 degrees tilt |
Reduces suction forces and improves resin drainage |
|
Support Placement |
Inconspicuous areas |
Minimizes visible support marks |
By fine-tuning these settings, you can optimize your slicer for FDM miniature printing, ensuring your models are both detailed and durable.
Material Selection for FDM Miniature Printing
Choosing the right material is essential for achieving the best results in FDM miniature printing. PLA is a popular choice due to its ease of use and ability to capture fine details, making it the best for fine detail and precision. However, for more durable miniatures, consider using PETG or ABS. These materials offer greater strength and heat resistance, though they may require more advanced printer settings and post-processing.
When selecting a material, consider the application of your miniatures. For display pieces, prioritize materials that produce smooth finishes and vibrant colors. For tabletop gaming miniatures, durability and impact resistance are more important. Adjust shell thickness and infill percentages based on your needs. Increasing shell thickness enhances strength but also increases print time and material usage. Similarly, infill patterns like honeycomb or triangular structures provide excellent strength, while rectangular infills are faster and more efficient for rapid prints.
To summarize, match your material choice to the specific requirements of your project. Experiment with different filaments and settings to find the combination that works best for your models. This approach ensures your miniatures meet your expectations in both quality and performance.
Tips for Successful 3D Printing of Small Models
Using Smaller Nozzles
Switching to smaller nozzles can significantly enhance the detail and quality of your 3D prints, especially when working on miniatures. Smaller nozzles allow for finer extrusion, which results in thinner layers and more precise features. For example, a 0.1 mm nozzle can achieve a minimum layer height of 0.12 mm, producing high-detail prints. In contrast, larger nozzles, such as 0.8 mm, create thicker layers, which are less suitable for intricate designs.
|
Nozzle Size (mm) |
Minimum Layer Height (mm) |
Print Detail Level |
|---|---|---|
|
0.1 |
0.12 |
High |
|
0.4 |
Varies |
Moderate |
|
0.8 |
Thicker |
Low |
When using smaller nozzles, ensure your printer is well-calibrated to avoid clogging and maintain consistent extrusion. This adjustment is particularly beneficial for printing miniatures, where capturing intricate details is essential.
Cooling and Temperature Control
Effective cooling and temperature control are critical for maintaining the quality of your prints. Consistent interpass temperature control ensures stable layer heights, reducing shape deviations to less than 2% compared to the CAD model. Forced air cooling can also boost productivity by up to 30%, especially in areas where air convection is the primary heat exchange method.
To optimize cooling:
- Maintain a controlled temperature of around 150 °C for consistent layer adhesion.
- Use forced air cooling during the deposition process to improve efficiency.
- Integrate temperature control systems to streamline the printing process, similar to modern FDM printers.
These techniques help prevent warping and ensure your models retain their intended shape and detail.
Monitoring the Print Process
Monitoring the print process is essential for reducing defects and ensuring high-quality results. Advanced techniques, such as camera-based approaches and machine learning, can detect errors early and improve the overall success rate of your prints.
|
Monitoring Technique |
Description |
|---|---|
|
Camera-based approaches |
Utilizes single cameras for detecting various extrusion errors through computer vision techniques. |
|
Machine learning |
Offers robust error detection capabilities that may generalize across different materials and geometries. |
|
Acoustic sensors |
Potentially useful for detecting specific types of print defects, though not explicitly detailed. |
By implementing these monitoring methods, you can identify and address issues in real-time, ensuring your 3D prints meet the desired quality standards. Regularly observing the process also helps you fine-tune your support settings and other parameters for future projects.
Removing Supports Safely

Essential Tools for Support Removal
Removing supports from your 3d prints requires precision and the right tools to avoid damaging your miniatures. A pair of flush cutters is essential for snipping away larger support structures cleanly. For finer details, use a precision hobby knife to carefully trim supports in tight spaces. Sanding tools, such as small files or sanding sticks, help smooth out rough areas left behind after support removal. Tweezers are also useful for pulling away small fragments without applying excessive force.
Tip: Always keep your tools sharp and clean. Dull blades or worn-out files can cause uneven cuts, increasing the risk of damaging your print.
Techniques to Avoid Damage
To preserve the quality of your miniatures, adopt a methodical approach when removing supports. Start by identifying the most accessible supports and remove them first. Work gradually toward more intricate areas. Avoid pulling or twisting supports, as this can tear away fine details. Instead, use a slicing motion with your hobby knife or cutters.
For delicate sections, consider softening the supports by briefly soaking the model in warm water. This technique works particularly well for PLA prints, making the supports easier to remove. Additionally, adjust your slicer settings to include a small Z-gap between the model and the supports. This gap reduces the adhesion strength, allowing for smoother removal.
Finishing Touches for Miniatures
After removing supports, focus on refining your miniatures to achieve a professional finish. Begin by sanding rough areas with 150–220 grit sandpaper, then progress to finer grits for a polished surface. Post-curing is essential for resin-based models, as it hardens the material and enhances durability. Rotate the model during curing to ensure even exposure.
Apply a thin coat of primer to improve paint adhesion and protect the surface from environmental factors. When painting, use thin layers and a fine brush to preserve intricate details. Techniques like shading and dry brushing add depth and realism to your miniatures. For a weathered look, incorporate effects like dirt or rust. Finally, seal your work with a protective varnish to preserve the paint job during gameplay or display.
Pro Tip: Experiment with color theory when painting your miniatures. Complementary colors can create striking visual effects, enhancing the overall quality of your 3d prints.
Mastering 3d printing for small models requires attention to detail and a focus on key factors. Filament processing, material selection, and printing parameters directly impact the quality of your prints. The table below summarizes these critical elements:
|
Key Factors |
Impact on Quality |
|---|---|
|
Filament processing |
Influences surface finish and mechanical properties |
|
Materials |
Affects strength, durability, and aesthetics |
|
Printing parameters |
Critical for achieving dimensional accuracy and surface quality |
|
Flexural strength |
Essential for structural integrity |
|
Tensile strength |
Determines the material's ability to withstand tension |
|
Surface roughness |
Impacts the aesthetic quality of the print |
|
Production time |
Affects efficiency and cost of production |
|
Yield strength |
Important for load-bearing applications |
|
Ductility |
Influences the material's ability to deform under stress |
Experiment with different settings and materials to refine your process. Each adjustment brings you closer to achieving exceptional results. Patience and practice are essential. Every print teaches you something new, helping you improve your skills and produce high-quality 3d models.
FAQ
How can you prevent warping during 3d printing?
Ensure proper bed adhesion by leveling the bed and using adhesives like glue sticks. Maintain consistent cooling and temperature control throughout the print process.
What nozzle size works best for printing miniatures?
Use a smaller nozzle, such as 0.1 mm, for intricate details. Smaller nozzles improve precision and enhance the quality of your 3d prints.
Which material is ideal for high-detail miniature printing?
PLA is the best choice for capturing fine details. It offers ease of use and produces high-quality results for 3d miniature printing projects.


Leave a comment
All comments are moderated before being published.
This site is protected by hCaptcha and the hCaptcha Privacy Policy and Terms of Service apply.