


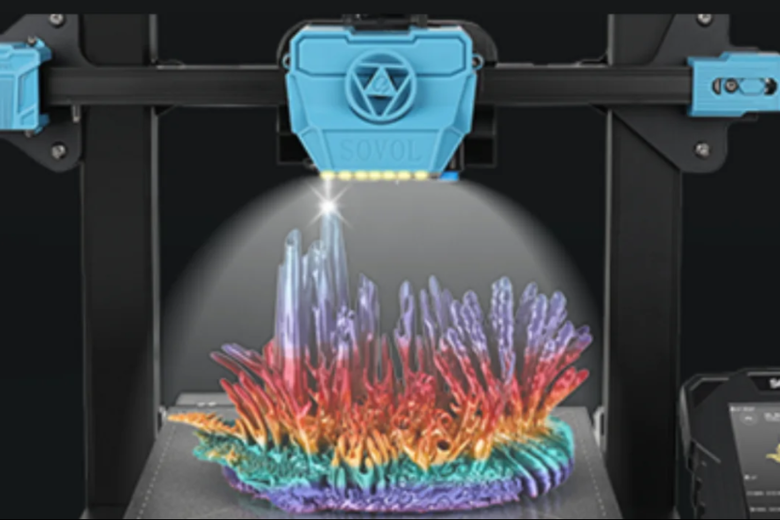
Adding light to your 3D printer projects enhances both functionality and design. A well-placed 3D Printer Light improves visibility, making intricate details easier to monitor. Studies show that lighting upgrades, such as silicon photonics, can boost efficiency by enabling faster print speeds and compact designs. These benefits transform your workspace into a more productive and creative environment.
Key Takeaways
- Adding light to your 3D printer projects helps you see better. This makes it easier to find mistakes early and save time.
- LED strips are cheap and use little energy. They are great for both new users and experts.
- Managing power and heat is important. It keeps your lights working well and lasting longer.
Why Add a 3D Printer Light to Your Projects?
Practical Benefits
Adding lighting to your 3D printer projects offers several practical advantages. It enhances visibility, allowing you to monitor intricate details during the printing process. This is especially useful for identifying errors early, saving time and materials. Lighting also improves interactivity by showcasing moving parts in prototypes, making them more realistic and functional.
Key Benefits:
- Improved detail visibility for error detection.
- Enhanced interactivity for functional prototypes.
- Highlighting critical features for better presentations.
"The integration of lighting allows for moving parts that demonstrate the prototype's functionality, enhancing the model's realism."
LED strips are a popular choice for their affordability and ease of installation, making them ideal for hobbyists and professionals alike.
Aesthetic Enhancements
Lighting transforms your 3D printer projects into visually striking creations. It adds depth and drama, turning ordinary designs into captivating displays. For example, the 'Fall of the Damned' chandelier by Luc Merx uses lighting to create a dramatic effect, while the 'Forms in Nature' chandelier casts oversized shadows that redefine a room's atmosphere.
Examples of Aesthetic Lighting:
- Wall-mounted lamps shaped like animal heads by Linlin and Pierre-Yves Jacques.
- Chandeliers that combine art and functionality, such as those by Thyra Hilden and Pio Diaz.
These examples demonstrate how lighting can elevate your projects, making them both functional and artistic.
Improved Workflow
Incorporating lighting into your workspace enhances efficiency and flexibility. For instance, lighting styles associated with Image-Based Lighting (IBL) improve realism in visualizations, making project presentations more impactful. Additionally, features like ray tracing modes and progress bars provide better control over rendering quality, streamlining your workflow.
|
Enhancement Description |
Impact on Workflow |
|---|---|
|
Image-Based Lighting (IBL) |
Improved realism in visualizations, enhancing user experience in project presentations. |
|
Ray Tracing modes (Low/Draft/High) |
Better control over rendering quality, improving efficiency in project workflows. |
|
Save Ray Traced image at any point in the rendering process |
Allows for iterative design reviews, enhancing collaboration among team members. |
By integrating a 3D Printer Light, you can achieve a more productive and visually appealing workspace, ensuring your projects stand out.
Simple 3D Printer Light Options
LED Strips
LED strips are one of the most versatile and cost-effective lighting options for your 3D printer projects. They are easy to install, energy-efficient, and provide consistent illumination.
Key Features:
- Cost: LED strips cost between $15 and $50 for 10 feet, depending on quality.
- Energy Efficiency: They consume approximately $3.60 annually for 8 hours of daily use.
- Lifespan: High-quality strips last 30,000 to 50,000 hours.
- Durability: Designed to withstand low heat output and robust construction.
|
Metric |
Description |
|---|---|
|
Energy Efficiency |
LEDs use less power compared to traditional bulbs, leading to lower operating costs. |
|
Luminous Efficacy |
Measures the amount of visible light produced per watt of power consumed (lm/W). |
|
Color Temperature |
Indicates the light's appearance in Kelvin, ranging from warm (2700K) to cool (6500K). |
|
Color Rendering Index (CRI) |
Ranges from 0 to 100, with higher values indicating better color rendering capabilities. |
LED strips, such as the WS2811 and WS2813 chipsets, offer customization and reliability. The WS2813, for instance, includes a backup data line that prevents the entire strip from failing if one LED malfunctions.
Lightbulbs
Lightbulbs are a traditional yet effective option for adding light to your 3D printer projects. They are ideal for focused lighting and can be used in combination with diffusers to soften the light.
Advantages:
- Widely available and affordable.
- Easy to replace and maintain.
- Compatible with various fixtures for directional lighting.
However, lightbulbs consume more energy than LED strips and have a shorter lifespan. For optimal results, choose energy-efficient LED bulbs with a high CRI to ensure accurate color rendering.
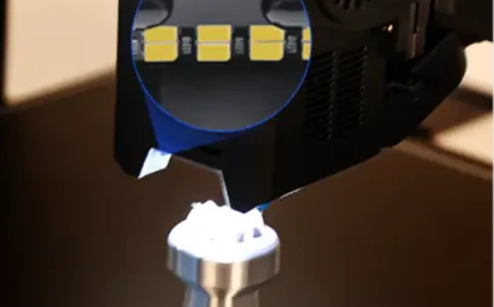
Small Diodes
Small diodes are perfect for compact and intricate 3D printer projects. They provide targeted illumination and are often used in prototypes or decorative models.
A study on LED systems highlights that the lifespan of small diodes depends on factors like operating temperature and thermal management. Solder joint failure is a common issue, but proper installation can mitigate this risk. Small diodes are efficient and reliable when used correctly, making them a valuable addition to your 3D printer light setup.
No-Soldering Solutions
If you are new to electronics or prefer a hassle-free approach, no-soldering solutions are an excellent choice. These options include plug-and-play LED kits, adhesive-backed LED strips, and snap-on connectors.
Benefits:
- Simplifies the installation process.
- Reduces the risk of errors during assembly.
- Ideal for beginners and hobbyists.
No-soldering solutions allow you to focus on the creative aspects of your project without worrying about technical complexities.
Installation Tips
Proper installation ensures the longevity and performance of your 3D printer light. Follow these best practices for a successful setup:
|
Warning/Recommendation |
Details |
|---|---|
|
Utilize software limiter in WLED to cap current draw, preventing wire damage. |
|
|
Add more panels responsibly |
Maintain the current limiter to adjust brightness based on calculated current draw. |
|
Increase power supply or demand with knowledge |
Consult an expert if unsure to prevent component failures and ensure safe installation. |
Secure the lights with adhesive or mounting brackets to prevent movement during operation. Route the wires neatly to avoid interference with the printer's moving parts.
Safety Considerations
Safety should always be a priority when integrating lights into your 3D printer projects. Overloading the power supply or using incompatible components can lead to overheating and potential hazards.
- Use a power supply with adequate capacity to handle the total current draw.
- Avoid placing lights near heat-sensitive components.
- Regularly inspect the wiring and connections for signs of wear or damage.
By following these precautions, you can enjoy a safe and efficient lighting setup for your 3D printer projects.
Creative Applications of 3D Printer Light
Illuminated Display Models
Lighting can transform your display models into captivating visual experiences. By integrating light into your designs, you can highlight intricate details and create a dynamic presentation. For example, the Meristem Wall demonstrates how lighting fixtures enhance both form and function. This design combines structural support with integrated electricity and light, showcasing the creative potential of 3D printing. You can use similar techniques to make your models stand out in exhibitions or presentations.
To achieve this, consider using LED strips or small diodes for consistent and targeted illumination. Position the lights strategically to emphasize key features of your model. Adding diffusers can soften the light, creating a more polished look.
Functional Lighting for Prototypes
Lighting plays a crucial role in functional prototypes. It enhances usability by illuminating moving parts or operational features. For instance, adding a 3D Printer Light to a mechanical prototype can help you demonstrate its functionality more effectively. This approach is particularly useful for engineering or product design projects where clarity is essential.
You can also use lighting to simulate real-world conditions. For example, integrating light sensors or adjustable brightness levels can mimic environmental changes, providing valuable insights during testing.
Artistic and Decorative Lighting
Lighting opens up endless possibilities for artistic and decorative projects. You can use it to create mood lighting, shadow effects, or even interactive installations. Designs like the Meristem Wall inspire creative applications by blending aesthetics with functionality.
Experiment with different light colors, patterns, and intensities to achieve unique effects. Whether you're designing a decorative lamp or an art piece, lighting can elevate your project to a new level of creativity.
Tips for Success with 3D Printer Light
Power Management
Effective power management ensures your 3D printer light operates efficiently and safely. You need to calculate the total power consumption of your lighting setup to avoid overloading the power supply. Each component, including LED strips, diodes, or bulbs, has a specific power requirement. Adding these values helps you determine the total current draw.
Steps for Power Management:
- Check the voltage and current ratings of your lights.
- Use a power supply with a capacity that exceeds the total current draw by at least 20%.
- Incorporate a current limiter to prevent excessive power usage.
💡 Tip: Use a multimeter to measure the actual current draw during operation. This ensures your setup remains within safe limits.
Additionally, consider using energy-efficient lighting options like LED strips. These consume less power and generate minimal heat, reducing the strain on your power supply. Proper power management not only extends the lifespan of your components but also minimizes the risk of electrical hazards.
Heat Dissipation
Heat dissipation is critical for maintaining the performance and longevity of your 3D printer light. LEDs and other lighting components generate heat during operation. Without proper thermal management, this heat can damage the lights and surrounding components.
Research shows that LEDs without adequate heat dissipation can reach temperatures as high as 130°C within a minute, leading to failure. However, using a 3D-printed flat heat pipe can stabilize the temperature at 35°C, significantly extending the LED's service life. This highlights the importance of robust heat dissipation strategies.
Techniques for Effective Heat Dissipation:
- Use heat sinks or heat spreaders made from thermally conductive materials like aluminum or copper.
- Design your lighting setup with adequate ventilation to allow airflow.
- Apply thermal paste between the LED and heat sink to improve heat transfer.
A study by the University of Wolverhampton demonstrated the effectiveness of 3D-printed heat spreaders in improving thermal management. These spreaders enhance heat dissipation by optimizing material properties and geometries. Computational fluid dynamics (CFD) simulations also play a crucial role in designing efficient LED fixtures. By replicating working conditions, engineers can create lighting setups that maintain optimal temperatures.
🔧 Note: Regularly inspect your lighting components for signs of overheating, such as discoloration or reduced brightness. Addressing these issues promptly prevents long-term damage.
Design Considerations
The design of your 3D printer light setup impacts both functionality and aesthetics. You should prioritize designs that integrate seamlessly with your printer while providing adequate illumination.
Key Design Factors:
- Placement: Position the lights to minimize shadows and ensure even illumination.
- Compatibility: Choose components that fit your printer's dimensions and power supply.
- Adjustability: Incorporate adjustable mounts or brackets to direct light where needed.
When designing your setup, consider the materials and geometries of your lighting fixtures. For example, using lightweight materials reduces the strain on your printer's frame. Additionally, diffusers can soften the light, creating a more uniform appearance.
✨ Pro Tip: Experiment with different color temperatures to achieve the desired ambiance. Warm light (2700K) creates a cozy feel, while cool light (5000K) enhances visibility.
By focusing on these design considerations, you can create a lighting setup that enhances your 3D printer projects while maintaining a professional appearance.
Adding light to your 3D printer projects improves visibility, enhances aesthetics, and boosts functionality. You gain better control over your designs while creating visually striking models.
💡 Tip: Experiment with different lighting setups to discover unique effects. Creativity transforms ordinary designs into extraordinary displays.
Lighting opens endless possibilities for innovation. Start exploring today!
FAQ
How do I choose the right type of light for my 3D printer project?
Select lights based on your project's needs. LED strips work for general illumination, while small diodes suit intricate designs.
Can lighting affect the performance of my 3D printer?
Yes, improper installation or overheating can impact performance. Use heat sinks and ensure proper wiring to avoid interference with printer components.
Are no-soldering solutions reliable for long-term use?
No-soldering solutions are reliable for beginners and hobbyists. For advanced projects, consider soldered connections for enhanced durability and stability.


