


Calibration is a critical process that ensures your 3D printer works the way it's supposed to—consistently, accurately, and reliably. Whether you're printing your first benchy or prototyping a part for robotics class, getting the calibration right means better prints, fewer failures, and more confidence with your machine. This guide is designed for middle school students, educators, and hobbyists who want a clear and practical explanation of how to calibrate a 3D printer step-by-step.

1. What Is Calibration and Why It’s Important Think of a 3D printer like a robot with really good handwriting. If its hands (axes), pen (nozzle), and paper (print bed) aren’t in the right place, the print will look messy or wrong. Calibration helps the printer know exactly how far to move and how much plastic to use.
If you skip calibration, you may run into problems like:
- Parts that are the wrong size
- Layers not sticking
- Plastic blobs or gaps in the model
- Poor first-layer adhesion
Even with great printers, calibration should be done regularly. Learn more here: 3D Printer Calibration Guide – All3DP

2. Before You Start: Setup & Tools Checklist Get your printer and workspace ready. You’ll need:
- ✅ Updated firmware (Marlin, Klipper, etc.)
- ✅ Calipers (to measure prints and filament)
- ✅ Calibration test files (like cubes and towers)
- ✅ Feeler gauge or paper (for bed leveling)
- ✅ Screwdriver or hex keys (for hardware adjustments)
- ✅ Isopropyl alcohol and cloth (to clean the print bed)
Make sure your belts are tight, nozzles clean, and your printer is sitting on a level surface.

3. Calibrating in Steps
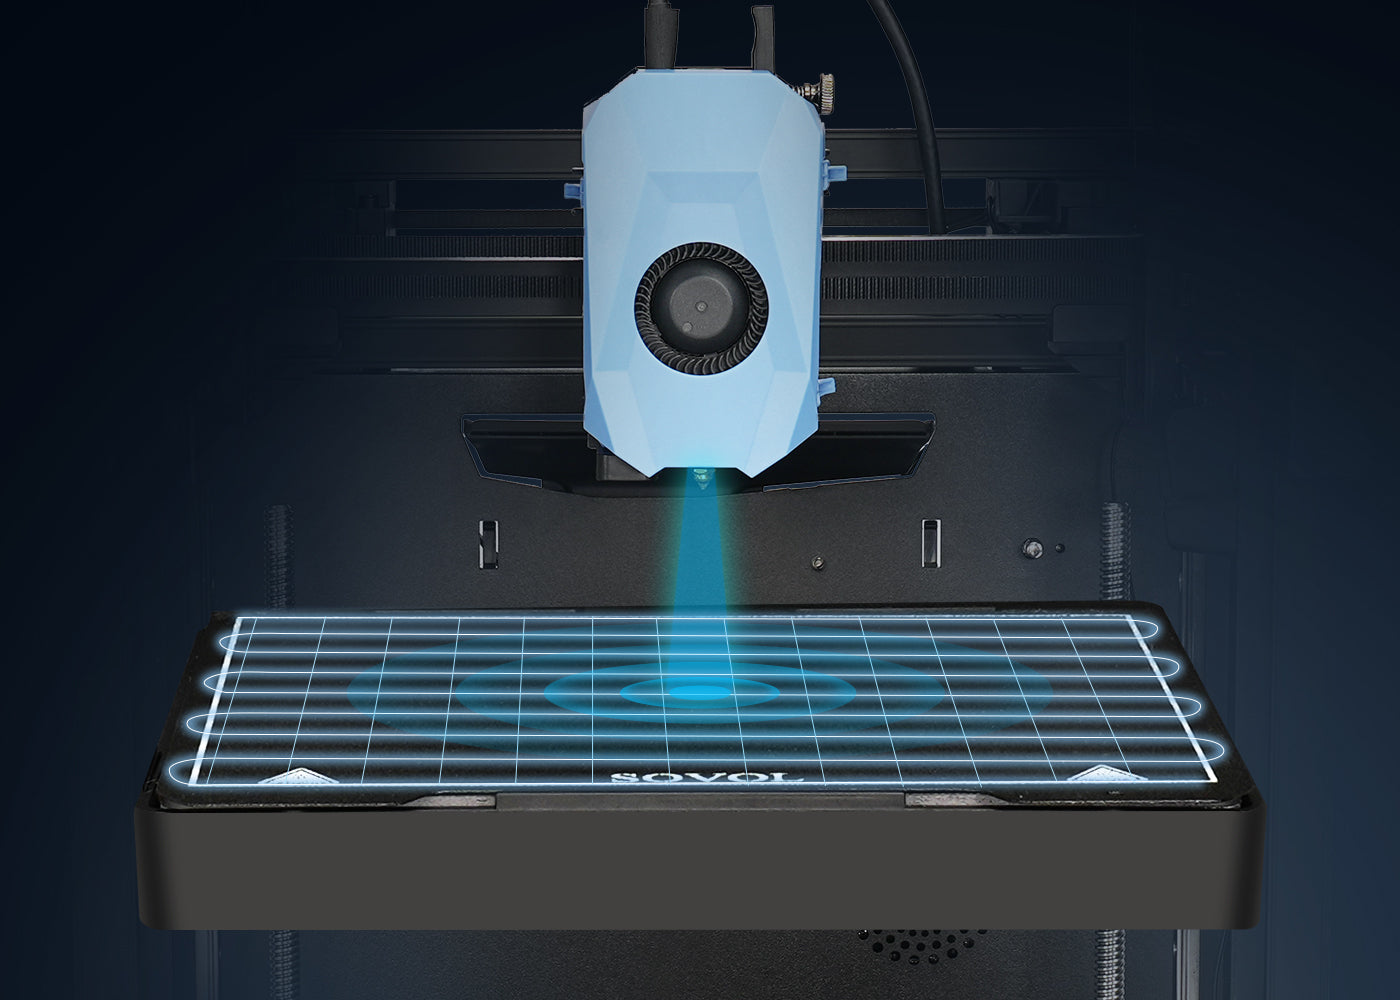
3.1 Bed Leveling and Z-Offset The first layer is the foundation of your print. If it's uneven, the whole print may fail.
Manual Bed Leveling:
- Preheat the nozzle and bed to printing temperature.
- Move the nozzle to each corner of the bed.
- Place a piece of paper under the nozzle—it should drag slightly.
- Adjust screws under the bed at each corner.
Z-Offset: This sets how far the nozzle is from the bed when printing starts.
- Too high = no stick.
- Too low = nozzle scratches the bed.
➡️ Auto-leveling sensors like BLTouch or inductive probes help, but you still need to manually set the right Z-offset.
Z-offset visual guide
3.2 E-Steps: Calibrating Your Extruder E-steps tell the printer how much filament to push through. If it says 100mm and only 90mm comes out, you’ll under-extrude.
How to calibrate E-steps:
- Mark 100mm on your filament.
- Heat the nozzle and extrude 100mm using printer controls.
- Measure how much was actually pulled in.
- If it’s off, adjust your firmware or use
M92 E###andM500to save.
Full tutorial here – Teaching Tech
3.3 Flow Rate and Extrusion Multiplier This fine-tunes filament flow. Even with correct E-steps, your filament diameter or slicer settings may need adjusting.
Steps:
- Print a single-wall cube.
- Measure wall thickness with calipers.
- Adjust flow rate in slicer until it matches expected value (usually 0.4mm).
📌 PLA often starts around 95–100%, PETG around 90–98%.
3.4 PID Tuning: Hotend and Bed Temperature Control PID tuning helps the printer maintain stable temperatures—no bouncing up and down.
Marlin command: M303 E0 S200 C8 (E0 for nozzle, S200 = 200°C)
Once it finishes, apply settings with: M301 P### I### D### and save with M500
More info: PID on Marlin
3.5 Axis Steps/mm (X/Y/Z Calibration) To ensure your prints are the right size:
- Print a calibration cube (20x20x20mm)
- Measure all sides with calipers
- Use this formula:
New Steps = (Current Steps × Desired Size) / Measured Size - Update firmware or EEPROM accordingly
XYZ Calibration Cube – Thingiverse
4. Extra Calibration for Advanced Users
- Retraction Tuning: Helps reduce stringing between parts.
- Input Shaping (Klipper): Cancels ringing during fast prints.
- Linear Advance / Pressure Advance: Improves sharp corners and flow control.
- Speed & Acceleration Settings: Balance quality vs time.

5. Common Calibration Mistakes (And Fixes)
- ❌ Leveling with a cold nozzle – always heat first.
- ❌ Forgetting to save new values (EEPROM!)
- ❌ Not re-calibrating after changing filament or nozzle
- ❌ Ignoring temperature variation in your room
📌 Always test after changes using calibration models.
6. Test Prints That Help Here are some great test models to help you spot calibration issues:
Use PLA for testing—it’s easier to print and more forgiving.
7. Keep Your Printer Tuned Over Time
- Recalibrate once a month or after hardware changes
- Write down your Z-offset, E-steps, and flow rates
- Label your filaments by brand/type and any tweaks needed
- Update your slicer and firmware regularly
Keep a calibration log or print out a sheet and tape it to your printer table.
Calibrating your 3D printer doesn’t have to be hard. With the right tools, some patience, and a few test prints, you can dramatically improve the quality of your projects. Whether you’re building school projects, cosplay props, or prototypes, calibration ensures your printer is ready to deliver great results every time.
FAQ
How do I start calibrating my 3D printer?
First, clean your printer and gather key tools like calipers and a feeler gauge. Update the firmware and make sure the print bed is level. These steps help you get accurate calibration results.
How often should I calibrate my 3D printer?
Calibrate every few weeks or after big changes, like using new filament or moving the printer. Regular calibration keeps print quality steady and avoids future problems.
Why is leveling the bed so important?
Leveling the bed keeps the nozzle at the right height from the surface. This stops problems like warped prints, uneven layers, or poor sticking, which can ruin your work.
Can I skip calibrating the extruder?
Skipping extruder calibration can cause too much or too little filament to come out. This weakens prints and lowers detail. Always calibrate the extruder for smooth filament flow and better prints.
What if my prints still fail after calibration?
Look for common problems like clogged nozzles, wrong temperatures, or loose belts. Print test objects to find specific issues. If problems continue, go through each calibration step again to fix errors.
Tip: Write down your calibration settings and changes. This makes solving problems easier later.


