


Bridging plays a crucial role in 3D printing, enabling your printer to create unsupported spans with precision. As the demand for 3D printing grows—76% of users now print over ten parts annually—bridging quality directly impacts cost savings, lead time, and part durability. Poor 3D printing bridging can lead to sagging, stringing, or weak structures, compromising your final product. By applying targeted tips, you can fix bad 3D printer bridging, ensuring strong, smooth, and reliable bridges in your designs.
Key Takeaways
- Reducing the printing temperature stops bridges from sagging. Lower it slowly to find the right setting.
- Turning up the cooling fan speed helps the filament harden. This makes bridges smoother and stronger. Watch for cracks or splits.
- Good-quality filament works better and avoids bridging problems. Use trusted materials for the best results.
Understanding 3D Printing Bridging
What Is 3D Printing Bridging?
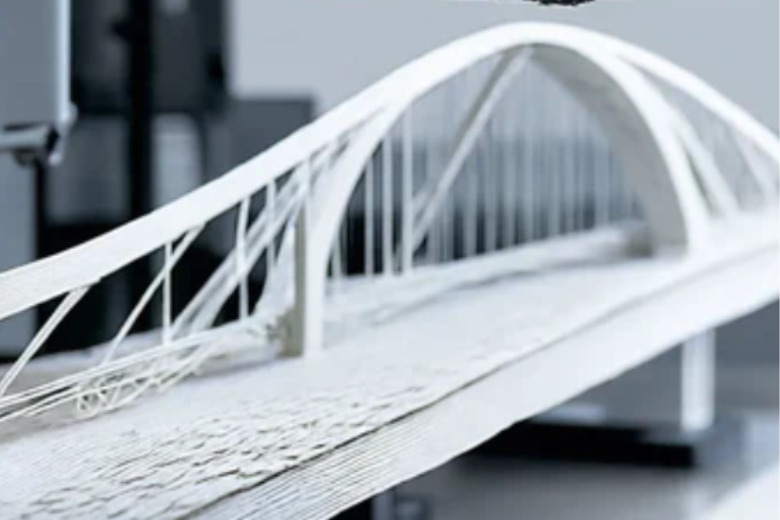
3D printing bridging refers to the process where your printer creates unsupported spans between two points without using additional support material. This technique allows you to produce self-supporting structures, which are essential for designs requiring open spaces or intricate geometries. However, achieving successful bridging depends on precise control of printing parameters.
Common challenges include drooping, sagging, or uneven filament deposition. These issues often arise when the filament does not cool quickly enough or when the extrusion flow is inconsistent. To overcome these problems, you can adjust settings like temperature, cooling, and extrusion multiplier. For example, lowering the printing temperature can reduce sagging, while increasing cooling fan speed helps the filament solidify faster.
Why Is Bridging Important for Perfect Bridges?
Bridging capabilities are crucial for creating perfect bridges in your 3D prints. They enable you to design complex parts with minimal material usage and reduced post-processing. Strong and smooth bridges enhance the structural integrity and aesthetic quality of your prints, making them suitable for functional and decorative applications.
Research highlights the importance of optimizing parameters for better bridging. For instance, a study on carbon fiber-reinforced polymer composites identified challenges like fiber breakage and nozzle clogging, emphasizing the need for precise settings. Another study developed a model to simulate 3D printing processes, showing improved mechanical properties when bridging parameters were fine-tuned.
|
Study Title |
Focus |
Findings |
|---|---|---|
|
Fibre bridging and nozzle clogging in 3D printing of discontinuous carbon fibre-reinforced polymer composites: coupled CFD-DEM modelling |
Fibre motion, distribution, and interaction among fibres |
Identified challenges in fibre breakage and nozzle clogging, emphasizing the need for optimal printing parameters. |
|
Yang et al. study on CFRP composites |
Rheological flow and fibre orientation |
Developed a new coupling model to simulate 3D printing processes, yielding promising results for mechanical properties. |
By understanding and improving your bridging capabilities, you can achieve reliable and high-quality results in your 3D printing projects.
Common Problems with Poor 3D Printing Bridging
Sagging or Drooping Bridges
Sagging or drooping occurs when the filament fails to maintain its shape while spanning unsupported areas. This issue often arises due to high printing temperatures or insufficient cooling. When the filament remains too soft, gravity pulls it downward, leading to uneven bridges.
To address this, you should lower the printing temperature and increase the cooling fan speed. These adjustments help the filament solidify faster, reducing sagging. Additionally, reducing the printing speed can improve the filament's stability during extrusion.
Stringing and Excess Filament
Stringing refers to thin strands of filament that stretch between two points, creating a web-like appearance. This problem typically results from excessive extrusion or improper retraction settings. Stringing not only affects the appearance of your bridges but also complicates post-processing.
You can minimize stringing by fine-tuning the retraction settings in your slicer software. Increasing the retraction distance and speed can prevent excess filament from oozing during non-printing movements. Using high-quality filament with consistent diameter and composition also reduces the likelihood of stringing.
Weak or Brittle Bridge Structures
Weak or brittle bridges compromise the structural integrity of your 3D prints. This issue often stems from poor layer adhesion, insufficient extrusion, or low-quality filament. Brittle bridges may crack or break under stress, rendering the part unusable.
To strengthen your bridges, ensure that your printer's extrusion multiplier is correctly calibrated. This setting controls the amount of filament extruded, ensuring proper layer bonding. Experimenting with bridge-specific settings in your slicer software can also enhance the strength of unsupported spans.
Poor Surface Finish on Bridges
A poor surface finish on bridges can detract from the overall quality of your 3D prints. Rough or uneven surfaces often result from improper printing parameters, such as high layer height or fast printing speed. These imperfections can affect both the aesthetics and functionality of your parts.
Quantitative assessments, such as Ra (average roughness) and Rz (maximum roughness), measure surface finish quality. For example, SLA technology produces smoother surfaces (Ra: 1.5 µm) compared to FDM (Ra: 22.5 µm perpendicular to layers). The table below highlights surface finish metrics for various 3D printing technologies:
|
3D Printing Technology |
Ra (µm) |
Rz (µm) |
|---|---|---|
|
SLS (As printed) |
10-12 |
59.9-69.4 |
|
SLS (After polishing) |
4.4 |
31.1 |
|
DMLS (Bead blasted) |
6-12 |
39.8-69.4 |
|
SLA (As printed) |
1.5 |
10.1 |
|
Carbon DLS (As printed) |
1.22 |
11.1 |
|
FDM (Perpendicular) |
22.5 |
114.9 |
|
FDM (Along layers) |
0.9 |
N/A |
To improve surface finish, adjust parameters like layer height and printing speed. Studies show that lower speeds and optimized orientations can significantly enhance surface quality. For instance, a 90° orientation improves dimensional accuracy, while slower speeds reduce warping and improve overhangs.
|
Study |
Key Parameters |
Findings |
|---|---|---|
|
Garg et al. (2023) |
Orientation, dimensional accuracy, surface roughness |
90° orientation is optimal for accuracy; conflicting effects on quality metrics observed. |
|
Galetto et al. |
Layer height, printing speed, part design |
Higher layer height and speed reduce warpage; low speed beneficial for overhangs. |
|
Cardoso et al. |
Printing speed, layer height, raster angle |
All parameters and their interactions affect dimensional error. |
By addressing these common problems, you can significantly improve the quality of your 3D printing bridging. Understanding the causes of poor bridging and implementing targeted solutions will help you achieve smoother, stronger, and more reliable bridges.
How to Fix Bad 3D Printing Bridging
Lower Printing Temperature
Reducing the printing temperature is one of the most effective tips for improving 3D printing bridging. High temperatures can cause the filament to remain too soft, leading to sagging or drooping bridges. By lowering the temperature, you allow the filament to solidify faster, maintaining its shape as it spans unsupported areas. Start by reducing the temperature in small increments, such as 5°C, and observe the results. This adjustment minimizes deformation while ensuring proper layer adhesion.
Increase Cooling Fan Speed
Increasing the cooling fan speed enhances the thermal performance of your printer during bridging. Faster cooling prevents the filament from sagging under gravity and provides better support for subsequent layers. However, you should monitor for signs of delamination, which may indicate that the filament is cooling too quickly. If this occurs, slightly reduce the fan speed to strike the right balance.
- Benefits of increased cooling fan speed:
- Quick solidification of filament for smoother bridges.
- Reduced sagging and deformation.
- Improved support for longer bridges.
- Reduce Printing Speed
Slowing down the printing speed gives the filament more time to cool and solidify, resulting in stronger and more stable bridges. High speeds can cause the filament to stretch unevenly, leading to poor bridging quality. Reducing the speed also improves the precision of filament deposition, ensuring smoother and more consistent results. Adjust the speed settings in your slicer software and perform a bridging test to determine the optimal speed for your printer.
Adjust Print Orientation
The orientation of your print can significantly impact the quality of your bridges. Aligning the bridge along the shortest span reduces the risk of sagging and improves structural integrity. For example, rotating the model in your slicer software to minimize unsupported distances can lead to better results. This simple adjustment often eliminates the need for additional supports, saving time and material.
Use Support Structures for Long Bridges
For longer bridges, using supports is essential to maintain stability and prevent sagging. Support structures provide a temporary base for the filament, ensuring that it remains in place during printing. When using supports for large bridges, choose settings that make them easy to remove without damaging the print. Many slicer programs offer customizable support options, allowing you to optimize their placement and density.
Experiment with Bridge Settings in Slicer Software
Modern slicer software includes advanced settings specifically designed for bridging. Parameters such as bridge flow rate, fan speed, and bridge speed can be fine-tuned to achieve perfect bridges. Conducting a bridging test with different settings helps you identify the optimal configuration for your printer and filament.
|
Test Feature |
Expected Result |
Actual Result |
Possible Fixes |
|---|---|---|---|
|
Bridging Test |
Smooth, sag-free bridges |
Visible sagging and deformation |
Increase cooling, lower temperature, reduce speed |
|
Stringing Test |
No filament strings |
Minor stringing observed |
Increase retraction distance, adjust travel speed |
|
Sharp Corners Test |
Well-defined sharp edges |
Slight rounding of corners |
Reduce jerk and acceleration settings |
Choose High-Quality Filament for Better Results
Printing with high-quality filament ensures consistent performance and reduces common bridging issues. Low-quality filament often has inconsistent diameter or poor material composition, leading to weak or brittle bridges. Invest in high-quality filament to achieve smoother surfaces, stronger structures, and better overall results. Look for filaments with good thermal stability and minimal impurities to enhance your prints.
Perform Test Prints to Fine-Tune Settings
Test prints are invaluable for fine-tuning your printer's settings and achieving optimal bridging performance. Controlled tests allow you to evaluate specific parameters, such as temperature, speed, and cooling, and make necessary adjustments. For example, a bridging test can reveal issues like sagging or stringing, which you can address by tweaking the relevant settings. Regular testing ensures that your printer remains calibrated and ready to produce high-quality results.
By applying these tips, you can overcome common bridging challenges and create strong, smooth, and reliable bridges in your 3D prints. Experimenting with different settings and using high-quality filament will help you achieve perfect bridges, even in complex designs.
Improving 3d printing bridging requires a combination of precise adjustments and consistent testing. Experiment with temperature, speed, and cooling settings to find the best configuration for your printer. Patience and practice are essential. High-quality filament ensures reliable results. By applying these strategies, you can achieve smooth, strong, and professional-grade bridges in your prints.
FAQ
1. What is the ideal cooling fan speed for bridging?
The ideal cooling fan speed depends on your filament. For PLA, set it to 100%. For ABS, use 50-70% to prevent warping.
Tip: Always test different speeds to find the best setting for your material.
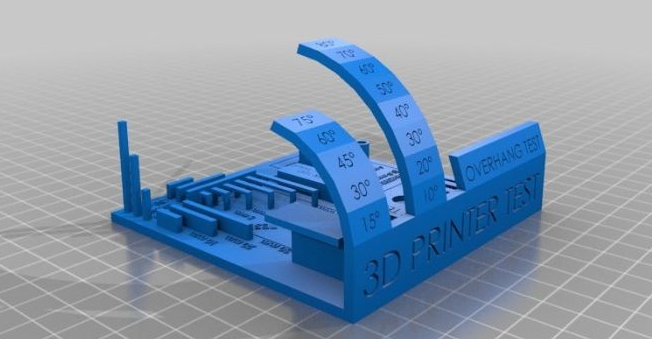
2. How can you test bridging performance effectively?
Use a bridging test model from online repositories like Thingiverse. These models help you evaluate sagging, stringing, and other issues under controlled conditions.
3. Does filament type affect bridging quality?
Yes, filament type significantly impacts bridging. PLA performs better due to its cooling properties, while ABS and PETG may require additional adjustments for optimal results.
Note: High-quality filament ensures consistent performance and fewer bridging issues.


