


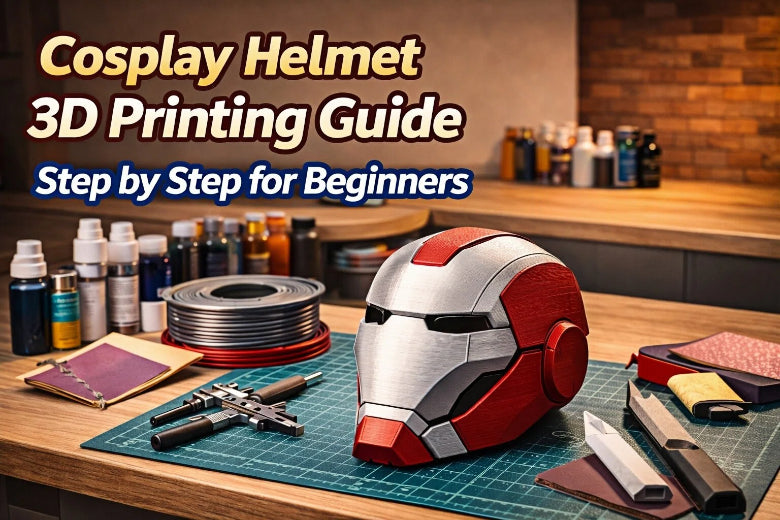
You can create your own cosplay helmet using a cosplay helmet 3D printing guide. Beginners can complete this project from start to finish. This guide ensures you have fun while crafting your helmet. You will feel a sense of pride when you wear your helmet. Many beginners encounter issues with achieving the right fit for their helmets. It is crucial to measure carefully, especially for mandalorian helmets or other intricate designs. Follow each step slowly, take your time, and let your creativity shine.
Key Takeaways
- Pick a 3D printer that has a big build space. This lets you print a full-size helmet in fewer pieces. You will not need to put together as many parts.
- Pick the right filament for your helmet. PLA+ is easy for beginners to use. PETG is stronger and good for outside.
- Measure your head carefully before you print. Use a soft tape measure or a 3D scanner app. This helps your helmet fit well and feel comfy.
- Take your time after printing. Sanding and filling holes makes your helmet look nice. It will look ready for any event.
- Join online groups for help. You can share your work and ask questions. This helps you solve problems and get better at making helmets.
Tools and Materials for Cosplay Helmet 3D Printing Guide
Before you start your cosplay helmet project, you need the right tools and materials. This section helps you choose what works best for beginners and ensures your helmet turns out great.
3D Printer and Build Volume
You need a 3D printer with a large build volume if you want to print a full size helmet in fewer parts. Bigger printers let you print mandalorian helmets and other designs without splitting them. Here is a table showing popular models for cosplay helmet printing:
|
Printer Model |
Build Space (mm) |
Key Features |
|---|---|---|
|
Sovol SV08 MAX |
500×500×500 |
Large build space, fast printing, supports multiple materials, user-friendly. |
|
Creality CR-M4 |
450×450×470 |
Budget-friendly, strong frame, supports multiple materials, good for beginners. |
|
Bambu Lab X1 Carbon |
256×256×256 |
High detail, fast printing, AI-powered tools for monitoring and fixing issues. |
|
Anycubic Kobra Max |
400×400×450 |
Affordable, easy to use, large build space, supports various materials. |
|
Prusa XL |
360×360×360 |
Ideal for pros, large build space, suitable for detailed helmets. |

Filament Choices (ABS, ASA, PLA, PETG)
You must pick the right filament for your helmet. PLA+ works well for beginners because it is easy to print and gives good detail. PETG is tough and resists warping, so it is great for helmets used outdoors. ABS and ASA are strong and heat-resistant. ASA is also UV-resistant and can be smoothed with acetone vapor, making it ideal for durable cosplay helmet projects.
Tip: ABS and ASA are easier to sand and weld, which helps you get a smooth finish on your helmet.
Here is a quick comparison:
- PLA+ is cost-effective and sands well.
- PETG is tough and handles heat better.
- ABS is durable but needs a heated bed and good ventilation.
- ASA is strong, UV-resistant, and easy to smooth.
Slicing Software and Accessories
You need slicing software to prepare your 3d printing files. Choose programs like Cura or PrusaSlicer. Set layer height between 0.16mm and 0.2mm for detail. Use 15-20% infill for strength. Add 'Tree' supports for easy removal. Use a 'brim' for better bed adhesion.
Supplies for Post-Processing
After printing your helmet, you need supplies for finishing. Gather sandpaper, strong glue, filler primer, and paints. Use tools to cut supports, fill cracks, and sand surfaces. Wet sanding gives a smooth finish. Vapor polishing makes your helmet shiny. Prime and paint your helmet for a bright look.
Note: Good post-processing makes your cosplay helmet look professional and ready for any event.
Model Preparation for Cosplay Helmet
Finding and Downloading STL Files
You need a good 3D model to start your helmet project. Many websites offer high-quality STL files for cosplay helmets. Here are some popular places to find them:
- Cults3D has a large collection of helmet STL files. Designers update the site often, so you can find new styles.
- SelfCAD provides a wearable 3D helmet model. This model works well for fans of movies and games, including Star Wars.
Choose a model that matches the look you want. Make sure the file is designed for 3D printing and fits your skill level.
Scaling for Proper Fit
Getting the right fit is important for comfort and safety. You should measure your head before printing. Use a soft tape measure to find the widest part of your head. For the best results, use a 3D scanner app on your phone or a dedicated 3D scanner. These tools give you a full picture of your head shape, not just the size. If you have thick hair, wear a tight cap to get a better scan.
Once you have your measurements, open the STL file in your slicing software. Adjust the scale so the helmet will fit your head. Most programs let you enter exact numbers. Double-check the size before you print. A well-fitted helmet feels comfortable and looks great.
Splitting Models for Small Printers
If your printer has a small build area, you may need to split the helmet into parts. This step helps you print each piece without losing detail or strength. Use free tools like Meshmixer, Blender, or Tinkercad to cut the model. Avoid cutting through detailed areas or thin spots.
|
Best Practice |
Description |
|---|---|
|
Software Tools |
Use Fusion 360, Meshmixer, Tinkercad, Blender, or Cura for model splitting. |
|
Avoid Intricate Cuts |
Do not cut through detailed parts to keep the design safe. |
|
Structural Integrity |
Split at strong points, not at thin or weak areas. |
|
Maximize Printer Bed |
Make sure each part fits your printer bed to save time and material. |
You can find many video tutorials online to help with splitting models. This step makes the cosplay helmet 3d printing guide work for any printer size.
Slicing and Print Settings
Layer Height and Surface Quality
Layer height is one of the most important settings in 3d printing. If you choose a smaller layer height, your helmet will have a smoother surface and show more detail. This is great for designs with lots of curves or fine features. A larger layer height will print faster, but you may see more lines on the surface. For most cosplay helmet projects, a layer height between 0.16 mm and 0.2 mm gives a good balance between quality and speed. You can adjust this in your slicer software before starting your full size helmet.
Tip: Use a smaller layer height for the outer shell and a larger one for hidden or inside parts to save time.
Infill and Strength
Infill controls how solid your helmet is inside. You do not need to make it completely solid. Most people use 5% to 15% infill for helmets. This keeps the helmet strong but not too heavy. Some users print bulky pieces with 10% infill and thin parts with up to 40%. Wall thickness matters more than infill for strength, so focus on having at least two or three perimeter walls.
- 5% to 15% infill works for most helmets.
- Use higher infill for thin or load-bearing parts.
- Make sure your helmet has strong outer walls.
Supports and Model Orientation
Supports help your printer build overhangs and tricky shapes. The way you place your helmet model on the print bed changes how many supports you need. Try different orientations to use fewer supports and make cleanup easier. Sometimes, changing the angle lets you fit a large piece on your printer or reduces wasted material. Too many supports can make the helmet harder to finish and use more filament.
- Test different orientations in your slicer.
- Place flat parts on the bed when possible.
- Fewer supports mean less sanding later.
Print Time and Filament Estimates
Before you print, check how long the job will take and how much filament you need. Most slicer programs show this information after you set your print settings. You can also use a filament usage calculator online. These tools help you plan and make sure you have enough material for your cosplay helmet 3d printing guide.
Note: Always check print time and filament needs before starting a big project. This helps you avoid running out of filament in the middle of a print.
Printing and Support Removal
Starting the Print and Monitoring
You have set up your model and sliced your file. Now you are ready to start printing your helmet. Watch the first few layers closely. Make sure the filament sticks well to the bed. Good bed adhesion helps prevent warping and failed prints. Check that the extruder moves smoothly and lays down even lines. If you see curling corners or hear strange noises, pause the print and check your setup.
Keep an eye on the printer during the first hour. Look for signs of trouble, such as gaps, uneven layers, or strong smells. If you use ABS, make sure your room has good ventilation. A closed enclosure with a filter works best for handling fumes. Check the Z-offset every few prints. This keeps the nozzle at the right height and helps you get clean layers. Do a full mesh recalibration once a month to keep your printer in top shape.
Here are some common print problems and how you can fix them:
- Uneven layers or gaps: Check the extruder and make sure the filament feeds smoothly.
- Layers splitting apart: Raise the nozzle temperature or adjust the cooling fan.
- Weak or fragile prints: Increase the temperature or tighten the extruder.
- Prints look messy or have blobs: Lower the flow rate in your slicer.
- Wrong size: Measure your helmet and adjust the scale in your slicer.
- Small holes or gaps: Fill them with epoxy putty or use a 3D pen.
Tip: Always check print time and filament levels before you start. This helps you avoid running out of material during a big cosplay helmet project.
Removing Supports Safely
When your print finishes, let the helmet cool down before you touch it. Warm plastic bends and breaks easily. Wait until the bed and the helmet feel cool to your hand. Remove the helmet gently from the print bed. Use a spatula or scraper if needed.
Supports help your printer build overhangs, but you need to remove them carefully. Start with a small chisel or a pocket knife. Work slowly and do not force the tool. For detailed areas, use needle files. Pick the right shape for the surface you are cleaning. Sand the rough spots with coarse sandpaper first, then switch to finer grits for a smooth finish. Cabinet scrapers work well for large, flat areas, especially if you use PLA. They create less heat than sandpaper and help you avoid melting the plastic.
Note: Take your time with support removal. Rushing can damage the surface and make it harder to assemble pieces later.
Cooling and Handling Prints
Proper cooling is important for strong prints. Let your helmet sit for at least 30 minutes after printing. This helps the plastic harden and keeps the shape true. Do not try to assemble or paint the helmet while it is still warm.
Handle the helmet with clean hands. Check for any sharp edges or leftover supports. Sand these areas before you assemble the parts. If you printed your helmet in several pieces, lay them out and check the fit. Make sure each part lines up before you glue or weld them together. This step makes it easier to assemble and gives you a better final result.
Tip: If you find small gaps or rough spots, fill them before you assemble. This saves time during finishing and helps your cosplay helmet look smooth and professional.
You have now finished the printing and support removal stage. You are ready to assemble your helmet and move on to the next steps in your cosplay helmet 3d printing guide.
Assembly and Fitting
Joining Parts (Glue, Welding)
When you need to assemble pieces of your helmet, you want strong bonds that last. CA glue works well for most 3D printed parts. Before you glue, roughen both surfaces with sandpaper. This helps the glue stick better. For extra strength, add a thick bead of CA glue along the seam. If you use flexible materials like TPU, vibrational welding can create a strong, airtight bond without chemicals.
|
Technique |
Material Used |
Bonding Method |
Result |
|---|---|---|---|
|
CA Glue |
PLA, ABS, ASA |
Roughen, apply glue |
Strong, quick bond for most plastics |
|
Thick CA Bead |
PLA, ABS, ASA |
Extra bead on seam |
More durable for joints that get handled often |
|
Vibrational Welding |
TPU-95 (PolyFlex) |
Local melting at interface |
Uniform, airtight, and mechanically strong bond |
Reinforcing for Durability
To make your helmet last, reinforce the seams from the inside. You can use fiberglass resin for extra strength. Apply epoxy along the seam lines to seal and harden the joints. Some builders use printed strips that you can heat-weld in place for even more support. For the best results, combine fiberglass cloth with epoxy to create a mesh that holds everything together.
- Use fiberglass resin for strong, lasting seams.
- Apply epoxy generously along all seam lines.
- Add printed strips and heat-weld them for extra support.
Using a Heat Gun for Fit
A heat gun helps you shape your helmet for a comfortable fit. Warm the plastic gently and press it to match your head shape. Move the heat gun in circles to avoid overheating one spot. Always wear gloves to protect your hands. If you need to adjust the fit after you assemble, reheat the area and reshape it as needed.
Note: Take your time with fitting. A well-shaped helmet feels better and looks more professional.
You have now learned how to assemble pieces, reinforce seams, and use a heat gun for the perfect fit. These steps help your helmet stay strong and comfortable for every cosplay event.
Finishing and Painting Cosplay Helmet
Sanding and Smoothing
You want your helmet to look smooth and professional. Start sanding with 180-200 grit sandpaper. Move the sandpaper perpendicular to the layer lines. This helps remove the worst lines from the print. After you finish with the first grit, switch to 200, then 320, and finally 400 grit. Each step removes scratches from the previous one. Wet sanding with 600 grit gives you a polished surface. Wet sanding works well for materials like PLA and ABS.
Apply filler primer before sanding. Raw PLA does not sand well. Filler primer creates a workable surface. Spray a coat, let it dry, and sand with 320 grit. Repeat this process two or three times. Filler primer fills minor imperfections and makes the helmet easier to finish.
Tip: Sanding takes time, but it makes your helmet look like it came from a movie set.
Filling Gaps and Seams
You may see gaps or seams after assembling your helmet. Fill these areas for a seamless look. Choose the right filler for your project. Here is a table showing popular fillers:
|
Product Name |
Description |
Sandable |
Notes |
|---|---|---|---|
|
Green Stuff |
Good for sculpting but does not sand well. |
No |
Better for detailed work rather than filling gaps. |
|
Liquid Green Stuff |
Water-based but flakes when sanded. |
No |
Decent for filling but not the best option for smooth finishes. |
|
Sprue-Goo |
Liquid plastic, great for smaller gaps, requires multiple applications. |
Yes |
Thin consistency, needs drying time between layers. |
|
Mr Hobby Dissolved Putty |
Goes on in globs, reduces down to a hard surface that can be sanded smooth. |
Yes |
Requires more application than expected but provides a solid finish. |
Use sandable fillers like Sprue-Goo or Mr Hobby Dissolved Putty for best results. Apply the filler to the seam, let it dry, and sand it smooth. Repeat if needed. Avoid fillers that flake or do not sand well.
Note: Filling and sanding seams makes your helmet strong and gives it a clean look.
Priming, Painting, and Sealing
You need to prime and paint your helmet to protect it and make it look amazing. Use a filler primer with high solids content, such as Rustoleum Grey Filler Primer. This primer fills surface texture and sands easily. Spray a coat, sand with 220 grit, and let it dry. Repeat until you get a smooth finish.
"To achieve a smooth surface on 3D printed cosplay helmets, it is recommended to use a 'Filler Primer' with high solids content, such as Rustoleum Grey Filler Primer. This primer is effective for filling surface texture and can be sanded without gumming up. The process involves multiple cycles of sanding with 220 grit sandpaper, applying primer, and allowing it to dry thoroughly before repeating until a smooth finish is achieved."
Choose paints made for plastics. Acrylic spray paints work well and come in many colors. Spray light coats and let each coat dry. Seal your helmet with a clear coat to protect the paint. Use a matte or gloss finish depending on your design.
Tip: Always paint in a well-ventilated area. Wear a mask to protect yourself from fumes.
Adding Details and Accessories
You can add custom details to make your helmet unique. Use EVA foam for lightweight accessories. Shape the foam with a heat gun. Glue pieces with super glue or hot glue. Sand the foam for extra smoothness. Prime it with ModPodge and paint it with brushes for detail.
- Prepare your foam and tools.
- Heat shape the foam to match your pattern.
- Sand and prime the foam for a smooth finish.
- Paint details with small brushes.
Add visors, lights, or decals to finish your helmet. Attach these accessories after painting and sealing. Make sure everything fits well and stays secure.
Note: Custom details help your helmet stand out at any cosplay event.
Common Mistakes and Tips
Scaling and Fit Issues
Many beginners print a helmet that does not fit. You should always measure your head before you start. Double-check the scale in your slicer. Print a small test ring to check the fit before printing the full helmet. If the helmet feels tight, adjust the scale by a few percent and try again. Remember, it is easier to make a helmet bigger than to fix one that is too small.
Print Failures and Solutions
Print failures can happen to anyone. You might see warping, stringing, or layer shifts. To avoid these problems, keep your printer clean and level the bed before each print. Use the right temperature for your filament. If your print stops halfway, check the filament spool and make sure nothing blocks the path. When you see rough surfaces, slow down the print speed or lower the layer height. Good lighting helps you spot problems early.
Assembly and Finishing Pitfalls
Sometimes, parts do not line up or glue does not hold. Dry-fit all pieces before gluing. Sand the edges so they fit together well. Use the right glue for your material. If you see gaps, fill them with putty and sand smooth. When painting, use thin coats to avoid drips. Let each layer dry before adding the next. Rushing can ruin your hard work.
Community Support and Resources
You do not have to solve every problem alone. Many people share their 3d printing tips online. Join forums like Reddit’s r/3Dprinting or cosplay groups on Facebook. Watch tutorial videos on YouTube for step-by-step help. Ask questions and share your progress. The community can help you fix mistakes and improve your skills.
You now know how to 3D print your own cosplay helmet from start to finish. Each step helps you build skills and confidence. Start your project today and try new designs. You will feel proud when you wear something you made yourself. Take your time, enjoy the process, and share your results with others. Your creativity can inspire more people to join the cosplay community.
FAQ
How do I measure my head for a cosplay helmet?
Use a soft tape measure. Wrap it around the widest part of your head, just above your eyebrows and ears. Write down the measurement. Enter this number in your slicer to scale the helmet model.
What filament is best for beginners?
PLA+ is easy to print and sands well. You can use PETG for more durability. ABS and ASA work for advanced users. Choose PLA+ if you want simple, smooth results.
Can I print a helmet with a small 3D printer?
Yes! Split the helmet model into smaller parts using free software like Meshmixer or Tinkercad. Print each piece separately. Glue or weld the parts together for a full helmet.
How do I get a smooth finish on my helmet?
Sand the helmet with different grits. Start with coarse sandpaper, then use finer grits. Apply filler primer and sand again. Repeat until the surface feels smooth. Paint and seal for a shiny look.
Where can I find help if I get stuck?
Join online forums like Reddit’s r/3Dprinting or cosplay groups on Facebook. Watch YouTube tutorials. Ask questions and share your progress. The community will help you solve problems and improve your skills.


