


When you see 3d print layers shifting, you might feel frustrated. You want your prints to look clean and professional. Luckily, you can fix most 3d printer layer shifting issues at home with basic checks. You do not need advanced skills or expensive tools. Many 3d printing problems have simple solutions. With some troubleshooting and regular care, you can enjoy smoother 3d printing and better results every time.
Key Takeaways
- Layer shifting happens when printed layers misalign, causing crooked or stepped prints that ruin quality.
- Check and tighten belts and pulleys regularly to prevent slipping and keep layers aligned.
- Keep your printer clean and lubricated to reduce friction and ensure smooth movement of parts.
- Calibrate your printer often, including bed leveling and motor settings, to maintain accurate printing.
- Place your printer on a stable surface and reduce print speed to avoid vibrations and motor overload that cause shifting.
What Is Layer Shifting?
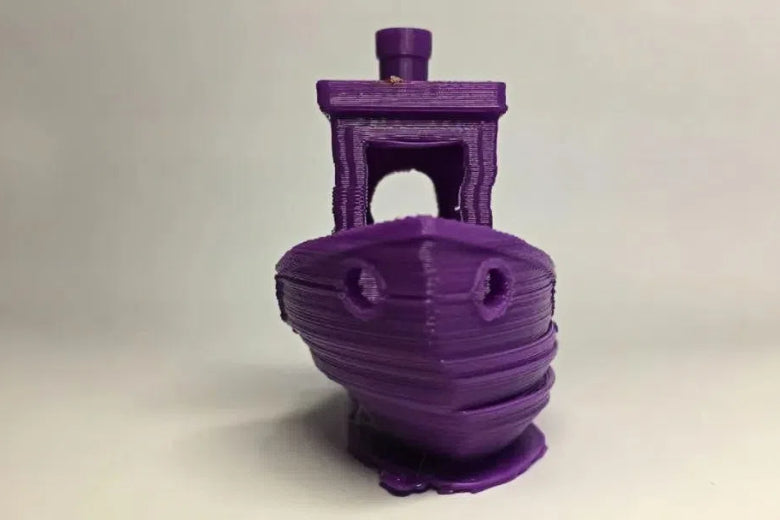
Layer shifting in 3D printing happens when the layers of your print do not line up as they should. You see this as a sudden movement or misalignment in the printed object. Industry experts define layer shifting as the misalignment of printed layers, causing horizontal or vertical displacement during the printing process. This misalignment can ruin the look and strength of your print. You may notice that the object no longer matches the original design. Layer shifting can result from mechanical faults, software errors, or outside disturbances like vibrations. If you want strong and accurate prints, you need to understand and fix these issues.
Signs of Layer Shifting
You can spot 3d print layers shifting by looking for certain clues. Professionals say the most obvious sign is a sudden horizontal shift in the layers. This shift stays for the rest of the print unless you stop and fix the problem. You might see the layers step out of place, making the print look crooked or jagged. Sometimes, the top layers look fine, but the lower ones show clear separation. This separation often appears as a visible offset or a stair-step effect on the sides of your print. You may also notice that the print surface moves or the layers do not stack up straight. These signs point to a layer shifting problem, which is a common issue for many users.
Tip: If you see layer separation or shifting, pause your print and check for loose belts or unstable parts right away.
Why It Happens
Several factors can cause 3d print layers shifting. Most often, mechanical problems like loose belts, worn pulleys, or unstable build plates lead to misalignment. Electrical issues, such as stepper motors skipping steps or overheating, can also cause the print head to miss its position. Sometimes, the problem comes from the model file itself or from voltage instability. Even small bumps or vibrations can make the print platform move, leading to layer separation. You can see the main causes in the table below:
|
Cause Category |
Description |
|---|---|
|
Timing Pulley Issues |
Loose or tight pulleys cause slipping, leading to misaligned layers. |
|
Build Plate Stability |
An unstable plate can move, causing layers to shift out of place. |
|
Timing Belt Adjustments |
Worn or loose belts skip teeth, while tight belts strain motors and bearings. |
|
Electronic Component Cooling |
Overheating stepper drivers can cause skipped steps and layer shifting. |
You can prevent most issues by checking your printer’s calibration, securing all parts, and keeping the machine on a stable surface. Regular maintenance helps you avoid layer separation and keeps your prints looking sharp.
Causes of 3D Print Layers Shifting
Mechanical Issues
You often see 3d print layers shifting because of mechanical problems. Loose or unevenly tensioned timing belts on the X and Y axes are a main cause. Over time, these belts stretch and lose tension, which leads to sudden shifts during a print. If you hear strange vibrations or rattling, check your belts and pulleys right away. Sometimes, overtightening belts can break them, so always aim for balanced tension. Regularly lubricate motion rods and check for any loose screws or misaligned parts. Even if you maintain your printer well, you might still face issues like layer separation or poor bed adhesion if a part slips out of place. Keeping spare belts and tools on hand helps you fix problems quickly and avoid downtime.
Electrical Problems
Electrical issues can also cause 3d print layers shifting. Overheating stepper motor drivers or the mainboard may make motors skip steps, which leads to layer shifting or layer separation. Dust buildup and poor ventilation can make these problems worse. Incorrect voltage or current settings for stepper motors can cause under extrusion, over extrusion, or even sudden stops. To prevent these issues, clean your electronics regularly and make sure your printer has good airflow. You can also install extra cooling fans or use thermal pads to help with heat dissipation. If you notice your print suddenly shifting or stopping, check the electronics for signs of overheating.
Environmental Factors
Your printing environment plays a big role in print quality. Vibrations from nearby machines or an unstable table can cause 3d print layers shifting and layer separation. If your printer sits on a wobbly surface, you may see poor bed adhesion or even 3d print warping. Always place your printer on a solid, level surface. Avoid printing near heavy equipment or in areas with lots of foot traffic. Even small bumps can affect bed adhesion and layer bonding, leading to print issues.
Calibration and Slicer Settings
Incorrect calibration or slicer settings often lead to print issues like under extrusion, over extrusion, and poor bed adhesion. If your bed is not level, you will struggle with adhesion and may see layers shifting or separating. Wrong temperature or speed settings in your slicer can also cause problems. For example, printing too fast can cause the extruder to skip steps, resulting in layer shifting. Always double-check your calibration and slicer profiles before starting a new print. Test with small calibration prints to catch issues early and improve layer bonding.
Tip: Good bed adhesion is the foundation for every successful print. Take time to level your bed and adjust your slicer settings for the best results.
How to Fix Layer Shifting
Layer shifting can ruin your 3D prints, but you can fix layer shifting with the right troubleshooting steps. Follow these easy solutions to get your printer back on track and enjoy smooth, accurate prints.
Check Belts and Pulleys
Start your troubleshooting by checking the belts and pulleys. Loose or worn belts often cause layer shifting. You should check and tighten belts and pulleys on both the X and Y axes. If you hear rattling or see slack, adjust the belts until they feel firm, like a guitar string. Avoid overtightening, which can strain the motors. Inspect the pulleys for any movement. Tighten the grub screws on the pulleys to prevent slipping. If you notice any fraying or damage, replace the belts right away.
Tip: Adjust the belts regularly as part of your troubleshooting routine. This helps prevent sudden shifts during a print.
Lubricate and Clean Motion Parts
Dust and debris can build up on rods and bearings, causing resistance and layer shifting. Clean the motion parts with a soft cloth and apply a small amount of lubricant to the rods and lead screws. This reduces friction and helps the print head move smoothly. Make sure you do not use too much lubricant, as it can attract more dust. Regular cleaning and lubrication are simple troubleshooting techniques that keep your printer running well.
Inspect Stepper Motors
Stepper motors control the movement of your printer. If they malfunction, you may see skipped steps, jittering, or even hear excessive noise. These signs often point to electrical problems that cause layer shifting. Look for:
- Skipped steps from incorrect voltage or current settings.
- Overheating stepper drivers.
- Excessive step rates that cause torque loss.
- Motor stalls or rough running.
- Intermittent operation or missed microsteps.
To fix layer shifting, calibrate the stepper motor voltage (VREF) using a multimeter. Make sure the motors have enough torque but do not overheat. Add cooling fans if needed. Lower the print speed if you notice the motors struggling. These troubleshooting steps help keep your motors running smoothly.
Secure Bed and Frame
A wobbly printer can cause layers to shift. Secure the print bed and frame by tightening all screws and bolts. Check the leveling screws on the bed and make sure the bed does not move during printing. Place your printer on a solid, level surface to reduce vibrations. If you see the print bed shaking, move your printer to a more stable location. This simple step can fix layer shifting and improve print quality.
Adjust Print Speed
Printing too fast can overload the motors and cause missed steps. To fix layer shifting, set your print speed to safe values:
- ABS: 40-60 mm/s
- PETG: Up to 60 mm/s
- TPU: 15-30 mm/s
Reduce print speed and acceleration by 20-50% from custom profiles. Lower the "Jerk" and "Acceleration" settings for the X and Y axes. Use default profiles for your material as a starting point. These troubleshooting steps help prevent motor overload and lost steps. Always use proper speed and temperature for your chosen filament.
Prevent Collisions
Collisions between the print head and the print can cause sudden layer shifts. Watch for these common causes:
- Stiff or blocked axles.
- Loose pulleys or screws.
- Belt issues, such as rubbing or improper tension.
- Filament curling or warping.
- Nozzle obstructions or stringing.
- Unstable build plate.
Check for any obstructions before starting a print. Level the 3d printer bed and inspect the nozzle for clogs. Make sure the filament feeds smoothly. These troubleshooting steps help prevent collisions and keep your prints aligned.
Calibrate Printer
You need to calibrate your 3d printer regularly to avoid layer shifting. Start by leveling the 3d printer bed and checking that the X, Y, and Z axes move the correct distances. Adjust the steps per millimeter (SPM) for each axis. Calibrate the extruder to ensure consistent filament feed. Set the Z-axis offset for proper first layer adhesion. Tighten belts and screws, lubricate moving parts, and check for obstructions. These calibration steps are essential troubleshooting actions that keep your printer accurate.
Note: Level the 3d printer bed before every important print. Good adhesion prevents shifting and warping.
Test with Calibration Prints
Calibration prints help you diagnose and fix layer shifting. Use test prints like speed towers, acceleration tests, and temperature towers. Watch how your printer behaves at different speeds and temperatures. If you see shifting, adjust the settings and try again. Perform a frame check by tightening nuts and bolts, adjusting V-roller tension, and lubricating moving parts. Adjust the belts to the correct tension. Calibrate the stepper motor driver current to balance torque and temperature. Use these troubleshooting prints to catch problems early and fine-tune your printer.
Tip: Regularly use calibration prints as part of your troubleshooting routine. This helps you spot issues before they ruin a big print.
By following these troubleshooting steps, you can fix layer shifting and enjoy reliable, high-quality prints. Make these checks a regular part of your maintenance routine for the best results.
Preventing 3D Printing Problems
Maintenance Tips
You can avoid most 3d printing problems by following a regular maintenance schedule. Manufacturers recommend these steps to keep your printer running smoothly and prevent issues like layer shifting, under extrusion, and over extrusion:
- Recalibrate and level the build plate before every print. This step ensures even layers and strong adhesion.
- Remove dust and debris from the build plate and nozzle. Clean surfaces help with bed adhesion and prevent poor bed adhesion.
- Tighten all screws and bolts. Loose parts can cause instability and lead to shifting or other issues.
- Lubricate moving parts such as rods and lead screws. This reduces friction and noise, helping the printer move smoothly.
- Check and adjust belt tension often. Proper tension prevents the printhead from slipping and keeps layers aligned.
- Clean and lubricate the printer every 30 minutes to 1 hour during long print sessions.
- Perform deep cleaning, firmware updates, and component inspections every 1-2 hours as needed.
- Calibrate stepper motors (E-steps) to ensure correct movement on all axes.
- Inspect and tighten motor fasteners and set-screws to secure pulleys.
- Keep firmware and software updated for the best performance.
Tip: If you establish a routine for reliable 3d prints, you will catch small problems before they become big issues.
Best Practices
You can prevent 3d printing problems by using proven best practices. Experienced users recommend these habits to improve adhesion, reduce shifting, and avoid common issues:
- Level the bed regularly and place your printer on a stable surface. This step improves bed adhesion and prevents vibrations that cause shifting.
- Use adhesives like glue sticks, hairspray, or a heated bed to boost adhesion and stop the print from moving.
- Inspect and tension timing belts to avoid slipping or skipping. This keeps layers aligned and prevents layer misalignment.
- Avoid collisions by checking bed leveling, adjusting print settings to prevent over extrusion, and enabling Z-hop to lift the nozzle over the print.
- Keep firmware and slicing software updated. Updates optimize motion paths and reduce risks of mechanical interference.
- Reduce print speed for more precise movements. Slower speeds help prevent under extrusion, over extrusion, and layer shifting.
- Use adhesives or a heated bed to address warping and improve first layer adhesion. This step is key for preventing warping and poor bed adhesion.
Good adhesion is the foundation of every successful print. Take time to prepare your bed and use the right adhesive for your material.
By following these maintenance tips and best practices, you can prevent most 3d printing problems. You will see fewer issues with adhesion, under extrusion, over extrusion, and shifting. Consistent care and attention help you achieve high-quality prints every time.
You can fix most 3D printer layer shifting problems with simple steps and regular care. Start by tightening belts, lowering print speed, and checking your print profiles. Try these expert tips:
- Reduce layer height and increase nozzle temperature for better adhesion.
- Use an enclosure to keep temperature stable.
- Enable Z hop and adjust retraction settings to prevent collisions.
Keep learning through online courses, video tutorials, and community forums. A troubleshooting checklist helps you catch issues early and improve your results every time.
FAQ
What causes sudden layer shifting during a print?
You often see sudden layer shifting when belts slip, pulleys loosen, or motors overheat. Vibrations or bumps can also move your printer. Check all mechanical parts and secure your printer on a stable surface.
How do I know if my belts are too tight or too loose?
Press the belt gently. If it feels floppy, it is too loose. If it feels hard to press or makes a high-pitched sound, it is too tight. Aim for a firm, slight bounce.
Can slicer settings affect layer shifting?
Yes. High print speeds or acceleration can cause motors to skip steps. Lower your speed and acceleration in your slicer settings to help prevent shifting.
Should I stop a print if I notice layer shifting?
You should pause or stop the print right away. Fix the problem before starting again. Continuing may waste filament and time.
How often should I perform maintenance to prevent layer shifting?
Check belts, screws, and lubrication every few prints. Clean your printer weekly. Perform a full inspection and calibration once a month for best results.


