


You want your 3D prints to look good each time. Learning how to replace nozzle is essential for keeping your printer working well. Safety is important because jams and loose thermistors can start fires. When you switch filaments, the nozzle makes tiny particles, so always use the right tools and follow safe steps when figuring out how to replace nozzle.
Key Takeaways
- Always put on heat-resistant gloves and safety glasses when you change the nozzle. These protect you from getting burned or hurt.
- Look for signs that the nozzle is worn out, like rough prints or lots of clogs. Changing the that part can make your prints better and stop bigger problems.
- Make sure your workspace is neat and has good airflow. A clean area helps you stay safe and work well when you change the nozzle.
3D Printer Nozzle Basics
What Does the Nozzle Do?
You may ask what the nozzle does in a 3D printer. The nozzle lets melted filament come out in a controlled way. It shapes the plastic as it leaves the printer. This changes how smooth your print looks and how fast it prints. The nozzle’s material and size also change how the filament comes out. They affect the detail of your finished object. A smaller nozzle gives you more detail, but printing takes longer. A bigger nozzle prints faster, but you lose some detail.
|
Nozzle Size |
Print Quality |
Print Speed |
|---|---|---|
|
Smaller |
Higher resolution, finer details |
Longer print times |
|
Larger |
Lower resolution, less detail |
Faster print speeds |
When to Replace the Nozzle
You should change the nozzle often to keep your printer working well. Most people swap brass nozzles after 500 hours of printing. If you use strong filaments or print a lot, you may need to change it sooner. Special nozzles like hardened steel or ruby last longer. They work better with rough materials. These nozzles cost more, but they can save money later.
|
Maintenance Task |
Recommended Interval |
|---|---|
|
every 500 print hours |
|
|
Replace build surface |
if adhesion degrades |
|
Deep clean hotend |
if clogged |
Signs of Nozzle Wear
You can tell if a nozzle is worn by looking for these things:
- Prints look rough or have blurry edges.
- The nozzle clogs a lot, even with clean filament.
- You see scratches or uneven spots on the nozzle tip.
- The printer makes thin walls or leaves gaps in prints.
- Filament leaks out or gets partly blocked.
If you see these problems, your nozzle may be clogged or damaged. Changing the nozzle stops bigger problems and keeps your prints looking good.
Tools and Safety for Nozzle Change
Tools Needed
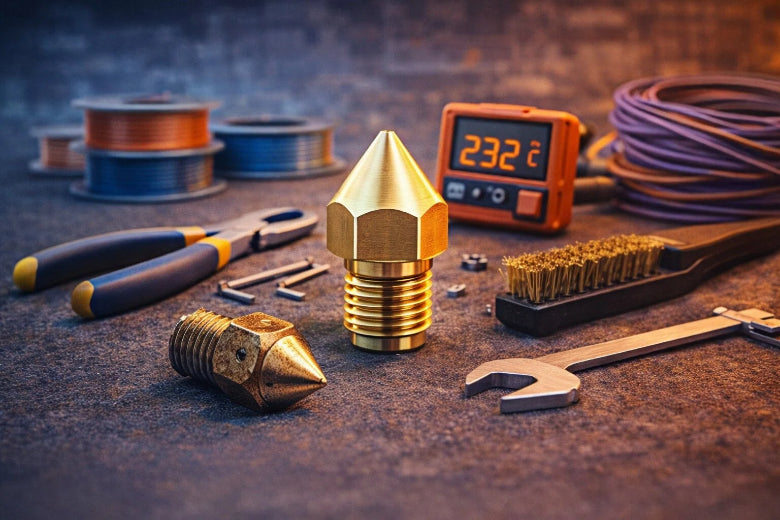
Before you start, gather all the tools you'll need for changing your 3D printer nozzle. Having everything ready makes the job much easier. Here’s a handy list of tools for changing 3d printer nozzle:
- Pliers or a wrench for gripping the heater block
- Socket or ratchet for loosening and tightening the nozzle
- A new nozzle that matches your printer
- Heat-resistant gloves to protect your hands
You want to keep these tools close by. This way, you won’t have to search for them while the nozzle is hot.
Safety Gear and Preparation
Safety comes first when you work with a hot nozzle. You should always wear gloves, especially heat-resistant ones. These protect your hands from burns. Many manufacturers recommend gloves as the most important safety gear. Never touch the nozzle or heater block with bare hands after heating. Double-check that you have all your tools and safety gear before you begin.
Tip: Let others in your space know you’re working with hot equipment. This helps everyone stay safe.
Workspace Setup
Set up your workspace before you start. Organize your area so you have zones for printing, cleaning, and storing tools. Label your items and use small boxes or trays to keep things tidy. Good ventilation is important. Open a window or use a fan to keep fresh air moving. This helps clear out any fumes from the hot nozzle. Keep a fire extinguisher nearby, just in case. Clean up spills right away and wipe down your workspace often. This keeps dust and mess away from your printer.
If you follow these steps, you’ll have a safe and smooth nozzle change every time.
How to Replace Nozzle: Step-by-Step
Changing your 3D printer nozzle might sound tricky, but you can do it safely and easily if you follow this step by step guide. Let’s walk through the nozzle replacement process together.
Prepare Printer and Workspace
Before you start, get your printer and workspace ready. This helps you avoid accidents and makes the job smoother.
- Turn off and unplug your 3D printer. This keeps you safe from electrical shock.
- If you just finished printing, let the nozzle cool down before you touch anything.
- Put on safety glasses and heat-resistant gloves. These protect your hands and eyes from hot parts and debris.
- Work in a well-ventilated area. Open a window or use a fan if you use any cleaning sprays or heat guns.
- Keep your workspace clean and organized. Lay out your tools and new nozzle so you don’t have to search for them later.
Preheat the Hotend
You need to heat the hotend before you unscrew the nozzle. This step is important because a cold nozzle can get stuck and damage your printer.
- Set your printer to preheat the hotend to about 230–250°C. Most filaments melt at this range, so it works for most nozzles.
- Wait until the printer reaches the right temperature. You can check this on your printer’s screen.
Never try to unscrew the nozzle when it’s cold. You could strip the threads or break the hotend.
Unload Filament
Now you need to remove the filament from your printer. This step keeps melted plastic from making a mess during nozzle replacement.
- Use your printer’s menu to unload the filament. If your printer does not have an unload option, gently pull the filament out while the hotend is still warm.
- Cut off any melted or stringy ends from the filament. This makes it easier to reload later.
Always remove the filament before you start to replace the nozzle. This prevents clogs and keeps your printer clean.
Unscrew Old Nozzle
This is the main part of how to replace nozzle. Take your time and follow these steps for a safe and easy removal.
- Put on your heat-resistant gloves.
- Hold the heater block steady with pliers or a wrench. This keeps the hotend from twisting and breaking wires.
- Use a socket or ratchet to unscrew the nozzle. Turn it counterclockwise while the hotend is hot.
- Apply steady, gentle pressure. Do not force the nozzle at an angle. If it feels stuck, let the hotend heat up a bit more.
Install New Nozzle
Now you’re ready to install a new nozzle. This part is just as important as removing the old one.
- Screw the new nozzle in by hand until it feels snug. This is called finger-tight.
- Heat the hotend to 250°C if it isn’t already there.
- Use your wrench to tighten the nozzle just a little more—about 0.5 N·m of torque. Don’t over-tighten, or you could strip the threads.
- Make sure the nozzle sits flush against the heater block.
Test Filament Flow
After you finish the nozzle replacement, you need to test the new nozzle to make sure everything works.
- Heat the nozzle to 240–250°C.
- Reload your filament and try to extrude some by hand.
- Watch for smooth, steady flow. If the filament does not come out, you might have a clog.
- If you see a blockage, try a cold pull to clear it before you print again.
- Here’s a quick checklist to help you check and test the new nozzle:
- Level the print bed and adjust the Z-offset for a good first layer.
- Calibrate your E-steps by measuring and extruding 100 mm of filament.
- Adjust the extrusion multiplier or flow rate if you changed nozzle sizes.
|
Issue |
Possible Cause |
How to Fix It |
|---|---|---|
|
Cold block or partially clogged nozzle |
Heat to 240–250°C and extrude manually. Try a cold pull if needed. |
Safety Tips and Mistakes to Avoid
You want to stay safe and avoid common mistakes during nozzle replacement. Here are some things to watch out for:
|
Common Mistakes |
Description |
Prevention Steps |
|---|---|---|
|
Using the wrong nozzle |
Not all nozzles fit every printer. |
Always check compatibility before you install a new nozzle. |
|
Forcing a cold nozzle |
Trying to unscrew the nozzle when it’s cold. |
Always heat the hotend before you unscrew the nozzle. |
|
Over-tightening |
Tightening the nozzle too much. |
Use gentle pressure and stop at 0.5 N·m torque. |
|
Skipping PPE |
Not wearing gloves or safety glasses. |
Always use protective gear when working with hot parts. |
|
Ignoring regular checks |
Not inspecting your nozzle often. |
Make nozzle checks part of your regular maintenance routine. |
Note: Personal protective equipment (PPE) helps, but you still need to use the right tools and follow safe steps.
Troubleshooting Issues
Sometimes things don’t go as planned. If you have trouble after you replace the nozzle, try these steps:
- Check the filament path. Make sure the filament feeds smoothly and isn’t tangled.
- Inspect and clean the nozzle. If you see a clog, try to clear it or replace the nozzle again.
- Verify the print temperature. Make sure it matches your filament type.
- Level the bed and set the correct Z-offset. This helps the filament stick to the bed.
- Adjust the extruder tension. Too loose or too tight can cause feeding problems.
- Run an extrusion test. Manually feed filament to see if it comes out smoothly.
If you follow these steps, you’ll have a smoother nozzle replacement and better prints. Now you know how to replace nozzle safely and easily!
How to Change 3D Printer Nozzle: Tips & Maintenance
Preventing Damage
You want your 3D printer to last, so preventing damage during nozzle changes matters. Here are some easy ways to protect your nozzle:
- Always heat the hotend before you remove the nozzle. This keeps the metal from gripping too tightly.
- After you install the new nozzle, heat it again and give it a final snug twist. This step helps prevent leaks.
- Check that your printer is cool before you start. Make sure your tools fit well and clear away any leftover filament.
- Never force a cold nozzle. You could strip the threads or crack the heater block.
Regular Maintenance Advice
Keeping your nozzle clean and well-maintained improves print quality and extends its life. Here’s how to change 3d printer nozzle and keep it working smoothly:
- Clean the nozzle after every big print job or when you notice minor clogs.
- Use a heated brass wire brush or a cleaning needle to clear out blockages.
- Try a cold pull to remove deep debris from inside the nozzle.
- Cover the heater block with a silicone sock to keep the nozzle area cleaner.
- Replace brass nozzles every six months if you use standard materials. Change them more often for abrasive filaments.
- Hardened steel nozzles last longer and resist wear.
- Set a cleaning schedule. Adjust it if you see more clogs.
- Inspect the nozzle and print bed daily for debris. Clean the print bed and check belt tension weekly.
- Soak the nozzle in warm, soapy water for 10–15 minutes for a deep clean.
You can change your 3D printer nozzle with confidence. Just follow these steps: heat the nozzle, unload filament, unscrew the old nozzle, and install the new nozzle. Remember, safety comes first. Check your nozzle often and keep spares ready. Many users adjust nozzle size in software for better prints.
- Regular nozzle maintenance prevents clogs and keeps your printer running.
- Beginners often face nozzle leaks or clogs, so recheck nozzle tightness and bed level.
- Nozzle replacement schedules depend on use and material. There’s no fixed rule.
- Keep your nozzle clean and replace it every few months for best results.
- Users suggest keeping extra nozzle sizes for different projects.
|
Common Nozzle Issues |
How to Fix Them |
|---|---|
|
Leaks or oozing |
Hot-tighten the nozzle and check the seal. |
|
Clogs |
Heat and extrude, or try a cold pull. |
|
Uneven layers |
Make sure the nozzle sits straight. |
Try changing your nozzle and share your results. You’ll get better prints and learn more about your 3D printer.
FAQ
How often should you change your 3D printer nozzle?
You should change your nozzle every 500 print hours. If you use abrasive filaments, swap it sooner for best results.
Can you clean a clogged nozzle instead of replacing it?
Yes! Try a cold pull or use a cleaning needle. If the clog stays, you may need to replace the nozzle.
What size nozzle works best for beginners?
A 0.4 mm nozzle is a great choice. It balances detail and speed. Most printers come with this size.


