


Understanding printable size limitations is vital for achieving precision in 3D printing. For instance, SLA techniques offer an LPCL of 600 µm, ensuring over 80% printability and 90% accuracy. By mastering these constraints, you can optimize designs effectively. This approach has enabled industries to create lighter, stronger components and even customized medical devices with exceptional precision.
Key Takeaways
- Know your printer's build size. This helps you make models that fit and print well.
- Pick the best material for your project. Each material has different size limits and features that change print quality.
- Fix your model's mesh quality. Better mesh lowers mistakes and makes prints more accurate and neat.
Printable Size Limitations in 3D Printing
Printer Build Volume and Its Constraints
The build volume of a 3D printer defines the maximum dimensions of objects you can create. This limitation directly impacts the size of your 3D model for printing. For instance, desktop printers typically offer smaller build volumes compared to industrial-grade machines. Understanding these constraints helps you design models that fit within the printer's capabilities without compromising functionality.
To illustrate, here’s a comparison of maximum and minimum printable sizes across different materials:
|
Material |
Maximum Size (mm) |
Minimum Size (mm) |
|---|---|---|
|
Plastic |
677 x 368 x 565 |
N/A |
|
Silver/Brass |
60 x 80 x 100 |
2.4 x 2.4 x 0.8 |
|
Resin |
290 x 190 x 147 |
N/A |
|
Alumide |
300 x 300 x 500 |
N/A |
|
Ceramic |
250 x 350 x 200 |
6 x 6 x 6 |
|
Multicolor |
254 x 381 x 203 |
N/A |
This table highlights how material choice influences the printable size limitations. For example, while plastic allows for larger models, materials like silver or brass impose stricter size constraints. You should always verify your printer's specifications and material compatibility before starting a project.
Material Properties and Their Role in Size Limitations
The physical properties of materials play a crucial role in determining printable size limitations. Factors such as strength, flexibility, and thermal stability affect how large or small a model can be without compromising its structural integrity. Research by Kacmarcik et al. demonstrated that industrial 3D printers achieve higher precision than home models, thanks to their ability to handle material properties more effectively. For instance, deviations in geometrical tolerances ranged from 5% to 15% in studies by Mahesh et al., emphasizing the importance of material selection.
Moreover, the "size effect" phenomenon, as highlighted by Jadayel et al., shows that the mechanical properties of a printed object can vary based on its size. Larger models may experience reduced strength due to internal stresses, while smaller models might face challenges in maintaining dimensional accuracy. To optimize your 3D model for printing, consider how the chosen material will behave under these conditions.
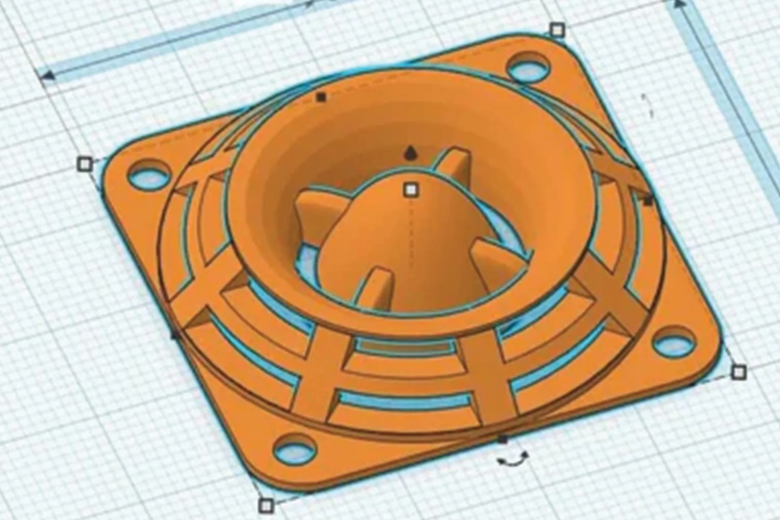
Design Complexity and Its Impact on Printability
The complexity of your design significantly influences its printability. Intricate models with fine details or overhangs often require additional support structures, which can increase printing time and material usage. Studies have shown that as design complexity rises, so do fabrication costs. For example:
- Conventional pattern-making costs increase with added complexity due to the need for more cores, leading to higher labor and material expenses.
- When complexity factors exceed approximately 51, 3D sand printing becomes more cost-effective than traditional mold-making methods.
These findings underscore the importance of balancing design complexity with practical considerations. Simplifying your model where possible can reduce costs and improve the likelihood of a successful print. However, if your project demands intricate details, advanced techniques like multi-material printing or geometric compensation methods can help achieve the desired results.
Scaling a 3D Model for Printing
Techniques for Adjusting Dimensions
Adjusting the dimensions of a 3D model for printing requires precision to ensure the final product meets your expectations. You can use several methodologies to achieve this. For instance:
- Bed leveling ensures the first layer adheres properly, preventing warping or detachment.
- Extruder calibration fine-tunes filament deposition, maintaining dimensional accuracy.
- Temperature tuning optimizes filament flow and layer adhesion.
- Retraction settings reduce stringing, improving surface quality.
Optimizing software settings also plays a critical role. Adjusting print speed can balance production time and print quality, while temperature control ensures consistent filament flow. These techniques help you adjust the resolution and scale of your model effectively, leading to a successful print.
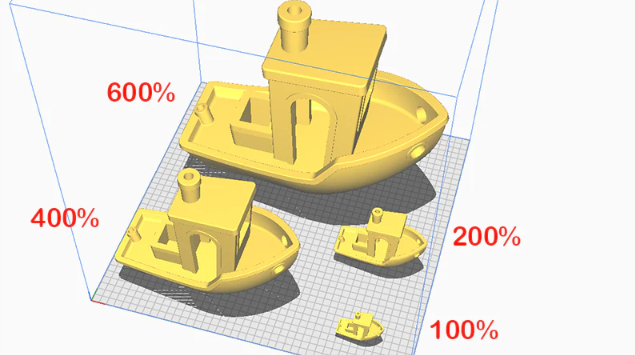
Preserving Structural Integrity During Scaling
Scaling a 3D model can impact its structural integrity, especially when enlarging or reducing its size significantly. Multi-scale modeling helps you understand how structural responses at one level influence the next. For example, testing across micro, meso, and macro scales reveals how damage mechanisms evolve, allowing you to predict and manage potential issues.
When scaling, you should also consider the hierarchy of structural analysis. A larger model may experience internal stresses, while a smaller one might lose fine details. Testing and analyzing your design parameters across a size spectrum ensures the model retains its strength and functionality. This approach is essential for preparing 3D models that meet both aesthetic and practical requirements.
Tools for Scaling 3D Models
Several tools simplify the process of scaling 3D models while maintaining their integrity. Software like Blender, TinkerCAD, and Fusion 360 offers intuitive interfaces for resizing models. These tools allow you to adjust the resolution and scale with precision, ensuring the design remains true to its original intent.
Comparative studies highlight the performance of different scaling tools. For example, instruments like MICRON3D and EinScan excel in point density and axial resolution, making them ideal for detailed models. Choosing the right tool depends on your project's complexity and the desired print quality. Testing the printability of your model using these tools ensures a smoother 3D printing process and minimizes errors.
Optimization Strategies for 3D Models
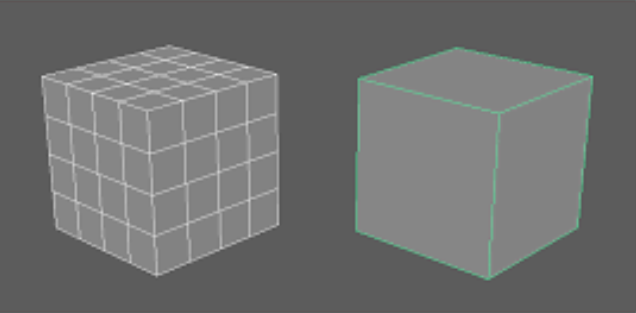
Enhancing Mesh Quality for Better Results
Improving the mesh quality of your 3D models is essential for achieving precise and visually appealing prints. Mesh refinement reduces errors and enhances the geometric accuracy of your design. When you optimize the mesh, you minimize issues like overlapping faces, non-manifold edges, and inconsistent normals, which can disrupt the printing process.
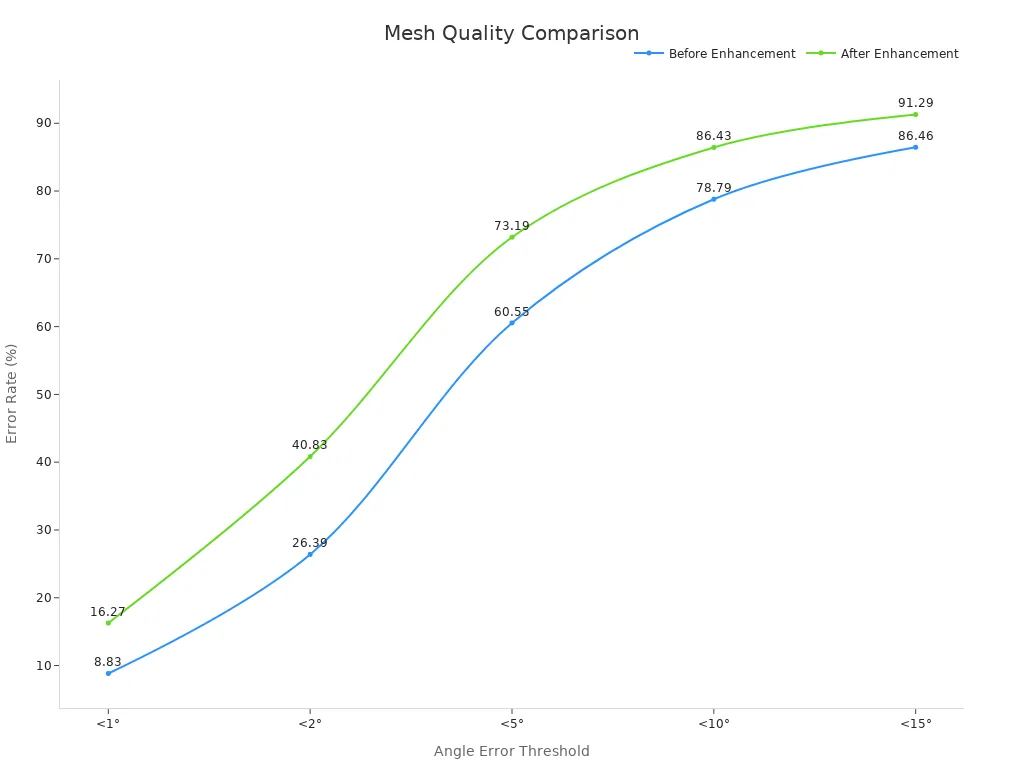
Statistical data highlights the benefits of mesh enhancement. For example, error rates across various angle thresholds significantly improve after refinement:
|
Angle Error Threshold |
Before Enhancement |
After Enhancement |
|---|---|---|
|
<1° |
8.83% |
16.27% |
|
<2° |
26.39% |
40.83% |
|
<5° |
60.55% |
73.19% |
|
<10° |
78.79% |
86.43% |
|
<15° |
86.46% |
91.29% |
To enhance mesh quality, use tools like MeshLab or Blender. These applications allow you to clean up and repair your model's geometry, ensuring it is ready for printing. Regularly testing your design for errors and applying corrective measures will improve the final print's accuracy and durability.
Balancing Resolution and File Size
Balancing resolution and file size is critical for optimizing 3D models. High-resolution designs capture intricate details but often result in large file sizes that can slow down processing and printing. Conversely, reducing resolution may compromise the quality of your print. Striking the right balance ensures efficiency without sacrificing detail.
Testing different print settings and materials can help you achieve this balance. For instance:
- Adjusting layer thickness improves surface smoothness while reducing file size.
- Modifying infill density enhances structural integrity without increasing complexity.
- Fine-tuning extrusion rates ensures consistent material flow and reduces errors.
Comparative studies validate the effectiveness of optimization techniques. Research on PLA/SiO2 nanocomposites demonstrates how hyperparameter optimization methods like Bayesian Optimization, Simulated Annealing, and Genetic Algorithms improve mechanical properties such as elasticity, yield strength, and toughness. These methods utilize key input parameters like extrusion rate, layer thickness, and infill density to achieve optimal results.
By experimenting with these settings, you can tailor your design to meet specific requirements while maintaining manageable file sizes. Tools like Cura and Simplify3D offer advanced features for adjusting resolution and file size, making them invaluable for 3D printing projects.
Orientation and Support Structures for Optimal Printing
The orientation of your 3D model and the placement of support structures significantly impact the success of your print. Proper orientation ensures the model's geometry remains self-supporting, reducing the need for excessive supports. Strategic placement of support structures prevents issues like compression and projection errors, which can compromise the initial layer's quality.
Research highlights the importance of these factors:
- Printing orientation affects the accuracy of denture bases and other complex designs.
- Support structure density and positioning influence the overall precision of the printed object.
- Variations in orientation alter support requirements, directly affecting the final product's quality.
When optimizing orientation, consider the model's geometry and the printer's capabilities. For example, orienting flat surfaces parallel to the build plate minimizes warping and improves adhesion. Use slicer software like PrusaSlicer or Autodesk Netfabb to analyze and adjust orientation and support structures effectively.
Strategic optimization of these elements ensures your 3D models print successfully, with minimal errors and maximum accuracy. Regular testing and adjustments will help you refine your approach and achieve consistent results.
Understanding printable size limitations ensures your 3D models fit within the constraints of your printer and material. Scaling techniques preserve structural integrity while maintaining design accuracy. Optimization strategies improve mesh quality, balance resolution, and refine orientation for better results. To enhance your prints, test settings, analyze designs, and use reliable tools like Cura or Blender.
FAQ
What is the importance of understanding printable size limitations in 3D printing?
Knowing size limitations helps you design models that fit your printer's capabilities, ensuring successful prints without compromising functionality or structural integrity.
How can you test the printability of a 3D model for printing?
Use slicer software to analyze design parameters, adjust the resolution and scale, and choose the right print settings and materials for optimal results.
What tools are best for scaling and optimizing 3D models?
Blender, Cura, and Fusion 360 offer features for scaling, mesh refinement, and orientation adjustments, improving print quality and preparing 3D models effectively.


