


If your 3d printer bed will not heat, you might feel frustrated. You want your 3d print to work, but the printer just sits there. Do not worry. You can find solutions for most 3d heatbed problems with simple steps. Many 3d printer issues come from poor adhesion or weak bed temperature. Good adhesion helps every 3d print stick and finish well. Check your 3d printer for loose wires or poor connections. Clean the 3d print surface to improve adhesion. You can fix many 3d printer problems with careful checks. Good adhesion means your 3d printer works better and every 3d print comes out strong.
Key Takeaways
- Check power, wiring, and connectors first if your 3D printer bed does not heat. Loose or damaged parts often cause heating problems.
- Watch for thermistor faults by monitoring temperature readings. Replace faulty sensors quickly to avoid safety risks like thermal runaway.
- Inspect relays and MOSFETs regularly. Failures in these parts can cause the bed to heat uncontrollably or not at all.
- Improve bed adhesion by slowing the first layer speed, increasing first layer width, and leveling the bed carefully for strong prints.
- Use insulation materials under the bed to reduce heat loss and keep temperatures stable. Replace the heatbed if you see cracks or uneven heating.
3D Printer Bed Not Heating
When your 3d printer bed not heating, you need to look at a few key areas. The print bed must reach the right temperature for every 3d print. If the bed stays cold, your 3d printer cannot start or finish a print. You can solve most bed heating issues by checking power, wiring, and connectors. Follow these steps to find the problem and get your print bed working again.
Power & Connections
Start with the basics. The print bed needs steady power to heat up. If your 3d printer bed not heating, check the power supply first. Make sure the printer is plugged in and the switch is on. Look at the power cable for any cuts or damage. A weak or broken cable can stop the bed from heating.
Next, check the mainboard and the wires that go to the print bed. You want to see tight, clean connections. Loose or damaged connections can cause the bed to lose power. If you see any burnt marks or melted plastic near the connectors, turn off the printer right away. This can mean the connectors are overheating.
Tip: Always unplug your 3d printer before you touch any wires or connections. Safety comes first.
Wiring Issues
Wiring problems often cause the 3d printer bed not heating. The print bed uses thick wires to carry power from the mainboard. If these wires break or fray, the bed cannot heat up. Run your fingers along the wires from the mainboard to the print bed. Feel for any soft spots, cuts, or exposed metal.
Sometimes, the wires under the print bed move a lot during printing. This movement can wear out the wires over time. If you see any damage, replace the wires with new ones. Make sure you use wires that match the original size and type.
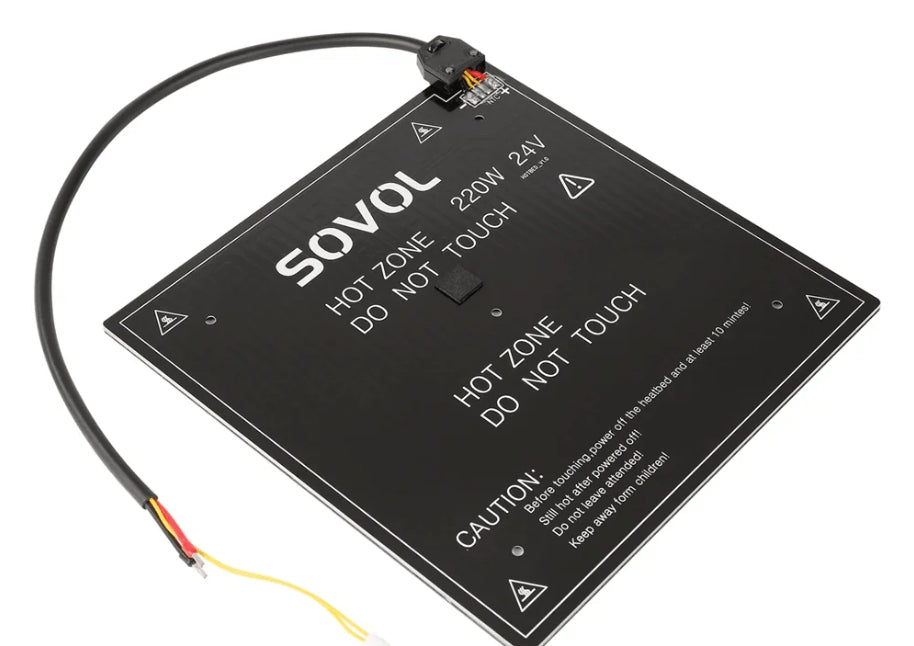
A bad heating element can also stop the bed from working. If you have checked the wires and connections, but the bed still does not heat, the heating element inside the bed may have failed. You may need to replace the whole print bed if this happens.
Socket & Connector Checks
Sockets and connectors link the print bed to the rest of the 3d printer. These parts can fail after many hours of printing. If you notice the print bed not heating, look at the connectors for signs of wear. Burnt or melted connectors mean too much heat or a poor connection.
You can use the table below to see how often connectors fail in 3d printed parts compared to traditional materials:
|
Component Type |
Common Failure Mode |
Failure Rate Compared to Traditional Materials |
|---|---|---|
|
3D Printed Sockets |
Circumferential breaks, cracking |
Higher |
|
Locking Mechanisms |
Material yielding, cracking |
Higher |
|
Modular Connectors |
Early failure under high load |
Higher |
|
Laminated Composites |
Gradual yielding or deformation |
Lower |
3d printed connectors and sockets often fail faster than traditional ones. Most failures happen at the ends or where the connectors lock. You may see cracks or breaks around these areas. If you spot any damage, replace the connector or socket before you use the printer again.
A systematic review shows that most failures in 3d printed connectors happen at the distal end or locking area. These spots take the most stress during printing. The print bed can survive light loads, but heavy use can cause sudden breaks. Design changes and stronger materials can help, but you should always check connectors for damage if your print bed stops heating.
Note: If you find burnt connectors or melted plastic, do not use the printer until you fix the problem. This can prevent bigger issues and keep your 3d printer safe.
By checking the power, wires, and connectors, you can solve most 3d printer bed not heating problems. Careful inspection and quick fixes will get your print bed heating again, so you can enjoy smooth 3d prints.
Thermistor & Heatbed Sensor

The thermistor and heatbed sensor play a big role in keeping your 3D printer safe and your prints successful. If you notice your bed not heating or see strange temperature readings, you may have a thermistor problem. The thermistor measures the bed temperature and sends this data to your printer’s control board. If it fails, your printer may trigger signs of thermal runaway to protect itself. You need to know how to spot these issues and fix them before they cause bigger problems.
Thermistor Faults
You can spot thermistor faults by watching for odd temperature behavior. Sometimes, the display shows sudden spikes or drops in temperature. Other times, the bed temperature stays stuck at zero or jumps to a very high number. These are common symptoms of a failing thermistor. Your printer’s firmware uses thermal runaway protection to stop heating if it detects these problems. This keeps your printer safe from overheating or fire.
Here are some signs that point to thermistor faults:
- Erratic or inconsistent temperature readings on the display
- Sudden temperature drops or spikes during heating
- Error messages about thermal runaway or temperature out of range
- Bed temperature stuck at zero or maximum value
You can use G-code commands to help diagnose these issues. The M105 command reports current temperatures, while M303 helps with PID auto-tuning for better temperature control. If you see thermal runaway errors, check the condition of the thermistor and its wiring right away. A disconnected or broken thermistor can cause the printer to keep heating the bed, which may lead to dangerous situations.
The table below shows how different thermistor errors appear and what you can do:
|
Error Type |
Diagnostic Data / Symptoms |
Cause / Explanation |
Troubleshooting Steps |
|---|---|---|---|
|
Thermal Runaway Errors |
Error messages indicating thermal runaway protection triggered |
Thermistor failure causing temperature readings lower than actual, leading to continuous heater ON |
Replace indicated thermistor; contact support if hotbed related |
|
Max Temperature Triggered |
Temperature readings above max limits (e.g., >300ºC hotend) |
Defective hotend thermistors, electronics delivering excess power, or mainboard issues |
Swap hotends side to side; swap extruder boards; check mainboard fuse |
|
Min Temperature Triggered |
Temperature readings at or below 0ºC |
Thermistor disconnected or malfunctioning, electronics or mainboard faults |
Check hotend connections and flat cable connections |
If you see any of these errors, act quickly. Replace the thermistor if needed. This prevents damage to your printer’s mainboard and keeps your prints safe.
Testing with External Heat
You can test your thermistor using simple tools at home. A hairdryer or heat gun works well for this job. First, set your printer to display the bed temperature. Next, gently blow warm air over the bed sensor. Watch the temperature reading on the screen. If the number rises smoothly, your thermistor works. If the reading jumps, drops, or does not change, you may have a faulty sensor.
Thermal conductivity tests in labs use thermistors to measure temperature changes across a sample. These tests show that external heat testing gives accurate and repeatable results. For example, researchers placed thermistors on both sides of a heated bed and logged temperature changes over time. They found that the readings matched the actual heat flow, proving that this method works well for checking thermistor accuracy.
You can also use a multimeter to check resistance. A working thermistor will show a steady change in resistance as the bed heats up. If the resistance stays the same or jumps around, replace the sensor.
The table below shows how temperature changes during external heat testing:
|
Measurement Point |
Description |
Example Values (°C) |
Calculated Efficiency (%) |
|---|---|---|---|
|
Hot in (HI) |
Temperature of warm air entering hot side |
34 - 35 |
- |
|
Hot out (HO) |
Temperature of warm air exiting cool side |
19.5 - 23 |
- |
|
Cool in (CI) |
Temperature of cool air entering cool side |
14.5 - 18 |
- |
|
Cool out (CO) |
Temperature of cool air exiting hot side |
28 - 32 |
- |
|
Hot flow efficiency |
(HI - HO) / (HI - CI) * 100% |
- |
|
|
Cool flow efficiency |
(CO - CI) / (HI - CI) * 100% |
- |
78.0% - 87.5% |
|
Average efficiency |
Average of hot and cool flow efficiencies |
- |
~76.5% |
These numbers show that external heat testing gives you a clear picture of how well your thermistor tracks temperature changes.
Tip: Always unplug your printer before testing or replacing the thermistor. This keeps you safe from electric shock.
Replacing the Thermistor
If you find that your thermistor is faulty, you need to replace it. Start by turning off and unplugging your printer. Remove the bed cover to reach the sensor. Carefully disconnect the old thermistor from the control board. Take note of how the wires connect, so you can install the new one the same way.
When you install the new thermistor, make sure it matches the type your printer uses. Some printers need a specific sensor to read the correct temperature. Secure the new sensor in place and connect the wires tightly. Loose connections can cause more heating problems or trigger runaway errors.
After you finish, run a test print. Watch the bed temperature on the display. The number should rise smoothly as the bed heats up. If you see any more errors or the temperature does not change, double-check your wiring and sensor type.
You can also use the following steps to troubleshoot startup runaway errors:
- Unplug the bed and hotend thermistors from the motherboard.
- Boot the printer. If the error disappears, replace the thermistor.
- If the error stays, replace both the motherboard and the thermistor. Some boards do not have short protection, so upgrading to a board with better safety features can help.
Note: Always check the condition of the thermistor and its wiring before every long print. This simple step can prevent most runaway problems and keep your heatbed working well.
By understanding how the thermistor and heatbed sensor work, you can spot problems early. You keep your bed heating safely and avoid dangerous runaway situations. Careful checks and quick action help you enjoy smooth, reliable 3D prints every time.
Relay, MOSFET & Control
Relay or MOSFET Failure
When your 3D printer bed will not heat or heats uncontrollably, you should check the relay or mosfet. These parts control the flow of power to the heating element. Mechanical relays can switch the bed on and off, but they wear out over time and may start making clicking sounds. Solid state relays last longer and work more quietly, but you must match them to the right current and voltage. Sometimes, relay contacts fuse together, which can keep the bed heating even when it should stop. Good printer designs use thermal fuses and feedback systems to prevent these problems.
MOSFETs are electronic switches that handle high currents with little heat loss. For example, a common MOSFET used in 3D printers has very low resistance, so it stays cool and works efficiently. Designers add special circuits to protect the MOSFET from voltage spikes and to make sure it turns on and off quickly. They also use thick copper traces on the circuit board to carry the high current safely. These steps help your printer run smoothly and reduce the risk of failure.
Some printers add a backup relay as extra protection. If the MOSFET fails and stays on, the relay can cut power to the bed and stop runaway heating. This extra layer keeps your printer safe.
Firmware Issues
Firmware controls how your printer heats the bed. If the software freezes or locks up, the bed may keep heating without stopping. Some printers use watchdog timers to reset the system if the firmware stops working. If your printer does not have this feature, you could face overheating risks. Always keep your firmware updated and follow the manufacturer’s safety advice.
Continuous Heating Problems
Continuous heating can damage your printer and even cause fires. Several things can cause this problem:
- Firmware crashes or freezes, leaving the bed powered on.
- Thermistor failures or loose wires, which confuse the control system.
- MOSFETs on cheaper boards can fail and stay stuck in the “on” position.
- Missing hardware safety features, like relays or thermal cutoffs.
- Power switches or electronic parts that get stuck and will not turn off.
If you notice your bed keeps heating when it should not, turn off the printer right away. Check all wiring and safety devices before using it again. Regular maintenance and careful checks help prevent these issues and keep your 3D printer safe.
Tip: Always watch your printer during the first few minutes of heating. If you see anything unusual, stop the print and inspect the control board and wiring.
Bed Adhesion & Leveling

First Layer Adhesion
You need strong bed adhesion for every successful 3d print. The first layer adhesion sets the stage for the rest of your print. If the first layer does not stick well, you will see warping, shifting, or even total print failure. You can improve first layer adhesion by slowing down the first layer speed by 30-50% compared to your normal print speed. This helps the material settle and bond with the print bed. Increasing the first layer width by 10-20% gives more contact area, which boosts adhesion. Careful Z-offset calibration ensures the nozzle presses the filament just right onto the bed. When you get first layer adhesion right, you avoid many adhesion problems and make your 3d print stronger.
- Slow down the first layer speed by 30-50%
- Increase first layer width by 10-20%
- Adjust Z-offset for the perfect first layer "squish"
Tip: Always watch the first layer. If you see gaps or curling, stop and fix the adhesion problems before printing the whole object.
Mechanical Bed Issues
Mechanical problems with the print bed can cause serious adhesion problems. You might find bulges, dents, or uneven spots on the bed. These defects stop the filament from sticking and lead to poor bed adhesion. Sometimes, leftover filament or dust on the print bed surface creates bumps that ruin adhesion. Clean the bed before every print. Check for loose screws or wobbly parts under the bed. Tighten everything to keep the bed stable. If you see damage, replace the print bed to avoid ongoing adhesion problems.
|
Common Mechanical Issues |
Effect on Adhesion |
Solution |
|---|---|---|
|
Bulges or dents |
Poor bed adhesion |
Replace or resurface |
|
Dirty bed surface |
Adhesion problems |
Clean before printing |
|
Loose screws |
Uneven bed, poor adhesion |
Tighten all hardware |
Leveling & Calibration
Bed leveling is the foundation for good bed adhesion. If the bed is not level, you will see adhesion problems, warping, or layer shifting. Manual bed leveling uses screws and a piece of paper to set the nozzle-to-bed distance. Automatic bed leveling uses sensors to check many points and adjust the bed during printing. You should check the level often because temperature changes, vibrations, and material buildup can shift the bed. About 70% of 3d print failures come from miscalibrated machines, with improper bed leveling as a main cause. Proper calibration means you adjust the bed, set the nozzle height, and check the extruder. This keeps your print bed ready for strong adhesion and reduces wasted material.
Note: Regular bed leveling and calibration help you avoid most adhesion problems and keep your 3d prints looking great.
Insulation & Heat Loss
Identifying Heat Loss
You may notice your 3D printer struggles to keep the bed temperature steady. Heat loss often causes this problem. When you print, heat escapes from the bed into the air and the printer frame. If your room feels cold or drafty, the bed loses temperature even faster. You can spot heat loss by watching the temperature graph on your printer’s display. If the temperature drops quickly after the heater turns off, your setup may need better insulation.
Thermal imaging studies show how heat moves away from 3D printed parts and the printer bed. Researchers used infrared cameras to watch heat patterns during printing and testing. These images reveal that heat escapes through the air and the printer’s structure. The studies also show that heat loss increases when the printer faces mechanical stress or when the bed surface is exposed. You can use this knowledge to check your own printer for cold spots or uneven heating.
Improving Insulation
You can improve insulation to keep the bed temperature stable. Many users add a layer of cork or foam under the bed. This layer helps trap heat and stops it from escaping. You can also use a silicone mat or special insulation sheets made for 3D printers. These materials help the bed reach the right temperature faster and use less power.
To insulate the 3d printer bed, follow these steps:
- Turn off and unplug your printer.
- Remove the bed and clean the bottom surface.
- Cut the insulation material to fit the bed size.
- Attach the insulation with heat-resistant tape or adhesive.
- Reinstall the bed and check for smooth movement.
Tip: Always use materials that can handle high temperature. Avoid anything that melts or burns easily.
A study on 3D printer designs found that reducing heat flow away from the heating block keeps the temperature more stable. This helps your prints stick better and prevents hardware problems.
When to Replace the Heatbed
Sometimes, insulation cannot fix all problems. If you see cracks, warping, or uneven heating, you may need to replace the heatbed. Old beds can lose their ability to hold a steady bed temperature. You might notice cold spots or slow heating. If your prints keep failing even after you improve insulation, a new heatbed may solve the issue.
|
Sign of Failure |
What You See |
What To Do |
|---|---|---|
|
Cracks or warping |
Uneven surface, poor prints |
Replace the heatbed |
|
Slow heating |
Long wait for temperature |
Check wiring, replace if needed |
|
Cold spots |
Uneven bed temperature |
Try insulation, replace if not fixed |
Note: Regular checks help you catch problems early. A healthy heatbed gives you better prints and saves energy.
You can solve most 3d printer heatbed problems with careful checks and simple solutions. Use this checklist to improve adhesion and print success:
- Level the bed and set the nozzle distance with paper or a gauge.
- Adjust bed temperature for your filament type.
- Apply glue, tape, or PEI sheets for better adhesion.
- Change first layer speed and height for stronger bonding.
- Keep records of your 3d printer settings and results.
- Update your software for new adhesion features.
Trial prints show that these steps reduce failed 3d prints by 40%. If you still have trouble, ask the 3d printing community or your printer’s manufacturer for help. With patience and regular checks, you will find solutions and enjoy strong adhesion on every 3d printer project.
FAQ
Why does my 3D printer bed heat unevenly?
You might see uneven heating if the bed insulation is poor or the heater is damaged. Check for cold spots using your hand (carefully) or a thermal camera. Replace the heater or add insulation if you find uneven areas.
How often should I level my print bed?
You should level your bed before every important print. If you move your printer or change the bed surface, check the level again. Regular leveling helps you avoid failed prints and keeps your first layer strong.
What temperature should I set for my print bed?
The best bed temperature depends on your filament. PLA works well at 50–60°C. ABS needs 90–110°C. PETG prints best at 70–85°C. Always check your filament’s packaging for the recommended range.
Can I use glue or tape to improve bed adhesion?
Yes, you can use glue sticks, painter’s tape, or PEI sheets. These help your prints stick better. Clean the bed before each print. Try different surfaces to see which works best for your filament.
Tip: Always let the bed cool before removing your print. This prevents damage to both the print and the bed.


