


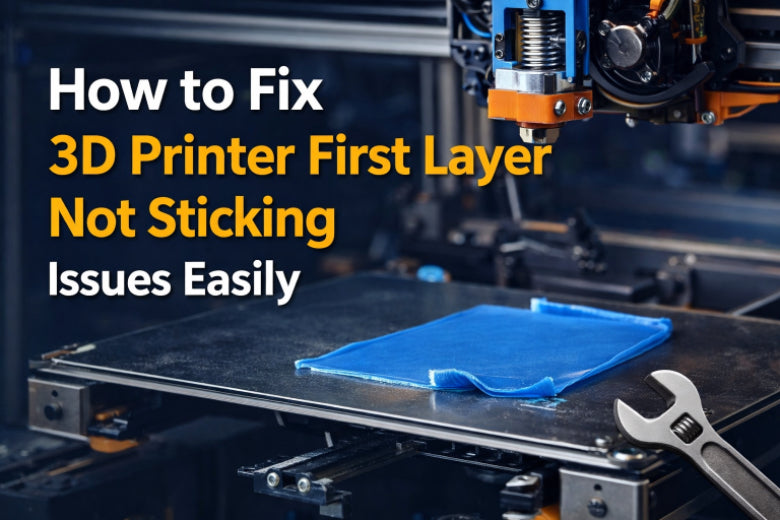
You know the feeling—your print starts, but the 3d printer first layer not sticking ruins everything. That first moment matters. The first impression sets the stage for your whole project. When the first layer fails, frustration builds. Clean steps and small changes give you that perfect first layer every time.
Key Takeaways
Always clean your print bed before you start a print. A clean bed helps stop first layer problems and makes things stick better. - Check and change your bed and nozzle temperatures for your filament. The right temperatures help the first layer stick well. - Level your print bed often. A flat bed helps the print stick everywhere and stops it from lifting or bending.
3D Printer First Layer Not Sticking: Problem Overview
3D Printing First Layer: Visual Signs
You start a print and watch the first layer go down. Sometimes, you notice the lines look rough or uneven. Maybe you see gaps, or the filament just won’t stick to the print bed. These are clear signs of first layer problems. If the first layer peels up or moves around, you know something is wrong. You might spot loose lines or even blobs forming. These issues show up right away, so keep your eyes on the print as it begins.
Common Symptoms and Failures
You can spot first layer issues by looking for a few common symptoms. Here’s a quick table to help you identify what’s happening:
|
Bed Leveling Issue |
Effect on Extrusion |
Signs to Watch For |
|---|---|---|
|
Nozzle too close |
Clicking, gaps, rough lines |
|
|
Nozzle too far |
Poor adhesion, under-extrusion |
Loose lines, failed prints |
|
Uneven bed |
Inconsistent extrusion, clicking |
Layer shifts, blobs |
- Nozzle too close can cause clicking and jams.
- Nozzle too far leads to poor adhesion and gaps.
- An uneven bed creates blobs or layer shifts.
If you see these problems, you know the first layer is not sticking as it should.
Why First Layer Adhesion Matters
First layer adhesion is the foundation of every print. If the first layer does not stick, the whole print can fail. You waste time and filament. Good adhesion means your print stays in place and the quality improves. The right bed temperature, proper leveling, and a clean print bed all help. When you fix first layer issues, you find a solution that makes your prints reliable. Getting the first layer right is the key to great 3d printing first layer results.
Quick Fixes for First Layer Not Sticking
You want your 3d printer first layer not sticking problems gone fast. Let’s jump into the most effective fixes. These steps help you get better adhesion, improve print quality, and stop warping before it starts. You’ll see how simple changes can make a huge difference in your 3d printing first layer results.
Cleaning Methods with Dish Soap and Hot Water
Dirty beds cause first layer issues. Dust, grease, and leftover filament stop the first layer from sticking. You need a clean print bed for good adhesion.
Symptoms of a dirty bed:
- First layer peels up or slides around.
- Filament lines look rough or patchy.
- Prints warp at the edges.
Step-by-step cleaning solution:
- Turn off your printer and let the bed cool.
- Remove the build plate if possible.
- Wash the surface with dish soap and hot water. Scrub gently to remove all residue, stickers, or films.
- Rinse and dry the bed completely.
- Reinstall the bed and start your print.
Tip: Clean your bed before every print. This simple habit prevents most first layer problems.
If you see leftover plastic on the nozzle, heat it to the last filament’s temperature. Use a brass brush or nozzle tool to clean the outside. For deep clogs, try a cold pull or use a thin needle. Always check for damage and replace worn parts. Good heat transfer between parts helps with first layer adhesion.
Adjusting Bed and Nozzle Temperatures
Temperature settings matter for first layer adhesion. If the bed temperature is too low, the filament won’t stick. If it’s too high, you might get blobs or poor quality.
Symptoms of wrong temperatures:
- First layer not sticking at all.
- Filament curls or warps.
- Print quality drops.
Check the table below for the best bed and nozzle temperatures for common filaments:
|
Filament |
Nozzle Temperature (°C) |
Bed Temperature (°C) |
|---|---|---|
|
PLA |
180 - 220 |
45 - 60 |
|
PETG |
230 - 250 |
35 - 90 |
|
Adjusted |
210 - 250 |
75 - 90 (up to 120) |
How to adjust:
- Open your slicer software.
- Set the bed temperature based on your filament.
- Adjust the nozzle temperature to match the filament type.
- Start a test print and watch the first layer.
Note: Higher bed temperature helps with adhesion, but don’t go too high or you risk warping.
Leveling the Bed and Setting Nozzle Distance
Bed leveling is the key to solving 3d printer first layer not sticking. If the bed isn’t level, the first layer won’t bond. The nozzle distance (Z-offset) also matters. Too close, and you get jams. Too far, and the filament won’t stick.
Symptoms of poor leveling or wrong nozzle distance:
- First layer lifts or curls at the edges.
- Filament lines look uneven.
- Print moves during printing.
Step-by-step leveling solution:
- Home your printer and move the nozzle to each corner.
- Use a piece of paper under the nozzle. Adjust until you feel slight resistance.
- Repeat for all corners and the center.
- Set the Z-offset so the first layer is pressed gently into the bed.
- Start a test print and check the first layer.
Tip: Proper bed leveling and nozzle distance prevent layer separation and improve adhesion.
Slowing Down First Layer Speed
Speed affects how well the first layer bonds to the bed. If you print too fast, the filament doesn’t have time to stick. Slower speeds give better adhesion and quality.
Symptoms of printing too fast:
- First layer lines look thin or broken.
- Filament doesn’t bond to the bed.
- Print fails early.
Check the recommended first layer speeds:
|
Filament Type |
Recommended Speed (mm/s) |
|---|---|
|
PETG |
30-50 |
|
ABS |
30-50 |
|
PLA |
Up to 60 (slower speeds recommended for tricky prints) |
How to slow down:
- Open your slicer.
- Find the first layer speed setting.
- Set it to 30-50 mm/s for most filaments.
- For PLA, use slower speeds if you see first layer problems.
Tip: Slower first layer speed means better adhesion and fewer failed prints.
Using Adhesion Promoters (Glue, Hair Spray)
Sometimes you need extra help for first layer adhesion. Adhesion promoters like glue stick or hair spray give the first layer a better grip.
Symptoms when you need adhesion aids:
- First layer not sticking even after cleaning.
- Filament lifts at the corners.
- Warping happens often.
How to use adhesion promoters:
- Clean the print bed first.
- Apply a thin layer of glue stick or a light mist of hair spray.
- Let it dry for a minute.
- Start your print and watch the first layer.
Note: Don’t use too much. A thin, even coat works best for quality prints.
These quick fixes help you solve 3d printer first layer not sticking issues fast. Clean your bed, set the right temperatures, level the bed, slow down the first layer, and use adhesion aids when needed. You’ll see better first layer adhesion and more reliable prints every time.
Troubleshooting Workflow for 3D Printer Not Sticking to Bed
Quick Diagnosis Checklist
When you see your 3d printer not sticking to bed, you need a quick way to spot the cause. Use this checklist to catch first layer problems fast:
- Is the print bed clean and free of dust or grease?
- Did you set the correct bed temperature for your filament?
- Is the bed level across all corners and the center?
- Did you adjust the nozzle distance for the first layer?
- Are you using the right print speed for the first layer?
- Is the filament dry and free from moisture?
- Did you apply an adhesion aid if needed?
Tip: Check these points before every print. You can prevent most first layer issues with this simple routine.
Step-by-Step Troubleshooting Order
You want a clear solution when you face 3d printer first layer not sticking. Follow these steps in order:
- Clean the print bed with dish soap and hot water.
- Calibrate the bed level. Move the nozzle to each corner and the center, then adjust until you feel slight resistance with a piece of paper.
- Set the correct bed temperature for your filament.
- Adjust the nozzle distance so the first layer presses gently into the bed.
- Slow the print speed for the first layer. Start with 30-50 mm/s.
- Dry your filament if you see signs of moisture.
- Apply an adhesion promoter if the first layer still lifts or warping appears.
Print Test Patterns for Confirmation
You can use test patterns to confirm your fixes. Print a simple square or line pattern. Watch the first layer closely. Good adhesion means smooth, even lines with no gaps or lifting. If you see rough spots or the layer peels up, repeat the troubleshooting steps.
Troubleshooting Checklist:
- Clean print bed
- Level bed
- Set bed temperature
- Adjust nozzle distance
- Slow first layer speed
- Dry filament
- Use adhesion aid
This workflow helps you solve first layer problems and improve print quality. You get a reliable solution for 3d printing first layer issues every time.
Hardware Issues Affecting First Layer
Bed Leveling Problems
You might notice your 3d printer first layer not sticking even after cleaning and prepping everything. Often, the real problem comes from uneven bed leveling. If the bed sits higher on one side, the first layer will look squished in some spots and barely touch the bed in others. This leads to weak adhesion and poor print quality. You may see the first layer peel up or shift during printing.
Common symptoms:
- Sparse or squished lines on the first layer
- Parts of the print not sticking
- Edges lifting or warping
To fix this, check the bed at all corners and the center. Use a piece of paper to feel for slight resistance under the nozzle. Adjust the bed screws until the resistance feels the same everywhere. This simple solution helps you avoid most bed adhesion issues.
Nozzle Distance Errors
The distance between the nozzle and the print bed matters a lot for 3d printing first layer success. If the nozzle sits too close, you risk damaging the bed or making it hard to remove prints. If it’s too far, the filament won’t stick and the first layer may look stringy or incomplete.
Watch for these signs:
- First layer not sticking at all
- Sparse or broken lines
- Model shifts or collapses
Always set the Z-offset carefully. Home the printer, then adjust the nozzle so it just touches a piece of paper on the bed. Skipping this step leads to poor adhesion and failed prints.
Warped or Damaged Bed Surface
A flat print bed is key for good first layer adhesion. If your bed has dents or warping, some areas won’t heat evenly or touch the nozzle at the right distance. This causes corners to lift or the whole print to warp, especially on large models.
What to do:
- Inspect the bed for dents or warping before every print
- Clean the surface and check for damage
- Replace the bed if you see major issues
Regular checks and cleaning keep your bed in top shape. This prevents warping and helps every first layer stick better.
Slicer Settings and First Layer Fixes
Initial Layer Height and Flow
You can solve many first layer issues by tweaking the initial layer height and flow in your slicer. If the first layer is too thin, it might not stick well. Too thick, and you could see blobs or uneven lines. Most slicers let you set the first layer height higher than the rest. This gives the filament more room to squish onto the print bed, which helps with adhesion.
Symptoms of wrong settings:
- Gaps between lines
- Poor surface quality
- Warping at the edges
Solution:
Set the first layer height to about 0.2–0.3 mm for most printers. Increase the initial flow rate to 105–110% if you see gaps. This simple change can optimize first layer settings and boost print quality.
First Layer Speed Settings
Printing the first layer too fast often leads to 3d printer first layer not sticking. Slow down the speed so the filament has time to bond with the bed. Fast speeds can cause the filament to drag or curl, especially if you have uneven bed leveling.
What to do:
- Open your slicer.
- Set the first layer speed to 20–30 mm/s.
- Watch the print and adjust if needed.
Tip: Slower speeds give you a smoother first layer and better adhesion.
Skirt, Brim, and Raft Options
You can use skirt, brim, or raft features in your slicer to help with first layer adhesion. A skirt primes the nozzle. A brim adds extra lines around your model to hold down the edges. A raft creates a base under your print, which helps if you struggle with warping or bed temperature problems.
When to use:
- Skirt: For priming only
- Brim: For small parts or tricky adhesion
- Raft: For serious first layer problems
Try these options if you need a quick solution for stubborn prints.
Material Issues and Drying Filament
Moist or Dirty Filament
You might not realize it, but filament can pick up moisture or dust from the air. When you use moist filament, you often hear popping sounds or see bubbles on your print. These signs mean steam forms inside the filament as it melts. This can cause weak bonds, rough spots, and even layer delamination. Dirty filament can also bring dust or oil onto the print bed, making first layer issues worse. If you want a strong first layer and better print quality, always use dry, clean filament.
What can you do?
- Store filament in a dry box or sealed bag with desiccant.
- Wipe filament with a clean cloth before loading.
- Dry wet filament in a filament dryer or a warm oven (check the safe temperature for your material).
Tip: Dry filament gives you stronger bonds and fewer problems with 3d printer first layer not sticking.
Material-Specific Adhesion Tips
Every filament type needs a different approach for the first layer. PLA, ABS, and PETG all have their own tricks for better adhesion and less warping. Check the table below for quick tips:
|
Filament |
Enclosure Temp |
Bed Temperature |
Notes |
|---|---|---|---|
|
ABS |
38-46°C |
Over 90°C |
Use an enclosure for best results. |
|
PETG |
20-40°C |
About 70°C |
Handles heat well; keep steady temps. |
|
PLA |
20-30°C |
Lower |
Cooler temps help avoid jams. |
- Use a heated print bed for ABS and PETG.
- Try glue stick or hairspray for extra grip.
- Set a thicker first layer and slow down the speed.
- Add a brim or raft to stop warping.
- Keep your printer clean and check leveling before each print.
Recommended Bed Temperatures
Getting the right bed temperature is a simple solution for first layer adhesion. If the bed is too cool, prints may not stick. If it’s too hot, you might see warping or poor quality. Always check your filament’s recommended bed temperature. For example, ABS likes a hot bed, while PLA works with lower temps. Adjust the bed temperature in your slicer and watch the first layer closely. This step helps you avoid most first layer issues and keeps your prints looking great.
Environment Factors and Bed Surface Prep
Room Temperature and Drafts
The temperature in your room can change how prints stick. If your workspace is cold, the first layer may not stick. Drafts blowing on the bed can cause problems too. Sudden temperature changes can make prints warp. This happens more with big prints or sensitive materials. Keep your room at a steady temperature. Block drafts to help your first layer stick. This easy step helps you avoid problems and keeps prints looking good.
Tip: Put your printer away from windows and doors. Keep it away from air vents. Use an enclosure for materials that need steady heat.
Humidity and Filament Storage
Humidity can ruin your prints if you are not careful. Wet filament does not stick well and makes weak first layers. You need to store filament the right way to keep it dry. Here are some best ways to store filament:
|
Best Practice |
Description |
|---|---|
|
Drying Filaments |
Dry filaments to less than 0.1% moisture before printing. |
|
Proper Storage Temperature |
Store filaments at 20 to 25°C in airtight containers with desiccants. |
|
Humidity Monitoring |
If humidity is over 30% RH, dry your spool before using it. |
Keep filament dry and you will have fewer problems. Your first layer will stick better.
Bed Surface Types and Preparation
The kind of print bed you use matters for the first layer. Glass, PEI, and textured beds need different cleaning. Always clean your print bed before you start printing. Use dish soap and hot water for glass beds. For PEI beds, wipe with isopropyl alcohol. Make sure the bed is flat and not damaged. If you see scratches or dents, replace the bed surface. Good cleaning and leveling help your first layer stick. The right bed temperature also helps your prints look better.
Beginner Mistakes in First Layer Adhesion
Skipping Bed Cleaning
You might feel excited to start a new print, but skipping bed cleaning is a common mistake. Dust, oil, or leftover glue on the print bed can stop the first layer from sticking. You may notice the first layer peels up, slides around, or leaves gaps. This can ruin the quality of your print and cause warping.
What should you do?
- Always clean the print bed before every print.
- Use dish soap and hot water for glass beds.
- Dry the bed completely before you start.
Tip: A clean bed is the easiest solution for most first layer issues.
Ignoring Z-Offset
Many beginners forget to check the Z-offset. This setting controls how close the nozzle gets to the bed during the first layer. If you ignore it, the nozzle might be too high or too low. You could see poor adhesion, uneven lines, or even damage to the bed.
How can you fix it?
- Home your printer.
- Place a piece of paper on the bed.
- Adjust the Z-offset until you feel slight resistance when moving the paper.
This small adjustment helps you get better adhesion and print quality.
Overlooking Slicer Settings
You might rush through slicer settings, but this can lead to 3d printer first layer not sticking. If you use the wrong first layer height, speed, or bed temperature, your print will not stick well. You may see rough lines or the first layer lifting.
Steps to avoid this mistake:
- Double-check first layer height and speed in your slicer.
- Set the correct bed temperature for your filament.
- Use recommended settings for your material.
Remember: Careful slicer setup is the key to a strong first layer and fewer problems with leveling or warping.
Advanced Calibration and Pro Tips
Manual Mesh Leveling
Manual mesh leveling helps you fix uneven spots on your print bed. You move the nozzle to different points and set the height at each one. This gives you a flat surface for your first layer. If you see 3d printer first layer not sticking in some areas but not others, mesh leveling is a smart solution.
How to do it:
- Heat the bed to your normal bed temperature.
- Use your printer’s menu to start mesh leveling.
- Move the nozzle to each spot and use a piece of paper to check the gap.
- Adjust until you feel the same resistance at every point.
Tip: Mesh leveling stops warping and gives you better adhesion across the whole print bed.
Live Z-Adjust
Live Z-Adjust lets you change the nozzle height while the first layer prints. You can fix first layer issues right away. If the filament looks squished or too loose, turn the knob or use the menu to move the nozzle up or down.
Steps:
- Start your print.
- Watch the first layer closely.
- Adjust the Z value until the lines look smooth and even.
You get better quality and fewer failed prints with this trick.
Upgrading Bed Surfaces
Sometimes, the best fix is a new print bed surface. Glass, PEI, and magnetic beds all help with adhesion. If your old bed has scratches or dents, upgrade for better results.
Common upgrades:
- Glass beds for a smooth first layer.
- PEI sheets for easy removal and strong grip.
- Magnetic beds for quick swaps.
A new surface can solve many first layer problems and improve print quality.
Remember: Advanced calibration and the right bed surface give you a strong start and fewer headaches.
Recommended Settings for First Layer
Layer Height and Speed
Getting the first layer right starts with the correct layer height and speed. If you use a 0.4mm nozzle, keep the layer height at 0.15 or 0.2mm. This gives you the best strength and helps the first layer stick well. Thicker layers, like 0.3 or 0.4mm, often lead to more failures and weak bonds. You want your print to last, so stick with the recommended settings.
Here’s a quick table to help you choose:
|
Layer Height (mm) |
Strength Result |
Recommendation |
|---|---|---|
|
0.15 |
Best strength |
Use for strong, detailed prints |
|
0.2 |
Good strength |
Do not exceed this for a 0.4mm nozzle |
|
0.3 - 0.4 |
Lower strength |
Avoid for strong first layers |
For speed, slow down the first layer. Try 30–50 mm/s for most filaments. This gives the filament time to bond with the print bed and stops warping before it starts.
Bed and Nozzle Temperatures
The right bed temperature and nozzle heat make a big difference for first layer adhesion. If you use PLA, set the nozzle to 200–220°C and the bed to 50–60°C. For ABS, use a nozzle at 240–260°C and a bed at 90–110°C. PETG works best with a nozzle at 230–250°C and a bed at 70–80°C. Always check your filament’s label for the best range.
Tip: Warm up your printer before starting. This helps with leveling and gives you a smooth first layer.
Adhesion Aid Application
Sometimes, you need a little extra help for the first layer. If you still see 3d printer first layer not sticking or other first layer issues, try an adhesion aid. You can use a glue stick, hairspray, or a special sheet. Clean the print bed first, then apply a thin, even layer of your chosen solution. This simple step boosts quality and keeps your prints from lifting or warping.
Remember: A clean bed, the right settings, and a little help from adhesion aids give you the best start for every print.
First Layer Comparison: Wrong vs Correct
Bad Adhesion Visuals
You can spot bad first layers right away. When you see gaps between lines or the filament curling up, you know something is off. Sometimes, the first layer looks patchy or has rough spots. You might notice the print bed has streaks where the filament did not stick. Warping at the corners is another sign. If you see these problems, your 3d printer first layer not sticking is likely the cause.
- Gaps or holes in the first layer
- Edges lifting or peeling
- Filament dragging or bunching up
If you see these symptoms, stop the print and look for a solution before wasting more filament.
Perfect First Layer Signs
A perfect first layer looks smooth and even. The lines touch each other with no gaps. You see a slight shine, and the layer sticks flat to the print bed. The corners stay down, and there is no warping. When you get this result, you know your leveling, bed temperature, and adhesion are just right.
What to look for:
- Smooth, even surface
- No gaps or lifted edges
- Consistent color and shine
A good first layer sets the stage for high quality prints every time.
Common Defects and Causes
You might run into a few common first layer issues. Each one has a simple cause and solution.
|
Defect |
Cause |
Solution |
|---|---|---|
|
Gaps in layer |
Bed too low |
Adjust leveling |
|
Lifting corners |
Low bed temperature |
Raise bed temperature |
|
Poor adhesion |
Dirty print bed |
Clean print bed |
When you know what to look for, you can fix problems fast and get better results.
Prevention and Maintenance for First Layer Issues
Regular Cleaning Routine
You want every print to start strong. A clean print bed is your best solution for preventing first layer issues. Dust, fingerprints, and leftover glue can block adhesion. If you skip cleaning, you might see the first layer peel up or slide around.
Here’s how you can keep your print bed spotless:
- Wash the bed with dish soap and warm water before each print.
- Dry the surface with a lint-free cloth.
- Wipe glass or PEI beds with isopropyl alcohol for extra cleaning.
Tip: Make cleaning part of your printing routine. You’ll see better quality and fewer problems with warping.
Scheduled Bed Leveling
Bed leveling keeps your first layer even and helps with adhesion. If you forget to check leveling, you might notice gaps or squished lines. Uneven beds cause prints to fail or lift at the corners.
Set a schedule for bed leveling:
- Level the bed after every five prints.
- Use a piece of paper to check the nozzle gap at each corner.
- Adjust screws until you feel slight resistance.
Regular leveling means fewer surprises and more reliable prints.
Filament Storage Best Practices
Moist filament can ruin your first layer. If you leave filament out, it absorbs water from the air. This leads to popping sounds, rough surfaces, and weak adhesion.
Store filament the right way:
- Keep spools in airtight containers with desiccant packs.
- Check humidity levels in your storage area.
- Dry filament in a filament dryer if you notice bubbles or poor quality.
Good storage keeps your filament ready and your first layer sticking every time.
You see the 3d printer first layer not sticking problem often. You fix it with cleaning, drying filament, and adjusting settings. Try each solution for better adhesion. Use the checklist before every print. Focus on the first layer. Watch the first layer closely. Adjust the first layer settings. Clean the first layer area.
Master the first layer and you get strong prints every time!
FAQ
Why does my first layer keep peeling up?
You might have a dirty bed, wrong bed temperature, or poor leveling. Clean the bed, check temperatures, and level the bed for better results.
How do I know if my nozzle is too close or too far?
If lines look squished, the nozzle is too close. If lines look thin or don’t stick, it’s too far. Adjust until lines look smooth and even.
What should I do if my filament absorbs moisture?
Dry your filament in a filament dryer or warm oven. Store it in an airtight container with desiccant to keep it dry for future prints.


