


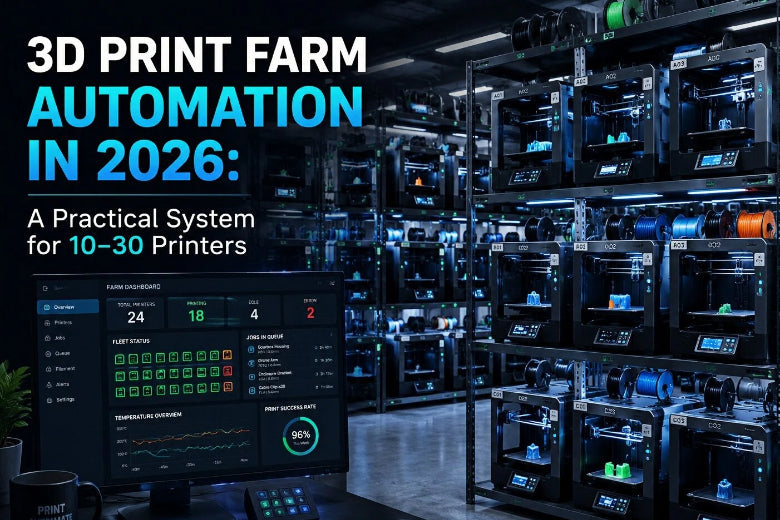
In 2026, 3D print farm automation works best when you treat your farm as a system:
- one place where jobs enter the pipeline
- standardized slicing profiles
- a queue that understands constraints
- monitoring that triggers action (not just dashboards)
- predictable recovery when something goes wrong
This guide assumes an open-source stack (Klipper + Moonraker + a UI like Mainsail/Fluidd, with OctoPrint where it still makes sense).
Key takeaways
- Start with standardization, not fancy orchestration. If each printer is “special,” no automation layer will save you.
- Build a control plane. Automation scales when every printer reports state the same way and can be controlled the same way.
- Make monitoring actionable. Define alerts, owners, and “what happens next.” (That’s the difference between video feeds and real 3D print farm monitoring.)
- Queue by constraints, not by vibes. Route jobs by material/nozzle/printer group.
- Design for recovery. The farm that prints the most is the one that fails gracefully and restarts cleanly.
The 2026 print-farm maturity model
You don’t need everything at once. Build automation in layers.
- Standardize: consistent hardware baselines, naming, profiles, and SOPs
- Observe: unified dashboard + alerts + logs
- Control: safe remote actions (pause/cancel/restart) + permissions
- Schedule: queueing + routing by constraints (material/nozzle/priority)
- Recover: automatic rescheduling + triage workflows
- Physical automation (optional): bed/plate handling, part collection
For a 10–30 printer prosumer farm, layers 1–5 usually deliver the biggest ROI.
Best practice 1: Standardize your fleet so automation has something to control
Why it matters: Fleet automation isn’t magic. It’s the ability to make the same input produce the same output across many machines.
How to implement:
- Create a printer baseline (motion system, hotend/extruder class, bed surface type, enclosure or not).
- Name printers in a way that carries meaning (e.g.,
A01–A10for PLA/PETG,B01–B06for enclosed ABS/ASA). - Lock a profile library: one approved profile per material + nozzle size + printer class.
- Write two short SOPs:
- “What to check before starting a job” (bed, nozzle, filament path, camera)
- “What to do after a job completes” (part removal, bed reset, label, photo)
Failure mode to watch: The “special printer.” One machine with a different fan duct, worn belt, or mystery profile will poison your results and convince you the software is unreliable.
Best practice 2: 3D print farm automation architecture (control plane + fleet layer)
Why it matters: A Klipper web UI is not a farm. Your farm needs a control plane that sees the whole fleet.
How to implement:
- Run a separate Klipper + Moonraker stack per printer.
- Put all printers behind a reverse proxy and give each Moonraker instance a distinct path. Moonraker explicitly supports
route_prefixfor multi-instance setups—useful for proxy routing without rewriting URLs (see the Moonraker documentation linked below). - Decide what your fleet layer does:
- inventory (what each printer can do)
- routing (which jobs can run where)
- queueing and prioritization
- audit logs (“who started what when”)
Failure mode to watch: Building a “fleet UI” that’s really just 20 browser tabs. That works at 5 printers. At 20, it becomes the bottleneck.
Best practice 3: Make your Moonraker multi-printer setup secure by default
Why it matters: In a farm, a single wrong click (or a leaked API key) can cancel a full day of production.
How to implement:
Separate roles:
- operator: start/stop jobs, acknowledge alerts
- maintainer: firmware/config changes
- Use Moonraker’s built-in authorization options (
trusted_clients, API key auth, and login policies). The canonical reference is Moonraker Configuration (authorization section). - Put printers on a dedicated network segment if you can. Sovol’s A Beginner’s Guide to Managing a 3D Printer Farm also recommends stability-first connectivity for scale (wired Ethernet where possible, printer network isolation, and basic power planning).
Failure mode to watch: “We’ll secure it later.” Farms don’t get wrecked by Hollywood hackers—they get wrecked by convenience: shared passwords, exposed ports, and dashboards you forgot were public.
Best practice 4: Turn 3D print farm monitoring into a decision loop
Why it matters: Dashboards don’t fix failed prints. People do.
How to implement:
- Define a minimum alert set:
- print finished
- print paused/canceled/error
- filament runout
- thermal fault / runaway protections triggered
- camera offline (if you rely on it)
2.For each alert, write one line:
- owner: who responds?
- SLA: how fast?
- next action: cancel, pause, resume, requeue, or dispatch a human
Pro Tip: The best alert is the one that causes a decision within 60 seconds. If an alert doesn’t change what you do, delete it.
Failure mode to watch: Alert fatigue. If every minor event pings your phone, you’ll ignore the one alert that matters.
Best practice 5: Build a constraint-aware queue for 3D printer farm management
Why it matters: At 10–30 printers, your farm loses hours when jobs bounce between machines that aren’t actually configured for them.
How to implement:
Create a job intake form (even a simple one) that captures:
- part name / revision
- material
- color (if relevant)
- nozzle size
- priority / due date
- quantity
- post-processing notes
Then route jobs by constraints:
- “ABS/ASA only” → enclosed group
- “TPU” → slower, dialed-in group
- “0.6 mm nozzle” → high-throughput group
This is where a Klipper print farm starts to feel like manufacturing instead of hobby printing: the queue becomes your “operating system,” not a folder of STL files.
If you want a concrete vision of what full pipeline automation can look like, Prusa’s concept writeup shows software-driven job assignment integrated with automated sheet handling and collection. See The future of manufacturing by Prusa Research (2025).
Failure mode to watch: Queueing without profiles. A constraint-aware queue still fails if “PLA on Printer A” means a different result than “PLA on Printer B.”
Best practice 6: Design failure recovery as a workflow, not a gut feeling
Why it matters: You don’t need a farm that never fails. You need a farm that recovers quickly.
How to implement:
Define 3 buckets:
- retriable (spaghetti on layer 2, adhesion loss)
- needs inspection (layer shift, under-extrusion)
- stop-the-line (thermal fault, smoke, unknown electrical issue)
Create a requeue rule:
- same printer after a quick check
- different printer class (if the root cause is environmental)
- hold for maintenance
DHR Engineering’s project description includes real-time error detection and automatic rescheduling as part of their automation stack; it’s a useful mental model for what “recoverable operations” looks like at scale. See 3D Print Farm Automation by DHR Engineering (2025).
Failure mode to watch: Retrying blindly. If you requeue without changing anything, you’re just burning filament faster.
Best practice 7: Reduce the physical bottlenecks (even without robotics)
Why it matters: Farms don’t slow down because “start print” is hard. They slow down because finished parts sit on beds.
How to implement:
- Standardize on flex plates and train “clean release + quick reset.”
- Build a bed reset kit for every row: spare sheet, wipes (only as appropriate for your surface), label printer, a safe scraper if you need it.
- Add a part bin + labeling station so completed parts get identified immediately.
Failure mode to watch: Unlabeled parts. The faster your farm runs, the faster you lose track of which revision is in which pile.
Best practice 8: Treat filament as inventory (dryness and continuity are uptime)
Why it matters: Moisture and mid-print runouts create the kind of failures that waste hours—not minutes.
How to implement:
Track spools by material, color, open date, and storage location.
- Create two rules:
- dry hygroscopic materials before long runs
- don’t start long jobs on “mystery spools”
A small reliability upgrade that scales across a farm is a dryer workflow. Sovol’s SH01 filament dryer box is one example of a tool that can support a “dry before production” habit.
Failure mode to watch: Over-automating spool changes before you can track spools reliably. Inventory accuracy comes first.
Best practice 9: Don’t ignore power and network (automation depends on them)
Why it matters: The most sophisticated queue can’t recover from flaky Wi‑Fi and overloaded circuits.
How to implement:
- Use surge protection and consider UPS coverage for printers and network gear.
- Distribute load across circuits and label outlets.
- Prefer Ethernet for the printers that matter most.
If you want a practical checklist for the “boring but critical” foundations, start with Sovol’s print farm guide (linked earlier).
Failure mode to watch: “It’s probably the slicer.” Many intermittent failures are power dips and network dropouts masquerading as print problems.
A quick decision table: what to automate next
|
Your current pain |
Automate next |
Done when… |
|---|---|---|
|
Too much babysitting |
monitoring + alert playbooks |
alerts trigger a consistent response within minutes |
|
Too much time between jobs |
bed/plate reset workflow |
printers return to printing quickly after completion |
|
Too many inconsistent results |
profile library + fleet standardization |
same file prints similarly across a printer group |
|
Too many failed long prints |
filament + environment control |
failures from moisture/runout drop noticeably |
|
Operators triage all day |
recovery workflow + rescheduling |
retriable failures requeue cleanly with traceability |
FAQ
Is OctoPrint still useful in 2026?
Yes—especially for workflows and plugins you already rely on. But for a Klipper-centered farm, Moonraker provides a printer-control API designed around Klipper, and many farms treat OctoPrint as “where it fits,” not the control plane.
What’s the hardest part to automate in a real prosumer farm?
Physical handling: part removal, bed prep, and labeling/traceability. Software can help a lot, but the farm still needs a clean human workflow at the physical stations.
Can I run multi-printer Moonraker behind one domain?
Yes. Moonraker documents route_prefix for multi-instance setups behind a reverse proxy (see the Moonraker documentation linked earlier).
Do I need cameras on every printer?
Not necessarily, but cameras become more valuable as your response time increases (nights/weekends) and as job value rises. The key is to connect cameras to alert workflows—otherwise it’s just more video.
Next steps
If you’re building out your farm operations, start by writing baseline SOPs and locking your profile library—then add monitoring, queueing, and recovery in that order.
If you want a separate “foundations” checklist to pair with this automation layer, Sovol’s print farm management guide is a good companion read. For first-layer consistency across a fleet, our bed leveling guide is another practical reference.


