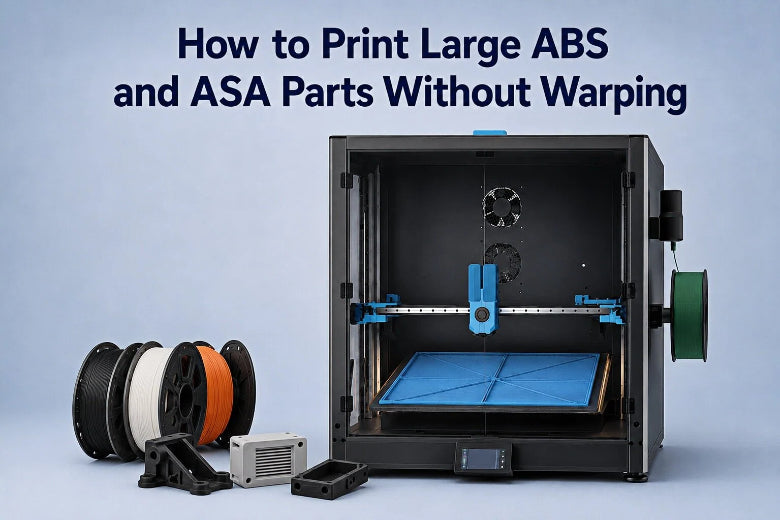
Acrylonitrile Butadiene Styrene (ABS) and Acrylonitrile Styrene Acrylate (ASA) are widely used engineering thermoplastics for FDM 3D printing. Valued for high heat resistance, mechanical toughness, and impact strength, they are ideal for functional prototypes, enclosures, and outdoor components.
However, large-scale ABS and ASA printing presents serious thermal challenges. While small parts print easily, large parts with footprints around 300-500 mm often suffer from lifted corners, parts detaching from the build plate, or cracked layer lines.
If you want to master how to print large ABS parts without warping, this practical guide explains the primary causes of warping, compares material behavior, provides recommended ASA 3D printing settings, and outlines a step-by-step workflow for reliable results.
Why Do Large ABS and ASA Parts Warp? Primary Causes
Warping is caused by thermal contraction. Polymers expand when heated and shrink when cooled. ABS and ASA shrink by approximately 0.7% to 1.5% as they cool from molten temperature (~250°C) past their glass transition temperature ($T_g \approx 100^\circ\text{C}\text{--}105^\circ\text{C}$) into solid form.
On a small print, total shrinkage is minimal. On large parts, cumulative contraction acts as a lever arm, pulling outer corners upward.
Here are the seven primary causes of warping:
- Temperature differences across the print: A hot bed (100°C) combined with cool ambient air creates steep temperature gradients between lower and upper layers.
- Cold drafts and unstable room temperature: Air currents from AC units, open windows, or room movement trigger localized thermal shock.
- Poor bed adhesion: Finger oils, dust, improper Z-offset, or lack of adhesive weaken mechanical grip.
- Excessive part cooling: High part cooling fan speeds blast cold air onto hot extrusions, accelerating shrinkage.
- Incorrect first-layer settings: Printing initial layers too fast or cold prevents proper squish and bed bond.
- Wet or poorly stored filament: Moisture in ABS or ASA turns to steam in the hotend, creating voids that weaken inter-layer strength.
- Large flat surfaces and sharp corners: Wide bases and 90° corners concentrate thermal shrinkage stress at acute points.
ABS vs. ASA: Material Comparison and Warping Behavior
Makers often ask how to prevent ABS warping versus how to prevent ASA warping. ABS and ASA share similar thermal challenges, but their exact shrinkage, adhesion, and printing behavior can vary by brand and formulation.
|
Property |
ABS |
ASA |
|---|---|---|
|
Primary Advantages |
High impact strength & heat resistance |
Excellent UV stability, weather resistance, and chemical durability |
|
Outdoor Suitability |
Prone to UV degradation and yellowing over time |
Replaces butadiene with acrylic rubber; ideal for outdoors |
|
Warping Behavior |
Requires draft control and high bed temperature |
Similar thermal shrinkage, though some blends warp slightly less |
|
Thermal Controls |
Requires warm, enclosed environment |
Requires stable enclosure temperatures and controlled bed heat |
Formulation Variance: Avoid assuming a single universal temperature profile fits every brand. Modern high-speed ABS and modified ASA blends vary in viscosity and temperature requirements. Always refer to manufacturer specifications.
Safety and Ventilation Recommendations
ABS and ASA printing should be performed in a well-ventilated area or with appropriate filtration systems. While an enclosure helps control drafts and ambient temperature, it does not automatically make indoor printing completely safe from volatile organic compounds (VOCs) and styrene emissions. Ensure room airflow or carbon filtration when running extended ABS/ASA builds.
Practical Starting Settings for Large ABS and ASA Prints
When configuring your slicer, start with proven baseline parameters for large ASA 3D printing and ABS parts. Note that these are starting ranges only—optimal temperatures vary significantly depending on filament formulation and machine capabilities:
|
Parameter |
ABS Starting Range |
ASA Starting Range |
Key Operational Notes |
|---|---|---|---|
|
Nozzle Temp |
240°C – 260°C |
240°C – 260°C |
Verify hotend temperature ratings. All-metal hotends are recommended for sustained high-temperature printing. |
|
Bed Temp |
90°C – 100°C |
80°C – 100°C |
Starting baseline only. Do not exceed hardware limits (e.g. 100°C for Sovol SV08 Max). |
|
Part Cooling Fan |
0% – 15% Max |
0% – 20% Max |
Keep fan OFF for layers 1–5. Use minimal fan only for tight overhangs. |
|
First-Layer Speed |
20 – 30 mm/s |
20 – 30 mm/s |
Slow speeds allow deep thermal bond into build plate texture. |
|
Print Speed |
40 – 100 mm/s |
40 – 100 mm/s |
Adjust based on machine kinematics and flow rate limits. |
|
Brim / Raft |
8 – 15 mm Outer Brim |
8 – 15 mm Outer Brim |
Fine-tune brim gap based on slicer profile and initial layer test prints. |
|
Enclosure Temp |
40°C – 50°C (Passive) |
40°C – 50°C (Passive) |
Maintain stable ABS enclosure temperature to prevent air currents. |
Note: These ranges are baseline starting points. Always follow specific filament manufacturer recommendations and your printer's official maximum temperature specifications.
Open-Frame Printing vs. Passive Enclosure vs. Actively Heated Chamber
Ambient thermal control determines success when executing large format ABS 3D printing.
|
Enclosure Type |
Ambient Environment |
Performance & Suitability |
|---|---|---|
|
Open-Frame |
20°C – 25°C Room Air |
Higher risk of warping and delamination for large ABS/ASA parts. |
|
Passive Enclosure |
Trapped Bed Heat (40°C – 50°C) |
May improve reliability for small-to-medium parts with brims. |
|
Actively Heated Chamber |
Controlled Heat (50°C+) |
Provides better draft and temperature control for large or thick parts. |
1. Open-Frame Printing
Printing large ABS or ASA parts on open-frame machines leads to high failure rates. Ambient drafts cool the part unevenly, causing corner curl and layer separation.
2. Passive Enclosure
A passive enclosure traps heat radiated from the bed, holding internal ABS enclosure temperature around 40°C to 50°C. This helps reduce ambient drafts for small to medium models.
3. Actively Heated Chamber
An actively heated chamber for ABS and ASA uses a dedicated heating system to maintain a more stable ambient temperature inside the build volume and can reduce temperature gradients during long prints.
For detailed criteria on active vs. passive setups, read Sovol's in-depth guide on whether you need a heated chamber 3D printer.
Hardware Example: Large-Format CoreXY Printers
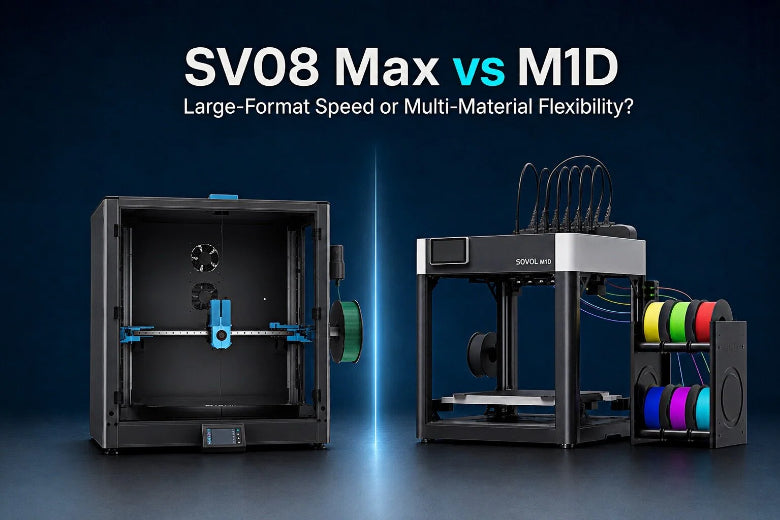
For expansive projects, large-format 3D printers like the Sovol SV08 Max feature a massive 500 × 500 × 500 mm build volume, up to 300°C nozzle temperature, and up to 100°C bed temperature. When printing large ABS or ASA models on this scale, installing an enclosure kit (which results in a 500 × 500 × 450 mm enclosed build volume) helps capture bed heat and prevent cold air drafts. If your application demands active chamber heating, note that the optional heated-chamber module needs to be purchased and installed separately.
Step-by-Step Workflow to Prevent Warping on Large Parts
Follow this 7-step pre-flight workflow to ensure success when executing large format ABS 3D printing:
|
Step |
Action Item |
Focus Area |
|---|---|---|
|
Step 1 |
Dry Filament |
Pre-dry spools based on manufacturer specs (e.g. 65°C for 6–8+ hours). |
|
Step 2 |
Preheat Bed |
Soak heat bed for 20–30 mins to stabilize ambient air temperature. |
|
Step 3 |
Clean Plate |
Scrub PEI build plate with dish soap, water, and 99% IPA. |
|
Step 4 |
Apply Brim |
Configure 8–15 mm outer brim with 0.0 mm gap or corner mouse ears. |
|
Step 5 |
Seal Drafts |
Ensure enclosure doors and panels remain fully closed. |
|
Step 6 |
Tune Fans |
Keep part fan 0% for initial layers; max 15–20% on overhangs. |
|
Step 7 |
Inspect First Layer |
Verify uniform line squish and zero corner lifting before proceeding. |
- Dry and store filament properly: ABS and ASA absorb moisture from humidity. Drying parameters depend on filament brand and moisture levels. As a starting guideline, ABS typically requires around 65°C for at least 6 hours, while ASA requires around 65°C for at least 8 hours in a filament dryer like the Sovol SH02 filament dryer box (which offers an adjustable 40°C–70°C temperature range). Always follow the filament manufacturer's specific recommendations.
- Preheat the bed and enclosure: Set the bed to operating temperature within your machine and filament specs (e.g. 90°C–100°C) and let the enclosed printer sit idle for 20–30 minutes before starting. This stabilizes ambient enclosure temperature and thermal frame expansion.
- Clean and prepare the build plate: Scrub PEI sheets with dish soap and warm water, then wipe with 99% IPA. Apply bed adhesive if using smooth PEI or glass.
- Use a wide brim or mouse ears: Configure an 8–15 mm brim or place 20–30 mm circular mouse ears on sharp corners in your slicer, fine-tuning the brim gap based on first-layer test prints.
- Reduce drafts and avoid opening the enclosure: Keep doors and covers closed throughout the print to prevent cold drafts from shocking the part.
- Adjust cooling gradually: Keep part cooling fans at 0% for initial layers, capping maximum fan speed at 10%–20% only for steep overhangs.
- Inspect the first layer before continuing: Check for uniform line squish and zero edge lifting before leaving the machine unattended.
Troubleshooting Common ABS and ASA Printing Issues

When issues arise, use this diagnostic reference to fix ABS/ASA warping and printing errors:
|
Symptom |
Primary Cause |
Recommended Action |
|---|---|---|
|
Corners Lifting |
Weak adhesion or thermal stress |
• Add a 12–15 mm brim and fine-tune brim separation based on first-layer test prints. |
|
Layer Cracking (Delamination) |
Cold air drafts / weak inter-layer bond |
• Turn part cooling fan OFF. |
|
Warping Mid-Print |
Temperature drop or room draft |
• Preheat enclosure longer before printing. |
Corners Lifting
- Cause: Insufficient bed adhesion or localized thermal contraction.
- Solution: Increase brim width to 12–15 mm, scrub PEI with dish soap, ensure bed temperature is within recommended filament limits, and fine-tune Z-offset.
Cracks Between Layers (Delamination)
- Cause: Cold ambient air causing weak layer bonding.
- Solution: Turn cooling fans completely OFF, raise nozzle temperature by 5°C, and maintain higher ambient chamber heat.
Warping After Several Hours
- Cause: Chamber air cooled down or room draft entered mid-print.
- Solution: Preheat the enclosure longer before starting, seal panel gaps, and ensure no AC drafts hit the printer.
Poor Bed Adhesion
- Cause: Finger oils on PEI surface or Z-offset set too high.
- Solution: Wash PEI plate with dish soap, re-level the bed, and reduce first-layer speed to 20 mm/s.
Uneven Walls or Dimensional Distortion
- Cause: Internal residual stress relaxing when cooling too fast post-print.
- Solution: Allow the model to cool down slowly inside the closed enclosure until the bed temperature drops below 40°C before removal.
Large ABS/ASA Printing Checklist
Follow this checklist before starting large ABS or ASA prints:
- Filament Dried: Dried ABS (approx. 65°C for ≥6 hours) or ASA (approx. 65°C for ≥8 hours) according to manufacturer guidance.
- Build Plate Scrubbed: Washed PEI plate with dish soap and wiped with 99% IPA.
- Enclosure Pre-Heated: Heated bed within hardware limits (e.g. 90°C–100°C) for 20–30 minutes to warm ambient air.
- Z-Offset Calibrated: Confirmed proper first-layer line squish via test print.
- Wide Brim Set: Applied 8–15 mm outer brim or corner mouse ears with fine-tuned brim separation gap.
- Cooling Restricted: Fan set to 0% for first 5 layers, max 15%–20% for steep overhangs.
- Drafts Sealed: Enclosure doors and panels completely closed.
- First Layer Verified: Checked L1 adhesion before leaving printer unattended.
Frequently Asked Questions (FAQ)
Q1: Why do large ABS parts warp more than PLA?
ABS warps more because of its higher thermal contraction rate and higher glass transition temperature (105°C). PLA solidifies near room temperature, whereas ABS shrinks significantly as it cools from 250°C, creating internal stress across large parts.
Q2: How can I prevent ABS warping on an open-frame printer?
To reduce warping on open machines, use a wide brim, bed adhesives, maximum bed temperature supported by your hardware (e.g. 90°C–100°C), and place the printer in a draft-free room. However, for large prints, adding an enclosure is strongly recommended.
Q3: What is the optimal ABS enclosure temperature?
Optimal ABS enclosure temperature ranges from 40°C to 50°C for passive enclosures, and higher controlled temperatures for an actively heated chamber for ABS and ASA, depending on part geometry and hardware specs.
Q4: Is ASA easier to print than ABS?
ASA and ABS require similar thermal-control strategies, but nozzle, bed, cooling, and drying settings should still follow the specific filament manufacturer's profile. While ASA is not inherently effortless to print, it offers superior UV resistance and weatherability for outdoor functional parts.
Q5: Should I leave large ABS prints inside the enclosure after printing finishes?
Yes. Let the part cool down slowly inside the closed enclosure until the bed drops below 40°C. Removing hot ABS parts into cool room air triggers rapid contraction and post-print warping.