


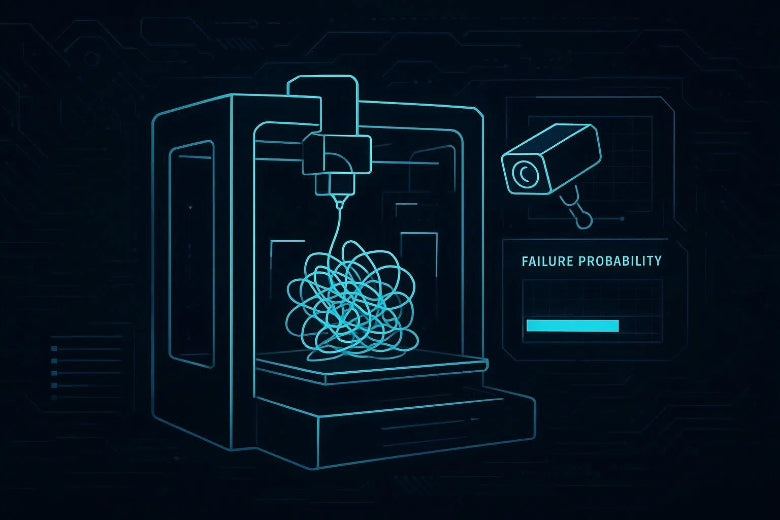
That’s where AI print failure detection has quietly become one of the most useful workflow upgrades for advanced FDM hobbyists in 2026: not a magic “quality button”, but a practical safety net that can catch obvious failures early, alert you, and (in some setups) pause a print before you waste half a spool.
You’ll also see this described as spaghetti detection for 3D printing—but the better systems aim to catch more than spaghetti.
This guide is product-agnostic. You’ll learn what AI monitoring can and can’t do, how to evaluate options, and how to set up your camera so the AI isn’t guessing in the dark.
Key Takeaway: AI failure detection works best when you treat it like a smoke alarm: it won’t prevent the fire, but it can stop a small problem turning into a full-on mess.
Why AI failure detection is worth considering now
Three things have changed:
- Better models, fewer “cry wolf” alerts. AI monitoring tools have been steadily improving at distinguishing real failures from shadows, reflections, and “busy” prints. Obico, for example, has discussed updates focused on reducing false alerts and improving detection in low light (Obico, “Next-Gen AI Failure Detection…”, 2026).
- Monitoring is getting easier to add. Whether you’re running OctoPrint, Klipper, or a more integrated ecosystem, camera-based monitoring has become a normal part of a serious hobby setup.
- Your prints are getting longer (and faster). High-speed tuning is great—until a small first-layer issue becomes a spaghetti disaster 40 minutes in, and you’re not in the room.
What AI can catch well (and what it can’t): 3D printer camera monitoring reality check
Most camera-based systems are strongest at visual, obvious failures. They’re weaker at failures that don’t show clearly on camera, or that look “normal” until it’s too late.
Here’s a practical matrix you can use when deciding whether AI monitoring will actually help your setup.
|
Failure type |
Camera-based AI is usually good at… |
Typical weak spots |
What to pair it with |
|---|---|---|---|
|
Spaghetti (air printing / bird’s nest) |
Noticing filament going where it shouldn’t |
If the failure is hidden behind the toolhead / tall part |
Smart pause/cancel rules + good camera angle |
|
Bed detachment |
Detecting a part that shifts or comes loose |
Small parts detaching under the nozzle can be subtle |
Better adhesion process + brim/raft decisions |
|
Nozzle blob / “filament beard” |
Spotting unusual blobs or shapes |
Glossy filaments + glare can look like blobs |
Lighting that avoids reflections |
|
Layer shift |
Catching obvious geometry drift |
Small shifts are harder, especially early |
Mechanical checks + belts + accelerations |
|
First-layer issues |
Sometimes detectable (especially close-up approaches) |
Wide shots often miss subtle under/over extrusion |
First-layer routine + z-offset discipline |
|
Clogs / heat creep |
Rarely “seen” early |
The print can look OK until it fails |
Extrusion monitoring, temp stability, maintenance |
If you want a broader overview of the kinds of failures camera-based tools talk about catching (spaghetti, detachment, layer shifts, first-layer issues), Obico’s 2026 comparison article is a decent starting point (Obico, “Best 3D Printer Failure Detection Tools Compared” (2026)).
The 5 evaluation criteria that matter for AI print failure detection
Most marketing focuses on “AI detection: yes/no”. That’s the wrong question.
1) What does it do when it detects a failure?
Detection without action is just a fancier notification. This matters for any system—including Obico AI failure detection—because the whole point is reducing wasted time and filament.
Look for:
- Auto pause (useful when you want to inspect and maybe recover)
- Auto cancel (useful for pure spaghetti where recovery is unlikely)
- Customisable sensitivity (you’ll want to tune this)
- Notification routes you’ll actually see (push, email, etc.)
Your goal isn’t “never fail.” It’s “fail fast, waste less, intervene when recovery is realistic.”
2) Camera requirements and flexibility
Ask:
- Can it use a standard USB webcam or Pi cam?
- Does it need 24/7 cloud streaming?
- Can you mount the camera where it makes sense for your printer (not where it looks pretty)?
This is the difference between “AI monitoring that works” and a webcam that just makes you more anxious.
If you’re comparing tools, look specifically for 3D print monitoring best practices built into the product: clear setup guidance, sensitivity controls, and an audit trail of what triggered an alert.
3) False positives: how controllable are they?
False positives are the main reason people abandon AI monitoring.
You want controls like:
- Sensitivity/threshold settings
- “Confirm before cancel” modes
- Ability to ignore certain regions (depends on tool)
And you want to set expectations: AI is pattern recognition. A shiny PETG reflection can look like a blob. A tall print can hide a failure from view.
4) Cloud vs local processing (privacy + latency)
Some systems process images in the cloud. Others can be self-hosted or run locally.
Consider:
- Privacy: are you comfortable sending periodic snapshots off-device?
- Latency: a slow detection loop can mean more wasted filament before pause/cancel
- Reliability: what happens if your Wi‑Fi drops mid-print?
There isn’t one “right” answer. The right answer is the one you’ll keep turned on.
5) Integration with the rest of your workflow
The more your printing is already structured (profiles, calibration, maintenance), the more value AI monitoring adds.
If your workflow is chaotic—random profiles, inconsistent filament storage, “I’ll level it later”—AI will mostly just document the chaos.
If you want to tighten the basics, SOVOL has a practical slicer-focused post on improving results with OrcaSlicer settings (“Improving Sovol Printer Results with OrcaSlicer Settings”). Treat it as “raise the floor” work that makes AI monitoring more effective.
Setup best practices that dramatically improve detection
AI detection is only as good as what the camera can see.
Obico’s guidance is refreshingly direct: get the angle, lighting, and focus right (Obico Docs: “Optimal camera and lighting setup for the best results”). Here’s the practical interpretation for a home workshop.
Camera angle: see the print, not the toolhead
Aim for:
- The camera view covers most of the print volume
- The extruder/toolhead doesn’t block a big chunk of the print
- A slight downward side angle is usually better than perfectly top-down
Avoid:
- Mounts that sit too close (huge toolhead in frame)
- Views that include lots of background clutter (wires, loose filament, moving shadows)
Lighting: avoid backlight and harsh reflections
If the camera is looking into a bright window, your prints will look like silhouettes. That’s bad for you and bad for the AI.
Practical rules:
- Put your light source on the same side as the camera
- Use a small lamp or LED strip if your room light goes off at night
- Reduce harsh reflections (especially with glossy filaments) by diffusing the light
- Focus: boring, but non-negotiable
- If your feed is blurry, don’t expect reliable detection.
- If your camera has autofocus, make sure it’s actually focusing on the print area.
- If it’s fixed-focus, spend the extra 10 minutes to dial it in.
Pro Tip: Before you trust AI monitoring on an overnight job, record a short timelapse or simply watch 2–3 minutes of the feed while the printer moves. If the toolhead repeatedly blocks the print, change the mount.
A “first week rollout” plan for advanced hobbyists
Don’t go from “no monitoring” to “auto-cancel everything” in one night. Treat this like any other tuning process.
Days 1–2: Nail visibility (camera + lighting)
Checklist:
- Most of the build volume visible
- No strong backlight
- Minimal background clutter
- Clear focus on the print zone
- Days 3–4: Alerts first, automation later
- Start with notifications.
If you enable automation, start with auto-pause (not auto-cancel).
Print something you already trust so you’re testing the monitoring, not your tuning.
Days 5–7: Add one rule at a time
Reserve auto-cancel for obvious, unrecoverable spaghetti.
For functional parts, prefer pause + inspect.
When you get a false alert, diagnose the cause (lighting, angle, reflections, occlusion) before blaming the model.
If it’s still spamming you after fixing visibility, the tool isn’t a fit for your environment.
What AI monitoring won’t fix (and what to do instead)
Some problems need old-school troubleshooting.
If you’re getting repeatable failures at the same height, look for mechanical binding, cooling issues, or power stability.
If the machine is losing power or behaving inconsistently, AI can only observe the failure.
For a safety-first troubleshooting walkthrough, SOVOL has a step-by-step guide focused on diagnosing power supply issues (“How to Troubleshoot 3D Printer Power Supply Issues”).
Key takeaways
- AI print failure detection is a workflow upgrade, not a quality upgrade. It’s about reducing wasted time and babysitting.
- Camera angle + lighting + focus matter more than the brand of AI. Fix the feed before you judge the model.
- Start conservative. Alerts first, then pause, then selective cancel.
- Use AI as a safety net while you improve fundamentals (profiles, filament handling, mechanical reliability).
FAQ
- Is AI print failure detection worth it for experienced hobbyists?
Often, yes—because your opportunity cost is higher. If you print overnight, run batches, or tune for speed, AI monitoring can reduce babysitting and wasted filament. It’s most useful when your camera setup is solid and you enable conservative automation.
2.What’s the most common failure AI catches?
“Spaghetti” style failures (filament extruding into air / tangles) are the classic win, because they’re visually obvious. Many systems also aim to catch detachment and other large anomalies, depending on camera view and model.
3.Will AI detection stop false alarms completely?
No. You can reduce them dramatically with lighting and camera placement, but some prints and materials create confusing visuals (reflections, shadows, occlusion). Use sensitivity controls and roll out automation slowly.
4.Do I need an enclosure for good detection?
Not strictly. But an enclosure can make lighting and camera placement more consistent (and reduce drafts that cause warping). If you print ABS/ASA, you’re likely already thinking about enclosure stability for reasons beyond AI monitoring.
5.Is it better to auto-pause or auto-cancel?
Start with auto-pause. Once you’ve seen what your system flags reliably, reserve auto-cancel for obvious, unrecoverable failures.
Next step (optional): If you’re tightening your reliability stack this year, start with one change you can verify—camera visibility, then slicer profile discipline, then monitoring automation. And if you’re looking for more practical maker-focused reliability guides, browse the SOVOL blog.


