


This guide focuses on the highest-ROI ways to cut filament use in FDM printing without tanking reliability. Examples reference OrcaSlicer, but the principles work in any slicer.
Key Takeaway: The biggest savings usually come from (1) removing supports, (2) printing less plastic inside the part, and (3) preventing failed prints.
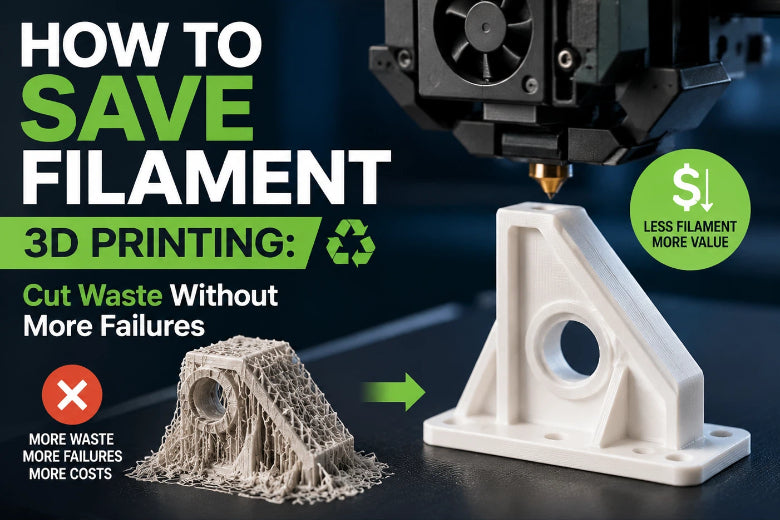
Where filament actually gets wasted
If you want to save filament, don’t start by shaving 2% off infill. Start where the plastic goes.
Most wasted filament falls into a few buckets:
- Supports: they’re designed to be thrown away.
- Overbuilt interiors: infill and thick shells that don’t match real strength needs.
- Adhesion helpers: brims/rafts you don’t truly need.
- Failed prints: first-layer failures, clogs, wet filament, bad extrusion calibration.
- Multi-color purging (if you do it): purge/flush towers can dwarf the part.
How to save filament 3D printing without increasing failures
Here’s the workflow that tends to work in real shops:
- Preview the slice (supports + infill) and estimate waste before printing.
- Reduce or eliminate supports via orientation and targeted support placement.
- Right-size the part’s interior (infill vs walls, infill type, layer height).
- Remove “comfort settings” (unnecessary brim/raft, too many bottom layers).
- Run a quick reliability check (first layer + flow/temperature sanity) before long prints.
A simple rule: if a tweak saves 10 grams but increases your failure rate, it’s a net loss.
1) Reduce supports first (the biggest lever)
Supports are often the largest chunk of “wasted” filament because you can’t reuse them and they add failure points.
Start with orientation (before touching support settings)
Rotate the model and re-slice. You’re looking for an orientation that:
- minimizes steep overhangs
- keeps cosmetic surfaces away from support contact
- avoids tall, skinny prints that wobble
Even small rotations can cut support volume dramatically.
Use chamfers or self-supporting geometry (when you control the design)
If you’re designing your own parts, swapping a sharp downward edge for a chamfer often turns “needs supports” into “prints cleanly.” Hydra Research’s FFF design rules and best practices is a good reference.
Split the model instead of printing a support forest
If no orientation looks good, splitting the model can be cheaper than supports:
- split into two parts so each prints support-free
- add alignment features (pins/slots) if needed
- glue/bolt together afterward
Target supports: blockers / paint-on supports / organic supports
Automatic supports are usually conservative. Instead:
- Block supports where they’re useless.
- Add supports only where you actually need them.
- Consider tree/organic supports for complex shapes—they can reduce contact and often use less material.
Don’t “fix” supports by making them dense everywhere
If underside quality is important, try keeping the bulk of supports sparse and using a denser interface only where it matters.
For a practical overview of selective supports and material-saving tactics, Prusa’s 10 tips for saving filament, money and environment is a solid starting point.
⚠️ Warning: If you reduce supports too aggressively, you may “save” filament and then lose the whole print to a collapsed overhang. Test on a small section before committing.
2) Print less plastic: infill vs walls, infill pattern, and layer height
The goal isn’t “lowest infill.” It’s “enough structure for the job.”
Use walls strategically (often better than dense infill)
For many parts, extra walls add strength more efficiently than cranking infill.
If you’re printing something functional (brackets, mounts, jigs), a reliable starting mindset is:
- start with moderate walls
- keep infill modest
- increase infill only when the part truly needs internal support
Choose infill patterns that match your goal
Different infill patterns trade strength, speed, and material use. If you want a quick refresher, SOVOL’s guide to infill patterns explained: strength vs material efficiency summarizes common patterns and typical density ranges.
A quick settings table: strength vs filament used
Use this as a starting point, then iterate based on the part’s real load and how your printer behaves.
|
Part type |
Walls (perimeters) |
Infill density |
Infill type (idea) |
Layer height (idea) |
Notes |
|---|---|---|---|---|---|
|
Visual / cosmetic models |
2 |
Low |
Lightning / sparse / fast pattern |
Moderate to thicker |
Prioritize support reduction and good top surfaces over “strong internals.” |
|
Light-duty functional parts (covers, organizers) |
2–3 |
Low–moderate |
Gyroid / grid |
Moderate |
Add walls before jumping infill. |
|
Brackets / jigs / moderate load |
3–4 |
Moderate |
Gyroid / cubic |
Moderate |
Make sure layer adhesion and extrusion are dialed in first. |
|
High-stress parts |
4+ |
Moderate–high (as needed) |
Strong pattern (e.g., gyroid/tri-hex) |
Moderate |
Consider redesigning geometry before pushing infill very high. |
Variable layer height: a smaller lever, but useful
Variable layer height won’t usually beat support reduction, but it can help you keep detail where you need it and use thicker layers elsewhere.
3) OrcaSlicer settings that quietly waste filament
Even if you don’t change your model at all, a few habits can burn filament:
- Using a brim or raft by default (instead of only when needed)
- Keeping extra bottom layers “just in case”
- Leaving supports on when a small rotation would remove them
- Doing full-size test prints instead of tiny calibration pieces
The fix is less about one magic toggle and more about printing with intent: use the helper only when it solves a real failure mode.
4) Stop failed prints before they happen (the underrated filament saver)
The cheapest filament is the filament you never had to reprint.
A minimal calibration checklist (worth doing before long prints)
If your print success rate isn’t where you want it, run a short routine:
- Clean the bed (fingerprints and residue are adhesion killers)
- Re-check first-layer/Z-offset with a first-layer test
- Verify extrusion calibration (E-steps, then flow)
- Run a temperature tower when changing filament type/brand
Obico’s OrcaSlicer calibration guide is a helpful OrcaSlicer-oriented reference.
Keep filament dry (storage beats troubleshooting)
Moisture can show up as stringing, rough surfaces, bubbling, or inconsistent extrusion—then you’re wasting filament chasing settings.
A good baseline:
- store opened spools sealed with desiccant
- dry only when needed (and avoid overheating)
For practical storage habits, SOVOL’s filament storage tips to prevent stringing and jams is a solid checklist, and Prusa’s drying filament guidance is a good reminder to treat drying as the exception, not the default.
5) If you do multi-color printing: treat purge waste as its own project
Multi-color setups can waste a surprising amount of filament on purging.
If you do multi-color regularly, don’t guess—tune purge/flush volumes and, where your workflow allows, redirect purge into less-visible areas like supports or infill.
For a deeper dive, see SOVOL’s guide: reduce filament waste in multi-color 3D printing.
FAQ
What saves more filament: fewer walls or lower infill?
Lowering infill usually saves more filament immediately, but it can also cause top-surface sagging or weak parts if you push too far. For functional prints, a better path is often: add a wall first, then adjust infill.
Is lightning infill always the best for saving filament?
It can be great for visual models, but it’s not universal. If the part needs internal support for screws, loads, or impact, use a stronger infill strategy.
Will drying filament really save me money?
If you’re reprinting because of stringing, popping, clogs, or inconsistent extrusion, better storage (and occasional drying) can pay for itself quickly.
How do I know if I’m “saving filament” but increasing failure risk?
If supports start collapsing, top surfaces sag, or parts crack along layer lines, you’ve pushed too far. Change one variable at a time and test a smaller print before a long job.
Next steps
Pick one area and improve it systematically:
- If you use supports a lot, focus on orientation + targeted supports first.
- If you reprint often, focus on first-layer + extrusion + dry storage.
- If you do multi-color, treat purge tuning as its own project.
And if you’re collecting tuning notes, keep them in a simple “profiles log” (filament + nozzle + printer + date). The fastest way to waste filament is to forget what worked.


