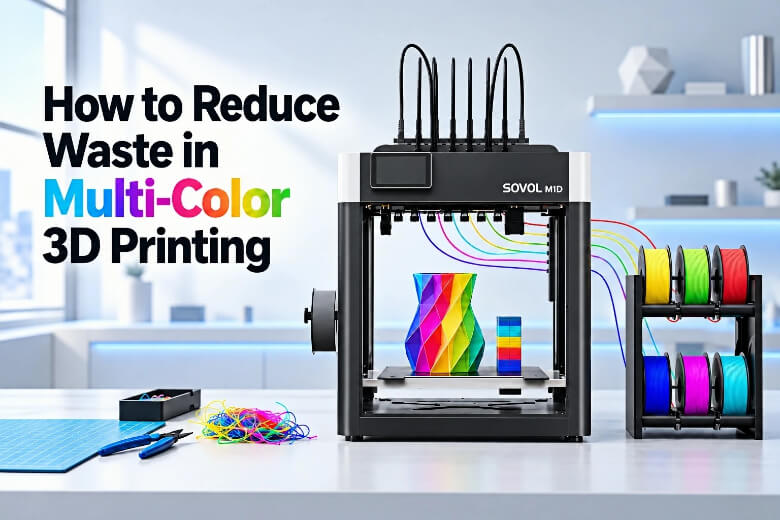
You sliced a four-color model, hit print, and twelve hours later the purge tower weighs more than the part. The mechanism behind that is simple: on a single-nozzle multi-color printer, the hotend is a shared melt reservoir, so when filament changes the nozzle keeps emitting a blend of old and new plastic until enough new material pushes the old out, and the slicer commands a purge to get there (why the waste happens at all). That purge is the waste.
It is not fixed, though. Waste is often strongly influenced by the number of filament changes and the flush volume used for each transition, which means every lever that reduces either number reduces what you throw away. The catch is that flush volume is not one setting: Bambu Studio's documentation states the required flushing volume "is different depending on the relationship between the 'From' filament and the 'to' filament," with darker colors needing a higher volume to switch into lighter ones.
This guide covers where multi-color 3D printing waste actually comes from, how the main workflows compare, and the concrete steps, in the model, the slicer, and the hardware, that cut it down.
Key Takeaways
- Waste is often strongly influenced by the number of filament changes and the flush volume used for each transition.
- Layer height, part orientation, and plate batching all change the number of filament changes before you touch a purge setting.
- Flush volume is a per color pair value, not a global number, and dark-to-light transitions usually need the most.
- Flush-into-infill and flush-into-support only work while the prime tower stays enabled, so they reduce waste rather than remove the tower.
- Independent toolheads can reduce shared-nozzle purging but do not eliminate wiping and priming.
- The highest-impact moves are the ones that cut the number of filament changes, because waste generally tracks change count. Increase layer height, reorient the part so transitions sit low, batch identical copies on one plate, tune flush volume per color pair, and route purge into infill or a sacrificial object where your slicer allows it.
Why Multi-Color 3D Printing Creates Waste
Waste in multi-color FDM comes mainly from two streams: the purge that clears the shared melt zone at each filament change, and the prime tower that receives the purged and primed material. Additional waste can come from support and interface material, failed or incomplete transitions that force a reprint, and color bleed that fails a part on inspection.
On a shared-nozzle system, some purging is generally needed to clear the previous material.as an unload/load pair: the nozzle has to be emptied of the previous polymer before the next one is reliable, and the size of that deposit is the user-tunable purging volume. Prusa's own example values show the asymmetry clearly: black to white requires more total volume than white to black, because contamination from a darker into a lighter color is higher.
The prime tower is the second stream, and it is sized by your transitions, not your model. Prusa's documentation notes that the wipe tower size depends on the amount of color changes rather than the size of the object, and that printing multiple copies at once can improve overall filament efficiency (how the wipe tower is sized).
The Main Sources of Filament Waste

Think of it this way: every gram you lose is usually tied to a filament change and a flush volume. That makes the sources fairly predictable once you know where to look.
Note: Flush-into-infill and flush-into-support do not remove the prime tower. OrcaSlicer's flush options state that purging into infill "will not take effect, unless the prime tower is enabled." The same page warns that mixed-color infill can show through transparent walls, so treat this as a way to absorb some purge, not to delete the tower.
The main sources of waste to check on any multi-color print:
- Purged filament at each change, scaled by flush volume
- Prime tower material, scaled by change count and the height of the last change
- Filament used to build the tower's foundation below the first change
- Failed or incomplete transitions that force a reprint
- Color bleed that fails a part on inspection
- Support and interface purging when a second material is involved
Every multi-color workflow trades waste against cost, speed, and complexity. The question is not which one eliminates waste, because none does, but which one matches how often you change colors and how much you care about the trade.
How Model Design Affects Waste
The cheapest waste reduction happens in the model, before any slicer setting. Orientation and color placement decide how many transitions a part needs, and no purge setting can undo a design that changes color on every layer.
Orientation is the clearest example. Rotating the same part upside down so all filament changes sit at the bottom can reduce prime-tower material substantially, because the tower can stop early once the last change is done (Bambu Studio's worked example).
Flush-into-object goes further by giving the purge somewhere useful to land. In Bambu Lab's flush-into-object example, a cube that would normally require a large amount of flushed filament ends up with very little flush once that filament is deposited into sacrificial objects instead of the tower or chute. The accounting caveat matters: the plastic still gets printed into those objects, so you save the chute waste, not the material itself.
Design levers worth testing before you commit to a long print:
- Orient the part so transitions cluster low. Fewer layers above the last change means a shorter tower.
- Lay a tall part on its side when the color pattern allows it. This can reduce the change count, but laying down a part whose colors are already organized horizontally can multiply waste instead.
- Match the flush object's height to the main part. Flush parts taller than the multi-material part consume new filament for the remaining height.
- Give the purge somewhere to go. This can help use some purged material inside infill, supports, or sacrificial objects instead of sending it directly to waste.
- Batch identical copies. Duplicating a model does not increase the change count, so the same waste is shared across more finished parts.
Slicer Settings That May Reduce Waste

The slicer is where you verify that a design change actually paid off, and where you tune the flush volume that the model cannot control. The rule is to change one thing, slice, and read the numbers before committing filament to a long print.
Start with the flush multiplier, then prove it. The Bambu Studio wiki's multiplier guidance calls a multiplier of 0.8 or 0.9 "a quick way to save filament," because default values "tend to be slightly higher than necessary in order to err on the side of print quality," and it states you must run test prints to confirm color and physical quality are unaffected. Treat that as a starting point for a calibration print, not a setting to trust blind.
Then reduce the tower itself. Prusa's wipe-tower guidance describes options such as skipping sparse layers, which skips the layers that contain no tool change, cutting tower material that serves no transition.
Pro Tip: Before any long multi-color print, open the preview and count the tool changes. If the number surprises you, the model orientation or layer height is the problem, not the purge setting.
Check the ratio on your own preview: if the tower is a large share of total waste, the flush-into-object settings are not doing the work you think.
Comparing Multi-Color Printing Workflows

Every multi-color workflow trades waste against cost, speed, and complexity. The question is not which one eliminates waste, because none does, but which one matches how often you change colors and how much you care about the trade.
UltiMaker's dual-extrusion guide frames the trade directly: dual-extruder systems avoid filament switching during the print, while single-nozzle multi-material systems "may lead to longer print times because of filament switching and can produce more waste material." The same guide notes that increasing purge volume for cleaner color transitions "may increase material usage," which is the honest version of the tradeoff: waste and color purity move in opposite directions.
|
Workflow |
Typical waste sources |
Potential considerations |
Best fit |
|---|---|---|---|
|
Single nozzle with filament changer |
Purge at every change plus prime tower |
Failed loads or clogs can end a job; more purging overall |
Beginners and hobbyists printing occasional multi-color parts |
|
Dual extruder |
Purge mainly when switching between the two nozzles |
Usually relies on preloaded materials, but capabilities vary by printer and workflow. |
Two-material functional parts and soluble supports |
|
IDEX or tool changer |
May reduce shared-nozzle purging, although wiping, priming, and other transition material may still be required |
More setup and calibration; mechanical alignment matters |
Repeated multi-color work and multi-material parts |
|
Manual filament changes |
Entire transition is user-timed |
Layer alignment depends on the operator; suited to simple bands |
One-off color bands and signage |
How IDEX Printers Can Help
IDEX and tool-changing printers can reduce waste by giving each material its own melt path, so a color change becomes a tool swap instead of a full nozzle flush. That can cut the largest waste stream, the purge, but it does not remove wiping and priming, and it does not make waste zero.
The vocabulary here is defined by process, not by marketing. The ISO/ASTM definition of material extrusion notes that support material can be different from the part material and deposited from a separate orifice, which is the mechanical basis for tool-based multi-material printing.
How the Sovol M1D Fits Multi-Color Printing Workflows
The Sovol M1D uses independently controlled toolheads, which can reduce the need for shared-nozzle purging in applicable multi-color and multi-material workflows. However, wiping, priming, and other transition processes may still use some filament, depending on the model, materials, and slicer settings. You still tune flush volumes and transition settings yourself, on any machine.
Practical Workflow Before a Long Print
Cut the number of filament changes first, then the volume per change. Raise the layer height, reorient the part so transitions sit low, and batch copies on one plate. Then lower the flush multiplier within your slicer's supported range and confirm the result with a small test print before running a long job.
Multi-color printing is not inherently wasteful, it is waste-proportional. Every gram you lose is usually tied to a filament change and a flush volume, so the workflow is straightforward: reduce the changes in the model, verify the count in the slicer preview, tune the flush volume per color pair, and route what purge remains into infill or a sacrificial object. If you print multi-color often enough that the tower is a recurring cost, it is worth seeing how an independent-toolhead printer handles color changes before you buy another spool to feed the chute.
FAQ
Does Multi-Color 3D Printing Always Create More Waste?
Not always, but single-nozzle multi-color systems often use extra filament for purging, wiping, and priming during color changes. The amount of waste depends on the number of changes, color combinations, materials, slicer settings, and model design. IDEX systems may reduce shared-nozzle purging, but they can still use some filament for wiping and priming.
Can Flush-Into-Infill Reduce Filament Waste?
Flush-into-infill can redirect some purged filament into the model instead of sending it directly to waste. However, it may not remove the prime tower, and mixed-color infill can show through thin or transparent walls. Treat it as a way to reduce discarded material, not as a guarantee of zero waste.
Does an IDEX 3D Printer Eliminate Purge Waste?
No. An IDEX printer can reduce the need to flush a shared nozzle because each toolhead has its own melt path. However, wiping, priming, tool changes, and other transition processes may still use some filament. Results depend on the printer, materials, model, and slicer settings.
How Can I Reduce the Number of Color Changes?
Simplify the color layout, group color changes into fewer layers, and orient the model so the final color changes occur lower in the print. You can also consider a higher layer height when the model’s surface detail allows it, batch identical copies on one plate, and review the tool-change count in the slicer preview before printing.
What Flush Multiplier Should I Use?
Start with your slicer’s default value and test a small model before making a long print. Flush requirements vary by color pair, material, nozzle, printer, and model geometry. Reduce the value gradually only if the test shows that color transitions remain clean without excessive bleeding.