Independently heated toolheads are one way the industry is addressing this problem. If you've wondered how the approach works and whether it applies to you, this article breaks it down in plain terms.
Key Takeaways
- An independently heated toolhead is a complete print head with its own heater, thermistor, and nozzle that can be set to its own temperature.
- Unlike a single-nozzle filament-changer, a tool-changing system assigns a dedicated toolhead to each material so the nozzle never has to flush one material out before accepting another.
- Independent heating lets each material stay at the right temperature and allows preheating before the toolhead is called into action.
- Practical benefits include cleaner color transitions, less nozzle contamination between materials, and potentially shorter wait times during tool changes.
- Independent heating improves the hardware side of multi-material printing — it does not substitute for compatible materials, correct slicer settings, or a well-maintained machine.
What Is an Independently Heated Toolhead?
An independently heated toolhead is a self-contained print head — heater block, thermistor, heat break, and nozzle — that can be temperature-controlled on its own, separate from any other toolhead on the same printer.
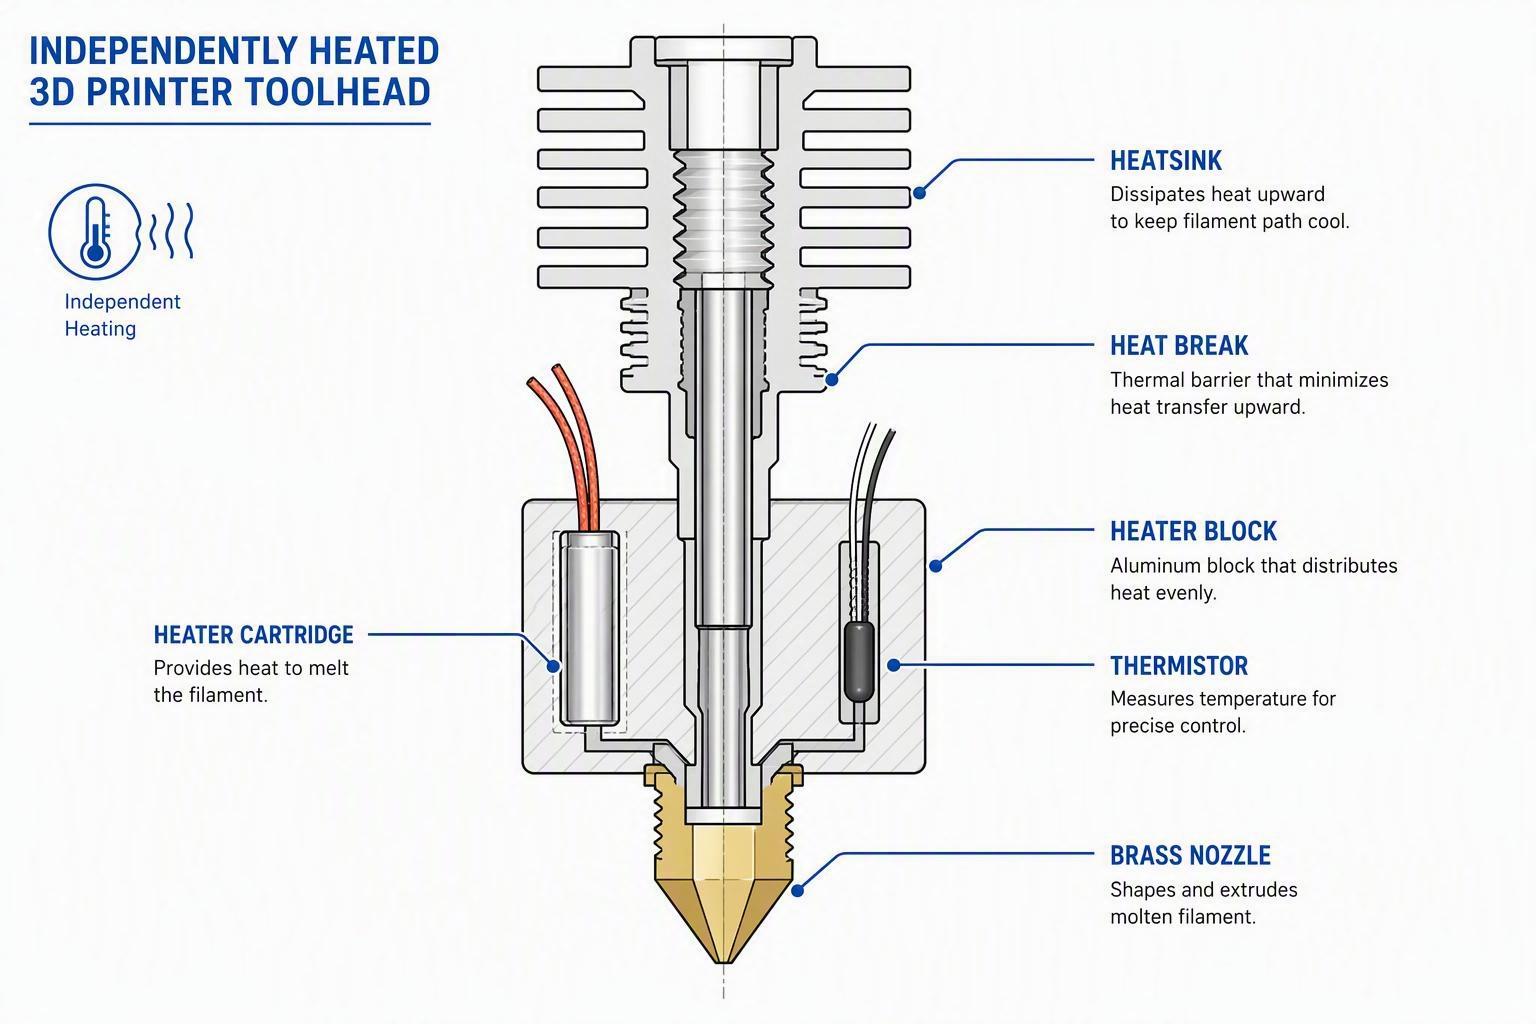
In a tool-changing system, the printer holds more than one of these toolheads and swaps between them during a print. Each toolhead is assigned to a specific filament. Because each has its own heater, you can set each one to whatever temperature that material requires.
How that differs from a filament-changing system: A single-nozzle filament changer uses one hotend for everything. When the material switches, the printer has to purge the old filament out of the shared nozzle before the new one can flow cleanly. That nozzle has to satisfy the temperature needs of every material in the print — sometimes heating up, sometimes cooling down — and some of the purging happens at an intermediate temperature that neither material fully prefers.
With dedicated toolheads, there is no shared nozzle to flush. Each toolhead can be assigned its own material profile and target temperature, depending on the printer and slicer configuration. The only thing that changes during the print is which head is over the build plate.
How Independent Heating Works in Practice

Two things change once each toolhead has its own heater. First, the slicer assigns a target temperature to each toolhead based on the material loaded in it, and the printer controller holds those temperatures independently — Material A's toolhead stays at its set point no matter what Material B's toolhead is doing. Second, because the heating is separate, the printer can start warming a toolhead before it is called into the print. By the time the active toolhead finishes its segment, the next one may already be at temperature instead of catching up after the switch command.
There is also no repeated unload-and-reload cycle. Each filament stays loaded in its own head for the whole print, so the printer simply parks the current head and picks up the next one.
Practical Benefits of Independently Heated Toolheads

Each Material Uses Its Own Temperature Settings
Because there is no shared nozzle, there is no need to compromise on temperature. A material that prints best at a higher temperature can run at that temperature without affecting the toolhead assigned to a lower-temperature material.
Potentially Less Waiting During Tool Changes
Preheating means the next toolhead may already be at temperature when it is needed. Actual time savings depend on the printer model, firmware, slicer configuration, and the thermal properties of the materials involved — results will vary.
Reduced Nozzle Contamination
When every material has its own nozzle, the residue from one filament does not end up inside another filament's flow path. This matters most when mixing materials with very different flow characteristics or colors, where even a small amount of contamination shows in the final print.
More Flexibility With Model and Support Materials
Pairing a rigid model material with a soluble support material — like PVA — works better when the support material has its own dedicated nozzle. Mixing soluble and non-soluble materials through the same hotend raises the risk of residue buildup over time.
Independently Heated Toolheads vs. Single-Nozzle Filament Changers
|
Aspect |
Independently Heated Toolheads |
Single-Nozzle Filament Changer |
|---|---|---|
|
Heating workflow |
Each toolhead maintains its own temperature independently |
One hotend handles all materials and may need different temperature settings between them |
|
Material switching |
Printer parks one toolhead and picks up another |
Printer retracts, purges, and loads the next filament through one nozzle |
|
Nozzle contamination |
Each material has its own nozzle |
Shared nozzle can retain residue from previous material |
|
Temperature management |
Each material can run at its optimal temperature |
Temperature must satisfy the current material while managing residue from the last |
|
Purge / cleaning requirements |
Typically requires a wipe or prime; may reduce the need for large purge structures, depending on the workflow |
Often requires a purge tower or flush block to clear the shared nozzle |
|
Workflow complexity |
More hardware to calibrate (XY offsets, Z alignment); simpler per-material temperature management |
Simpler hardware setup; more complex filament-change sequence per transition |
|
Suitable use cases |
Multi-material combinations with different temperature ranges; high-contrast color work; soluble supports |
Multi-color work with similar materials at similar temperatures; setups where hardware simplicity is the priority |
How Independent Heating Helps With Different Material Combinations
Different Colors of the Same Material
Even within the same filament type, independent toolheads reduce cross-color contamination. A dedicated nozzle per color means you are not trying to purge a dark color out of a shared path before switching to white or yellow.
Rigid and Flexible Materials
Combining a rigid filament (such as PLA or PETG) with a flexible one (such as TPU) is one of the scenarios where shared-nozzle systems struggle most, because flexible filament does not respond well to the retraction and purge sequences designed for rigid materials. A dedicated toolhead for the flexible filament avoids that conflict.
Model Material and Support Material
Using a soluble support like PVA alongside a model material is a common use case for independent toolheads. Each material stays in its own flow path. Dedicated toolheads can reduce cross-contamination between support and model materials, but moisture control is still necessary for materials such as PVA.
One important note: independent heating improves the temperature management side of the equation, but it does not guarantee compatibility between any two materials. Adhesion between layers of different materials depends on their chemical compatibility, shrinkage rates, thermal behavior, bed surface, slicer profile, and the specific printer and nozzle configuration. Check material compatibility guidance for your printer before combining materials.
The Sovol M1D: Tool-Changing With Independent Heating
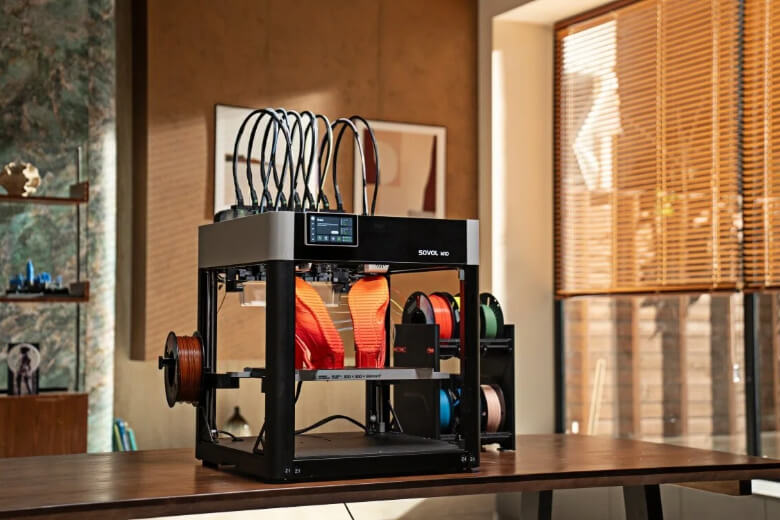
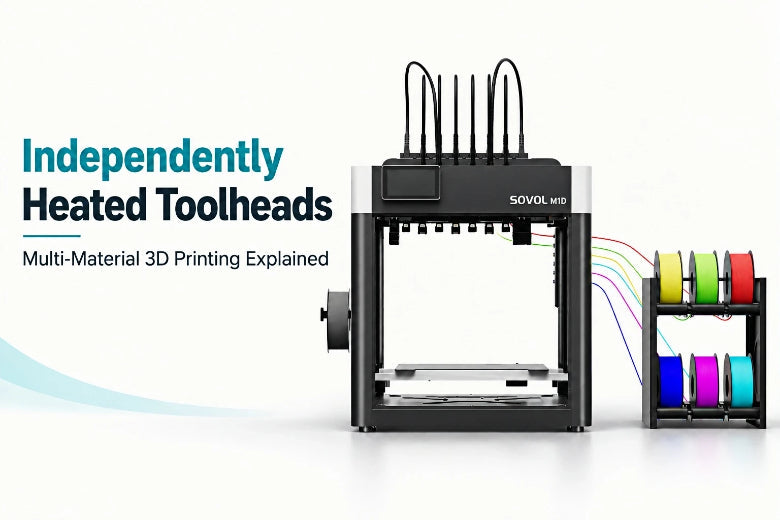
The Sovol M1D is a tool-changing 3D printer built around a system Sovol calls DualX — a 1+6 configuration with one fixed toolhead on the left and six changeable toolheads on the right.
All seven toolheads on the M1D are designed to heat independently. Each one can be assigned a different material or color, and each can be set to its own temperature profile. The six-channel automatic filament system monitors all active filaments for runout and tangles throughout the print.
The fixed left toolhead is well-suited for the support material or the most frequently used color, since it does not need to dock and undock. The six right-side toolheads swap in and out as needed via an automatic motor-driven locking mechanism.
This setup supports up to seven colors or materials in a single print. Users can assign dedicated toolheads to rigid materials, flexible materials, or soluble supports without sharing a nozzle between them.
What Independent Heating Does Not Solve
Independent heating is a meaningful improvement in multi-material hardware — but it does not replace the rest of what a successful multi-material print requires.
- Incompatible materials: If two materials do not bond well or shrink at incompatible rates, separate toolheads do not change that. Even compatible materials can bond poorly if cooling, speed, or layer temperatures are not tuned for the combination.
- Incorrect slicer assignments: Assigning the wrong material profile to a toolhead, or swapping which toolhead handles which material by mistake, will produce predictable failures regardless of the heating system. Each material still needs its own optimized cooling and print speed — independent heating sets the nozzle temperature, but the slicer handles the rest.
- Poor filament storage: Moisture-degraded filament causes underextrusion and surface defects no matter how well the toolhead is heated. Filament runout and detection systems can catch some problems mid-print, but dry filament is still the starting point.
- Dirty or worn nozzles: A partially blocked nozzle in any toolhead will produce poor extrusion for that material, so inspect and clean worn nozzles regularly.
- Mechanical and calibration issues: Docking errors from wear or debris, misaligned XY or Z offsets, and unreliable bed adhesion are all problems independent heating cannot fix — the first layer has to stick before adding more materials helps.
Practical Setup Workflow for Multi-Material Printing
Before starting a multi-material print with a tool-changing system, work through these steps:
- Choose compatible materials — confirm that the materials you plan to combine are known to bond and print together successfully on your printer and bed surface.
- Assign each material to its intended toolhead and profile — review the material-to-toolhead mapping in your slicer, use profiles validated for your printer rather than generic defaults, and double-check the physical loading on the printer before starting.
- Review the sliced preview — check that each color or material segment is assigned to the correct toolhead and that tool-change sequences occur where you expect.
- Monitor the first layers and early tool changes — watch the first few switches live. If a transition looks wrong, stop and investigate before the print continues.
Troubleshooting Common Multi-Material Issues
The wrong material prints in a section, or color bleeds at the boundary Check the toolhead-to-material assignment in both the slicer and the printer — a mismatch between what the slicer thinks is loaded and what actually is, is the most common cause. A small wipe or prime amount may still be needed at transitions even with dedicated toolheads, so review the transition settings in your slicer profile.
The next toolhead is not ready when it is called Check whether preheating is enabled for standby toolheads in your slicer or firmware settings. A cold toolhead will either make the printer wait or throw a temperature error.
Bonding problems, either within one material or between two Poor layer bonding usually comes down to print temperature, print speed, and cooling rather than the toolhead itself. If two different materials will not adhere at the interface, it may be a compatibility issue instead — check whether those materials are known to bond.
A tool change errors out, or print quality differs between toolheads Inspect the docking mechanism for debris or wear and confirm the toolhead is seated correctly. If one toolhead consistently prints worse than the others, tune its flow rate, retraction, and print speed individually rather than assuming a hardware fault.
Frequently Asked Questions
What are independently heated toolheads?
Independently heated toolheads are print heads that each contain their own heater, thermistor, and nozzle. In a tool-changing printer, each toolhead can be set to a different temperature, and the temperatures are managed separately — one toolhead's setting has no effect on another's.
Are independently heated toolheads better than one shared nozzle?
It depends on your use case. For multi-material combinations with very different temperature requirements — or whenever nozzle contamination is a concern — a dedicated toolhead per material offers real advantages. For simpler multi-color work using similar materials at similar temperatures, a filament-changer may be sufficient.
Do I need separate material profiles for each toolhead, and can toolheads run the same material?
A suitable material profile is generally recommended for each material, while the exact mapping depends on the slicer and printer workflow. Multiple toolheads can also run the same material in different colors.
Can I print different materials in the same model, and do independent toolheads eliminate purge waste?
You can, but compatibility between materials is not guaranteed by the hardware alone. The materials must bond to each other, shrink at compatible rates, and be printable on the same bed surface — always check the material compatibility guidance for your specific printer and filament combination first. As for waste, independent toolheads can reduce purge waste compared with some single-nozzle systems, although wipe or prime material may still be used to ensure the nozzle tip is clean at the start of a segment.
Conclusion
Independent heating is the right foundation for multi-material printing, but the hardware only unlocks its full potential when the rest of the stack is in order: compatible materials, correct slicer profiles, clean and calibrated toolheads, and reliable bed adhesion. Everything else still needs to be built on top of it.