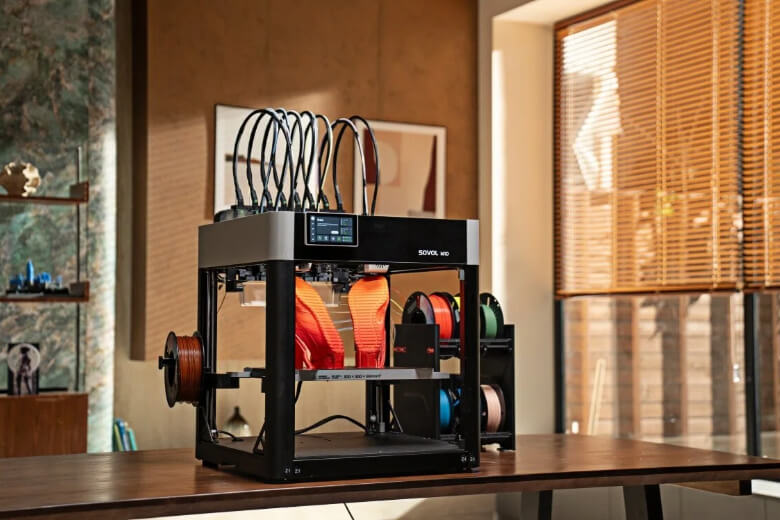
This guide walks you through a sensible first-print path for the Sovol M1D: what to check before you start, how the tool-changing workflow fits together, how to assign filaments to toolheads, how to prepare a simple first test in OrcaSlicer, what to watch while it runs, and how to sort out the problems that show up on early multi-material jobs.
Key Takeaway: The M1D's automatic loading, monitoring, and calibration features remove a lot of fiddly work — but they don't guarantee a perfect first print. The prints that go smoothly are the ones where the build plate, toolheads, filament routing, and slicer assignments were all double-checked first.
What to Check Before Your First Print
A few minutes of checks up front save you from chasing a failed first layer later. Walk through each of these before you slice anything.
Build Plate
- Confirm the plate is seated flat and pushed fully into place.
- Clean the surface — even a fresh plate can pick up fingerprints or dust from handling.
- Wipe it with a clean cloth and a suitable cleaner for your plate type, and let it fully dry before printing.
Toolheads
- Verify each toolhead you plan to use is seated and locked in its bay.
- Check that exchangeable toolheads move freely and have no visible debris on the nozzle tips.
- Look for any stray filament or dried residue on a nozzle tip before it goes to work.
Filament Paths and Cables
- Route filament so it feeds smoothly from the spool into each assigned channel without sharp bends or snags.
- Confirm toolhead cables and tubes aren't catching on anything during travel.
- Make sure no wire or filament runs through the path an exchangeable toolhead needs to park in.
Workspace and Ventilation
- Put the printer on a sturdy, level, vibration-free table with room on all sides.
- Keep the area around the machine clear of clutter that could block a toolhead change.
- Printing with some materials releases fumes, so work in a ventilated area — and if you run engineering plastics like ABS or ASA, follow the guidance for an enclosed setup such as the one covered in our Sovol M1D Essential vs Advanced guide.
How to Use the Sovol M1D: Understanding the Workflow

Understanding the machine's design helps you configure it correctly instead of just guessing at settings.
One Fixed Toolhead and Six Changeable Toolheads
The M1D uses Sovol's DualX system, combining one fixed toolhead with six changeable toolheads that dock in a parking bay. That "1 + 6" arrangement gives you up to seven toolheads, each able to hold its own color or material. Because toolheads are exchanged rather than routing every filament through one nozzle, each color or material can have a dedicated toolhead with its own temperature and preheat behavior.
Multi-Color and Multi-Material Printing
You can run up to seven colors or materials in a single job — for example a PLA body with TPU flexible grips and a PVA layer used purely for soluble supports. Because each material gets its own toolhead and nozzle temperature, you don't push one filament through settings meant for another.
Automatic Filament Loading and Monitoring
The M1D's six-channel auto filament system handles M1D filament loading automatically and keeps an eye on things while you print. It monitors for filament runout, nozzle clogs, and filament tangles — helpful early warning signals on a long first job.
Automatic Calibration
Several automatic systems cut the setup guesswork: vision-based calibration sets toolhead XY offsets, auto Z-lift and Z-offset keep both nozzles at matching height, eddy-current scanning handles non-contact bed leveling, and vibration compensation trims ringing. All handy — but early on, don't treat them as a one-time "set and forget" button. You still want to watch the first layers.
Multi, Copy, and Mirror Modes

The M1D supports different print modes you can choose depending on the job:
- Multi Mode builds a multi-color or multi-material model, assigning colors, materials, or a support role to different toolheads.
- Copy Mode prints two identical parts at once across the two toolheads — handy for doubling output of a simple part.
- Mirror Mode prints left- and right-hand mirrored parts together.
For your first test print, stick with Multi Mode and a simple model. That's the workflow this guide focuses on.
Prepare and Assign Filaments to Toolheads
Applying materials to the right toolhead is where multi-material prints are won or lost, and where beginners most often swap a color by accident. A little careful M1D toolhead setup here saves a lot of re-slicing later.
Learn Your Way Around the Machine First
Before you load anything, spend a minute learning how to use the Sovol M1D's workflow: a fixed primary toolhead on the main carriage and exchangeable toolheads parked in the bay. That mental model tells you why filament has to reach a specific docked toolhead rather than a single nozzle, and why each spool belongs to the slot you assign it to.
Practical Filament Checks
- Start each spool with a clean, smooth filament tip and no kinks near the end.
- Feed each filament along its path so it reaches the assigned channel without binding.
- Place spools so they unwind freely with consistent tension — a spool that snags mid-print feeds intermittently.
- For moisture-sensitive filaments such as PVA or nylon, dry them first and consider feeding from a dry box. Wet filament causes bubbling and poor adhesion.
Choose Materials That Suit the Job and Each Other
- For a first multi-material test, favor materials with forgiving, compatible temperature ranges rather than an ambitious mix.
- If you pair a support or flexible material with a model material, confirm they share a workable build-plate temperature and temperature window.
- Our M1D material compatibility guide covers good pairings and the thermal checks behind them — worth a read before you commit spools to a job.
Assign Each Material to a Toolhead
- In your slicer, add one filament profile per material you plan to use.
- Assign each material to the intended toolhead so the model, any supports, and any wipe structure all draw from the right channel.
- Double-check the mapping before you slice — this is the step that prevents "the blue spool printed where the red should be."
Prepare the First Test Print
The instinct to jump straight to a colorful project is strong, but it's also the fastest way to a confusing failure. Ease into it with a simple two-color test model using similar filaments, such as two PLA colors. That tells you far more about whether the workflow is right than a complex seven-material showpiece does. Think of the first run as a workflow test rather than a portfolio piece — if the two-color test comes out clean, move on to more colors or a tougher pairing; if it doesn't, you isolate the variable instead of debugging several at once.
Set Up the Print in OrcaSlicer

The M1D slices with OrcaSlicer by default. The exact labels and menu layout can vary by software version and profile, so rather than recite button names, follow the intent of each step.
- Select the correct M1D printer profile. Do this first. Switching printer profiles later can reset filament and color assignments, so choose the M1D profile that matches your machine before you set up materials.
- Assign colors and materials to the correct toolheads. Map each filament profile to the toolhead that physically holds that color or material.
- Check the material profiles and temperatures. Make sure each filament uses an appropriate profile and temperature for that material. Suitable values depend on the filament, nozzle size, and your setup — there's no single correct temperature for everyone.
- Confirm the selected printing mode. Make sure the mode you intend (Multi for your first test) is what the project is set to slice.
- Review the sliced preview before printing. Spend a minute in the preview rather than clicking print blindly.
What to Inspect in the Sliced Preview
Scanning the preview is the cheapest QA you'll ever do, and it's especially worthwhile on a tool-changing machine. Look for:
- Toolhead and material assignments — each region shows up in the toolhead/color you intended.
- Color transitions — confirm regions switch between toolheads where you expect them to.
- Tool changes — check that the tool-change sequence looks sensible for your model's layout.
- Supports — confirm supports use the correct support material and don't touch the model where you don't want them.
- Travel moves and clearances — catch paths that cross the model or that could collide with parked toolheads.
- First layers — verify the bottom layers are continuous and well-supported on the plate.
- Purge or wipe areas — if your selected profile uses a prime or wipe structure, confirm it's present and sized for the materials being used.
For a deeper look at reading toolpaths, our slicer preview guide explains how to interpret layers, color-coded paths, and travel moves across OrcaSlicer and other slicers.
Monitor Your First Print

For the first few prints, it's helpful to monitor the startup and early tool changes. The M1D's automatic monitoring helps, but early prints reward a watchful eye.
During Startup and Tool Changes
Watch the bed leveling and toolhead calibration complete without errors, and confirm the first few exchanges park smoothly, lock in, and start extruding with a clean nozzle. If a head looks off, a nozzle drags, or you hear scraping during a change, stop rather than letting a bad first layer happen.
During Filament Loading and the First Layers
When filament auto-loads, verify it reaches the nozzle and extrudes cleanly — grinding, skipping, or delayed flow means reload it. Then watch the first layers for good adhesion and even line width. If the first layer on any toolhead isn't right, correct it now, because everything built on top inherits it.
Troubleshooting Common First-Print Issues
Things go wrong on first prints — that's normal. Here's how to think about the most common problems without chasing firmware-rabbit-holes.
The Wrong Color or Material Is Printing
Recheck the filament-to-toolhead mapping and the printer profile in your project. A changed profile or a reassigned toolhead is the usual culprit. Re-slice after correcting.
Filament Is Not Loading Correctly
Confirm the filament path is snag-free and the spool unwinds smoothly. Reload with the nozzle up to temperature and watch that flow starts cleanly from the correct toolhead.
Toolhead Changes Are Failing
Check that the toolhead is seated and the parking bay is clear of obstruction, filament, or debris. Make sure cables and tubes don't catch during the exchange.
Toolhead Offset or Alignment Problems
If layers from different toolheads shift between them, stop and follow the recommended calibration process in the official manual rather than forcing a Z or offset workaround mid-print.
Filament Tangles or Runout
A tangle can result from the spool, filament path, or storage condition. Keep the filament feeding freely, and if the printer signals runout, pause, remove any snag, and resume rather than letting it idle.
Color Contamination
Residual color in a nozzle shows up when the previous material isn't fully cleared. Increase wipe or prime behavior for that material transition, and make sure the purge/wipe structure is enabled and sized for the filaments used.
Post-Print Checklist
Once the print finishes, run through a short review before celebrating:
- Model quality — geometry complete, clean surfaces, no major artifacts.
- Color separation — colors landed where assigned, with minimal bleed or contamination.
- Layer bonding — layers fused well with no delamination at material boundaries.
- Tool changes — exchanges were clean with no dragging or stringing left over.
- Material usage — note how much purge/wipe material the job consumed for your model and settings.
- Notes for next time — write down what you'd adjust: a support setting, a wipe change, or a spool to dry next before printing.
Pre-Print Checklist to Save
Keep a copy of this near the printer for quick reference before any multi-material job:
- Build plate clean, flat, and fully seated.
- Toolheads seated, locked, and nozzle tips clean.
- Filament routed smoothly, spools unwind freely.
- Cables and tubes clear of the tool-change path.
- Correct M1D printer profile selected.
- Each material assigned to the right toolhead.
- Material profiles and temperatures appropriate for the filaments.
- Correct print mode set (Multi for a multi-material test).
- Sliced preview reviewed: assignments, tool changes, supports, travel, first layers, purge/wipe.
Sovol M1D First Print FAQ
Do I need to calibrate the M1D manually before the first print?
The M1D includes automatic calibration for alignment, bed leveling, and more. Solid first-print prep still means confirming a clean plate and properly seated toolheads before you start, and watching the first layers — automatic calibration reduces guesswork but doesn't replace a good first-layer check.
Can I print different materials in one M1D job on the first try?
Yes, the M1D supports multi-material printing with dedicated toolheads. For a first run, though, start with a simple two-material job using compatible filaments — like two PLA colors — before attempting a demanding material mix.
Why did my second color print in the wrong area?
The most likely cause is a filament-to-toolhead assignment mismatch. Recheck which material each toolhead holds and confirm the printer profile and assignments in the slicer, then re-slice.
Do all seven toolheads print at once?
No. Toolheads are exchanged as the print requires them, according to the sliced toolpath and the selected print mode. Multiple toolheads aren't all extruding onto one model at the same time.
Final Thoughts
The Sovol M1D makes a capable first multi-material machine largely because its automatic handling systems take over the fiddly parts. The margin between a clean first print and a frustrating one usually comes down to the basics you control: a clean plate, seated toolheads, snag-free filament, and correct slicer assignments.
Start simple, watch the first layers, and let each print teach you one thing about your setup rather than chasing perfection on run number one. When you're ready to explore what a dedicated toolhead per material unlocks, the official Sovol M1D product page is the best place to review the full platform and its supported workflows.