You want to hide layer texture on your 3d printed parts to make them look smoother and more professional. Many people choose to do this for both looks and function. When you smooth your 3d printed parts, you can turn a simple 3d printing project into a display piece or improve print quality for moving parts. You can use post-processing methods or adjust your printer settings to get the finish you want.
Key Takeaways
- Use a lower layer height and smaller nozzles. This helps make layer lines less easy to see. Your prints will look smoother.
- Pick matte or light-colored filaments. These hide layer lines better than shiny or dark ones.
- Sand your print and use filler primers and epoxy putty. These help smooth the surface and fill in gaps before you paint.
- Try slicer features like fuzzy skin. You can also add textures in CAD. These tricks help hide layer lines without extra work after printing.
- Use more than one method, like sanding, priming, chemical smoothing, and painting. Doing this gives your print the best and most professional look.
Methods to Hide Layer Texture
If you want to make layer texture less visible on your 3d prints, you have a few choices. Each way works in its own way, and some are simpler than others. Here is a table that shows the main ways people cover up layer lines on 3d prints:
|
Method |
Pros |
Cons |
Difficulty |
|---|---|---|---|
|
Slicer Settings |
Free, simple to try, makes prints better |
Slower prints, might not remove all lines |
Easy |
|
Sanding & Priming |
Makes surface smooth, works on most plastics |
Messy, takes time, needs supplies |
Moderate |
|
Covers lines, adds color and detail |
Needs skill, needs extra materials |
Moderate |
|
|
Chemical Smoothing |
Makes a very smooth finish |
Can be unsafe, only works on some plastics |
Hard |
|
Resin/Epoxy Coating |
Fills gaps, gives a shiny look |
Needs curing, can be hard to do |
Moderate |
|
Texturing (CAD/Slicer) |
Hides lines by adding texture |
Changes look, does not remove lines |
Easy |
|
Material/Color Choice |
Hides lines by color, no extra steps |
Only works with some filaments |
Easy |
Tip: You can use more than one of these ways together for even better results on your 3d prints.
Slicer Settings for Layer Lines
Start by using your slicer. Lowering the layer height is a great way to hide layer texture on 3d prints. If you use a 0.4mm nozzle, try a layer height from 0.08mm to 0.2mm. Many people think 0.1mm is a good mix of speed and smoothness. You can also change the extrusion multiplier a little bit, about 2%. If it is too high, the print feels rough. If it is too low, you see gaps. Try to find the best setting for your 3d prints. Good cooling helps a lot. It keeps layers sharp and stops lines from showing.
Printing Adjustments for Smoother 3D Printed Parts
You can also change printer settings to hide layer texture. Set the print temperature to match your layer height. Thin layers may need less heat, thick layers need more. Keeping the temperature steady helps stop warping and keeps lines even. Watch your cooling fans. More cooling on overhangs and bridges makes lines harder to see. If you want to hide lines more, you can make the extrusion width a bit bigger. But do not go too far or the print will look rough. All these changes help you get smoother 3d prints without lines.
Printing Techniques to Hide Layer Lines

Reduce Layer Height
You can make your 3d prints look much smoother by lowering the layer height. When you use a smaller layer height, you get thinner layers. This change helps hide layer lines because the stair-step effect on curved or sloped surfaces becomes less obvious. If you set your layer height to 0.1 mm or even lower, you will notice a big improvement in the finish of your 3d printed parts. The surface feels smoother, and you may not need as much sanding later. Keep in mind, though, that printing with thin layers takes more time. Your 3d prints will look better, but you will need to wait longer for them to finish.
Use Fuzzy Skin or Texture Features
Sometimes, you do not want to spend hours sanding or painting your 3d prints. You can try a different trick—add a texture right in your slicer. Many slicers now let you enable smoothing features like "Fuzzy Skin." This setting makes the printer move in a zig-zag pattern, giving your 3d printed parts a soft, rough feel. Here are some cool things about using fuzzy skin or texture features:
- You can hide layer lines and small defects without extra work.
- You can adjust how rough or soft the texture feels.
- Your 3d prints will look unique and less like plastic.
People who use this feature say it saves time and makes it hard for others to tell the part was 3d printed. If you want to cover up layer lines fast, this is a fun option.
Adjust Nozzle Size and Print Speed
The nozzle size and print speed also change how your 3d prints look. Check out this table to see how these settings affect layer lines:
|
Parameter |
Layer Line Visibility |
Print Speed |
Notes |
|---|---|---|---|
|
Least visible |
Slow |
Great for smooth, detailed 3d printed parts |
|
|
Standard Nozzle (0.4 mm) |
Medium visibility |
Medium |
Good balance for most 3d prints |
|
Large Nozzle (0.6 mm+) |
Most visible |
Fast |
Best for big, simple 3d printed parts |
|
Low Layer Height |
Least visible |
Slow |
Smoother 3d prints, especially on curves |
|
High Layer Height |
Most visible |
Fast |
Good for quick, rough 3d prints |
If you want fewer layer lines, use a smaller nozzle and lower layer height. If you need your 3d prints fast, use a bigger nozzle, but you will see more lines. Print speed itself does not change layer lines much, but faster prints often use thicker layers, which show more lines.
Tip: Try different nozzle sizes and layer heights to find what works best for your 3d printed parts. You can always mix these tricks with other methods for even smoother results.
Material and Color Choices
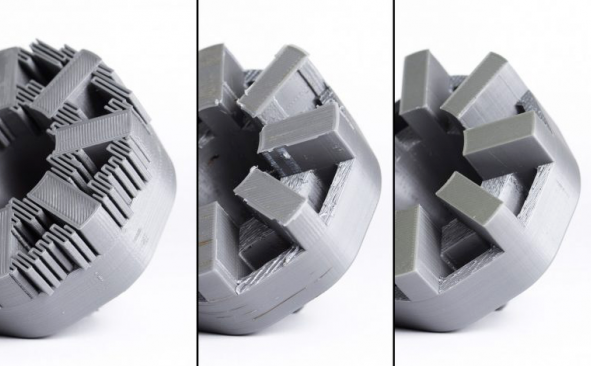
Matte and Dark Filaments
You might think dark or black filaments always hide layer lines, but that is not true. Shiny black filaments can actually make layer lines stand out more. The glossy surface reflects light and shows every bump and ridge. When you move your print under a lamp, you will see the lines pop out even more. If you want to hide layer lines, you should look for filaments with matte finishes. These filaments do not reflect as much light, so the surface looks smoother. White filament is also a great choice. It spreads out the light and makes lines much harder to see. Here are some tips for picking the right color:
- Avoid glossy or shiny black filaments if you want to hide lines.
- Choose white or light-colored filaments for a softer look.
- Matte filaments help hide small imperfections.
- Try changing the angle of your print to see if it helps reduce visible lines.
Tip: Matte finishes and lighter colors work best if you want your 3D prints to look smooth right off the printer.
Specialty Filaments for Smoothing
Some special filaments can make your prints look even better. Carbon fiber filled filaments, like PLA-CF or PETG-CF, are very good at hiding layer lines. These filaments have tiny fibers inside that break up the light and make the surface less shiny. Many people say they cannot see any layer lines at all when they use carbon fiber filaments with a fine layer height. You can also try other specialty filaments made for smoother prints. Here are some options:
- Carbon fiber filled PLA, PETG, or ASA for a low-gloss, smooth finish.
- Silk or satin filaments for a unique look, but be careful—these can sometimes show lines more.
- Specialty matte filaments for the best hiding power.
If you want to go even further, you can use slicer features like "fuzzy skin" with these filaments. This adds a texture that hides lines even more.
Smoothing and Finishing 3D Printed Parts
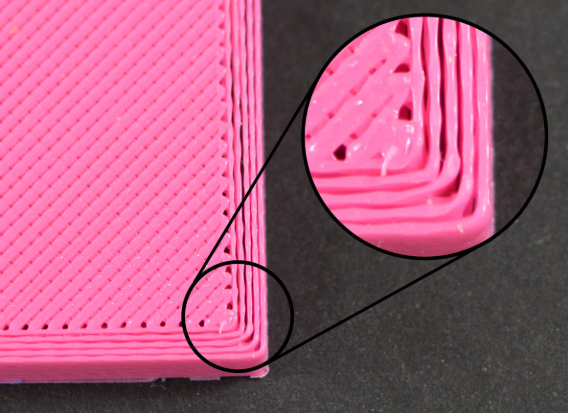
You can make your 3d printed parts look almost like they came from a factory with the right surface finishing techniques. Many people use a mix of sanding, priming, gap filling, painting, and chemical smoothing to get a great surface finish. Let’s break down each method and see how you can use them at home.
Sanding and Filler Primers
Sanding is the first step for most surface finishing techniques. You start with coarse sandpaper, like 200 grit, to knock down the biggest layer lines. Then, you move to finer grits, up to 3000, for a smooth touch. Wet sanding helps keep dust down and gives a better finish. If you see small holes or rough spots, spray on a filler primer. This primer fills in tiny gaps and makes sanding easier. After the primer dries, sand again with fine grit paper. You might need to repeat this cycle a few times.
Step-by-step guide:
- Sand your part with 200 grit sandpaper.
- Wipe off dust and spray a thin coat of filler primer.
- Let it dry, then sand with 400 grit.
- Repeat primer and sanding until the surface feels smooth.
- Finish with 1000-3000 grit for a polished look.
Tip: Always sand in a well-ventilated area and wear a dust mask to protect your lungs.
Sanding and priming work well for most PLA 3d printed parts. This method is safe, cheap, and gives you a nice surface finish before painting or other steps.
Epoxy Putty and Modeling Clay
Sometimes, you find deep gaps or holes that sanding and primer cannot fix. Epoxy putty and modeling clay help you fill these spots. You knead the putty, press it into the holes, and smooth it out with a wet finger or tool. After it hardens, sand it down to match the rest of the part. This step makes your 3d printed parts look even and ready for more finishing.
How to use epoxy putty:
- Cut off a small piece of putty and mix it until the color is even.
- Press it into gaps or seams.
- Smooth the surface with a wet tool.
- Let it cure fully (check the package for time).
- Sand the area with fine grit paper.
Epoxy putty works great for fixing big flaws before you move on to painting or chemical smoothing. You can also use modeling clay for small touch-ups, but epoxy putty is stronger and lasts longer.
Acrylic Paste and Resin Coating
Acrylic paste and resin coatings give your 3d printed parts a smooth, shiny finish. You spread acrylic paste over the surface to fill in lines and bumps. Once it dries, sand it smooth. For a glossy, tough surface, try an epoxy resin coating. Mix the resin and hardener, then brush it on in thin layers. Let each layer cure before adding another.
Steps for resin coating:
- Mix the epoxy resin and hardener as directed.
- Brush a thin layer over your part.
- Let it cure in a dust-free area.
- Sand lightly between coats for the best surface finish.
- Add more layers if needed.
Epoxy resin fills deep holes and gives a high-shine look. You can use special resins made for 3d printed parts, like Smooth-On XTC-3D. Just remember, resin can chip if you drop your part, so handle with care.
Note: Always wear gloves and work in a well-ventilated space when using resin or acrylic paste.
Painting and Chemical Smoothing
Painting is the final touch for many surface finishing techniques. After sanding, priming, and filling, you spray on a primer coat. This helps the paint stick and hides any last flaws. Use thin, even coats of acrylic paint for color. Let each coat dry before adding the next. Finish with a clear coat for extra shine and protection.
Chemical smoothing takes things to the next level. This method uses special chemicals or vapors to melt the outer layer of your 3d printed parts. The surface finish becomes glossy and smooth, almost like injection-molded plastic. Vapor smoothing works best for certain plastics, like ABS or special PLA blends. You can use a heat gun for quick smoothing, but you must control the temperature to avoid warping.
Safety tips for chemical smoothing:
- Wear chemical-resistant gloves (not latex or thin nitrile).
- Use splash goggles to protect your eyes.
- Work outside or in a fume hood with great ventilation.
- Use only glass or metal containers for strong chemicals.
- Never use chemical smoothing indoors without proper airflow.
- Dispose of used chemicals as hazardous waste.
Warning: Chemical smoothing is not for beginners. Some chemicals are flammable and toxic. Always test on a scrap piece first.
Chemical smoothing can give your 3d printed parts a professional surface finish, but you must follow safety rules. Picking the right chemical for your material is key. Some solvents work on ABS, but not on PLA. Modern smoothing fluids are safer, but you still need to handle them with care.
Combining Techniques for the Best Results
You get the best surface finish when you combine several surface finishing techniques. Here’s a simple order you can follow:
- Sand with coarse, then fine grit paper.
- Fill gaps with epoxy putty or acrylic paste.
- Sand the filled areas smooth.
- Spray filler primer and sand again.
- Use chemical smoothing if your material allows.
- Paint with thin coats, then add a clear coat.
This multi-step approach helps you hide layer lines, fill gaps, and create a smooth, professional look. Many professionals use these steps to make their 3d printed parts look like they came from a factory. You can try different combinations to see what works best for your project.
Pro Tip: Always test new surface finishing techniques on a failed print before using them on your final part.
Add Texture to Hide Layer Lines
Adding a texture pattern is a smart way to hide layer lines on your 3D prints. You can do this in your CAD software or right in your slicer. Both methods help you mask those lines and make your prints look more professional.
Design Textures in CAD
You can start by designing a texture pattern in your CAD program. This gives you full control over how your print will look. Here’s how to texture your model in CAD for the best results:
- Use a high-resolution black and white image with sharp borders for your texture pattern. This keeps the details crisp.
- Make sure your texture pattern tiles smoothly on all sides. This stops visible seams from showing up on your print.
- Focus on adding the texture pattern to vertical faces. These areas show layer lines the most, so the texture pattern helps cover them.
- Set the depth of your texture pattern to about 1 to 1.25 mm. If it’s too shallow, you might not see much effect.
- Use a consistent unit, like “hex per inch,” to keep your texture pattern even across your model.
- Always apply the texture pattern before slicing. If your file gets too big, you can try adding the texture pattern later.
- Think about how your model sits on the print bed. Place supports so they don’t mess up your texture pattern.
- Try different texture patterns and keep notes. This helps you learn which ones work best for your printer and material.
Tip: If you want to learn how to texture your models, start with simple patterns and see how they print. You can always get more creative as you go!
Apply Textures in Slicer
You don’t have to stop at CAD. Many slicers let you add a texture pattern right before printing. This is a great way to learn how to texture your prints without making your CAD files too complex. Slicer-based textures, like fuzzy skin, can hide layer lines very well. They also let you change the texture pattern locally, so you can try different looks on one print.
- Slicer textures are easy to use and don’t need special skills.
- You can pick from built-in texture patterns or make your own.
- Slicer textures work well for hiding lines, but you might have less control over the exact look.
A slicer can create a texture pattern that is hard to model in CAD. This means you get more freedom to play with how to texture your prints. Even simple slicer textures can do a great job of hiding layer lines. If you want to try something new, use both CAD and slicer textures together for a unique finish.
Note: Some texture patterns may not work well with every material. Always test a small print first to see how the texture pattern looks.
You have lots of ways to make your 3d printing project look smooth and professional. Try lowering your layer height, slowing your print speed, or using matte filaments to hide lines. Sanding, priming, and fillers work well for flat parts. Don’t be afraid to mix methods or test new textures. Start simple, then move to advanced finishing as you gain confidence. New printing tech and guides can help you reach pro-level results!
FAQ
What is the fastest way to hide layer lines on my 3D print?
You can use a filler primer spray and sand your print. This method works quickly and gives you a smooth surface. Try a few coats for the best results.
Can I use acetone to smooth all 3D printed parts?
No, acetone only works on ABS and some special filaments. It does not work on PLA or PETG. Always check your filament type before using acetone.
Do matte filaments really hide layer lines better?
Yes! Matte filaments scatter light, so you see fewer lines. Shiny filaments show every bump. If you want a smoother look right off the printer, pick matte.
Is sanding always needed for a smooth finish?
Not always. You can use chemical smoothing or resin coating instead. Some prints look good with just a texture added in the slicer. Sanding helps most with flat or large surfaces.


