


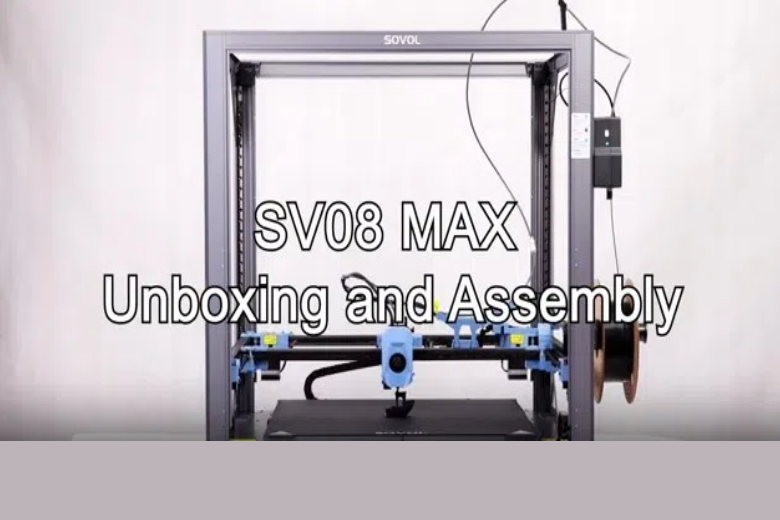
Welcome to the world of the Sovol SV08 MAX! You now have a powerful large 3d printer that can handle big projects with ease. When you first see your Sovol SV08 MAX, you might feel excited and a little nervous. That’s normal. This printer comes with cool features like automatic bed leveling and a bright touchscreen that make printing easier. You will find that the Sovol SV08 MAX stands out as a large 3d printer built for both beginners and pros. If you ever get stuck, don’t worry. You will find lots of troubleshooting and maintenance tips to keep your Sovol SV08 MAX running like a top. This large 3d printer will help you learn and grow as a maker. The Sovol SV08 MAX is more than just a printer—it’s your new creative partner.
Key Takeaways
- Make sure your workspace is clean and big enough. It should have good air flow. Put your tools and cables in order before you start setting up the Sovol SV08 MAX.
- Read the assembly manual and follow each step. Build a strong and flat frame. This helps your prints look better and stops many problems.
- Use the touchscreen to turn on the printer. Move through the menus and check the firmware. Always update the firmware so the printer works well.
- Run the automatic bed leveling. Set the extruder and Z offset. This helps your first layers stick and makes prints more accurate.
- Keep your printer clean. Look for problems like bed adhesion or filament jams. Do regular maintenance to help your printer last longer.
Preparation
Workspace Setup
Before you start your Sovol SV08 MAX 3d printer setup, you need a good workspace. Pick a spot with enough room for the printer and for you to move around. Make sure you have space to open doors or panels on your Sovol SV08 MAX. You want to reach every part of the printer for easy maintenance and filament changes.
Keep your printer inside an enclosure if you can. This helps control temperature and humidity, which makes your prints better. Try to keep humidity between 40% and 60%. Good airflow is important, too. Place a fan near the top of the enclosure to move hot air out. If you have more than one printer, group them by material or function. Leave space between each printer to cut down on noise and vibration.
Tidy up your cables using wire-zippers or clips. This keeps your setup safe and neat. Store your filament in a dry spot, away from dust and moisture. Use labels to keep track of your supplies and jobs. Before you start the installation, use masking tape to outline where your Sovol SV08 MAX will go. This helps you plan your 3d printer setup and avoid surprises.
Tip: Clean your workspace often. Wipe down surfaces and check for dust or debris. This keeps your setup running smoothly.
Tools and Safety
You need the right tools for a safe and easy setup. Always read the manual for each tool before you use it. Check tools for damage like frayed cords or loose parts. Never use a tool that looks broken.
Wear safety glasses, gloves, and closed-toe shoes. These protect you from sharp edges and hot parts during installation. Keep your work area clear and free of clutter. This helps you stay balanced and focused.
Plug your tools into grounded outlets. If possible, use GFCI outlets for extra safety. Never carry tools by their cords. When you finish, turn off and unplug everything. If you notice anything strange, stop and check before you continue.
Stay alert and keep others at a safe distance. A safe setup means a smooth 3d printer setup and fewer problems down the road.
Sovol SV08 MAX Installation
Unboxing
You finally have your Sovol SV08 MAX in front of you. This is an exciting moment! Start your installation by carefully opening the box. Use a box cutter or scissors, but watch your hands and avoid cutting too deep. The Sovol SV08 MAX comes packed with foam and protective materials. Take out each part one at a time and place them on a clean, flat surface.
You will see the main frame, gantry, touchscreen, power supply, and smaller boxes with tools and accessories. Keep the packaging nearby until you finish the installation. Sometimes you may need to check the box for small parts or screws that hide in the foam.
Tip: Take a photo of the contents before you start. This helps you remember how everything fits back if you need to move or store your large 3d printer later.
Parts Check
Before you jump into assembly, check every part against the list in the assembly manual. Lay out all the pieces so you can see them clearly. The Sovol SV08 MAX includes a detailed parts list with pictures. Match each item to the list. Look for the frame pieces, stepper motors, belts, screws, touchscreen, power cables, and tools.
Go slowly and check for missing or damaged parts. If you find anything wrong, stop the installation and contact Sovol support. It is much easier to fix problems now than after you start building your printer. Quality checks are important. Sovol uses strict procedures to make sure every large 3d printer meets high standards. They document each step, monitor the process, and keep records for traceability. This means you can trust the parts, but it is still smart to double-check.
Note: If you plan to upgrade your Sovol SV08 MAX later, keep extra screws and tools in a safe spot.
Frame Assembly
Now you are ready for the main event: frame assembly. Place all frame parts on a flat, sturdy table. The Sovol SV08 MAX is a large 3d printer, so you need space to work. Open the assembly manual and follow the steps closely. The manual shows each part and where it goes.
Here is a simple step-by-step guide to help you:
- Start with the base frame. Line up the corners and connect them using the screws from your kit.
- Attach the vertical columns to the base. Make sure they stand straight and tall.
- Secure the top gantry to the columns. Double-check that everything lines up.
- Use a carpenter’s square or ruler to check that each corner is at a right angle. A square frame is key for good print quality.
- Tighten all screws, but do not over-tighten. You want the frame solid, but not stripped.
- Attach the touchscreen and power supply as shown in the assembly manual.
- Check that the frame feels sturdy and does not wobble.
Take your time with this step. Rushing can lead to mistakes. Many users report that careful assembly leads to better print results and fewer problems later. The Sovol SV08 MAX works best when the frame is level and tight. If you notice any gaps or misalignment, loosen the screws, adjust, and try again.
Tip: The recommended calibration sequence after assembly is axis homing, bed leveling, PID calibration, extruder calibration, and first layer Z calibration. This order helps you get strong adhesion and accurate prints.
Common pitfalls during installation include missing a screw, misaligning the frame, or over-tightening bolts. These mistakes can cause layer delamination, support failures, or even nozzle clogs. You can prevent most issues by following the assembly manual step by step and checking your work as you go. Skilled users who take their time during installation see fewer failures and longer printer life.
If you ever feel unsure, check the Sovol website for their official blog post, "Step-by-Step Guide to Large 3D Printer Installation and First Print Success." This guide matches the assembly manual and gives extra tips for your Sovol SV08 MAX.
Remember: A solid frame is the foundation of every great print. Spend extra time here, and your large 3d printer will reward you with smooth, reliable results.
Printer Wiring
Power Connections
Your Sovol SV08 MAX is put together. Now you need to connect the power. This step keeps you and your printer safe. Always unplug the printer before you start. Find the power supply on your Sovol SV08 MAX. Plug the power cable into the printer. Then plug it into a grounded wall outlet. Never use a cord that is broken or a loose outlet.
Here are some main safety rules you should know:
|
Standard/Code |
Key Points Relevant to Secure Power Connections and Cable Management |
|---|---|
|
Covers low voltage wiring, like Class 2 circuits. It sets power and voltage limits, how to install, and what power sources to use. |
|
|
OSHA Safety Guidelines |
Says to use personal protective equipment (PPE). Also use lockout/tagout, insulated tools, and get training for installers. |
|
Local Codes and Permits |
Reminds you to follow local rules and get permits for electrical work. |
|
Professional Installation |
It is best to have a pro do the job. They follow NEC, OSHA, and local codes. This keeps power connections safe and cables neat. |
If you are not sure about electrical work, ask a pro for help. Licensed electricians know these rules. They keep your Sovol SV08 MAX and home safe.
Tip: Check the voltage switch on your Sovol SV08 MAX. Make sure it matches your country’s power supply. The wrong setting can break your printer.
Cable Management
Good cable management helps your Sovol SV08 MAX work well. It also helps stop accidents. Start by grouping cables from motors, sensors, and the power supply. Use zip ties or cable clips from your Sovol SV08 MAX to bundle cables. Keep cables away from moving parts. This stops them from getting pinched or pulled.
Remember these important points:
- Electrical work beyond simple fixes needs permits and checks.
- Electricians use the National Electrical Code for all wiring.
- Local building codes help you avoid insurance or legal trouble.
- Licensed pros make sure upgrades are safe and follow the law.
Neat cables make your Sovol SV08 MAX look better. They also help you spot problems fast. If you see a cable that looks worn or broken, change it right away. Do not let cables hang loose behind your Sovol SV08 MAX. Secure them to the frame or table so they do not get caught.
Note: A tidy Sovol SV08 MAX setup is a safe setup. Take a few minutes to check your cables before each print.
Initial 3D Printer Setup
Getting your Sovol SV08 MAX ready for its first print is an exciting part of the journey. You have already finished the assembly and wiring, so now it is time to bring your 3d printer setup to life. This section will guide you through powering on, using the touchscreen, and checking the firmware. Each step helps you avoid common mistakes and makes sure your Sovol SV08 MAX works smoothly from the start.
Power On
You are almost ready to see your Sovol SV08 MAX in action. Plug the power cable into the back of the printer and then into a grounded wall outlet. Make sure the power switch is set to the correct voltage for your country. You will find the switch near the power supply. Double-check this before you turn anything on.
Now, flip the power switch. The Sovol SV08 MAX will light up, and you will hear the fans start. The touchscreen should glow and show the Sovol logo. If nothing happens, check your connections and make sure the outlet works. Do not worry if you feel a little nervous—this is a big moment in your 3d printer setup!
Tip: Always keep your Sovol SV08 MAX on a stable surface. This helps prevent any movement or shaking during the setup and printing process.
Touchscreen Navigation
The Sovol SV08 MAX comes with a bright, easy-to-use touchscreen. This screen is your main control center for the entire 3d printer setup. When you first see the menu, you will notice big icons and clear labels. You can tap to move between screens, start a print, or change settings.
Here is a quick guide to help you get started:
- Home Screen: This is where you see the main options like Print, Prepare, and Settings.
- Prepare Menu: Use this to move the print head, preheat the nozzle, or home the axes.
- Settings: Here you can adjust things like language, screen brightness, and network setup.
- Print Menu: This is where you select files from your SD card or USB drive to start printing.
You do not need to memorize everything right away. Spend a few minutes tapping through the menus. Try moving the print head or heating the bed. The Sovol SV08 MAX touchscreen makes the 3d printer setup feel simple and fun. If you ever get lost, just tap the Home button to start over.
Note: The touchscreen is very responsive, but use gentle taps. Pressing too hard can damage the screen over time.
Firmware Check
Before you start your first print, you need to check the firmware on your Sovol SV08 MAX. Firmware is the software that controls your printer’s hardware. Good firmware makes your 3d printer setup reliable and helps you avoid common problems.
To check your firmware version, go to the Settings menu on the touchscreen. Look for a section called "About" or "Firmware Info." Write down the version number you see. Now, compare this number to the latest version on the Sovol website or the SD card that came with your printer. Sovol recommends always using the latest firmware for the best performance.
If you see that your firmware is out of date, you can update it. Follow the instructions from Sovol step by step. Never turn off the printer during an update. This can cause errors and may even damage the printer. Firmware updates often improve print quality, add new features, and fix bugs. They also help with calibration and maintenance tasks, making your Sovol SV08 MAX easier to use.
⚠️ Caution: Do not update the Klipper firmware unless you have a good reason. The Sovol SV08 MAX comes with a version that works well for most users. Updating without need can cause problems with your 3d printer setup.
A successful firmware check and update will help your Sovol SV08 MAX run smoothly. You will notice better reliability and fewer issues during your 3d printer setup. Always follow the instructions closely and never rush this step.
Quick Recap Table:
|
Step |
What to Do |
Why It Matters |
|---|---|---|
|
Power On |
Plug in and switch on the printer |
Starts your Sovol SV08 MAX safely |
|
Touchscreen |
Explore menus and settings |
Easy control of your 3d printer |
|
Firmware Check |
Verify and update firmware if needed |
Ensures smooth 3d printer setup |
You are now ready to move on to bed leveling and calibration. Take your time with each step, and your Sovol SV08 MAX will reward you with great prints and a smooth 3d printer setup experience.
Bed Leveling
Getting your Sovol SV08 MAX ready for perfect prints starts with bed leveling. This step helps you get a smooth first layer and strong adhesion. You want your bed to be flat and at the right height. Good bed leveling makes every layer stick well and keeps your prints looking sharp. Let’s walk through the process together.
Automatic Leveling
The Sovol SV08 MAX comes with automatic bed leveling. This feature saves you time and stress. You just tap a button on the touchscreen, and the printer does the work. The nozzle moves across the bed and checks many points. It measures the distance between the nozzle and the bed at each spot. The printer then adjusts itself to keep the nozzle at the right height for every layer. You do not need to guess or use paper. Automatic bed leveling helps you avoid mistakes and makes calibration easy. Some printers, like the Prusa Core One, use a similar system that checks only the print area. This means you spend less time on setup and more time printing.
Tip: Always run automatic bed leveling after you move your printer or change the bed surface. This keeps your first layer perfect.
Mesh Bed Leveling
Mesh bed leveling takes things a step further. The Sovol SV08 MAX scans the bed in a grid pattern. It creates a map of high and low spots. The printer uses this map to adjust the nozzle height for each part of the bed. This helps you get even layers, even if your bed is not perfectly flat. Mesh bed leveling works with automatic bed leveling to give you the best results. You can see the mesh map on the screen. If you notice a problem with a layer, check your mesh bed leveling and run calibration again.
-
Mesh bed leveling helps with tricky prints that cover the whole bed.
-
It also helps when you print thin layers or use special filaments.
Z Offset
Z offset is the final touch for bed leveling. This setting controls how close the nozzle gets to the bed during the first layer. If the nozzle is too high, the filament will not stick. If it is too low, the nozzle may scrape the bed. You can adjust the Z offset on the touchscreen. Start with a small change and watch the first layer. The Sovol SV08 MAX lets you fine-tune this setting during the print. Many users call this step first layer z calibration. You want the filament to look smooth and even. If you see gaps or bumps, adjust the Z offset and try again. Good first layer z calibration makes every print start strong.
Note: Always check your Z offset after you run bed leveling or change the nozzle. This keeps your calibration on point.
Extruder Calibration
Getting your Sovol SV08 MAX to print smoothly starts with proper extruder calibration. This step helps you get the right amount of filament every time. If you skip calibration, you might see gaps, blobs, or weak prints. Let’s walk through the process together.
Steps Calibration
You want your Sovol SV08 MAX to push out the exact amount of filament you ask for. To do this, you need to calibrate your printer using a simple method. Here’s how you can handle extruder calibration like a pro:
- Mark a 100 mm section on your filament with a marker.
- Use the printer menu to home all axes and level the bed. This ensures your Sovol SV08 MAX is ready for calibration.
- Heat the nozzle to the right temperature, usually around 234°C.
- Command the printer to extrude 100 mm of filament.
- Measure how much filament actually moved. If it’s not exactly 100 mm, you need to adjust the E-step value in your printer’s settings.
- Enter the new E-step value, then repeat the extrusion and measurement.
- Keep adjusting and testing until the extruded length matches your command.
Tip: Take your time with calibration. Small changes can make a big difference in print quality.
You should also run PID calibration from the printer menu. This keeps your hotend temperature stable during prints. Sovol recommends a print speed of 25 mm/s and a layer thickness of 0.29 mm for best results after calibration.
Nozzle Prep
Before you start a new print, always check your nozzle. Good nozzle prep is part of regular calibration. Wipe away any old filament or debris. If you see a clog, heat the nozzle and use a cleaning tool to clear it. Clean nozzles help your Sovol SV08 MAX lay down smooth layers.
Note: Regular cleaning and calibration keep your printer running longer and reduce print failures. Store your filament in a dry box to avoid moisture, which can mess up your calibration.
By following these steps, you set up your Sovol SV08 MAX for reliable, high-quality prints. Calibration is not just a one-time job. Make it part of your routine, and you’ll see better results every time.
Filament Loading
Filament Choice
Picking the right filament for your Sovol SV08 MAX can make a big difference in your prints. You will find many types of filament, like PLA, PETG, ABS, and even flexible ones. Each type has its own strengths. PLA is easy to use and works well for most projects. PETG gives you more strength and a bit of flexibility. ABS is tough but needs a warmer environment. If you want to try something special, you can look at wood, metal, or glow-in-the-dark filaments.
When you think about filament selection, check the recommended temperature range on the spool. Make sure your Sovol SV08 MAX can reach those temperatures. Also, look at the filament diameter. Most spools are 1.75 mm, which fits your printer. Keep your filament dry and sealed in a bag or box. Moisture can cause bubbles and weak spots in your prints.
Tip: Try a small test print with new filament before starting a big project. This helps you spot any problems early.
Loading Process
Now you are ready to load the filament. Start by turning on your Sovol SV08 MAX and heating the nozzle to the right temperature for your filament. You can do this from the touchscreen menu. Wait until the printer shows it is hot enough.
Cut the end of your filament at an angle. This makes it easier to feed into the extruder. Hold the filament and gently push it into the filament inlet. You will feel some resistance as it moves through the extruder gears. Keep pushing until you see filament come out of the nozzle.
If you want a quick checklist, follow these steps:
- Heat the nozzle to the correct temperature.
- Cut the filament tip at a sharp angle.
- Insert the filament into the extruder.
- Keep pushing until you see filament flow from the nozzle.
- Wipe away any extra filament with tweezers.
Research and real-world testing show that loading filament the right way keeps the flow smooth. This helps you avoid problems like gaps, blobs, or weak layers. When you load filament carefully, you help your Sovol SV08 MAX make prints with strong layers and accurate shapes. Always check that the extruder gear grabs the filament and the nozzle is clean. If you see any clogs or jams, stop and fix them before printing.
Note: If you hear clicking or see the filament stop moving, pause and check for a blockage. A clean path means better prints every time.
Slicer and Software Setup
Getting your Sovol SV08 MAX ready for printing means you need the right slicer and software. This part of the setup helps you turn 3D models into files your printer understands. You will see how easy it is to get started with the slicer, set up the Sovol SV08 MAX profile, and pick the best print settings for great results.
Slicer Download
You need a slicer to prepare your models for printing. The Sovol SV08 MAX works well with popular slicers like Cura and PrusaSlicer. These slicers are free and easy to download. Most users choose Cura because it has a simple interface and lots of features. PrusaSlicer is another good choice if you want more control over your printing. Both slicers support the Sovol SV08 MAX and let you use advanced features.
Tip: Always download your slicer from the official website to avoid problems or viruses.
Modern slicers help you manage your printing jobs. They offer live data monitoring, remote control, and even cloud management. These features can boost your printing speed by up to 30% and keep your Sovol SV08 MAX running smoothly.
Sovol SV08 MAX Profile
After you install your slicer, you need to set up the Sovol SV08 MAX profile. This profile tells the slicer about your printer’s size, speed, and special features. The Sovol SV08 MAX has a huge build volume of 500 × 500 × 500 mm and can print up to 700 mm/s. The CoreXY motion system and Klipper firmware give you fast, accurate moves and smooth prints.
Here’s a quick table with some key Sovol SV08 MAX benchmarks:
|
Feature |
Value/Description |
|---|---|
|
Maximum Print Speed |
Up to 700 mm/s |
|
Positional Accuracy |
≤0.02 mm |
|
Build Volume |
500 × 500 × 500 mm |
|
Bed Leveling |
80 seconds with Eddy Current Scan |
|
Frame Strength |
180% stronger than others |
When you load the Sovol SV08 MAX profile in your slicer, you unlock these features. The smart feeder system and thick heated bed help you print big projects without worry.
Print Settings
Now you can adjust your print settings for the Sovol SV08 MAX. Start with the default profile, then tweak things like layer height, speed, and temperature. For large prints, try thicker layers and slower speeds. This helps your Sovol SV08 MAX keep up with the demands of big jobs. The slicer lets you set the extrusion rate, which matches the printer’s 35 mm³/s capability.
Printing with the right settings means fewer problems and better results. You can track your printing jobs with slicer tools that show throughput, lead time, and cycle time. These stats help you finish more prints each week and spot any slowdowns in your setup.
Note: Save your favorite Sovol SV08 MAX settings as a custom profile in your slicer. This makes future printing even easier.
First Print Prep
Test Model
You are almost ready for your first print with the Sovol SV08 MAX. Picking the right test model helps you see how well your printer works. Many users start with a simple cube or a calibration square. These models let you check the first layer, the bed adhesion, and the overall print quality. When you print your first test model, you want to see if the bed is level and if the first layer sticks well.
Researchers use different tests to check if a model works as expected. They look at things like how well the first layer prints and if the bed stays flat. They use big groups of test prints and repeat the process to make sure the results are strong. They also check if the first layer looks the same for everyone, no matter where they print or what country they are in. This kind of testing helps you trust that your first print will show if your Sovol SV08 MAX is set up right.
- Print a simple test model to check the first layer.
- Watch for smooth lines and even coverage on the bed.
- If you see gaps or bumps, stop and check your bed leveling.
Bed Prep
Getting your bed ready is a big step before your first print. Start by cleaning the bed with isopropyl alcohol and a soft cloth. This removes dust and oil, which can mess up the first layer. Make sure the bed feels smooth and dry. If your Sovol SV08 MAX has a removable bed, take it off and clean both sides. Put the bed back and check that it sits flat.
You want the first layer to stick, so use a glue stick or special spray if your filament needs extra help. Some users add a thin layer of glue to the bed for better adhesion. Always check the bed temperature before you start. A warm bed helps the first layer bond and keeps your print from warping.
Tip: Clean your bed before every print. A clean bed gives you a strong first layer every time.
File Transfer
Now you need to move your first print file to the Sovol SV08 MAX. Save your test model from the slicer as a .gcode file. Use an SD card or USB drive to transfer the file. Insert the card or drive into the printer. On the touchscreen, tap "Print" and pick your file.
Check that the first layer starts in the right spot on the bed. Watch the first few lines as the printer moves. If the first layer looks good, let the print finish. If you see problems, pause the print and adjust the bed or the Z offset. You can always try again. The first print helps you learn how your Sovol SV08 MAX works and how to get a perfect first layer.
Note: Always watch the first layer. Fixing problems early saves time and filament.
Running the First Print
Start Print
You made it to the big moment—your Sovol SV08 MAX is ready for its first print! On the touchscreen, tap the file you want and hit start print. The printer will heat up and begin moving. You might feel excited or nervous, but that’s normal. Watch as the printer lays down the first layer. This layer is the foundation for your whole print. If the first layer looks smooth and sticks well, you are on your way to first print success.
Tip: Stay close for the first few minutes. If you see the filament not sticking or the layer looking uneven, pause the print and check your bed leveling or Z offset.
Monitor Layers
As your Sovol SV08 MAX keeps printing, you need to watch each layer. The first few layers are the most important. If you see gaps, blobs, or lines that look off, you can stop and fix things before wasting time or filament. Real-time monitoring helps you catch problems early. In high-tech printing, experts use sensors and cameras to watch the process. They look for changes in the layer, temperature, or print speed. These checks help keep the printing process smooth and improve the chance of success.
-
Watch the first layer for good adhesion.
-
Check each new layer for even lines and no bumps.
-
Listen for odd sounds from the printer during printing.
You can use the Sovol SV08 MAX’s touchscreen to see print progress and make small changes if needed. This hands-on approach helps you learn how each layer builds on the last one.
Adjust On-the-Fly
Sometimes, you need to make changes while printing. The Sovol SV08 MAX lets you adjust settings like temperature, speed, or Z offset during a print. If you notice the first layer is too high or low, you can tweak the Z offset right away. If the filament looks too thin or thick, change the flow rate. These quick fixes help you save your print and boost your success rate.
Note: Many advanced printing systems use real-time controls to spot problems and fix them fast. You can do the same by watching your Sovol SV08 MAX and making small changes as you go.
A table can help you remember what to check during your first print:
|
Step |
What to Watch For |
What to Do if Issues Appear |
|---|---|---|
|
First Layer |
Smooth, even, sticks to bed |
Pause and adjust Z offset |
|
Next Layers |
No gaps, blobs, or missed spots |
Adjust speed or temperature |
|
Whole Print |
Consistent sound and movement |
Stop and troubleshoot if needed |
With careful monitoring and quick adjustments, you set yourself up for first print success. Enjoy watching your Sovol SV08 MAX bring your ideas to life, one layer at a time!
Troubleshooting
When you start printing with your Sovol SV08 MAX, you might run into a few bumps. Don’t worry—most problems have simple fixes. Let’s look at some common issues and how you can solve them.
Bed Adhesion
If your print doesn’t stick to the bed, you might feel frustrated. You want that first layer to grip the bed every time. Start by making sure your bed is clean. Wipe the bed with isopropyl alcohol before each print. Dust or oil can stop the filament from sticking. Check that your bed is level. Run the automatic bed leveling feature if you see gaps or uneven lines. Adjust the Z offset so the nozzle is close enough to the bed, but not scraping it. Sometimes, a glue stick or special spray helps the filament hold onto the bed. Keep your bed at the right temperature for your filament. If your room is cold, use an enclosure to keep the bed warm and steady. Regular cleaning and calibration help your bed stay ready for every print.
Tip: Always watch the first layer. If it lifts off the bed, pause and fix it right away.
Filament Issues
Filament can cause trouble if it’s old, wet, or tangled. Store your filament in a dry box to keep moisture away. Wet filament pops and sizzles, making weak prints that don’t stick to the bed. Cut the end of the filament at an angle before loading. If you hear clicking or see the filament stop moving, check for a clog near the bed or in the nozzle. Use high-quality filament for the best results. Clean the nozzle often so melted plastic flows smoothly onto the bed. If you switch filament types, always check the bed temperature and nozzle settings.
Error Fixes
Sometimes, errors pop up on the screen or you notice the print looks strange. You can fix most problems by following a few steps:
- Check the bed for dust, loose screws, or uneven spots.
- Clean the printhead and bed before each job.
- Watch for layer shifts or gaps near the bed. These can mean the bed isn’t level or the platform is loose.
- Use real-time monitoring tools to spot problems early.
- Train yourself to spot trouble fast. The more you print, the better you get at fixing issues.
A smart troubleshooting plan helps you avoid downtime. Many print farms use dashboards and regular checks to keep every bed and printer running smoothly. You can do the same at home. Keep your Sovol SV08 MAX clean, your bed level, and your filament dry. You’ll spend more time printing and less time fixing.
Maintenance and Upgrades
Regular Checks
Keeping your Sovol SV08 MAX in top shape means you need to check a few things often. After every print, clean the bed with isopropyl alcohol. This keeps the bed free from dust and sticky spots. Wipe the nozzle to remove leftover filament. If you see any buildup, heat the nozzle and clean it out. Lubricate the rails and moving parts every week. This helps the bed move smoothly and stops squeaks. Watch the filament drive for dust or worn spots. If you notice the bed not heating evenly, check the wires and connectors. You should also look at the bed springs and screws. Tighten them if the bed feels loose. Predictive maintenance works best. Use the Sovol SV08 MAX’s sensors and watch for changes in print quality. Early checks help you fix problems before they get big.
Tip: Operator training helps you spot issues early. The more you know your Sovol SV08 MAX, the longer it will last.
Upgrades
You can make your Sovol SV08 MAX even better with a few upgrades. Try a PEI-coated bed for stronger adhesion. This helps every print stick to the bed and makes cleanup easy. Upgrade to a high-flow nozzle if you want faster prints. Add a filament dryer to keep your filament dry and ready. Some users install a camera to watch the bed during long prints. You can also add better bed springs for more stable calibration. If you want quieter prints, swap in silent stepper drivers. Each upgrade helps your Sovol SV08 MAX handle bigger projects and keeps the bed working at its best.
- PEI-coated bed
- High-flow nozzle
- Filament dryer
- Camera for bed monitoring
- Upgraded bed springs
Calibration Tips
Calibration is the secret to great prints. Always run bed leveling before a big project. Use the Sovol SV08 MAX’s automatic calibration to check the bed at many points. Adjust the Z offset so the nozzle sits just above the bed. If you see gaps in the first layer, redo the calibration. Mesh bed leveling helps if your bed has high or low spots. Check the calibration after you change the nozzle or move the bed. Keep a log of your calibration settings. This helps you spot patterns if the bed starts acting up. Update your firmware when Sovol releases new features for calibration. Good calibration means every layer sticks to the bed and your prints look sharp.
Note: Make calibration part of your routine. A well-calibrated bed gives you fewer failed prints and saves time.
You finished setting up your Sovol SV08 MAX. You started with unboxing and ended with your first print. Every step is important for your printer. Take your time, especially with bed leveling, calibration, and software setup. Each calibration step helps your prints turn out better. Here’s a simple table that shows why each step matters:
|
Calibration Step |
Why It Matters for Printing Success |
|---|---|
|
Axis Homing |
Tells the printer where to start so it moves right. |
|
Bed Leveling |
Makes the bed flat so the first layer sticks and prints do not fail. |
|
PID Calibration |
Keeps the bed and nozzle at the right temperature to stop warping and stringing. |
|
Extruder Calibration |
Makes sure the printer uses the right amount of filament for each layer. |
|
First Layer Z Calibration |
Sets the nozzle at the best height for the first layer so it sticks and looks good. |
Keep up with regular maintenance and calibration. This helps your Sovol SV08 MAX work well and keeps the bed ready for printing. You can join Sovol forums or groups to share ideas and get help. If you have questions or want to show your first print, leave a comment below and join the Sovol SV08 MAX community!
FAQ
How do you update the Sovol SV08 MAX firmware safely?
You can update the Sovol SV08 MAX firmware from the touchscreen menu. Always check the Sovol website for the latest version. Never turn off your printer during the update. If you feel unsure, follow the official guide step by step.
What should you do if your Sovol SV08 MAX printer does not power on?
First, check the power cable and outlet. Make sure the switch on your Sovol SV08 MAX is set to the correct voltage. If the printer still does not turn on, inspect the fuse and power supply. Contact Sovol support if you need more help.
Why does your print not stick to the bed?
A clean bed helps every print stick. Wipe the bed before each job. Use the Sovol SV08 MAX automatic bed leveling feature. Adjust the Z offset if needed. Try a glue stick or bed adhesive for extra grip. Watch the first layer closely.
Can you use third-party filament with the Sovol SV08 MAX printer?
Yes, you can use most 1.75 mm filament brands with your Sovol SV08 MAX printer. Always check the recommended temperature for your filament. Store your filament dry. Run a small test print to make sure it works well with your printer.
How often should you calibrate your Sovol SV08 MAX printer?
You should calibrate your Sovol SV08 MAX printer after moving it, changing the nozzle, or switching filament types. Regular calibration keeps your printer running smoothly. Many users check calibration before every big project for the best results.
Tip: Keep a log of your calibration settings. This helps you spot changes in your Sovol SV08 MAX printer over time.


