Two terms do most of the work. Shore A is an indentation hardness grade, not a stiffness value. Retraction is the slicer's backward filament pull at travel moves. Moisture sensitivity is TPU's habit of absorbing water that flashes to steam in the nozzle.
This guide is printer-agnostic. It takes you from a first spool to a repeatable profile using the filament maker's own numbers, a short test print, and a diagnosis order for the failures you'll actually see.
Key Takeaways:
- Hardness sets the filament path: softer TPU needs a shorter, better-supported route from spool to nozzle.
- There's no universal TPU profile. Start from your spool's data sheet instead of a copy-pasted preset.
- A small test model before a long print catches a bad spool early.
- Drying advice differs by maker: one says it's usually unnecessary, another requires it before every print.
How Is TPU 3D Printing Different From PLA and PETG?
TPU differs from PLA and PETG because the filament is an elastomer rather than a rigid plastic, and that changes both how it feeds and how it fails. PLA and PETG break when overloaded; TPU stretches and recovers. Ultimaker's TPU 95A sheet reports "no yield" in every orientation, meaning the part deforms elastically instead of necking before it fails (Ultimaker, TDS v5.00).
That same softness is what makes feeding hard. A rigid filament acts as its own push rod; a soft one buckles under the extruder's load. The hardness grade therefore decides your setup more than any single slicer value does.
What Are the Core Principles for Printing TPU Successfully?
Six principles cover how to print TPU, and they follow from one mechanical fact: the filament has to stay stiff enough to feed and hard enough at the surface to resist grinding by the extruder gears (Acierno et al., Polymers, 2023 review).
- Keep the filament path short and constrained.
- Reduce idler pressure so the gears grip gently.
- Print slowly.
- Minimise or disable retraction.
- Keep the filament dry.
- Use a separation layer on smooth sheets.
Prusa's flexible-filament guidance says the same in printer terms: cold pull the nozzle if unsure, loosen the idler, and set retractions as low as possible — even switching them off entirely and raising them step by step (Prusa Knowledge Base, current article).
How Does Shore Hardness Change What My Printer Can Do?
Hardness sets expectations in two places: the feed path and the platform limits. ASTM D2240, the durometer method behind every Shore A rating, covers twelve durometer types and states plainly that the test doesn't measure stiffness, strength or tear resistance directly (ASTM International, D2240-15R21). Read the label as a nominal range, not a spec sheet.
Practically, softer TPU grades often benefit from a shorter, better-supported filament path. Some may also work better with a larger nozzle, but that depends on the filament and printer maker's guidance rather than a general rule. Bambu Lab's own compatibility table, for example, lists TPU 85A as not compatible with 0.2 mm or 0.4 mm nozzles, and states its printers don't support TPU below 85A (Bambu Lab Wiki, current wiki). That's a platform limit, not an industry standard — check yours.
How Should I Prepare My Printer Before Printing TPU?
Preparation comes down to three checks: the filament path, the idler tension and the build surface.
On a direct-drive printer the extruder sits on the head and the path is short. On a Bowden printer the filament travels through a PTFE tube, and soft TPU twists and jams inside it — practitioners on a Prusa MINI+ report needing very precise idler pressure and harder TPU to print at all (Prusa Knowledge Base, article and comment thread).
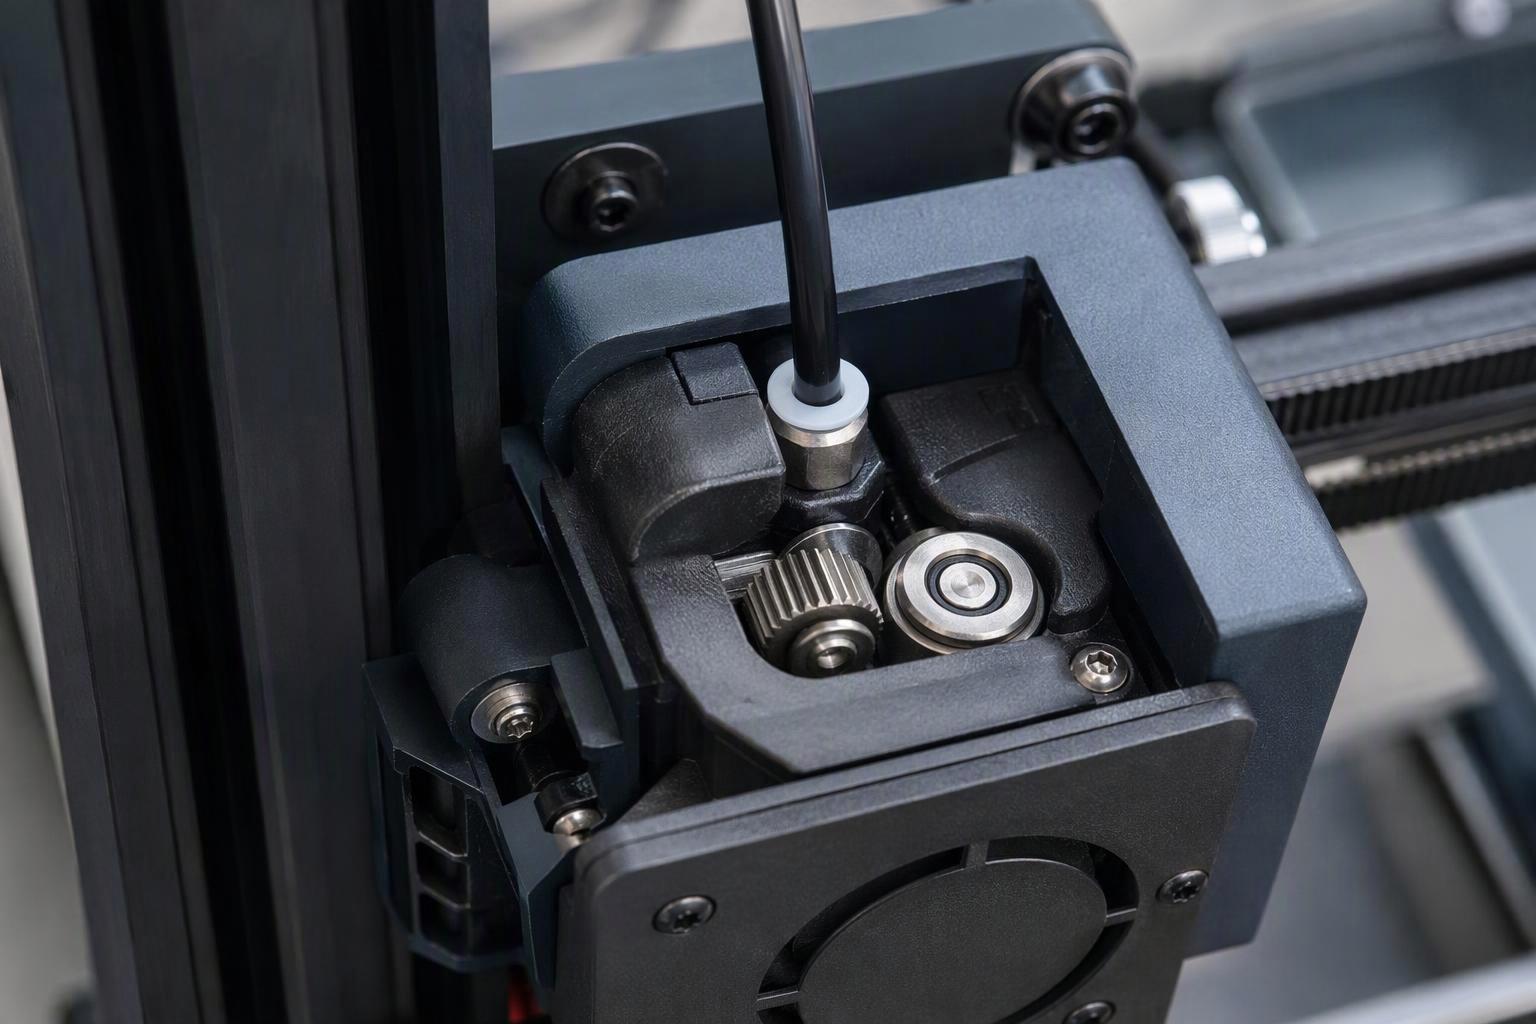
Reduce idler pressure before the first print. Follow your printer and filament maker's guidance for the amount — too little grip causes slipping, too much flattens the filament.
On the bed, add a separation layer. Prusa recommends glue stick or Kapton tape on smooth or satin sheets and warns that very soft flex can bond hard enough to damage PEI (Prusa Knowledge Base, current article).
One note worth keeping: some printers use a short direct-drive filament path, which may make TPU feeding easier. Always check the specifications and filament guidance for your specific printer rather than assuming.
Which Slicer Settings Matter for TPU, and How Do They Shift?
TPU settings shift with the grade, the nozzle and the maker, so treat every table as a starting point keyed to your spool label. The spread is real: Polymaker's PolyFlex TPU95 sheet gives 210–230 °C and 30–50 mm/s (Polymaker, maker TDS), while Prusa's general flexible-materials article gives 230–245 °C at a typical 20 mm/s (Prusa Knowledge Base, current article). The filament-specific sheet always wins over a general guide.
|
Setting |
Starting point |
What shifts it |
|---|---|---|
|
Nozzle temperature |
210–245 °C across makers |
Grade, brand, nozzle diameter |
|
Bed temperature |
25–75 °C across makers |
Sheet type, object size |
|
Print speed |
20–50 mm/s typical; faster on high-flow setups |
Hotend flow, grade |
|
Retraction |
Off or minimal |
Path length, stringing tolerance |
|
Pressure advance |
Calibrate per filament |
Brand, temperature |
Calibrate pressure advance before flow ratio. OrcaSlicer's calibration order treats it as the value most often wrong or never calibrated at all (OrcaSlicer, official wiki), and it has to be redone whenever the spool changes.
How Should I Design a Flexible Part That Prints and Performs Well?
Design around layer direction first. The same TPU part is roughly four times weaker across layers than in plane — Ultimaker's orientation data shows tensile strength dropping sharply from XY to Z (Ultimaker, TDS v5.00). Orient a hook or clamp so the load runs in plane.
Infill is your stiffness dial. Low infill keeps a part soft and springy; higher infill stiffens it and changes how the surface behaves at the same time (Brăileanu et al., PMC, 2025). Start soft and add density only where the part actually needs support.
Hardness is a design decision, not just a print setting. Softer grades absorb moisture faster and more of it, so a part that lives in humid conditions may behave differently than the same shape printed in 95A (Šimunić et al., PMC, 2026). Match the grade to the environment, not just to the feel you want.
What Are the Most Common TPU Printing Problems and How Do I Fix Them?
Most TPU printing problems trace to one of four causes: moisture, a long filament path, idler pressure, or a nozzle that's too small for the grade. Work the table in order, because stringing and bubbling look alike but have different fixes.
|
Visible problem |
Likely cause |
Quick check |
Adjustment |
|---|---|---|---|
|
Popping, bubbles, rough surface |
Moisture |
Dry the spool to spec |
Dry the spool according to the filament manufacturer's recommended temperature, time, and drying method |
|
Grinding or a stalled feed |
Buckling in a long path |
Inspect the filament between spool and extruder |
Shorten the path, reduce idler pressure |
|
Heavy stringing |
Retraction too high for the material |
Try a print with retraction off |
Reduce retraction; remove strings carefully with a heat gun at a suitable distance, following normal safety precautions |
|
Twisting or jamming in a tube |
Bowden path with soft TPU |
Confirm the path type |
Use harder TPU or a direct-drive setup |
|
Clog at the nozzle |
Nozzle too small for the grade |
Check the maker's compatibility guide |
Consider a larger nozzle only if the filament manufacturer's compatibility guide supports it |
Prusa's rule set is the cleanest starting point for stringing: switch retraction off, then raise it step by step and watch the result, accepting some stringing as the price of a reliable feed (Prusa Knowledge Base, current article).
How Do I Validate a New Spool Before a Long Print?
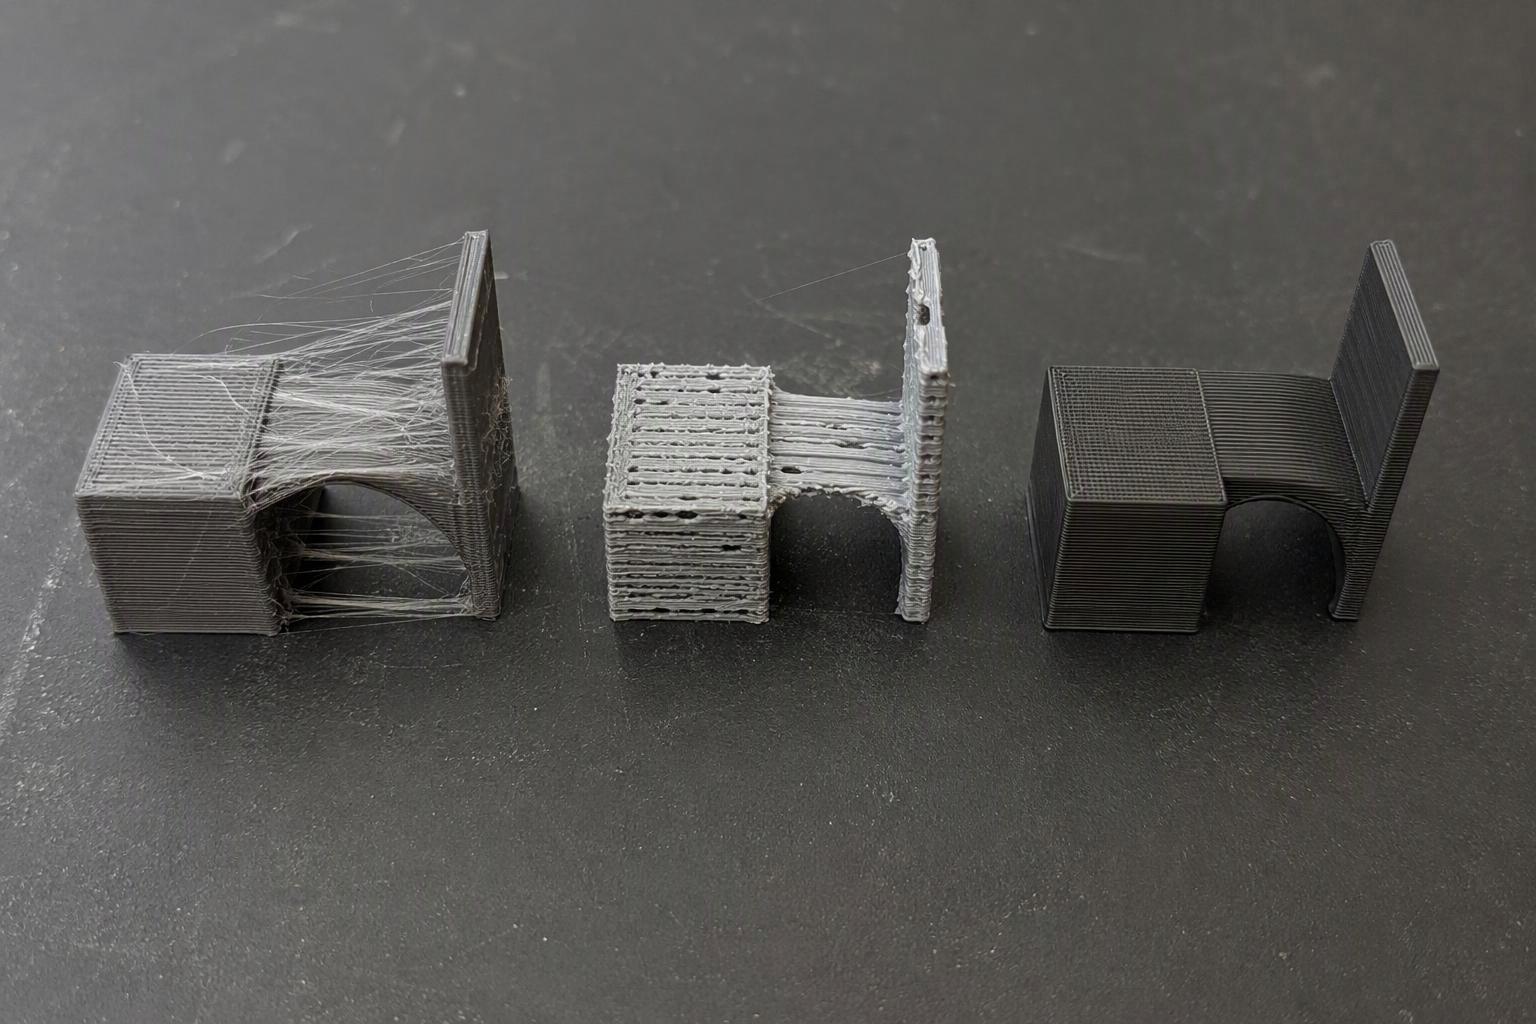
Validate a new spool with a small test model that exercises the hard parts: a short tower with a travel move, a bridging span and a thin wall. It doesn't need to be long — just long enough to show whether the feed is stable before a multi-hour job is at risk.
Drying is where makers disagree, and the disagreement matters. Prusa's TPU 95A guide says drying is usually unnecessary and suggests at least 4 hours at 60 °C if moisture is absorbed (Prusa Knowledge Base, current guide). Bambu Lab's drying table requires drying for all TPU variants at its own listed time and temperature (Bambu Lab Wiki, current wiki). Follow your own spool's data sheet rather than picking a side.
Two caveats decide whether your dryer is adequate. Static drying mode is unsuitable for TPU because its low softening point lets windings stick or deform, so use a dryer with airflow. And storage matters as much as drying: a freshly dried spool can reabsorb enough moisture to affect print quality within hours in ordinary room humidity.
Dry a spool to its maker's spec, run the small test model, and keep a log: spool, dry date, temperature, speed and result. That sheet is what turns a lucky print into a repeatable profile.
Frequently Asked Questions
Can I print TPU on a Bowden extruder?
Yes, with limits. On Bowden-fed printers such as the Prusa MINI+, practitioners report needing very precise idler pressure and harder TPU, because softer grades twist and jam in the PTFE tube (Prusa Knowledge Base, article and comment thread). Minimise retraction even if the print strings.
What is the best nozzle size for TPU?
It depends on the grade and your hardware. Bambu Lab lists TPU 90A and 95A HF as compatible with 0.4, 0.6 and 0.8 mm nozzles but not 0.2 mm, and 85A only on 0.6 and 0.8 mm (Bambu Lab Wiki, current wiki). Check your filament maker's compatibility guide before changing nozzles.
Do I need to dry TPU before printing?
Check your maker's data sheet. Prusa says drying is usually unnecessary and suggests 4 hours at 60 °C if moisture is absorbed (Prusa Knowledge Base, current guide), while Bambu Lab requires drying for all TPU variants (Bambu Lab Wiki, current wiki).
Why does my TPU print string so much?
Because retraction has to be reduced or switched off to keep the soft filament from buckling. Prusa's guidance is to set retractions as low as possible, then carefully remove the resulting strings with a heat gun at a suitable distance, following normal safety precautions (Prusa Knowledge Base, current article). Drying also reduces stringing when moisture is the cause.
Conclusion
The path from a failing TPU print to a repeatable one is short and mostly mechanical. Fix the feed first: a short, constrained path, reduced idler pressure and a nozzle that matches the grade. Then set temperatures from your own spool's data sheet, since the same 95A grade is published anywhere from 210 to 245 °C depending on the maker.
The evidence stops where makers disagree. Drying is required before every print on one maker's guidance and usually unnecessary on another's, and no filament maker publishes a retraction-distance range for TPU at all — so retraction stays a setting you tune by watching the print. Where the sources are silent, say so in your log rather than inventing a number.
Your next step is cheap: dry a spool to its maker's spec, run a small test model, and write down the result. Two or three logged spools give you a profile you can trust more than any table, including the ones above.