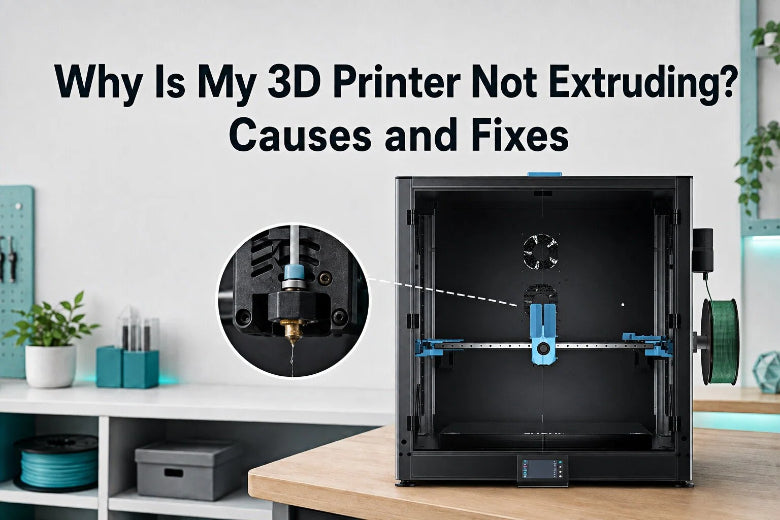
- Primary Root Causes: A 3D printer not extruding is usually caused by a clogged nozzle, filament path resistance, incorrect printing temperature, extruder gear slipping, heat creep, or wet filament.
- Systematic Diagnosis: Always troubleshoot from simple mechanical checks (spool movement, nozzle temp, bed clearance) to advanced hotend and slicer calibrations before taking hardware apart.
- Hotend Safety: When inspecting or clearing a hot nozzle (180°C–260°C+), wear thermal protection and hold the heater block securely to avoid burns or sheared heatbreak wires.
Few things are more frustrating than starting a print, coming back an hour later, and watching your toolhead move back and forth in thin air while no plastic comes out. When your 3D printer stops extruding or fails to feed material from the start, it stalls your workflow and wastes valuable time.
Because FDM printing relies on a continuous balance between mechanical pushing force, thermal melting, and precise nozzle clearance, a failure anywhere along the filament path can stop extrusion entirely. Rather than randomly guessing or tweaking slicer settings at random, you can isolate the exact root cause by following a logical process of elimination.
Quick Answer: The Most Common Causes
When a 3D printer is not extruding, the issue commonly results from one of seven main areas: physical obstruction, thermal mismatch, mechanical gear failure, cooling breakdown, PTFE tube/hotend misalignment, slicer parameter limits, or material moisture degradation.
|
Symptom |
Primary Cause |
Quick Fix |
|---|---|---|
|
No plastic coming out on layer 1 |
Nozzle too close to print bed or unprimed hotend |
Check the nozzle-to-bed clearance and adjust the Z-offset according to the printer's instructions; run a purge line before printing. |
|
Rhythmic clicking sound from extruder |
Stepper motor skipping due to clog, low temp, heat creep, or high resistance |
Check for nozzle clogs, increase nozzle temp slightly within filament specs, or inspect feeding path. |
|
Extrusion stops 15–45 mins into print |
Heat creep in the cold break or excessive retractions |
Inspect hotend heatsink fan operation; reduce retraction distance/speed per toolhead guidelines. |
|
Stripped/flattened filament in gears |
Drive gear tension too tight or teeth clogged with dust |
Clean gear teeth with a wire brush; adjust idler tension per your extruder's manual. |
|
Popping noise & steam bursts from nozzle |
Wet filament boiling in melt zone |
Dry filament using an active dryer or drying process before printing. |
How to Identify an Extrusion Problem
Before tearing down your hotend, pay close attention to when and how the extrusion failed. The exact timing provides immediate clues:
- Failure Right at the Start of Print: If the extruder gears turn but nothing flows during the first layer, your nozzle may be pressed flat against the build plate, blocking the orifice. Alternatively, the hotend may simply lack plastic if you did not purge or prime the nozzle during preheating.
- Extruder Gears Do Not Rotate At All: If the extruder motor or drive gears remain stationary when extrusion is triggered, the problem may involve the extruder motor cable, connector, motor driver, filament sensor, or firmware rather than a clogged nozzle. If the hotend cannot reach the target temperature, stop the print and inspect the heater or thermistor according to the manufacturer's instructions.
- Failure Mid-Print: If the print starts cleanly but filament stops feeding after 15 to 45 minutes, thermal dynamics are usually to blame. Heat creep, fan failure, or over-retraction in long prints often create a solid plastic plug above the hot zone.
- Consistent Under-Extrusion: If plastic flows but lines appear thin, line gaps show on top surfaces, or perimeter layers split apart easily, you are dealing with under-extrusion caused by a partial nozzle clog, low melt temperature, or incorrect slicer flow rate.
Step-by-Step Diagnosis: From Simple to Advanced
To solve non-extrusion quickly without unneeded teardowns, work through these diagnostic checks strictly in order—from easiest physical checks to advanced hotend and slicer adjustments.
1. Filament Path and Spool Resistance

Before inspecting hotend electronics, verify that filament can travel freely from the spool to the extruder drive gears.
- Check for Spool Tangles: Filament overlapping itself on the spool creates immense tension. The extruder motor may pull hard against a knot, grinding into the plastic until it loses grip entirely.
- Inspect Tube Bends & Friction: If your setup uses a Bowden or reverse-Bowden PTFE tube, ensure the tube does not have sharp bends or tight radiuses. Friction inside a worn or pinched PTFE tube can prevent the extruder from pushing plastic smoothly.
- Examine Filament Condition: Brittle filament can snap inside the feed tube or right above the extruder entry guide. Clearing debris and confirming an unhindered feeding path is an essential first step before adjusting hardware.
2. Nozzle Temperature and Clogging

Filament must reach a viscous fluid state above its glass transition temperature to flow properly through a fine nozzle orifice. If the hotend is too cold, flow resistance skyrockets, leading to feeding issues.
- Verify Melting Temperatures: Ensure your target temperature matches your material. While general guidelines exist (PLA: 190°C–220°C, PETG: 230°C–250°C, ABS: 240°C–260°C), exact temperatures always depend on your specific filament brand, speed, and hotend style.
- Identify Partial vs. Full Clogs: A full clog prevents all flow. A partial clog causes the extruded strand to curl upward tightly toward the heater block instead of dropping straight down.
- Perform an Atomic Cold Pull (For Partial Clogs):
Note: A cold pull is primarily designed for partial clogs where filament can still be loaded and unloaded normally. If the hotend is completely jammed or filament cannot move at all, do not force pull—refer to your specific hotend or printer manufacturer's clearing guidelines.
- Heat the hotend to normal printing temperature (e.g., ~200°C for PLA) and manually push a small length of filament through.
- Allow the hotend to cool to roughly 90°C–100°C for PLA (or as recommended for your material) so the plastic semi-solidifies inside the nozzle chamber.
- Firmly pull the filament straight up out of the toolhead according to your hotend design instructions. The pulled tip should mirror the internal shape of your nozzle, pulling out trapped dust, burnt residue, and carbonized debris.
3. Extruder Gear and Tension
Extruders utilize drive gears (often steel or hardened alloy, depending on the extruder model) to grip filament and push it into the melt zone under pressure.
- Diagnose Extruder Clicking: A sharp, rhythmic clicking sound indicates that the stepper motor is skipping steps under excessive backpressure or resistance. This can stem from a clogged nozzle, insufficient printing temperature, heat creep, excessive speed, or physical feeding path drag.
- Inspect Drive Gear Teeth: Metal gear teeth often collect ground plastic dust over time. As dust fills the gear grooves, the teeth lose their bite and slip across the filament surface. Clean the teeth using a small wire brush or compressed air.
- Adjust Idler Spring Tension: If tension is too loose, gears slip and grind. If tension is too tight, gears flatten the filament into an oval shape, causing it to bind inside the lower heatbreak guide. Modern dual-gear drive systems, such as planetary direct drive extruders used on direct drive 3D printers, provide high pushing torque with dual gear contact, reducing the risk of single-gear slipping.
Pro Tip: If you see fine plastic powder piled around your extruder gears, stop printing immediately. Clean the drive teeth and re-adjust the idler tension according to your printer manufacturer's manual before testing again.
4. Heat Creep
Heat creep occurs when thermal energy from the heater block migrates upward past the heatbreak into the heatsink cold break.
- How Heat Creep Causes Jams: When heat leaks upward, filament softens prematurely inside the PTFE tube or cold break section—well above the actual nozzle melt zone. As the extruder pushes down, the swollen, soft plastic expands and forms an immovable plug that stops extrusion completely.
- Check the Hotend Cooling Fan: Ensure your hotend heatsink cooling fan operates properly whenever the hotend is heated, following your toolhead's design specifications. If this fan slows down due to debris, hair, or worn bearings, heat creep can occur during long prints.
- Thermal Paste Application: On hotends designed for thermal compound, verify whether the manufacturer recommends applying thermal grease between the heatbreak threads and heatsink body to improve heat dissipation. Always follow your specific hotend's assembly documentation.
5. PTFE Tube or Hotend Issues
In PTFE-lined hotends (where a PTFE tube runs all the way down to contact the back of the nozzle), mechanical fit is critical.
- The PTFE Gap Plug: If the PTFE tube is not cut perfectly flat at a 90-degree angle, or if pneumatic couplers slip, a gap opens between the tube end and the nozzle. Molten plastic enters this void, cools slightly, and creates a collar-shaped obstruction.
- PTFE Tube Thermal Limits: PTFE-lined hotends have a manufacturer-specified temperature limit. Sustained operation above that rating may deform or degrade the tube, so always follow the hotend manufacturer's guidance.
6. Slicer Flow and Retraction Settings
Software configurations can trigger physical extrusion failures if they exceed the mechanical or thermal limits of your toolhead.
- Excessive Retraction Distance: Direct drive extruders typically require minimal retraction (often 0.5mm to 1.5mm), while Bowden systems require longer distances (often 3.0mm to 6.0mm). Setting retractions too long pulls hot, sticky filament up into the cold zone, triggering instant jams.
- Exceeding Volumetric Flow Limits: Every hotend has a maximum volumetric flow rate (measured in mm³/s). If you increase print speed or layer height beyond what your hotend can heat in real time, the extruder motor will click and under-extrude.
- Flow Rate (Extrusion Multiplier): Verify that your slicer flow rate is set correctly (typically 95%–100% for PLA/PETG). Always refer to your toolhead documentation for baseline slicer profiles.
7. Moisture-Related Extrusion Problems
Hygroscopic filaments like PETG, TPU, ABS, and even PLA absorb water molecules from ambient air.
- How Moisture Impairs Flow: When damp filament enters a hotend, trapped water rapidly vaporizes into steam bubbles. The rapid expansion creates pressure fluctuations, popping sounds, and inconsistent extrusion output, which can contribute to partial flow restrictions or irregular feeding.
- Brittleness & Feeding Jams: Moisture changes the physical integrity of filament, making strands brittle. Brittle filament frequently snaps inside extruder gears or feed tubes.
- Active Drying Fix: Storing filament with silica gel is good for maintenance, but removing absorbed moisture requires active heat and airflow. Using an active dry box like the Sovol SH02 Filament Dryer Box restores damp spools by baking out moisture at controlled temperatures, eliminating steam popping and restoring predictable flow.
How to Fix Extrusion Problems Safely
Working around a heated 3D printer hotend carries genuine safety risks. Elevated temperatures can cause severe burns in seconds, while improper force can damage delicate hotend components.
⚠️ Warning: Hotend Maintenance Safety:
- Wear Thermal Protection: Use heat-resistant gloves or silicone grips when handling heated nozzles or hotend tools.
- Support the Heater Block: Never attempt to unscrew or tighten a nozzle without holding the heater block firmly with an adjustable wrench or appropriate tool as recommended by your hotend's manufacturer. Unsupported twisting can snap delicate heatbreak tubes or damage heater/thermistor wires.
- Protect Electronics: Thermistor and heater wires are delicate. Avoid touching or straining wires or retention screws with metal tools while preheated.
When performing hotend repairs, always follow your printer or hotend manufacturer's specific instructions for preheating temperatures and tightening torque specs. Hot-tightening at recommended operating temperatures ensures a proper seal between the nozzle and heatbreak, preventing molten plastic leaks while avoiding overtightening that could strip aluminum heater block threads or shear nozzle threads.
When to Clean, Replace, or Inspect the Nozzle
Not all extrusion issues can be solved with a cleaning needle or cold pull. Nozzles wear out naturally over time, especially when printing abrasive materials.
- Inspect for Tip Wear: Standard brass nozzles wear down quickly when printing abrasive filaments like carbon fiber, glow-in-the-dark, or wood fills. Worn nozzle orifices become enlarged and asymmetrical, causing erratic extrusion pressure.
- Burnt External Residue: Thick layers of charred plastic on the nozzle tip can catch on printed walls and drag extruded material along. Clean the exterior using a brass wire brush while hot.
- When to Replace: If you have performed one or more cold pulls, confirmed proper temperatures, and verified clear extruder gears, yet extrusion remains irregular, replace the nozzle. Swapping to fresh replacement 3D printer nozzles and hotend parts is an inexpensive fix that eliminates worn internal geometry as a variable.
Final Troubleshooting Checklist
Use this quick diagnostic checklist before starting your next long print job:
- Spool Check: Is the filament spool turning freely without overlapping knots or binding?
- Bed Clearance: Is the first-layer Z-offset set correctly so the nozzle is not choking against the bed?
- Nozzle Preheat: Is the hotend fully preheated to the recommended temperature for your filament brand?
- Purge Line: Does a manual extrusion push a clean, vertical strand of filament straight out of the nozzle?
- Extruder Gears: Are the drive gear teeth clean and free of ground plastic dust?
- Heatsink Cooling: Is the hotend heatsink cooling fan spinning properly without noise or obstruction?
- Slicer Settings: Are retractions set within safe limits recommended for your toolhead type?
- Filament Dryness: Is your filament dry and free from popping sounds or visible steam during extrusion?
Frequently Asked Questions (FAQ)
Why is my extruder clicking but no filament comes out?
Extruder clicking indicates that the stepper motor is skipping steps under excessive resistance. Rather than a single cause, clicking can be triggered by a partial or full nozzle clog, insufficient hotend temperature, heat creep swelling filament in the cold break, excessive print speed/flow rate, or high friction along the feeding path.
Can wet filament cause a complete nozzle clog?
Wet filament primarily causes steam bubbles, pressure fluctuations, surface defects, and popping noises. While it can contribute to uneven flow and localized backpressure that may exacerbate partial clogs, full nozzle clogs are typically caused by physical debris, heat creep, or carbonized filament residue.
How do I distinguish between heat creep and a standard nozzle clog?
A standard nozzle clog occurs at or near the tip orifice and can often be cleared with a nozzle cleaning needle or atomic pull (if partially clear). Heat creep causes a swollen plastic plug higher up in the cold break/heatsink section. If pulled filament displays a wide, swollen bulb well above the nozzle tip shape, heat creep is the likely culprit.
What retraction distance should I use to prevent extrusion jams?
Retraction distance depends heavily on your extruder configuration. Direct drive setups typically use shorter distances (often 0.5mm to 1.5mm), while Bowden systems require longer distances (often 3.0mm to 6.0mm). Always consult your toolhead and hotend manufacturer guidelines, as excessive retraction distance can pull molten plastic into the cold zone and cause instant jams.
Next Steps
Restoring smooth, consistent extrusion comes down to methodical troubleshooting: isolate the physical feeding path, verify proper hotend melt temperatures, keep drive gears clean, and ensure your filament is dry.
If you are looking to upgrade your setup with high-torque dual-gear feeding, exploring modern direct drive 3D printers and active dry boxes may help reduce common extrusion problems and keep your FDM projects printing reliably.