


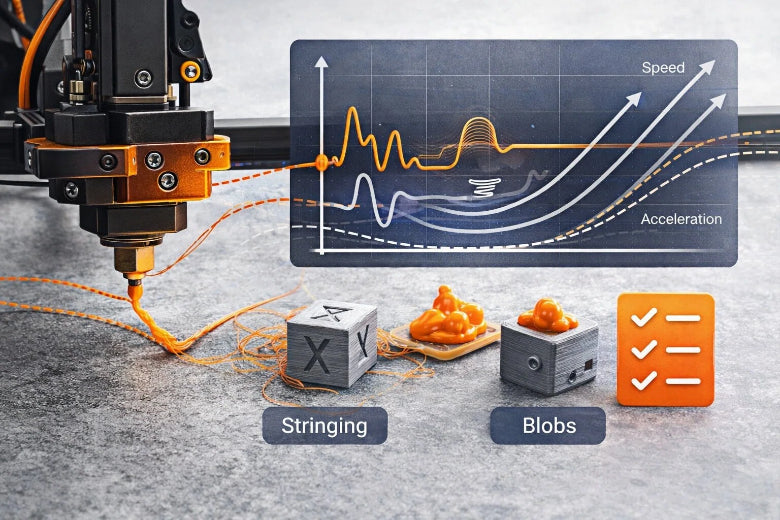
Adjusting 3D printer retraction settings is very important for smooth prints. Retraction pulls the filament back a little. This stops melted plastic from leaking out during moves. If you set these values right, you can stop stringing and blobs. Many people see big changes by changing retraction distance and speed. The table below shows how each setting changes stringing and print quality:
|
Retraction Setting |
Description |
Impact on Stringing Defects |
|---|---|---|
|
Retraction Distance |
How far the filament is pulled back; this depends on your setup (0.5–2.0 mm for direct, 4–7 mm for Bowden) |
Longer distances can help stop stringing but may cause clogs if too long. |
|
Retraction Speed |
How fast the filament is pulled back (20–60 mm/s) |
Faster speeds can help stop stringing but may cause clogs. |
|
Minimum Travel |
The smallest move before retraction happens (1–2 mm is best) |
This lowers extra wear and makes printing better. |
|
Maximum Retraction Count |
The most times retraction can happen to protect the filament and printer |
This helps keep the filament strong and prints nice. |
You can use slicing software like Cura, PrusaSlicer, or Creality Print to change and test these settings for your printer.
Key Takeaways
- Change retraction distance and speed to stop stringing and make prints look better. Begin with the suggested numbers and test until you find what works best for your printer.
- Use slicing software like Cura or PrusaSlicer to change retraction settings easily. Find these options under the 'Material' or 'Extruder' sections.
- Do a retraction test print to find the best settings for your filament and printer type. Small changes can make a big difference.
- Keep your filament dry and clean your nozzle often. This helps stop problems like oozing and blobs when printing.
- Know the differences between direct drive and Bowden setups. Each one needs different retraction settings to work well.
Understanding 3D Printing Retraction
What Is Retraction
A 3D printer nozzle moves to make shapes on the print bed. Sometimes, it must cross empty spaces without printing anything. Retraction helps keep prints neat during these moves. The printer pulls the filament back a bit before moving. This stops melted plastic from leaking and making a mess.
- Retraction means the filament moves backward. The printer does this to stop drips while moving.
- Retraction also lowers pressure in the hot end. This helps stop stringing and other print mistakes.
You can change retraction settings in your slicing software. These settings control how far and how fast the filament moves back. Every printer and filament type may need different settings.
Why Retraction Matters
You want your prints to look smooth and nice. Retraction is important for this. If you set retraction right, you can avoid many problems.
- Retraction stops oozing and blobs when the nozzle moves.
- Good retraction settings give you cleaner prints.
- Changing retraction distance and speed helps stop stringing.
- Getting retraction right is key for better accuracy.
- Each material, like PLA or PETG, may need special settings.
- Changing retraction speed helps you avoid strings and get better detail.
When you learn about retraction, your prints can look much better.
Common Retraction Issues
If you do not set retraction right, you may see problems:
- Oozing: Melted filament leaks or drips from the nozzle.
- Stringing: Thin strands form between parts of your print.
- Blobs: Small lumps of plastic show up on the print.
- Zits: Tiny bumps appear where the nozzle starts or stops.
- Scars: Marks or scratches show where the nozzle drags.
Oozing and stringing are the most common problems. Many people with printers like the Ender 3 see these issues a lot. You can fix most problems by changing your retraction settings and testing until you find what works best.
Key 3D Printer Retraction Settings
If you want better print quality, you should know the main 3d printer retraction settings. These settings tell your printer how to pull back filament. This helps stop stringing and blobs. You can change these in slicing software like Cura, PrusaSlicer, or Creality Print. Go to the "Material" or "Extruder" section. Open the "Retraction" menu to see all the controls.
Retraction Distance
Retraction distance tells your printer how far to pull filament back. This is one of the most important 3d printer retraction settings. If the distance is too low, you might see stringing and oozing. If it is too high, jams or under-extrusion can happen.
- Direct drive extruders work well with 1.5–2 mm retraction distance. This is good for filaments like PLA and ABS.
- Bowden tube setups need a higher retraction distance, usually 4–7 mm. The extra length helps because the filament travels farther.
- Some people get good results with 6 mm at 50 mm/s for Bowden systems.
- If you use flexible filaments like TPU, lower the retraction distance to avoid jams.
Tip: Run a retraction test print to find the best distance for your setup. Start with the suggested value. Change it by 0.5 mm until stringing stops.
Changing retraction distance affects print quality. More distance pulls more filament back. This helps stop stringing and oozing. Too much distance can waste time and cause clogs. If you see stringing, lower your retraction distance by 10%. This small change can help without causing jams.
Retraction Speed
Retraction speed tells your printer how fast to pull filament back. This works with retraction distance to stop defects. If you retract too slow, melted filament may ooze out. If you retract too fast, you can grind or strip the filament.
- Direct drive extruders work well with 25–35 mm/s speed.
- Bowden tube printers can use higher speeds, like 50–70 mm/s.
- Many people use 50 mm/s for Bowden setups and 25 mm/s for direct drive.
You can change retraction speed in your slicing software. It is in the same menu as retraction distance. Change the speed in small steps, like 5 mm/s. If you see stringing or blobs, make the speed higher. If you hear clicking or see grinding, make the speed lower.
- Change both retraction distance and speed for better results.
- Lower print temperature and raise fan speed to help stop stringing.
- Keep your filament dry and your nozzle clean for best prints.
Extra Prime & Advanced Options
Besides basic 3d printer retraction settings, slicing software has advanced options. These help you get smoother prints. You can fine-tune how your printer handles filament during travel moves.
|
Setting Name |
What It Does |
|---|---|
|
Minimum Travel Distance |
Sets how far the nozzle must move before retraction happens. |
|
Nozzle Switch Retraction |
Controls retraction when switching between multiple nozzles. |
|
Combing |
Keeps travel moves inside the print to avoid stringing. |
|
Z-Hop |
Lifts the nozzle during travel to prevent dragging and scarring. |
|
Retraction Towers |
Lets you print test models to compare different retraction settings easily. |
- Minimum Travel Distance: Set this to 1–2 mm to avoid extra retractions on short moves. This lowers wear and keeps prints clean.
- Combing: Turn this on to keep the nozzle inside the print edge during travel. This helps stop stringing.
- Z-Hop: Use Z-hop if you see scars or scratches. Set it to 0.2–0.5 mm to lift the nozzle just enough.
Note: Advanced options like extra prime amount or nozzle switch retraction help with multi-material printing or dual extruders. For most single-extruder prints, focus on retraction distance and speed first.
You can find these advanced settings in the "Travel" or "Experimental" sections of your slicing software. Change one setting at a time and run a test print to see what works. Retraction towers are a good way to compare different 3d printer retraction settings.
By learning and changing these 3d printer retraction settings, you can fix most stringing and oozing problems. Start with the suggested values. Try different settings to see what works best for your printer and filament. Careful tuning helps you get smoother, cleaner prints every time.
Retraction Settings by Printer & Filament
Direct Drive vs Bowden
You need to know your printer’s extruder type before you adjust retraction. Direct drive and Bowden setups work differently. Each one needs its own approach for smooth prints.
- Direct Drive: The extruder sits close to the hot end. This setup lets you use shorter retraction distances, usually between 1–2 mm. The filament responds quickly, so you get better control and less stringing. You can also use lower retraction speeds, which helps prevent grinding.
- Bowden: The extruder sits farther from the hot end. The filament travels through a long tube, which adds friction. You need a larger retraction distance, often 5 mm or more. This helps pull the filament back enough to stop oozing. You may also need to increase retraction speed to keep up with the longer path.
Tip: Always start with the recommended values for your extruder type. Then, print a small test model and watch for stringing or blobs. Adjust in small steps until you see clean results.
PLA, PETG, TPU, ABS Ranges
Different filaments react to retraction in their own way. You must tune your settings for each material to get the best prints. The table below shows common starting points for popular filaments:
|
Filament Type |
Retraction Distance |
Retraction Speed |
Notes |
|---|---|---|---|
|
PLA |
2–4 mm (Bowden) |
30–50 mm/s |
Minimal stringing, easy to tune |
|
PLA |
1–2 mm (Direct) |
25–35 mm/s |
Clean edges, quick response |
|
PETG |
3–5 mm (Bowden) |
30–40 mm/s |
Prone to stringing, lower speed helps |
|
PETG |
1–2 mm (Direct) |
20–30 mm/s |
Needs careful tuning, avoid high speed |
|
TPU |
1–2 mm (Direct) |
15–25 mm/s |
Use low distance and speed to prevent jams |
|
ABS |
2–4 mm (Bowden) |
30–50 mm/s |
Similar to PLA, but watch for oozing |
|
ABS |
1–2 mm (Direct) |
25–35 mm/s |
Clean results, adjust for your setup |
You should always experiment with your own printer and filament. Start with these ranges, then print a retraction test. If you see strings, increase the distance or speed a little. If you see jams or grinding, lower them. Every printer and spool of filament can act differently.
Note: No single setting works for every printer or filament. Testing and small changes help you find the perfect balance for smooth, clean prints.
Adjusting & Testing Retraction Settings
Step-by-Step Calibration
You can get smoother prints by fixing your retraction settings. Follow these steps to help your printer stop stringing and other problems:
-
Prepare Your Printer
Clean the nozzle with a brass brush while it is hot. Make sure the bowden tube or direct drive is tight. Check that the extruder gears are not worn out. -
Select a Calibration Model
Download or make a retraction tower. This model lets you test different settings in one print. You can find retraction towers in most slicer libraries under calibration. -
Set Initial Parameters
Start with the suggested values for retraction distance and speed. For direct drive, use 2-5 mm for distance and 30-60 mm/s for speed. For bowden, use 4-7 mm for distance and about the same speed. Set minimum travel retraction to 1-2 mm to stop extra retractions on short moves. -
Adjust Advanced Options
Turn on minimum travel retraction in your slicer. Set the maximum retraction count to protect the filament. If your slicer has z hop, set it to 0.2-0.5 mm to stop nozzle marks. -
Generate G-code and Print
Use the slicer to make your test print file. Print the retraction tower at three temperatures, starting about 10°C higher than normal. Set the fan speed to 80-100% so small towers do not melt. -
Change One Setting at a Time
After each test, change only one thing, like retraction speed or distance. This helps you see what change fixes stringing or blobs.
Tip: Always dry your filament before testing. Wet filament can cause stringing even if your retraction settings are good.
Using Slicing Software Tools
Popular slicing software like Cura, PrusaSlicer, and Creality Print make calibration simple. You can find all retraction controls in the "Material" or "Extruder" section. Look for these options:
|
Slicer Feature |
Where to Find It |
What It Does |
|---|---|---|
|
Retraction Distance |
Material/Extruder tab |
Sets how far filament pulls back |
|
Retraction Speed |
Material/Extruder tab |
Controls how fast filament retracts |
|
Minimum Travel Retraction |
Travel/Experimental tab |
Sets minimum move before retraction |
|
Z Hop |
Travel tab |
Lifts nozzle during travel moves |
|
Maximum Retraction Count |
Advanced/Experimental tab |
Limits retractions per area |
You can use the "Retraction Tower" plugin or calibration menu in your slicer to make test prints. Fill in the numbers for retraction speed, distance, and minimum travel retraction. Click "Generate" to make the test model. Print the tower and check each part for stringing, blobs, or zits.
Note: If you see stringing in every part, try lowering the print temperature or making retraction speed faster. If you see blobs, lower the retraction distance or speed.
Interpreting Results & Fine-Tuning
After printing your retraction tower, look at each part closely. Look for thin strings between towers, blobs on the surface, or tiny bumps. Use these steps to fine-tune your settings:
-
Check for Stringing
If you see strings between towers, raise retraction distance by 0.5 mm or make retraction speed 5 mm/s faster. Make sure minimum travel retraction is at least 1 mm. -
Look for Blobs or Zits
If blobs show up, lower retraction speed a little. Too much speed can make the filament slip. Change minimum travel retraction to stop too many retractions in small spots. -
Evaluate Temperature Effects
Compare towers printed at different temperatures. Lower temperatures can help stop stringing, but too low can cause under-extrusion. -
Check Filament Condition
Wet filament causes stringing even with good settings. Dry your filament in a dehydrator or oven at low heat. -
Inspect Hardware
Make sure the nozzle is tight and the bowden tube is secure. Loose parts can make extrusion uneven. -
Repeat Tests
Print another retraction tower after each change. Change only one setting at a time to see clear results.
Common Mistakes:
- Setting retraction length too high makes prints slower and can cause clogs.
- Using too much retraction speed can break or grind filament.
- Not changing minimum travel retraction can damage filament in small areas.
If stringing does not go away after many tests, try these steps:
- Dry the filament well.
- Raise retraction distance a little at a time.
- Slow down retraction speed.
- Lower print temperature by 5°C.
- Check extruder gears for damage.
- Try not to use AMS systems for feeding filament if you can.
- Use filament brands that are known to be good.
By following these steps, you can set your retraction settings for smoother, cleaner prints. Careful calibration and testing help you get the best retraction speed, minimum travel retraction, and other important settings for your printer and filament.
Troubleshooting 3D Printing Retraction
Fixing Stringing & Blobs
You might see stringing or blobs on your prints. These problems can happen if retraction settings are wrong. High nozzle temperature or too much filament can also cause them. The table below shows what causes these problems and how they affect your print:
|
Cause |
Explanation |
|---|---|
|
Over-extrusion |
Too much filament comes out. This makes blobs when the print head moves back to start. |
|
Retraction |
Bad retraction settings let extra material ooze out. This causes blobs and zits. |
|
Nozzle Temperature |
If the nozzle is too hot, filament oozes too fast. This leaves marks on the print. |
|
Print Speed |
Printing too fast can stop layers from cooling. This makes blobs and changes the shape. |
To fix stringing and blobs, try these steps:
- Change retraction settings to control how much filament pulls back.
- Use a smaller retraction distance if you see bubbles or gaps.
- Set retraction speed so filament does not ooze out.
- Lower the nozzle temperature if there is too much oozing.
- Set the maximum retraction count. This stops too many retractions in one spot and keeps filament strong.
If you still see blobs, check if the nozzle is partly clogged. Try printing slower. Always clean the nozzle and keep filament dry.
Avoiding Under-Extrusion
Under-extrusion means not enough filament comes out. This can make holes or weak spots in your print. Wrong retraction settings often cause this. If you retract too far or too many times, melted plastic can move into the cold part. This can make jams.
- Keep retraction distance under 1.5mm for direct drive printers. For Bowden setups, keep it under 6mm.
- Set the maximum retraction count to a safe number. This helps stop jams from too many retractions.
- If you see under-extrusion, lower the retraction distance. You can also reduce the maximum retraction count.
- Make sure the nozzle is not clogged and filament moves smoothly.
If you hear clicking or see gaps in your print, check retraction settings first. Changing the maximum retraction count can help stop jams and keep filament flowing well.
Ongoing Optimization Tips
You can keep prints smooth by following these tips:
|
Evidence |
Description |
|---|---|
|
Calibrating the extrusion multiplier |
Change this for each filament to get the best retraction. |
|
Properly drying filament |
Dry filament helps stop stringing and makes prints cleaner. |
|
Try different speeds and distances to see what works best for your printer and filament. |
- Watch for small strings or blobs. These show you need to change retraction or maximum retraction count.
- Use wiping and z-hop settings to stop marks and scars.
- Always calibrate the extrusion multiplier when you use a new filament brand.
- Set the maximum retraction count in your slicer. This protects your filament and extruder.
- Print retraction towers to test new settings and see results fast.
Tip: If you change filaments or see new problems, check your maximum retraction count. Run a quick calibration. Small changes can really help print quality.
By following these steps and watching your maximum retraction count, you can fix most retraction problems. You will get smoother and cleaner prints every time.
Changing your 3D printer’s retraction settings is very important for good prints. You should begin with the suggested settings. Then, try different numbers to see what works best for your printer and filament. Many guides from other users say calibration tools and careful testing help a lot. To keep getting good results, remember these tips:
- Know that retraction helps stop oozing and stringing.
- Change retraction length between 1mm and 5mm for your printer and filament.
- Pick a retraction speed that does not cause jams or problems.
If you use these steps, your prints will look smoother and cleaner.
FAQ
What causes stringing even after adjusting retraction settings?
Stringing can still happen if your filament is wet. It can also happen if the nozzle is too hot. Dry your filament before printing. Lower the print temperature by 5°C. Run a retraction test to check if things get better.
How do I know if my retraction distance is too high?
You might see gaps or hear clicking from the extruder. This means your retraction distance could be too high. Lower the distance by 0.5 mm. Print a test model to see if it helps. Look for smoother lines and fewer gaps.
Should I change retraction settings for every filament type?
Yes, you need to adjust retraction for each filament. PLA, PETG, TPU, and ABS all act differently. TPU needs less retraction so it does not jam. Always print a test when you use a new material.
Can retraction settings fix blobs and zits on prints?
Retraction settings can help stop blobs and zits. Lowering speed or distance can make the surface smoother. You can also turn on "coasting" or "wipe" in your slicer. This helps make your prints look even cleaner.
Where do I find retraction settings in my slicer?
Look in the "Material" or "Extruder" section of your slicer. Most slicers like Cura or PrusaSlicer have these options. Find "Retraction Distance" and "Retraction Speed." Change the numbers and save before you print.


