


Want to boost your 3d printing bed adhesion fast? Start by making sure your print bed is clean and level. You need solid first layer adhesion because it sets the foundation for every print. If your first layer slips or lifts, your whole project can fail. Try using a glue stick or a PEI sheet and adjust your bed temperature for better adhesion. Simple fixes like these save you time and materials.
- The first layer is the backbone of every successful print.
- Addressing poor adhesion helps you avoid wasted filament and failed prints.
Key Takeaways
- Always begin with a clean and flat print bed. This helps the first layer stick well and stops print problems.
- Set the nozzle distance with care. The right Z-offset lets the filament stick but does not scratch the bed.
- Use the correct bed temperature for your filament. The right heat helps things stick and makes prints look better.
Causes of Poor 3d Printing Bed Adhesion
When your prints don’t stick, it’s frustrating. Let’s look at the main reasons why you might struggle with 3d printing bed adhesion and how to fix them.
Unleveled Bed
If your bed isn’t level, you’ll see uneven layers or gaps. You want the nozzle to stay the same distance from the bed across the whole surface. Many printers let you adjust the bed. Always check the level before a big print. A level bed gives you the best chance for success.
- An unleveled bed causes uneven nozzle distance.
- You need a flat surface for good bed adhesion.
Incorrect Nozzle Distance
The nozzle should be close, but not touching, the bed. Too high, and the filament won’t stick. Too low, and the nozzle scrapes the bed. Here’s a quick way to set the right distance:
- Start with the nozzle touching the bed.
- Adjust the Z-offset until you see a thin, even line—about 0.2mm thick.
This step is key for first layer adhesion.
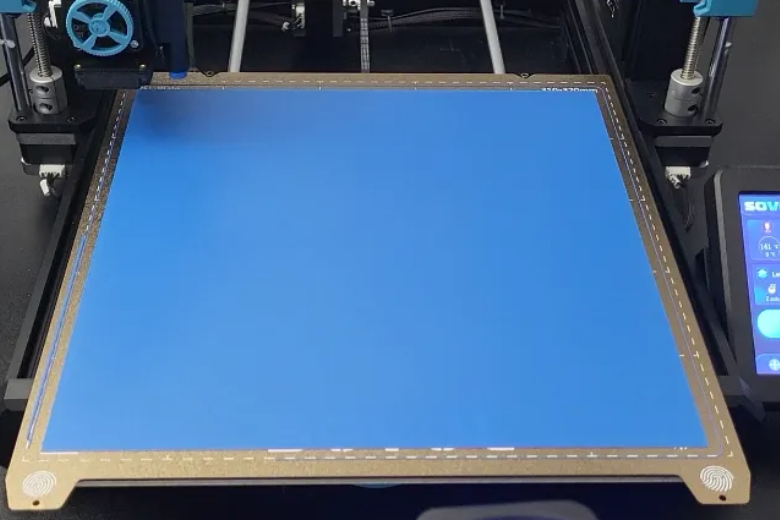
Dirty Bed Surface
A clean bed is a must. Dirt, oils, or leftover plastic stop your print from sticking. Always wipe the bed with isopropyl alcohol or dish soap before you start. If you see corners lifting or peeling, it’s time to clean.
Tip: Clean your bed before every print for the best results.
Wrong Temperature Settings
If your bed or nozzle is too cold, prints won’t stick. Too hot, and the filament gets soft or warps. Check the table below for the right range:
|
Filament |
Bed Temp Range |
Notes |
|---|---|---|
|
PLA |
50-70°C |
60°C works for most prints. |
|
ABS |
Needed to stop warping. |
Adjust your settings for your filament. This helps you avoid adhesion problems and wasted time.
Essential Preparation for First Layer Adhesion
Getting ready for a print is more than just pressing start. You need to set up your printer for success. Let’s walk through the steps that help you avoid adhesion problems and get a strong first layer every time.
Leveling the Print Bed
Bed leveling is the first thing you should check. If your bed isn’t level, your print might not stick or could peel up at the corners. Here’s a simple way to level your bed:
- Tighten the springs so the bed sits about 0.2mm from the nozzle tip.
- Open your printer’s Bed Leveling Wizard and click Begin Leveling.
- Place a piece of paper between the nozzle and the bed. Adjust the leveling screws at each corner until you feel slight resistance when moving the paper.
- Move the extruder to the next corner and repeat the paper test.
- Go around all corners twice for accuracy.
- Pre-heat the bed and nozzle before starting your print.
- If the filament doesn’t lay down smoothly, adjust the spring tension until it does.
Tip: Level your bed before every big print or after moving your printer. This keeps your 3d printing bed adhesion strong.
Setting Z-Offset
The Z-offset controls how close the nozzle gets to the bed. Getting this right makes a huge difference in adhesion.
- If the Z-offset is too high, the filament won’t stick well.
- If it’s too low, the nozzle scrapes the bed and messes up the flow.
- Lowering the Z-offset a little can help the filament grip the bed.
- Raising it can stop the nozzle from squishing the filament too much.
Try printing a small test square to check your settings. Adjust until you see a smooth, even first layer with no gaps or rough spots.
Cleaning with Isopropanol or Dish Soap
A clean bed is key for good adhesion. Oils from your fingers or leftover adhesive can ruin your print. Here’s how you can keep your bed spotless:
|
Cleaning Agent |
Effectiveness Description |
|---|---|
|
IPA (90%) |
Great for everyday cleaning. |
|
Warm Soapy Water with Soft Brush |
Removes dust and oils, restores grip. |
|
Soapy Water with Sponge |
Good for deep cleans when you remove the bed. |
|
Microfiber Cloth |
Prevents scratches during cleaning. |
- Wipe the bed after each print if you use your printer daily.
- Do a deeper clean every five prints or when you notice poor adhesion.
- Regular cleaning stops dust and oils from building up.
Note: Always let the bed dry before starting a new print. Water or alcohol left behind can cause adhesion problems.
Checking Bed Condition
Sometimes, cleaning isn’t enough. Your bed surface might need maintenance or even replacement.
- If you see changes in adhesion between prints or random spots where the first layer lifts, clean the surface.
- Switch between filament types? Clean the bed to keep adhesion strong.
- Light scratches or small gouges can be fixed by gently sanding with fine-grit sandpaper.
- If you spot rips, bubbling, or peeling, it’s time to replace the surface.
- Poor adhesion from damage means your PEI sheet or build plate needs a new one.
Tip: Check your bed for wear every month. A smooth, undamaged surface helps every print stick and makes your adhesive work better.
Regular maintenance and preparation are the secret to reliable first layer adhesion. When you level your bed, set the Z-offset, clean the surface, and check for damage, you set yourself up for printing success. These steps help you avoid wasted filament and keep your 3d printing bed adhesion strong.
Bed Surfaces & Adhesion Boosters
Getting the right bed surface can make a huge difference in your 3d printing bed adhesion. Let’s look at your options and how you can boost adhesion for print success.
Choosing the Right Build Plate
You have a few popular choices for build plates. Each one works best with certain filaments and has its own strengths and weaknesses. Here’s a quick comparison:
|
Build Plate Material |
Best for Filaments |
Strengths |
Weaknesses |
|---|---|---|---|
|
Spring Steel with PEI |
PLA, PETG |
Best adhesion for common filaments |
Can over-adhere to TPU or ABS (smooth PEI) |
|
Glass |
ABS, TPU |
Smoothest prints for high-temp filaments |
Less durable, prone to scratches |
If you print mostly with PLA or PETG, a PEI-coated plate gives you strong adhesion. Glass works well for ABS and TPU, but you might need to use a bed adhesive for extra grip.
Using Glue Stick or Hairspray
Sometimes, you need a little help to get your prints to stick. Many users find glue sticks easy to use and effective for bed adhesion. Hairspray is another option, but you should use it with care because it’s flammable. Some people get great results with hairspray after trying other adhesive products. Others say a clean bed with no adhesive works best for them. You can try both and see what works for your setup.
- Glue sticks are simple and mess-free.
- Hairspray can boost adhesion but needs careful handling.
- Clean your bed often for the best results.
- You may need to use a bed adhesive if you have ongoing adhesion problems.
Upgrading Bed Surface
Upgrading your bed surface can solve stubborn adhesion issues. Here are some options:
- Magnetic plates are easy to use and clean, but they scratch easily.
- Carborundum glass is durable and smooth, but you need clips and a spatula to remove prints.
- Removable PC spring steel plates are strong and flexible, making print removal easy, but they may not work with every filament.
- Flexible PEI steel sheets are practical and need little prep, but their surface can wear out over time.
If you keep having trouble, switching to a new surface or trying different adhesive products can help you get better adhesion and more reliable prints.
Temperature & Print Settings for 3d Printer Bed Adhesion
Getting your temperature and print settings right is a big step toward good bed adhesion and a successful 3d print. Let’s break down what you need to know.
Adjusting Bed and Nozzle Temperature
You want to set your bed temperature and nozzle temperature based on your filament. This helps you avoid adhesion problems and print failures. Here’s a quick guide:
|
Material |
Nozzle Temperature |
Bed Temperature |
|---|---|---|
|
PLA |
190°C - 210°C |
60°C - 80°C |
|
PETG |
230°C - 250°C |
65°C - 90°C |
|
ABS |
230°C - 260°C |
90°C - 110°C |
|
TPU |
220°C - 240°C |
50°C - 70°C |
Tip: Higher temperatures help layers fuse and stick better. Lower temperatures can cause poor bonding and under-extrusion.
Follow these steps for better adhesion:
- Set your bed temperature to match your filament.
- Adjust nozzle temperature for smooth flow.
- Make small changes if you see lifting or warping.
Filament-Specific Settings
Each filament needs its own settings for best results. Here are some practical tips:
- Use adhesives like Magigoo or glue stick for extra grip, especially with PETG and ABS.
- Apply adhesive in a thin, even layer to keep your bed clean.
- Slow down your first layer print speed. This gives the filament time to bond.
- Adjust cooling settings for PLA to prevent warping.
- Check your Z-offset and bed leveling before each print.
Note: If you switch filaments, always clean your bed and update your settings.
Slicer Features: Rafts, Brims, Skirts
Your slicer software offers features that boost first layer adhesion. Here’s how they help:
|
Feature |
|
|---|---|
|
Rafts |
Create a stable base and prevent warping. Great for ABS. |
|
Brims |
Anchor prints with a wider surface area. Reduce warping. |
|
Skirts |
Prime the nozzle for smooth flow and help check bed leveling. |
- Brims work well for small prints or tricky materials.
- Rafts help with prints that need extra support.
- Skirts let you spot problems before the real print starts.
Try these slicer features if you keep having adhesion problems. They can save your print and help you get reliable results.
Troubleshooting Adhesion Issues

If your prints keep having adhesion problems, it can be frustrating. But you can fix most issues with a few easy steps.
Diagnosing Persistent Problems
Try these steps if your prints still won’t stick:
- Check if your print bed is flat. A warped bed causes prints not to stick well.
- Change your Z-offset so the nozzle is in the right spot. If it’s too high or too low, prints won’t stick.
- Look at your temperature settings. For PLA, set the bed between 40°C and 70°C. For ABS, use 100°C to 120°C.
- Clean your bed with rubbing alcohol to get rid of dust and oils.
- Level your bed. You can use paper for manual leveling or auto bed leveling if your printer has it.
- Check your slicer settings. Slow down the first layer and look at your adhesion settings.
Tip: Print a small test piece first. This helps you find problems before you start a big project.
Environmental Factors
The room where you print can change how well your prints stick. Humidity and airflow are important.
|
Factor |
Impact on 3D Printing Bed Adhesion |
|---|---|
|
High Humidity |
Filament gets wet and prints don’t stick well. |
|
Ideal Humidity |
Keep humidity between 30-50% for better prints. |
|
Air Circulation |
Good airflow cools layers and makes prints smoother. |
If you keep filament in a damp place, you may get more failed prints. Try to keep your workspace dry and steady.
Community Support
Sometimes, you need help from other people. Online forums can give you advice for tough adhesion problems:
- The Bambu Lab Community Forum has tips for different materials and settings.
- Prusa3D Forum users talk about bed surfaces and temperature settings.
- Creality Community Forum members suggest slicer features like RAFT to help prints stick.
You can ask questions, share pictures, and get answers from people who have fixed the same problems.
Boosting 3D printing bed adhesion starts with a clean, flat bed and the right surface for your filament. Try slowing your first layer speed and using adhesives for tricky prints.
- Match your build plate to your filament
- Adjust first layer settings
- Clean your bed often
Keep experimenting and join online forums for more support!
FAQ
How often should you clean your print bed?
You should clean your print bed before every print. Dust, oils, and leftover filament can hurt 3D printing bed adhesion. A clean print bed gives you better results.
What is the best way to level your print bed?
Use the paper test. Place a sheet between the nozzle and print bed. Adjust each corner until you feel slight resistance. This helps you get strong 3D printing bed adhesion.
Why does filament not stick to the print bed?
Filament may not stick if your print bed is dirty, uneven, or too cold. Check your print bed temperature, clean the print bed, and level the print bed for better 3D printing bed adhesion.
Can you use glue stick on any print bed?
You can use glue stick on most print bed surfaces. It helps with 3D printing bed adhesion, especially for tricky filaments. Always clean your print bed after using glue stick.
How do you fix warping on the print bed?
Try raising your print bed temperature. Use a brim or raft in your slicer. Clean your print bed and check for damage. These steps improve 3D printing bed adhesion.
What print bed surface works best for beginners?
A PEI-coated print bed works well for beginners. It offers strong 3D printing bed adhesion and easy print removal. Clean your print bed often for best results.
Do you need to replace your print bed?
Replace your print bed if you see scratches, peeling, or poor 3D printing bed adhesion. A damaged print bed can cause prints to fail. Check your print bed monthly.
How does print bed temperature affect adhesion?
Print bed temperature helps filament stick. Too low, prints lift. Too high, filament warps. Set your print bed temperature for your filament to boost 3D printing bed adhesion.
Can humidity affect your print bed?
High humidity can hurt 3D printing bed adhesion. Filament absorbs moisture and may not stick to the print bed. Keep your print bed and filament dry for better results.
What is Z-offset and why does it matter for your print bed?
Z-offset sets the nozzle height above the print bed. If it’s wrong, filament won’t stick. Adjust Z-offset for a smooth first layer and strong 3D printing bed adhesion.
Should you use tape on your print bed?
You can use painter’s tape on your print bed for PLA. It helps with 3D printing bed adhesion. Replace tape often and clean your print bed before each print.
How do you remove prints from the print bed safely?
Let your print bed cool. Use a plastic spatula to lift prints. Avoid metal tools to protect your print bed. This keeps your print bed in good shape.
Why does your print bed lose adhesion over time?
Your print bed can lose grip from dust, oils, or wear. Clean your print bed often. Replace your print bed if 3D printing bed adhesion stays weak.
What slicer settings help with print bed adhesion?
Use brims, rafts, or slow first layer speed in your slicer. These settings help prints stick to the print bed and improve 3D printing bed adhesion.
Can you print directly on a glass print bed?
You can print on a glass print bed. Clean your print bed well. Use glue stick or hairspray for better 3D printing bed adhesion. Remove prints gently to avoid damage.
How do you check if your print bed is flat?
Move the nozzle across the print bed. Watch for gaps or scraping. Use a straight edge to check your print bed. A flat print bed helps with 3D printing bed adhesion.
What is the most common cause of poor print bed adhesion?
A dirty or uneven print bed causes most problems. Clean your print bed and level it before printing. This boosts 3D printing bed adhesion and print quality.


