


If you want the best infill for large 3D prints, you should try the gyroid pattern. This pattern gives you strong parts without wasting extra material. In 3d printing, the infill you pick makes a big difference. Higher infill density creates stronger objects, but it also uses more filament and takes longer to finish. Lower density saves time and material, but prints may not be as tough. In 3d printing, choosing the right infill helps you balance strength, weight, and print speed. Think about what you need before you pick an infill pattern for your next project.
Key Takeaways
Pick the gyroid infill pattern for big 3D prints. This pattern makes your print strong and light. - Change the infill density for what you need. Use less density for things that are just for looks. Use more density for things that need to work well. - Think about how long the print takes and how much material you use. Some patterns like concentric print faster but might not be as strong. - Try out different infill patterns on small prints first. This helps you see which one works best before you print something big. - Use slicer previews to look at the infill pattern. This helps you make sure your print will be strong and not have weak spots.
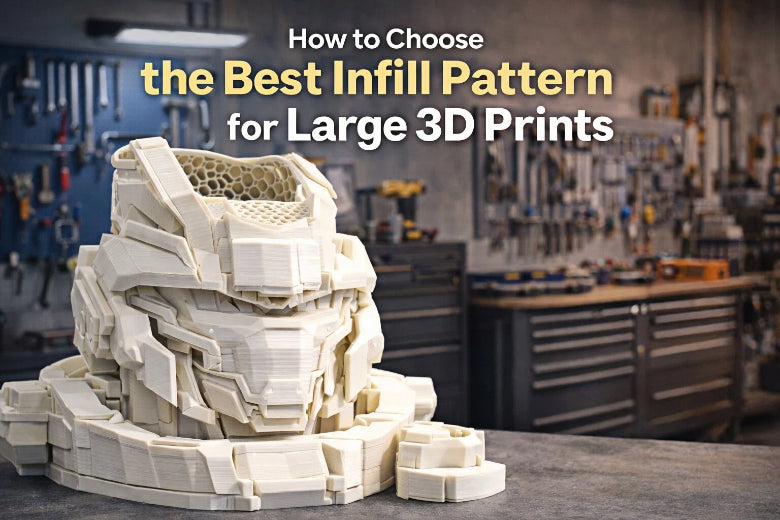
Best Infill for Large 3D Prints
Top Patterns for Strength and Efficiency
When you print large objects, you want them to be strong but not too heavy or expensive. The best infill for large 3d prints often comes down to the gyroid pattern. This infill structure gives you a great balance between strength and weight. You can use lower densities, like 5-10%, and still get solid parts. That means you save on material and time, but your print stays tough.
Let’s look at how the most popular infill structures compare for large prints:
|
Infill Pattern |
Pros |
Cons |
|---|---|---|
|
Gyroid |
Exceptional strength and weight balance, even at low densities |
Can be slower to print and uses more material |
|
Cubic/Grid |
Good for large prints, supports impacts, prints faster than gyroid |
Not as strong in all directions |
Gyroid stands out because it supports loads from many directions. This makes it perfect for big parts that need to handle stress from different angles. Cubic or grid infill structures work well if you want something that prints faster and still gives decent strength. However, they might not hold up as well as gyroid when your print faces twisting or bending.
You might wonder about print time. Gyroid prints pretty quickly, but not as fast as some other patterns. Cubic and grid infill structures can finish faster, which helps if you need to save time. Still, if you want the best infill for large 3d prints, gyroid is usually the top pick for strength and efficiency.
When to Use Gyroid, Concentric, and Cross
You have more choices than just gyroid. Sometimes, you need a different infill structure for special jobs. Here’s when you might pick each one:
- Gyroid: Choose this when you want the best infill for large 3d prints that need to be strong and light. Gyroid works well for functional parts, tools, or anything that will carry weight or face stress from different directions. It’s also a good choice if you want to use less material but still need a tough print.
- Concentric: This infill structure is great for parts that need to bend or absorb shocks. If you’re printing something that needs to flex, like a phone case or a part that will handle vibration, concentric is a smart pick. It prints fast and uses little material, but it’s not as strong as gyroid. You trade some strength for flexibility.
- Cross: Use this when you want a flexible shape or need your print to handle twisting. Cross infill structures work well for parts that don’t need to be super strong but do need to move or bend a bit.
Here’s a quick look at how these infill structures compare for print time and use:
|
Infill Pattern |
Print Time Characteristics |
|---|---|
|
Gyroid |
Printed relatively quickly |
|
Concentric |
One of the quickest patterns, but compromises part strength |
|
Cross |
Good for flexible shapes, print time varies |
Tip: If you want a fast print and don’t need much strength, try concentric. If you need strength in every direction, stick with gyroid.
Main Factors That Influence Your Choice
Picking the best infill for large 3d prints depends on a few key things. You should always think about these before you start:
- Purpose of the Print: Are you making something decorative, or does it need to be strong? Functional parts need more infill and a stronger structure.
- Strength and Flexibility: Gyroid gives you strength. Concentric gives you flexibility. Cross sits in the middle.
- Material Consumption and Cost: Lower infill density saves you money. Gyroid uses more material than concentric, but you get more strength.
- Print Time Constraints: If you need your print fast, go with a quicker infill structure like concentric or grid.
- Aesthetic Considerations: Sometimes, you want the inside of your print to look neat, especially if it’s visible. Concentric gives a clean look.
- Load Directions and Stresses: If your part will face stress from many directions, gyroid is the best infill for large 3d prints.
Here’s a table to help you remember:
|
Factor |
Description |
|---|---|
|
Purpose of the Print |
Functional prints need more infill and stronger structures |
|
Strength and Flexibility |
Gyroid = strength, Concentric = flexibility |
|
Material Consumption and Cost |
Lower density saves money, gyroid uses more material but gives more strength |
|
Print Time Constraints |
Concentric and grid print faster, gyroid is a bit slower but stronger |
|
Aesthetic Considerations |
Concentric looks neat inside, good for visible parts |
|
Load Directions and Stresses |
Gyroid handles stress from all directions, best for large prints under load |
When you choose the best infill for large 3d prints, think about what your part needs to do. If you want strength, go with gyroid. If you want speed and flexibility, try concentric or cross. Always match your infill structure to your project’s needs.
Understanding Infill Patterns
What Is Infill?
If you’ve ever wondered what makes a 3D print strong on the inside, you’re thinking about infill. In 3D printing, infill is the inner structure that supports your object. Most prints are not solid. Instead, they have a patterned structure inside that saves material and weight.
- Infill is the part of your print that you don’t see, but it does a lot of work.
- Slicing software creates this structure for you. You just pick the pattern and density you want.
- You can choose from many patterns, like grid, triangle, or even rings.
- Most prints are at least half hollow, so infill helps keep things light and strong.
- You don’t need to design infill by hand. Your slicer does it automatically.
When you set up your print, you can adjust how much infill you want. More infill means a stronger part, but it uses more material. Less infill saves time and filament, but your print might not be as tough.
Why Infill Matters for Large Prints
Large 3D prints need special attention to infill. The bigger your print, the more important the inside structure becomes.
Infill gives your print the strength it needs so it doesn’t crack or warp when you use it.
Large prints can have big empty spaces inside. If you don’t use enough infill, these spaces can make your print weak, especially if you use thick layers.
To make large prints stronger, infill patterns often use double walls and smooth paths. This helps fill gaps and keeps your print solid.
If you want your big project to last, don’t skip the infill settings. The right infill keeps your print strong, light, and ready for real-world use.
Comparing Common Infill Patterns
Choosing the right infill patterns can make or break your large 3D prints. You have many options, but not all infill patterns work the same way. Let’s break down the most common infill patterns and see how they stack up for big projects.
Grid vs. Honeycomb
You probably see grid and honeycomb infill patterns in your slicer all the time. Both are popular, but they have different strengths.
- Grid infill patterns give you moderate strength. They are easy to print and work well for general use. If you want a simple setup, grid infill patterns are a safe bet.
- Honeycomb infill patterns offer high strength and use less material. They are great for lightweight, load-bearing parts. Honeycomb infill patterns take more time to print, though, so plan for longer jobs.
Tip: If you want to save filament and still need strength, try honeycomb infill patterns. If you want a quick print, grid infill patterns are faster and easier.
Common mistake: Many people use grid infill patterns for everything. For large prints that need to handle weight, honeycomb infill patterns often work better.
Cubic vs. Gyroid
Cubic and gyroid infill patterns both support large prints, but they have some key differences. Check out this table:
|
Infill Type |
Pros |
Cons |
|---|---|---|
|
Gyroid Infill |
Exceptional strength and weight balance, even at lower densities like 5-10%. |
Can be slower to print and uses more material. |
|
Cubic or Grid Infill |
Good for large prints, supports impacts well, and can be quicker to print. |
May not provide the same level of strength in all directions as gyroid. |
Gyroid infill patterns stand out for large prints. You get strong parts without using a lot of material. Cubic infill patterns print faster, but they might not hold up as well if your print faces stress from many angles.
Note: For big, functional parts, gyroid infill patterns give you the best mix of strength and efficiency.
Triangle and Other Options
Triangle infill patterns are another solid choice. They give you good strength and print faster than honeycomb infill patterns. Triangle infill patterns work well for medium to large prints that don’t need extreme strength.
Other infill patterns, like cross or concentric, can help if you need flexibility or a special look inside your print. Always match your infill patterns to your project’s needs.
Practical tips:
- Test different infill patterns on small prints before starting a big job.
- Use slicer previews to see how infill patterns fill your model.
- Don’t set infill density too high unless you really need it. More isn’t always better.
Avoid this mistake: Don’t pick infill patterns just because they look cool. Think about what your print needs to do.
By understanding how infill patterns work, you can make smarter choices for your large 3D prints. Try different infill patterns and see what works best for your projects.
Choosing Infill Density and Pattern
Density for Decorative vs. Functional Prints
You may ask how much infill your big 3D print needs. The answer depends on what you want your print to do. If your model is just for looks, use low density. If your part must hold weight or handle stress, pick a higher density. Here is a table with quick tips:
|
Type of Print |
Purpose |
|
|---|---|---|
|
Decorative |
0-15% |
Saves material and makes printing faster |
|
Functional |
15-50% |
Good for test parts and medium strength |
|
High-strength |
50-100% |
Needed for heavy use or parts that hold weight |
Most decorative prints work well with 10% to 20% density. This saves filament and finishes the print faster. For working parts, try 30% to 50% density. If you need your print to be very strong, use more than 60% density.
Balancing Strength, Material, and Time
You want your print to be strong, but you also want to save time and material. Here are some tips to help you balance these things:
- Lower density uses less filament and prints faster, but parts are weaker.
- High density makes tough prints, but uses more filament and takes longer.
- Start with 30% to 50% density for most big prints. Test and change if you need to.
- Use high density only in spots that need extra strength.
- Pick smart infill patterns like gyroid to get strength and save material.
Tip: Thicker walls can make your print stronger without using high density everywhere.
Printer Limitations and Project Needs
Your printer and your project both change your infill choices. Think about these things:
|
Consideration |
What It Means for You |
|---|---|
|
Stress Points |
Add high density only where you need it to stop breaks. |
|
Material Properties |
Some filaments are not as strong, so high density may not always help. |
|
Excessive High Density |
100% density wastes filament and time. 40%-60% is enough for most prints. |
|
Infill Pattern Choice |
Pick strong patterns for better parts, not just high density. |
You should match your infill density and pattern to your print’s job, the filament you use, and what your printer can do. Always test with a small print before making a big one!
Tips for Optimizing Infill Selection
Testing Patterns and Densities
You want your big 3D prints to be strong. Before you start a big project, try out different infill patterns and densities on small models. This helps you save time and filament. Try gyroid if you want both strength and flexibility. Change the infill density to see how tough the part gets. For example, use quarter cubic at 50% density if you need a strong piece. If you use low infill density, add thicker walls to make the outside stronger.
Tip: Always print a small test piece first. You can find problems early and not waste material.
A common mistake is starting a big print without testing. You might get a weak or breakable part.
Using Slicer Previews
Slicer software lets you see how different infill patterns fill your model. You can pick from many choices that make your print stronger. Slicers work with tricky shapes and keep your print correct. Use the preview tools to balance speed, layer height, and wall strength. This helps you pick the best infill pattern before you print.
Here’s a quick look at slicer options:
|
Infill Pattern Type |
Benefits |
Considerations |
|---|---|---|
|
Conventional Patterns (squares, triangles) |
Simple, fills space well |
May not save material |
|
Custom Geometries |
Made for your model |
Needs advanced slicer features |
|
Sandwich-Patterns |
Uses less material |
Can make parts stiffer, needs special slicer support |
Note: Use slicer previews to check for gaps or weak spots in your infill before printing.
Quick-Reference Table for Infill Choices
You can use this table to help pick the best infill settings for your project:
|
What Are You Making? |
Walls (Perimeters) |
Best Infill Pattern |
Infill % |
|---|---|---|---|
|
Display Model (Figurine, Bust) |
2 |
Lightning |
10-15% |
|
Everyday Item (Phone Stand, Case) |
3 |
Grid or Cubic |
20-30% |
|
Strong Bracket or Hook |
4 |
Concentric |
40-60% |
|
Heavy-Duty Functional Part |
4-5 |
Gyroid |
40-60% |
|
Flexible Part (TPU) |
2-3 |
Concentric |
10-50% |
Actionable tip: Match your infill pattern and density to your print’s job. Only use high density if you really need extra strength.
When you pick the right infill for your large 3D print, you get the best mix of strength, speed, and material savings. Always match your infill pattern and density to what your print needs. Try different infill settings in your slicer and run small test prints to see what works best. If you want a quick answer, check the reference table or checklist. Remember, using the right infill can make your print last longer and look better.
FAQ
What infill pattern should I use for a strong but lightweight large print?
You should try the gyroid pattern. It gives you great strength without making your print heavy. Many users pick gyroid for big parts that need to handle stress from different angles.
How low can I set infill density for a decorative large print?
You can set infill density as low as 10%. For most display models, this saves time and filament. Your print will still look good, but it will not be very strong.
Does higher infill always mean a stronger print?
Higher infill usually makes your print stronger, but not always. The pattern you choose matters, too. Sometimes, a smart pattern like gyroid at lower density beats a simple pattern at high density.
Can my printer handle all infill patterns?
Most modern printers can handle common patterns like grid, gyroid, and cubic. Some complex patterns may slow down your printer or cause issues. Always check your slicer preview and run a small test print first.


