


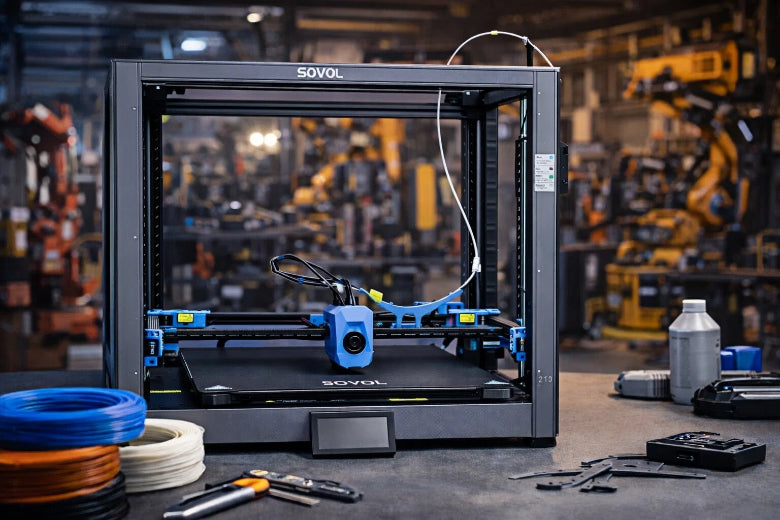
You want to fix high speed 3D printing problems fast. This guide helps you spot issues, understand what causes them, and use practical solutions. You use this guide to tackle common 3d printing issues with clear steps. The guide gives you easy tips for both hobbyists and professionals. When you follow this guide, you get results that improve your prints every time.
Tip: Keep this guide close. You can use it whenever you need quick answers to printing problems.
Key Takeaways
- Make sure the print bed is clean and flat before you start. This stops layers from moving and helps them stick better.
- Check your printer settings often. Good calibration makes prints look better and stops problems.
- Change print settings for each material. Use the right heat and speed for the filament. This lowers mistakes.
- Use a list to find problems. Checking often helps you spot issues early and saves time.
- Watch things like air and room temperature. Keep the area steady to get good prints and stop warping.
High Speed 3D Printing Problems Overview
Common Symptoms and Causes
When you print at high speeds, you often see new challenges. High speed 3d printing problems can show up in many ways. You might notice rough surfaces, gaps between layers, or prints that do not stick to the bed. Sometimes, your printer leaves strings of filament or the nozzle clogs. These symptoms make it hard to get a clean, strong print.
Here are the most common symptoms you may encounter:
- Flow issues from filament moisture or printing too fast
- Bed adhesion problems that affect the first layer
- Poor filament calibration causing print defects
- Environmental factors like drafts that lower print quality
You can link these symptoms to specific causes. The table below helps you match what you see to what might be wrong:
|
Cause |
Description |
|---|---|
|
Issues with the print sticking to the bed, often due to dirty surfaces or incorrect nozzle height. |
|
|
Extrusion Issues |
Problems with the amount of filament being extruded, leading to gaps or blobs in the print. |
|
Temperature Problems |
Incorrect temperatures causing warping or shifting in prints. |
|
Mechanical Failures |
Issues with printer mechanics leading to misaligned layers or incomplete prints. |
Quick Troubleshooting Steps
You can fix high speed 3d printing problems by checking a few key areas. Start with calibration. Make sure your printer moves and extrudes the right amount of filament. Next, check your temperatures. The nozzle and bed must be hot enough for your material. Clean your bed and adjust the nozzle height to help prints stick. Look at your hardware. Tighten belts and check for loose screws. Watch for drafts or cold air near your printer.
Tip: Use a checklist before each print. Check filament dryness, bed cleanliness, nozzle height, and temperature settings. This helps you catch high speed 3d printing problems early.
You can solve most high speed 3d printing problems by following these steps. You get better prints and spend less time fixing mistakes.
Layer Adhesion & Print Not Sticking to Bed
Diagnosing Adhesion Issues
You often see prints lifting or shifting when the bed adhesion fails. You can spot poor layer bonding by looking for curled edges, uneven first layers, or gaps between the print and the bed. High speed printing makes these problems more likely because the filament has less time to bond with the bed surface. You need to check several areas to find the cause.
Here is a checklist to help you diagnose adhesion issues:
- Inspect your hardware. Make sure all parts are secure and connected.
- Level the bed using the paper test. You should feel even resistance across the bed.
- Check the Z-axis for motor or mainboard problems.
- Examine your filament for quality. Old or moist filament can cause prints not sticking to bed.
- Clean the bed surface. Dust or residue can prevent good adhesion.
- Monitor temperature settings. Match the bed and nozzle temperature to your material.
- Review print speed and cooling settings. High speed and strong cooling can reduce adhesion.
- Look for under-extrusion. Check for clogs in the nozzle.
Tip: Use this checklist before every print. You catch problems early and avoid wasted time.
Causes of Print Not Sticking
You face many causes when you see print not sticking to bed. The most common reasons include poor bed leveling, incorrect temperature, dirty bed surface, and fast print speeds. Each factor can make the first layer weak or uneven.
- Uneven bed: If the bed is not level, the nozzle sits too high or too low. This causes poor contact and weak adhesion.
- Incorrect temperature: If the bed is too cold, the filament does not bond. If it is too hot, the print may warp.
- Dirty bed surface: Dust, oil, or leftover adhesive blocks the filament from sticking.
- Fast print speed: High speed reduces the time for the filament to bond with the bed.
- Cooling fan settings: Strong cooling can harden the filament before it sticks.
- Poor first layer settings: If the first layer prints too fast or too thin, it will not stick.
You need to address each cause to solve print not sticking to bed. You improve your results by focusing on the basics.
Fixes for Bed Adhesion
You can fix bed adhesion problems with simple steps. Start with bed leveling. Ensuring a level bed is the first step to a perfect first layer. Regularly check bed leveling because vibrations can affect alignment. Proper bed leveling keeps the nozzle at the right height, which helps the filament stick. A leveled bed ensures even adhesion, which is critical during high speed printing.
Follow these actionable tips to improve bed adhesion:
- Adjust bed leveling. Use the paper test and check all corners.
- Increase nozzle temperature. Hotter filament flows better and bonds with the bed.
- Optimize fan speed. Lower the cooling fan for the first few layers.
- Clean the bed before every print. Use isopropyl alcohol or a scraper.
- Use adhesives. Apply glue stick, hairspray, or specialized sheets to the bed.
- Check first layer settings. Slow down the first layer and increase its thickness.
- Match bed temperature to your filament. PLA needs a warm bed, while ABS needs a hotter bed.
- Replace worn bed surfaces. Old sheets or plates lose grip over time.
|
Problem |
Solution |
|---|---|
|
Uneven bed |
Re-level bed using paper test |
|
Low nozzle temperature |
Increase nozzle temperature |
|
Dirty bed surface |
Clean bed with alcohol or scraper |
|
Fast print speed |
Slow down first layer speed |
|
Strong cooling |
Lower fan speed for first layers |
|
Poor first layer |
Adjust thickness and speed in slicer |
Note: You get better adhesion when you combine several fixes. Always start with bed leveling and cleaning.
You solve print not sticking to bed by following these steps. You see stronger first layers and fewer failed prints. You build confidence in your high speed 3D printing process.
Extrusion Troubleshooting & Not Extruding at Start
Under-Extrusion and Over-Extrusion
Extrusion problems happen a lot when printing fast. Under extrusion means not enough filament comes out. Over-extrusion means too much filament comes out. This causes blobs and rough spots. You need to find these problems early. If you do not, the nozzle or extruder can get clogged.
Some common reasons for under extrusion and over-extrusion are:
- Printing too fast with normal temperature. The hot end cannot melt plastic fast enough. This leads to under extrusion.
- A partial clog in the nozzle blocks the flow. You may see gaps or weak layers.
- Heat creep causes jams. Heat moves up the filament before it melts.
- Wrong extruder tension. If it is too tight, the filament grinds. If it is too loose, the filament slips.
- Flow rate settings in your slicer. Changing flow rate can fix under extrusion.
You can fix under extrusion by slowing down print speed. You can also raise nozzle temperature and check for jams. Over-extrusion needs slicer changes. Lower the flow rate and check extruder calibration. Stable extrusion stops layer separation and bulging first layer.
Tip: Always check if your filament is wet. Wet filament can clog the extruder. It can also stop extruding during a print.
Not Extruding at the Start of the Print
Sometimes your printer does not extrude at the start. This can smash the first layer or make it bulge. You need to fix this quickly to avoid failed prints.
Here are steps to fix not extruding at the start:
|
Troubleshooting Step |
Description |
|---|---|
|
Clean or replace the nozzle |
Cleaning stops jams and helps smooth extrusion. |
|
Optimize slicer settings |
Change flow rate, layer height, and extrusion width. |
|
Monitor temperature fluctuations |
Keep temperature steady to avoid extrusion problems. |
Clean the nozzle before every print. Use good filament to stop buildup. Check slicer settings for the first layer. Slow down the first layer and make it thicker. This helps stop smashed or bulging first layers. If extrusion stops in the middle, check for clogs or jams.
Note: If you see gaps or layer separation, check extruder calibration and temperature.
Clogging and Filament Jams
A jammed nozzle or clogged extruder ruins prints. You need to know what causes these problems and how to fix them.
Main causes of filament clogs and jams:
- Wrong nozzle height. If the nozzle is too low, you get jams.
- Wrong temperature settings. A cold hotend causes jams from poor flow.
- Filament tension problems. Too much tension stops proper extrusion and causes jams.
- Bad bed leveling. If the bed is not level, the nozzle can be too low or high. This causes jams.
To fix a jammed nozzle, heat it up and use cleaning filament. For a clogged extruder, remove filament and check for dirt. Adjust nozzle height and bed leveling to stop smashed or bulging first layers. Watch your printer during the first layers. If extrusion stops, pause and check for jams.
Tip: Use this checklist before each print:
- Clean the nozzle.
- Check filament tension.
- Level the bed.
- Set the right temperature.
Calibration and Hardware Checks
Good calibration helps your printer use the right amount of filament. You get sharper details and smoother prints when you calibrate extruder steps/mm. Calibration stops under extrusion, layer separation, and extrusion stops.
Follow these steps for calibration and hardware checks:
- Calibrate extruder steps/mm using your printer’s menu.
- Check for loose screws and belts. Tighten them to stop vibration.
- Use high flow nozzles for fast printing. They help stop jams and clogs.
- Test your printer with a calibration cube. Look for smashed or bulging first layers and layer separation.
- Change slicer settings for flow rate and temperature.
Slow down print speed for better prints. Calibration matters more when printing fast. If extrusion stops, check hardware and recalibrate.
Note: Regular calibration and hardware checks stop most extrusion problems. You get steady results and save filament.
You can fix extrusion problems by following these steps. You avoid jams, clogs, smashed first layers, bulging first layers, layer separation, and extrusion stops. You feel more confident when printing fast.
Surface Defects & 3D Printer Troubleshooting
Ringing, Ghosting, and Artifacts
Printing fast can cause surface defects. You may see ringing, ghosting, or artifacts. These look like waves, shadows, or bulging lines. Sometimes, you notice layers shift or edges bulge. Here are common surface defects you might see:
- Bed adhesion issues make prints lift or shift.
- Under-extrusion leaves gaps and rough lines.
- Over-extrusion creates blobs and bulging spots.
- Gaps between layers happen with thin layers.
- Layer shifting moves layers out of place.
Ringing and ghosting show up as patterns or bulges near corners. These problems make your prints look messy.
Causes of Surface Defects
Mechanical problems and slicer settings cause these defects. Printing fast makes the printer shake more. This leads to bulging and ringing. Loose belts or weak frames make ghosting and artifacts worse. The table below lists the main causes:
|
Cause |
Description |
|---|---|
|
Mechanical Oscillations |
Printhead or bed shakes, causing waves and bulging. |
|
Fast moves shake the printer, causing bulging. |
|
|
Loose Belts |
Slack belts make moves slow or wrong, causing ghosting. |
|
Frame Flexing |
Weak frames shake and make bulging worse. |
|
Acceleration/Jerk Settings |
High values make moves sudden and cause bulging. |
|
Heavy Printhead/Bed |
Heavy parts stop slowly, causing ringing and bulging. |
Sudden speed changes or loose parts can shift layers or make bulges. You should check your printer’s parts and slicer settings to find the problem.
Solutions for Surface Quality
You can fix surface problems with a few changes. Tighten belts and check if the frame is strong. Slow down print speed if you see bulging or ringing. Change acceleration and jerk settings in your slicer to make moves smoother. Use the table below to help with slicer changes:
|
Setting |
Effect on Print Quality |
|---|---|
|
Acceleration/Jerk |
Smoother moves, less bulging and ringing |
|
Retraction & Infill |
Stops oozing, stringing, and bulging spots |
|
Cuts defects on overhangs and bulging at seams |
Try these steps too:
- Sand or polish prints to remove bulges and rough spots.
- Use vapor smoothing or epoxy for a shiny finish.
- Slow down print speed for tricky models to avoid bulging.
- Change retraction to stop stringing and bulging.
- Control cooling to stop warping and bulging edges.
Tip: Always check for loose screws or parts before printing fast. This helps stop bulging and other surface problems.
You get better prints when you fix both mechanical and slicer settings. Checking often and making small changes helps you avoid bulging, ringing, and ghosting in fast 3D prints.
Warping, Curling, and Advanced Troubleshooting
Identifying Warping and Curling
When you print fast, warping or corners lifting can happen. The edges of your print might curl up. Sometimes, the bottom lifts off the bed. These problems show up more on big, flat parts or sharp corners. Warping or lifting can mess up the shape and strength of your part. Always look at the first layers closely. If you see any curling or lifting, stop the print. Check the bed and temperature settings right away.
|
Factor |
Effect on Warping and Curling |
|---|---|
|
Energy Density |
Low energy density leads to delamination; high energy density increases warping and curling. |
|
Laser Power |
Higher laser power can reduce shrinkage and mitigate curling. |
|
Preheating |
Preheating the powder reduces temperature differences, preventing curling and warping. |
|
Sintering Temperature |
Close to crystallization peak can cause premature crystallization, leading to distortion. |
Causes at High Speeds
The main reasons for warping and curling at high speeds are uneven cooling and shrinking of the printed material, weak sticking to the bed, and things like drafts or changing room temperature. The shape of your model, like sharp corners and big flat areas, can make these problems worse.
Warping or lifting happens more when you print faster. Fast moves cool the plastic in different ways. Drafts from windows or air vents make it worse. ABS material warps more at high speed because it changes with temperature quickly. Use an enclosure to keep the heat in and block drafts.
Preventing and Fixing Warping
You can stop warping or lifting by controlling bed heat and fan speed. Try these steps:
- Keep the bed at the right temperature for your filament. If the bed is too cool, warping happens. If it is too hot, prints are hard to remove.
- Set the bed temperature for your material to stop warping and help it stick.
- Turn off the fan for the first few layers to help the print stick.
- Slowly turn up the fan after the first layers to stop warping and help sticking.
Clean the print bed before you start. If corners lift, pause the print and put painter’s tape on those spots. Use a heated bed to keep the first layer warm and stop shrinking. Put glue stick or hairspray on the bed to help the print stick. Add brims or rafts in your slicer to make the print stick better and stay flat. Change print settings by slowing down the first layer and making it thicker.
|
Technique |
Description |
|---|---|
|
Heated Build Plates |
Keeps the first layer warm to reduce shrinkage. Set the temperature according to the filament type. |
|
Adhesives |
Apply glue stick, hairspray, or special adhesive to improve filament adhesion to the bed. |
|
Brims and Rafts |
Use these in your slicer to increase contact area and stabilize the print. |
|
Print Settings |
Adjust settings like slowing down the first layer and using thicker layer heights to enhance bed adhesion. |
Keeping the right temperature is very important to stop warping. A heated bed keeps the bottom layers warm and stops uneven cooling. Set the bed to 60°C for PLA and up to 110°C for ABS. Watch the sides of your print because they cool fast and can warp. Enclosures keep the temperature steady and stop warping or lifting. You get better prints when you use these tips and check your printer before every fast print.
You can fix high speed 3d printer problems by using a simple troubleshooting guide. First, clean the print surface. Make sure the bed is level. This helps stop layers from shifting and prints from leaning. Calibrate your printer often. This makes support material easier to remove. It also helps small features print better. Clean the nozzle often. This stops infill from showing on the outside of your print. Change speed slowly and adjust firmware for better results. Try new settings with small prints. Use this guide again if you see leaning prints or shifted layers. Keep trying new things to make your prints better. This helps fix support material that is hard to remove, small features not printed, and infill showing on the outside.
- Clean and level the bed. This stops layers from shifting and prints from leaning.
- Calibrate often. This helps support material come off easily and small features print well.
- Change settings. This fixes infill showing on the outside.
|
Benefit |
Description |
|---|---|
|
Stops layers from shifting and prints from leaning. |
|
|
Detection of Surface Irregularities |
Helps support material come off easily and small features print well. |
Tip: Use this troubleshooting guide when you see infill showing on the outside or support material that is hard to remove. You get better prints and more reliable results.
FAQ
What are the best solutions for poor bed adhesion in high speed 3D printing?
You have many ways to fix poor bed adhesion. Clean the bed before you print. Adjust the nozzle height so it touches the bed well. Use glue stick or other adhesives. Slow down the first layer speed. Raise the bed temperature. These steps help prints stick and stop them from coming loose. Always check your printer setup for the best results.
How do I fix layer separation during fast printing?
Layer separation means layers do not stick together. You can raise the nozzle temperature. Slow down the print speed. Check if your filament is good. Adjust the cooling fan settings. Try making the layer height bigger. These steps help layers bond and make prints stronger. Always watch your print for any separation.
What solutions work for stringing and blobs on overhangs?
Stringing and blobs on overhangs need special fixes. Lower the retraction distance. Make the retraction speed faster. Dry your filament before printing. Change the print temperature. Adjust the cooling fan settings. Change slicer settings for overhangs. These steps help you get cleaner overhangs and fewer defects.
How can I improve print quality on overhangs and complex shapes?
You need to focus on cooling and support. Slow down the print speed for overhangs. Add supports in the slicer. Change the fan speed. Make the layer height bigger. These steps help overhangs print better. Always check for separation and use these steps for good results.
What solutions help with warping and separation on large prints?
Large prints can warp or separate. Use a heated bed to keep prints flat. Put glue stick or other adhesives on the bed. Add brims or rafts to help prints stick. Keep the room temperature steady. Slow down the first layer speed. These steps help prints stay flat and strong. Always use steps that match your filament and print size.
Tip: Use a checklist before every print. Check bed leveling, nozzle temperature, filament dryness, and slicer settings. These steps help you catch problems early and stop separation or overhang issues.
|
Problem |
Solutions |
|---|---|
|
Bed Adhesion |
Clean bed, adjust nozzle, use adhesives |
|
Layer Separation |
Raise temperature, slow speed, dry filament |
|
Overhangs |
Add supports, tune cooling, adjust speed |
|
Warping |
Heated bed, brims, control environment |
You get better prints when you use the right steps for each problem. Always pick steps that fit your printer and material. Try new steps if you see separation or overhang problems. These steps make your prints stronger and cleaner.
Note: Steps work best when you use more than one. Always test steps with small prints before big projects. Steps for separation and overhangs help you avoid failed prints.
Fixing high speed 3D printing problems means cleaning, calibrating, changing settings, and using supports. You need steps for bed adhesion, separation, overhangs, warping, and extrusion. Try changing temperature, slowing speed, and using adhesives. For overhangs, use supports and cooling. For separation, change temperature and speed. Always use steps that match your filament and printer. For warping, use heated beds and brims. For extrusion, clean the nozzle and calibrate steps. For surface defects, tighten belts and change slicer settings. For print quality, check hardware and use the right steps for each issue. For overhangs and separation, use special steps for better prints. For troubleshooting, use checklists and watch your prints. For advanced problems, update firmware and upgrade hardware. For common issues, clean, level, and calibrate. For adhesion, use adhesives and control temperature. For separation, adjust cooling and print speed. For overhangs, add supports and change slicer settings. For warping, control the room and heat the bed. For extrusion, dry filament and clean the nozzle. For surface defects, check mechanics and tune slicer. For print quality, do regular maintenance and calibration. For troubleshooting, check everything and use guides. For advanced problems, ask experts and join communities. For common problems, use tips and check often. For adhesion, separation, and overhangs, print faster and cleaner. For warping and extrusion, keep prints strong. For surface defects, make prints look better. For troubleshooting, save time. For advanced problems, use technical fixes. For common issues, use easy steps. For adhesion, separation, and overhangs, get great prints. For warping, extrusion, and surface defects, get reliable results. For troubleshooting and advanced problems, improve your process. For common problems, make printing easier. For adhesion, separation, and overhangs, feel confident. For warping, extrusion, and surface defects, print faster. For troubleshooting and advanced problems, solve issues quickly. For common problems, improve your workflow. For adhesion, separation, and overhangs, succeed. For warping, extrusion, and surface defects, get professional results. For troubleshooting and advanced problems, fix any issue. For common issues, always use helpful steps. For adhesion, separation, and overhangs, use your best tools. For warping, extrusion, and surface defects, make every print better. For troubleshooting and advanced problems, print with confidence.


