


If you’re managing a makerspace or a school lab, “best large format 3D printer” usually doesn’t mean “fastest” or “most features.” It means something more boring and more important: the machine that can run week after week with different users, different files, and different expectations.
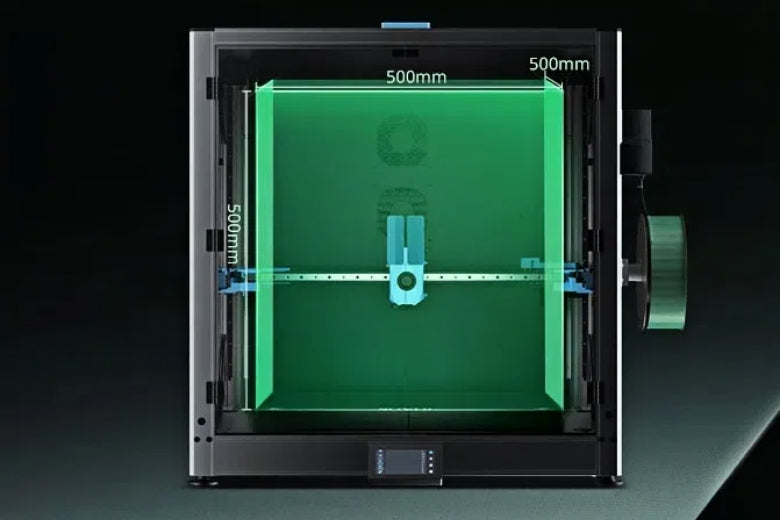
This guide is built around a 500mm-class printer (roughly 500×500×500mm). That size unlocks big prototypes and batch printing, but it also multiplies the operational stakes: power, safety, ventilation, noise, downtime, and the simple fact that failed large prints waste a lot of plastic.
By the end, you’ll have a shortlist-ready framework you can use in a UK purchase conversation.
What “large format” means (and why the definition is messy)
You’ll see wildly different definitions of “large format.” Some sources treat 500mm-class as large. Others reserve “large format” for printers over 1 metre in each direction. That mismatch is one reason buyers get confused, and why comparison lists don’t line up.
For this article, we’re using 500mm-class as “large format” because it’s the point where the work changes in a shared lab. Not just what you can print, but how you have to operate the printer.
Key Takeaway: A 500mm build volume isn’t a spec upgrade. It’s an operations upgrade.
Why 500mm-class printers are harder in shared labs
In a single-user workshop, you can babysit a finicky printer. In a lab, you can’t. A 500mm-class machine increases risk and workload in five predictable ways.
1) Safety and air quality become procurement criteria
FDM 3D printers can emit ultrafine particles (UFPs) and volatile organic compounds (VOCs) depending on materials and conditions. That’s why university safety teams emphasise ventilation, placement, and operating policies.
- Clemson’s safety team advises placing 3D printers in a well-ventilated area and/or directly ventilating outdoors in its 3D printer safety guidance.
- Princeton’s EHS team notes 3D printers can emit UFPs and VOCs in its guidance on 3D printers on campus.
A larger printer often means longer prints, bigger parts, and more opportunity for someone to be “near the machine” for extended periods. That’s not a reason to panic. It’s a reason to plan.
2) The footprint is bigger than you think
A 500mm build volume doesn’t mean the printer is 500mm wide. You need extra space for:
- opening doors/panels
- safe access around hot surfaces
- spool/dry-box placement
- maintenance (belts, rails, bed access)
In a school lab, a cramped layout turns into bad habits fast.
3) Bed levelling is no longer a “nice feature”
On smaller printers, manual tweaks can be tolerable. On a 500mm bed, tiny inconsistencies add up across a bigger surface.
Look for repeatable automated probing (often described as auto-levelling or bed mesh). Then ask a more important question: can you re-run it quickly, and do profiles stay stable across weeks?
4) Thermal stability matters more
Large flat parts warp when the environment is inconsistent. Drafts matter. Door openings matter. Overnight temperature drops matter.
That’s one reason enclosures are common in large-format setups: they help create a more stable printing environment and reduce casual interference.
5) Filament handling becomes a reliability system
Large prints fail in predictable ways when filament is wet, brittle, or inconsistent. In a shared lab where spools sit out for weeks, moisture control isn’t an enthusiast obsession. It’s a practical reliability lever.
The evaluation framework: how to pick the best large format 3D printer (500mm-class)
Instead of starting with brand names, start with the constraints that decide success in a lab.
Must-haves (non-negotiable for makerspaces/schools)
A. A safe setup plan: enclosure, ventilation, and policies
You’re not buying “a printer.” You’re buying a mini hot-work process.
Minimum baseline questions:
- Is there a clear ventilation plan for your room?
- Can the printer be placed so users aren’t clustered around it?
- Are you standardising “lab-safe” materials (often PLA/PETG) for most jobs?
For a structured institutional view, the UBC guideline for 3D printer safety (PDF) is a good example of what safety teams expect: training, risk assessment, and controls.
⚠️ Warning: An enclosure reduces exposure and stabilises prints, but it doesn’t replace basic ventilation and good operating policies.
B. Reliability features that reduce staff workload
In a lab, reliability isn’t about peak performance. It’s about reducing the number of “someone needs to fix this” moments.
Prioritise:
- automated bed probing/mesh that’s easy to repeat
- filament runout detection (because someone will forget)
- resume-after-power-loss (if available and reliable)
- straightforward access to wear parts (nozzle, belts)
C. Serviceability and spares
Ask vendors:
- What are the common wear parts?
- Are they standard sizes or proprietary?
- How quickly can you get spares in the UK?
- Is there a real support process for schools, or is it “forum only”?
A printer that’s “great on paper” but hard to repair becomes a shelf ornament.
D. Power and electrics you can actually support
Large printers can draw meaningful power. You don’t need exact wattage estimates to make a good decision, but you do need to confirm:
- the circuit capacity for the room
- whether the printer needs a dedicated circuit
- surge protection expectations
And you need to plan for the boring parts: cable routing, safe shut-down, and who is authorised to touch the electronics.
E. Standardised profiles and a repeatable workflow
If you run a makerspace, you’re effectively running a small production environment.
Look for a printer ecosystem that supports:
- saved profiles for common materials and nozzle sizes
- a clear “student mode” workflow (defaults that work)
- one or two slicers you can teach consistently
Nice-to-haves (they pay off when you have multiple users)
If you have budget or you’re buying more than one unit, these features reduce friction.
Remote monitoring
A camera or remote dashboard won’t solve every failure, but it reduces the number of wasted overnight prints.
Quieter operation
Noise is a real classroom issue. Enclosures often help here, and so does good placement and vibration control.
Filament drying and storage
If you can’t keep spools sealed, use a drying workflow. Even a basic “dry before long prints” policy reduces failures.
If you’re setting up a shared workflow, a dedicated dryer box can make the process consistent. Here’s one example of a filament dryer box designed to hold larger spools.
Red flags (what usually goes wrong with large-format lab printers)
- No clear ventilation story. “Just open a window” isn’t a plan.
- Hard-to-service design. If nozzle changes are painful, staff will avoid maintenance until failures pile up.
- Unclear spares pipeline. If you can’t keep wear parts on hand, downtime becomes normal.
- Wobbly mechanics for a huge bed. A 500mm bed magnifies small issues.
- A purchase conversation that’s all specs, no operations. In a lab, operations decides success.
How to shortlist candidates without getting trapped in spec sheets
Here’s a simple shortlisting method that works well for schools and makerspaces:
- Pick two “standard lab jobs” you care about (for example: a large signage panel, and a batch of 20 student parts).
- Ask each vendor to explain (not just claim) how their printer handles:
- bed probing/mesh routine
- enclosure/venting options
- common maintenance tasks
- spare parts and support
Ask for a realistic implementation plan: training time, what breaks most often, what you should stock.
If you want a concrete example of a 500mm-class option to include in a shortlist, the 500×500×500mm SOVOL SV08 Max is one model positioned for large-format work. Keep it in the “candidate list” bucket unless you can test it in your environment.
Rollout checklist for a school lab or makerspace
Before the first student print, set up the system.
- Confirm placement and ventilation.
- Define allowed materials for general use (start simple).
- Create two locked, tested slicer profiles.
- Stock wear parts (nozzles, belts, build surface consumables as applicable).
- Write a one-page SOP: start-up, shut-down, emergency stop, who to contact.
If you’re deploying a new machine, a vendor setup guide can help standardise your process. For example, here’s an SV08 Max step-by-step setup guide.
FAQ
What is a 500mm-class large format 3D printer?
A 500mm-class printer typically means a build volume around 500×500×500mm, which lets you print large parts in one piece or run bigger batch jobs. It also increases the demands on space, power, and consistency.
Are large format FDM printers safe for schools?
They can be, but treat safety as a system: ventilation, placement, materials, supervision, and operating policies. If you need a plain-English starting point for stakeholders, Princeton’s EHS team has a solid overview of emissions considerations for 3D printers on campus.
Do we need an enclosure?
Often, yes. Enclosures help with thermal stability, noise reduction, and limiting casual exposure, especially for long prints. They’re not a substitute for ventilation and good lab policies.
If you’re exploring enclosure requirements and sizing, see Sovol’s large 3D printer enclosure buyer’s guide.
How do we keep downtime low with multiple users?
Standardise profiles, limit materials at first, keep spares on hand, and schedule maintenance like you would for any shared equipment.
Key takeaways
- “Best” for a makerspace is the printer that’s easiest to run safely and consistently, not the one with the flashiest spec list.
- For 500mm-class machines, you’re buying an operational system: ventilation, training, maintenance, and standardised profiles.
- Start your shortlist with must-haves (safety plan, serviceability, spares, repeatable leveling), then compare features.
Next steps
If you’re planning a large-format setup, start with the environment. The enclosure and ventilation plan you choose will affect print consistency, noise, and day-to-day safety.
If it helps, use this large 3D printer enclosure buyer’s guide as a checklist for sizing, filtration, and placement.


