


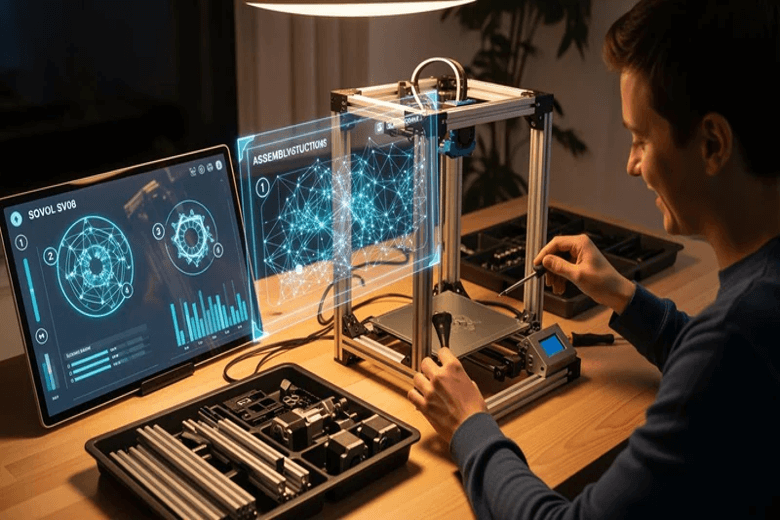
Start by clearing your workspace. Gather all the tools and parts you need for the Sovol SV08 3D Printer. Open the SD card and check the part list to make sure nothing is missing. The manual helps you find each component quickly. Follow the manual step by step so you can assemble sovol sv08 without stress. > Tip: Careful setup now helps you avoid mistakes and reach your first print faster.
Key Takeaways
- Clean your workspace and put away extra things. Organize your tools so you can find them easily. A tidy area helps you pay attention and make fewer mistakes when you build.
- Use the assembly manual and follow each step. This helps you put every part in the right place. You will avoid problems that many people have.
- Look at all the parts and match them to the SD card list before you begin. This stops you from having to wait for missing pieces. You will have everything you need for a smooth build.
- Make sure to level the bed before your first print. Bed leveling is very important for prints to stick well and look good.
- Take care of your printer often. Clean it and check the parts regularly. This helps stop problems and makes sure your prints work well.
3D Printer Setup Essentials
Tools and Parts Checklist
Before you begin your 3d printer setup, gather all the tools and parts you need. This step helps you avoid delays and keeps your large 3d printer setup smooth. You will need safety glasses, gloves, and closed-toe shoes for protection. Always use personal protective equipment during setup. Handle each tool with care and check for any damage before you start.
Here is a checklist to help you get ready for your 3d printer setup:
- Safety glasses
- Gloves
- Closed-toe shoes
- Allen wrenches (included with Sovol SV08)
- Screwdrivers
- Pliers
- Sovol SV08 parts (check the SD card part list)
- Power cables and USB cables
Tip: Organize your tools and Sovol SV08 components on your table. This makes your large 3d printer setup faster and easier.
Workspace Preparation
A clean and organized workspace is important for a successful 3d printer setup. Remove clutter and keep only the items you need for your large 3d printer setup. Make sure your table is sturdy and has enough space for all the Sovol SV08 parts. Plug your tools into grounded outlets. Use GFCI outlets if possible for extra safety.
Keep your workspace well-lit so you can see small parts and read the manual clearly. Maintain a safe distance from others during your large 3d printer setup. Turn off and unplug tools after use. This keeps your 3d printer setup safe and helps you focus on each step.
Before you move on, double-check the SD card part list. Make sure you have every part for your Sovol SV08. Organize the parts by type or step. This helps you find what you need quickly during your large 3d printer setup.
Note: Good workspace habits help you avoid mistakes and make your 3d printer setup more enjoyable. When you finish, you will be ready to move on to slicer configuration and slicer settings for your first print. The right slicer and slicer settings will help you get the best results from your Sovol SV08.
Unboxing & Organizing
Unpack Sovol SV08
Start by placing the Sovol SV08 box on your sturdy table. Open the box carefully. Use scissors or a box cutter if needed, but always cut away from your body. Keep the packaging close by. Small parts can roll away or get lost, so the box helps you keep everything together.
Many users find that unpacking and organizing the Sovol SV08 takes about an hour. This time includes checking each part and making sure nothing is missing. You may notice that this kit takes a little more work than some other printers, but the process is much easier than building a printer from scratch.
Tip: Take a quick photo of all the parts inside the box. This helps you remember where each piece goes if you need to reassemble later.
Sort and Identify Parts
Now, begin sorting and identifying each part. Lay out all the pieces on your table so you can see everything clearly. Use the assembly manual and the part list from the SD card to check each item. This step helps you avoid missing or mixing up parts during assembly.
Follow these steps to organize your Sovol SV08 parts:
- Unbox the Sovol SV08 and keep the packaging nearby for small items.
- Take a photo of the contents for reference.
- Check every part against the assembly manual’s list.
- Lay out all pieces so you can see them easily.
- Match each item to the detailed parts list. Look for frame pieces, stepper motors, belts, screws, touchscreen, power cables, and tools.
- Inspect each part for damage or missing pieces. If you find any problems, contact Sovol support right away.
|
Part Type |
Example Items |
|---|---|
|
Frame Pieces |
Aluminum rails, corners |
|
Electronics |
Stepper motors, touchscreen |
|
Hardware |
Screws, belts, cables |
|
Tools |
Allen wrenches, pliers |
Note: Careful sorting now makes the assembly process much smoother. You will save time and avoid frustration later.
Assemble Sovol SV08
Install Z-Axis Corners
Start by working on the Z-axis corners. Put the Z-axis corners onto the Sovol SV08 max frame. Use the assembly manual to match each corner to the right side. Fasten each corner with the screws from your kit. Make sure the screws are tight, but do not make them too tight. If you tighten too much, it can cause problems later.
You might run into some common problems when installing the Z-axis corners:
- Sometimes the proximity switch does not trigger. This can cause errors when the Z-axis tries to find its home position.
- Calibration errors can happen if the Z offset is wrong. This may cause scraping or problems with filament sticking. Always check the gantry and nozzle height.
- Wiring problems can show up if wires are loose or damaged. This can stop the proximity switch from working. Look at the wires and reconnect them if needed.
Tip: Check every connection before you move to the next step. The assembly manual has clear pictures for each part.
Rotate Base Assembly
When you finish with the Z-axis corners, turn the base assembly to a steady spot. The Sovol SV08 max base is heavy. Use both hands and ask someone to help if you need it. Put the base on your table with the bottom down. Make sure the base is flat and does not shake. This helps you avoid mistakes later in the build.
Look at the assembly manual to see how the base should face. The manual shows where each part goes. If you see gaps or uneven places, fix the base before you go on. A steady base makes the rest of the build easier and more exact.
Note: Most people say the Sovol SV08 max takes about one hour to put together. The printer is 90% pre-assembled, so setup is faster.
Attach Gantry & Rails
Next, connect the gantry and rails to the Sovol SV08 max frame. Use the assembly manual to find the right screws and brackets. Try these alignment steps for a smooth build:
- Turn off the printer. Loosen the fixing screw on the A/B idler tensioner. Turn the tightening screw to loosen the X/Y belt on both sides.
- Take off the belt. Push both ends of the X axis at the same time. This stops bending and keeps the X axis close to the AB axis motor base with no gap.
- Put the belt back on. Calibrate again by pushing both ends of the X axis to the back of the gantry frame. Make sure it is close to the AB axis motor seat with no gap.
Check each step with the assembly manual. The manual has clear pictures for every part. If you feel resistance or see things not lining up, stop and fix it before you tighten the screws.
Here is a table of common mistakes and what can happen:
|
Common Pitfalls |
Consequences |
|---|---|
|
Missing a screw |
Layers can peel apart |
|
Misaligning the frame |
Supports may fail |
|
Over-tightening bolts |
Nozzle can get clogged |
Tip: Always check your work with the assembly manual before you move on.
Mount Print Head & Extruder
Now, put the print head and extruder onto the Sovol SV08 max gantry. Use the screws and brackets from the assembly manual. Hold the print head steady and line it up with the holes. Put in the screws and tighten them evenly.
The assembly manual shows how to route the cables for the print head and extruder. Make sure the cables do not twist or get pinched. If you see any loose parts, secure them before you go on.
Check the manual for the right nozzle height. The print head should slide smoothly on the rails. If it feels stuck, loosen the screws, line up the print head again, and try once more.
Note: Careful work with the print head and extruder helps stop calibration mistakes during your first setup.
Wiring & Cable Management
Good wiring and cable management keep your printer safe and working well. Group the cables from motors, sensors, and the power supply. Use zip ties or cable clips to keep cables neat. Keep all cables away from moving parts so they do not get pinched or pulled.
Attach any loose cables to the Sovol SV08 max frame or your table. The assembly manual has diagrams for the right cable paths. Follow these closely to avoid errors.
- Group cables from motors, sensors, and the power supply.
- Use zip ties or cable clips to keep cables together.
- Keep cables away from moving parts so they do not get pinched or pulled.
- Attach loose cables to the frame or table.
Tip: Neat cables lower the chance of problems and make fixing things easier later.
You have finished the main steps for your Sovol SV08 max. Look over the assembly manual and check every connection. Careful setup helps you avoid mistakes and makes sure your printer works well. If you build with patience and care, your first print will go smoothly.
3D Printer Setup Calibration
Bed Leveling
You need to focus on bed leveling during your 3d printer setup. This step helps you get a smooth first layer z calibration. Leveling the bed keeps the nozzle at the right height from the surface. This stops problems like warped prints, uneven layers, or poor sticking, which can ruin your work.
Here are the most effective bed leveling methods for your Sovol SV08:
|
Method |
Description |
|---|---|
|
Heat Soak |
Preheat the bed for 30 minutes before printing large items to reduce distortion. |
|
Z-offset Adjustment |
Modify the Z-offset to ensure the nozzle is at the correct height from the bed. |
|
Auto Bed Leveling |
Use the auto leveling feature to keep the bed surface even for better prints. |
- Change variable_bed_mesh_calibrate_target_temp to 80°C for better leveling during heat soak.
- Set the leveling temperature to 85°C when printing with PETG.
The Sovol SV08 has an auto leveling feature. This makes bed leveling easier and helps you get a perfect first layer z calibration. Always check the manual for the right steps. You should also do pid calibration for the bed and hotend to keep temperatures steady.
Final Checks
Before you finish your 3d printer setup calibration, go through this checklist:
- Complete all setup steps.
- Level the bed and gantry.
- Set Z height and perform calibration.
- Clean the bed and nozzle.
- Monitor the first layer and pause if needed.
- Store filament in a dry location.
- Document calibration and leveling settings.
Check the manual for each step. Make sure you do first layer z calibration and pid calibration before your first print. Clean the bed and nozzle to avoid problems. Good 3d printer setup helps you get the best results.
Troubleshooting Tips
If you run into problems during 3d printer setup, try these quick fixes:
- Check for dust, loose screws, or uneven spots on the bed.
- Clean the printhead and bed before each job.
- Watch for layer shifts or gaps, which show bed leveling issues.
- Wipe the bed with isopropyl alcohol before each print.
- Use the auto bed leveling feature if needed.
- Adjust the Z offset for the right first layer z calibration.
- Use a glue stick or spray for better bed adhesion.
- Keep the bed temperature right for your filament.
- Store filament in a dry box.
- Clean the nozzle often to avoid clogs.
- Do pid calibration for the bed and hotend.
If the hot bed does not heat up, check the hot bed, driver module, and power cable. Restart the machine if you see a heater error. Use a multimeter to check the power output if needed.
Tip: Careful 3d printer setup and regular pid calibration help you avoid most problems. Always check the manual for first layer z calibration steps.
You can now calibrate your printer and enjoy smooth prints. Good bed leveling and pid calibration make your 3d printer setup easy and successful.
First Print Success
Power On Sovol SV08
You have finished the setup. Now you can power on your Sovol SV08. Follow these steps for a safe and smooth start:
- Plug the power cable into the back of the printer. Then plug it into a grounded wall outlet.
- Check the power switch near the power supply. Make sure it matches the voltage for your country.
- Flip the power switch. The Sovol logo will appear on the touchscreen, and you will hear the fans start.
Tip: Always double-check the voltage before you turn on the printer.
Run Test Print
After powering on, you can move to your first print success. Start by loading filament into the extruder. Open the machine settings page and go to the printer Gcode setting interface. Find the starting Gcode location. Add the command G4 P1800000 before the G28 command. Save your settings and give the setup a name you can remember.
Here are some recommended print settings for your first print:
|
Setting |
Recommended Value |
Purpose |
|---|---|---|
|
Layer Height |
0.2 - 0.3 mm |
Balances speed and detail |
|
Print Speed |
40 - 60 mm/s |
Reduces vibration, improves quality |
|
Extrusion Multiplier |
1.0 |
Ensures correct flow |
|
Bed Adhesion |
Brim or Raft |
Improves first layer stick |
Choose the right material and temperature for your print:
|
Material |
Nozzle Temp |
Bed Temp |
Print Speed |
Fan |
Notes |
|---|---|---|---|---|---|
|
PLA |
200-220°C |
50-70°C |
40-60 mm/s |
100% |
Easy to print, needs cooling |
|
PETG |
230-250°C |
70-90°C |
40-60 mm/s |
40-60% |
Sticks well, less cooling |
|
ABS |
240-260°C |
100-110°C |
40-50 mm/s |
0-20% |
Needs high temp, avoid drafts |
Press start print and watch the first layer. If you see good adhesion, you are on your way to success.
Tips for Smooth Printing
You want every print to be a success. Use these tips to keep your Sovol SV08 working well:
- Clean the moving parts with a lint-free cloth.
- Lubricate the linear rails and lead screws to reduce friction.
- Wipe down the printer after every few prints to remove dust and debris.
- Check the belts for tension and wear.
- Clean the nozzle with a brass brush to prevent clogs.
- Update the firmware often and back up your settings before updates.
Note: Regular maintenance and careful setup help you avoid problems and reach print success every time.
You now know the main steps to put together and set up your Sovol SV08. Setting up your printer carefully helps you get great prints. Keep these tips in mind:
- Level the bed before each print so things stick well.
- Clean the nozzle and check the extruder to stop clogs.
- Pick the best print settings for the material you use.
- Do regular checks and cleaning to keep problems away.
Go slow and look over your work at every step. Being patient and paying close attention will help you do well. If you have any questions or want to tell us about your build, write a comment below!
FAQ
How long does it take to assemble the Sovol SV08?
Most users finish assembly in about one hour. You can go faster if you organize your parts first. Take your time and check each step for the best results.
What should I do if a part is missing?
Check the part list on your SD card. If you find a missing part, contact Sovol support with your order details. They will help you get the part quickly.
Why does my first print not stick to the bed?
You may need to level the bed again. Clean the bed with isopropyl alcohol. Try using a brim or raft for better adhesion. Make sure the nozzle is at the right height.
Can I use different filaments with the Sovol SV08?
Yes, you can use PLA, PETG, and ABS. Set the right temperature for each filament. Check the table in this guide for the best settings.


