


Input shaping is a smart way to help your 3D printer move better. It changes the signals sent to your printer’s motors. This helps stop shakes and vibrations. These vibrations can cause problems like ringing, ghosting, and wavy lines on your prints. With input shaping 3D printing, you can get:
- Smoother surfaces and clearer details
- Fewer problems you can see, even when printing fast
- Improved prints on machines with some limits
If you want prints that look nice and finish quickly, input shaping is important.
Key Takeaways
- Input shaping makes prints look better by lowering vibrations. This gives smoother surfaces and clearer details.
- This method lets you print faster but still get good quality. It is great for quick projects.
- Input shaping fixes the main reason for problems like ringing and ghosting. It helps your prints turn out better and more reliable.
- Before you use input shaping, check that your printer works well. Make sure it has the newest firmware for the best results.
- Try printing simple shapes after turning on input shaping. This helps you see what got better and find new problems early.
Input Shaping 3D Printing Basics
What Is Input Shaping?
You can think of input shaping as a smart way to control how your 3D printer moves. Imagine you are carrying a tray full of water. If you move too quickly, the water sloshes and spills. If you move with careful, planned steps, the water stays calm. Input shaping 3d printing works in a similar way. It changes the signals sent to your printer’s motors so the machine moves smoothly, without sudden shakes.
Technically, input shaping is an open-loop control technique. This means it sends a special command to the printer’s motors that cancels out vibrations before they start. The printer does not need to sense or react to the vibrations. Instead, it prevents them by planning the movement in advance. This method comes from other industries, like robotics and manufacturing, where machines need to move quickly but stay steady.
Why Use Input Shaping in 3D Printing?
You want your prints to look clean and finish fast. Input shaping 3d printing helps you reach both goals. When your printer moves quickly, it can shake or vibrate. These vibrations cause problems like wavy lines or blurry corners on your prints. Input shaping reduces these issues by adjusting how the printer accelerates and stops.
Here are some reasons to use input shaping 3d printing:
- It reduces vibrations during printing, so you can print faster.
- It improves print quality by making surfaces smoother and details sharper.
- It uses a virtual model to plan movements, which helps the printer avoid making mistakes.
- It breaks up acceleration into smaller steps, which helps control ringing and ghosting.
- It manages the timing of movements to keep everything steady.
Other methods, like adding foam pads or rubber feet, do not fix the root cause of vibrations. Input shaping 3d printing targets the problem at its source by changing the way the printer moves.
Common Print Issues Solved
When you use input shaping 3d printing, you solve many common problems that can ruin your prints. Here are some issues you can fix:
- Ringing and Ghosting: These look like ripples or shadows near sharp corners. They happen when the printer vibrates after a quick move. Input shaping helps stop these ripples by planning smoother movements.
- Surface Bumps: Vibrations can make the surface of your print bumpy or uneven. Input shaping 3d printing reduces these bumps, so your prints look and feel better.
- Layer Shifts: Sometimes, layers do not line up because of sudden shakes. Input shaping helps keep each layer in the right place.
- Adhesion Issues: Some users find that input shaping helps with sticking problems, especially with certain materials like PLA. However, you may still need to clean your print bed or adjust other settings for the best results.
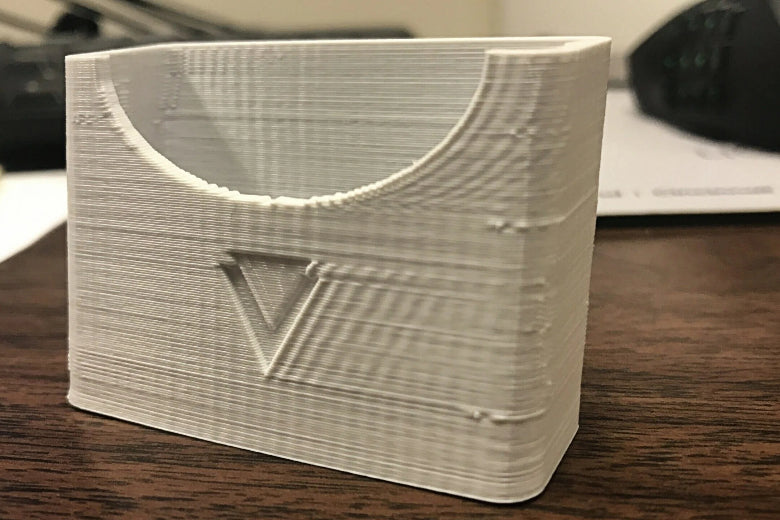
Tip: Always test your printer with a simple shape, like a calibration cube, after turning on input shaping. This helps you see the improvements and catch any new issues early.
You can see the difference input shaping makes in the numbers below:
|
Position |
Amplitude without Input Shaping |
Amplitude with Input Shaping |
Reduction |
|---|---|---|---|
|
A |
304 mm |
29.8 mm |
90.2% |
|
B |
387 mm |
11.1 mm |
97.1% |
|
C |
218 mm |
36.4 mm |
83.3% |
These results show that input shaping 3d printing can cut down vibration by over 90% in some cases. You get smoother, more reliable prints, even at higher speeds.
How Input Shaping Works
Printer Resonance Explained
Sometimes your printer shakes or gets loud when it moves fast. This is because of resonance. Resonance happens when parts like the Y carriage vibrate at certain speeds. These shakes can make your prints look messy. You can check for resonance by doing a few things:
- Print a test model that shows ringing.
- Slice the model with set speeds and layer heights.
- Measure the space between ripples to find the resonance frequency.
Resonance can come from different places:
- The Y carriage shaking while moving.
- Screws that are loose or not put in right.
- Putting your printer on a hard table, which makes it louder.
You can use rubber pads or tighten parts to help. But input shaping is a smarter way to fix resonance.
Algorithms and Motion Control
Input shaping uses special algorithms to change how your printer moves. These algorithms change when and how strong each move is. They split acceleration into two smaller steps. The second step cancels out the shakes from the first. This helps your printer move smoothly and avoid resonance.
Input shaper tuning lets you match the algorithm to your printer’s own resonance. You do not need sensors for this. The algorithm plans ahead and stops resonance before it starts. You get better prints without adding new parts.
Impact on Speed and Accuracy
Input shaping lets you print faster and still get good quality. With input shaper tuning, you can speed up and keep sharp corners and smooth sides. The algorithm keeps resonance away, so you see fewer problems.
Your printer also works better and is more reliable. Input shaper tuning helps your printer handle quick moves and stops. You do not have to slow down to stop resonance. Your prints finish faster, and you do not have to fix as many mistakes.
Tip: Try input shaper tuning with a simple test print. You will see how much it helps your printer and your prints.
Input shaping changes how you use 3d printing. You get better results, less shaking, and more control over your prints.
Why Input Shaping Matters
Print Quality Improvements
You want your 3D prints to look smooth and nice. Input shaping helps make your prints better in many ways. You will see fewer bumps on corners and edges. The biggest changes happen when your printer speeds up or slows down. This is true at the start or end of a bridge, or where infill meets the wall. If you use a direct drive extruder with a short filament path, your prints can look even better. Many people say input shaping gives small but clear improvements. You get sharper details and smoother surfaces. Your models look more finished and neat.
Eliminating Ringing and Ghosting
Ringing and ghosting can make your prints look bad. These problems show up as ripples or shadows near sharp parts. Input shaping helps by lowering mechanical vibrations. When you set up input shaping the right way, you see less ringing. This works for most printers, if you have fixed loose parts first.
Note: Input shaping may not fix every problem. Always check for loose screws or worn belts before using it.
Input shaping is a good way to stop ringing and ghosting. You get better prints without making your printer slower.
Reliability and Consistency
You want your printer to work well every time you use it. Input shaping helps by cutting down on vibrations and ringing. Your prints finish faster and have fewer mistakes. You also get more steady results, even when you print fast.
- Input shaping sends special signals to your printer’s motors to stop frame shakes.
- This method is used in other fields, like aerospace and robotics, to make things work better.
- You get better size accuracy and fewer failed prints.
Input shaping and resonance compensation are changing 3D printing. You can trust your printer to give you good prints every time.
Input Shaping vs Speed Tuning
Differences in Approach
You can make your 3D prints better with input shaping or speed tuning. Both help stop vibrations, but they do it differently. Input shaping uses software to find and fix the shaking in your printer. It checks for resonance frequency and uses special moves to stop vibrations. Speed tuning means you change how fast your printer works. If you slow down, you avoid some shaking, but your prints take longer.
Both methods need careful calibration. With input shaping, you measure your printer’s resonance and set the software to match. For speed tuning, you try different speeds and look for problems like ringing or ghosting. Calibration helps you pick the best settings for your printer.
Pros and Cons
Here is a simple table to compare both ways:
|
Aspect |
Input Shaping Control (ISC) |
Speed Tuning |
|---|---|---|
|
Complexity |
Simple design, open feedback loop |
More complex, requires feedback loops |
|
Implementation |
Easy to implement, real-time operation |
More involved, may require tuning |
|
Vibration Suppression |
Effective in reducing specific frequency vibrations |
May not target specific frequencies |
|
Sensitivity to Disturbances |
Prone to disturbances and model errors |
Generally more robust |
|
Requirement for Information |
Requires knowledge of natural frequency |
Can adapt without complete information |
You need to calibrate both methods more than once. Input shaping often works better for fast prints, but it needs more setup. Speed tuning is easier to start, but you might lose quality if you go too fast.
When to Use Each Method
Pick input shaping if:
- You want faster prints that still look good.
- Your firmware can use advanced vibration control.
- You are okay with spending more time on setup.
Pick speed tuning if:
- You want a simple way to stop ringing.
- You do not want to do hard calibration steps.
- You do not need the fastest print speed.
Tip: For the best results, use both methods together. Start with speed tuning and basic setup. Then add input shaping for even smoother prints.
Should You Enable Input Shaping?
When Input Shaping Is Most Useful
Input shaping helps if you want better prints and faster speed. It works well for projects that need quick results and sharp details. Many engineers and designers use input shaping for models that must look neat and finish fast. If you see ghosting or wavy lines on your prints, input shaping can help make them cleaner. It is also good for printing big or tricky objects where less vibration matters.
Considerations Before Enabling
Check if your printer is ready before you turn on input shaping. You need the latest Klipper firmware. If you use an S2DW board, make sure it has the right firmware to talk to your Pi board. Some printers use a sensor to measure vibrations and help with tuning. Always tighten all screws and belts first. Loose parts can cause extra shakes that software cannot fix.
Remember these things:
- Fix mechanical problems before using input shaping.
- Some printers do not support advanced input shaping.
- You might need to update your firmware or add a sensor.
- A tuning print helps you see if your changes work.
Tip: Good printer care is still important. Always check your hardware before changing software settings.
Getting Started
You can begin input shaping by doing a few easy steps:
- Read the setup guide in your printer’s manual.
- Find helpful tips and guides online.
- Watch a video tutorial for step-by-step help.
Try a test print to see if you lower vibrations. Use a calibration cube or a simple shape. If you see less ghosting and smoother sides, input shaping is working for you. With practice, you can use vibration reduction and advanced input shaping to get the best prints from your machine.
Input shaping helps your prints look smoother and finish faster. It also makes your printer work better every time. This method can fix problems like ringing and ghosting. If you want to know more or try it out, here are some helpful links:
- Unified/Marlin Input Shaping Tuning Guide
- Pre-sliced test GCode files for different materials
- Profile setup and slicing tips
- Input Shaping Calculator for simple changes
Try input shaping on your next print. You will notice better quality and faster prints.
FAQ
What is input shaping in simple terms?
Input shaping changes how your printer moves. It sends special signals to the motors. This helps stop shaking and makes your prints look smoother.
Will input shaping make my prints faster?
Yes! You can print at higher speeds without losing quality. Input shaping reduces vibrations, so you do not have to slow down to get good results.
Do I need extra hardware for input shaping?
Most printers only need a firmware update. Some setups use a sensor for tuning, but you can start without one. Always check your printer’s manual first.
Can input shaping fix all print quality problems?
Input shaping helps with vibrations, ringing, and ghosting. It does not fix issues like poor bed leveling or clogged nozzles. You should check your hardware before using input shaping.
Is input shaping safe for my 3D printer?
Yes, input shaping is safe when you follow setup instructions. It uses software to control movement. Always update your firmware carefully and test with simple prints first.


