


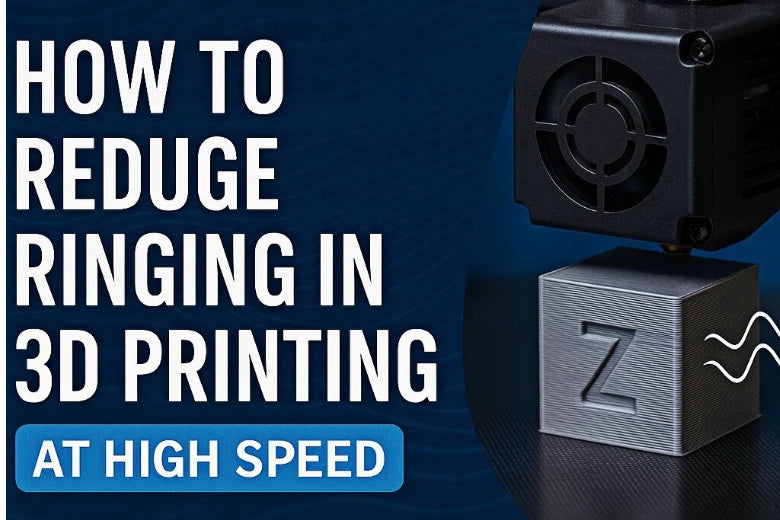
You can reduce ringing in high-speed 3D printing by making a few simple changes. Try lowering print speed by 20% to prevent extra vibrations. Tighten belts and pulleys to keep movements smooth. Adjust acceleration and jerk settings for better control. Use vibration-absorbing pads and check for loose screws. If you want to know how to reduce ringing at high speed, start with these steps. These solutions are practical and work for beginners and experts alike.
Key Takeaways
- Slow down print speed by 20% in important spots. This helps stop vibrations and makes prints look better.
- Make belts and pulleys tighter. This helps the printer move smoothly. It also stops parts from getting out of place. This makes prints look cleaner.
- Put damping pads under your printer. These pads soak up vibrations. They help stop ghosting from happening.
- Change acceleration and jerk settings in your slicer. This helps control how the printer moves. It also helps stop shaking.
- Check your printer’s parts often. Take care of them to keep your printer working well. This helps stop ringing from happening.
What Is Ringing in 3D Printing?
Ringing and Ghosting Explained
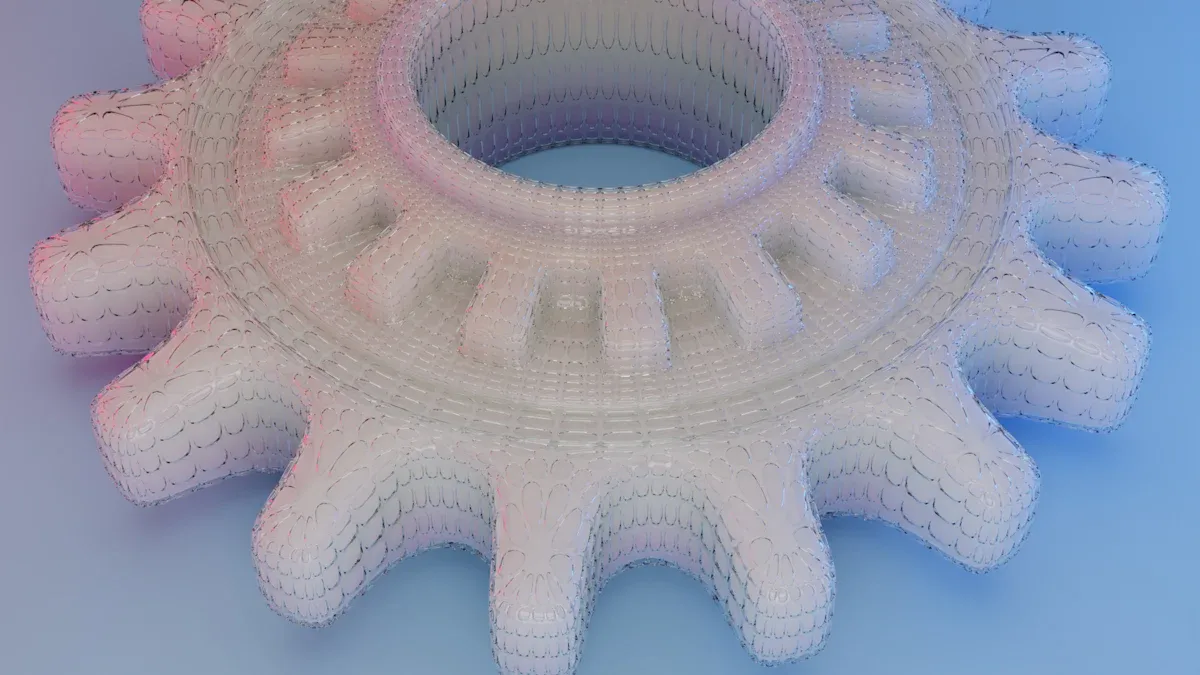
Sometimes, you might see wavy lines on your 3D prints. These lines are called ringing or ghosting. They usually show up near sharp corners or when the print head turns fast. The main reason is that the printer shakes or wobbles.
Here is a table that lists the main things about ringing:
|
Characteristic |
Description |
|---|---|
|
Definition |
Ringing is a wavy pattern on prints caused by printer shaking. |
|
Visual Characteristics |
Wavy lines often appear when the printer changes direction quickly, especially at corners. |
You can find ringing by looking for light, repeated lines on your print. These lines follow the shape of the print and show up after the print head turns a corner.
Some things that cause ringing and ghosting are:
- Belts that are loose or a frame that shakes, which lets parts move too much.
- Printing too fast or with high acceleration, which makes the printer shake.
- A bed or base that is not steady, which passes shaking to the print head.
- Old or worn parts, which make the shaking and ghosting worse.
Why High Speed Increases Ringing
When you print faster, the printer moves and turns more quickly. This quick movement can make the printer shake or vibrate. If the printer does not stop shaking before moving again, you will see more ringing.
For example, if you print a test shape and make each layer faster, you will see more ringing as speed goes up. If the time to speed up matches the printer’s natural shake, the ringing can almost go away. This means speed and shaking are closely connected.
To reduce ringing at high speed, you need to control shaking. Try slowing down for sharp corners, tightening belts, and putting your printer on a steady table. These steps help you get smoother prints with fewer wavy lines.
How to Reduce Ringing at High Speed
Lower Print Speed for Key Areas
You can control ringing by lowering the print speed in important areas. When your printer moves too fast, it shakes more and creates wavy lines on your prints. Slowing down the speed helps the printer stay steady, especially near corners and sharp turns.
-
Why it works:
Lower speeds reduce vibrations and give the printer time to settle after each movement. You get smoother surfaces and fewer ghost lines. - Step-by-step instructions:
- Open your slicer software.
- Find the speed settings for external walls and perimeters.
- Set the speed for these areas between 30–50 mm/s.
- For infill and less visible parts, you can use higher speeds.
- Run a test print and check for ringing near corners.
Tip:
If you see ghosting, try lowering acceleration and jerk settings. A print with high acceleration (3,000 mm/s²) and jerk (30 mm/s) shows more ghosting than one with lower settings (500 mm/s² and 12 mm/s). Adjusting these values can improve print quality.
Here are some quick facts about speed and ringing:
|
Print Speed (mm/s) |
Ringing Risk |
Print Quality |
|---|---|---|
|
80+ |
High |
Lower |
|
50 |
Medium |
Good |
|
30 |
Low |
Best |
You can use these numbers as a guide for how to reduce ringing at high speed.
Tighten Belts and Pulleys
Loose belts and pulleys let the print head move too much, which causes ringing. Tight belts keep everything in line and help your printer make clean moves.
-
Why it works:
Proper tension stops slipping and misalignment. You get better layer alignment and fewer defects. - Step-by-step instructions:
- Find the adjustment mechanism for your printer’s belts.
- Loosen the mounting bolts just enough to move the belt.
- Press the belt midway with your thumb. Aim for a deflection of about 1/2 to 3/4 inch.
- Tighten the bolts securely.
- Run the printer at low speed and listen for odd noises.
Note:
You can use a belt tension gauge, the deflection method, or tap the belt and measure vibration frequency. Always check for wear and alignment.
Here is a table to help you check belt tension methods:
|
Method |
How to Use |
|---|---|
|
Deflection |
Press belt midway, measure movement |
|
Frequency |
Tap belt, listen for vibration |
|
Visual Inspection |
Look for wear and alignment |
Tightening belts is a key step in how to reduce ringing at high speed.
Use Stiffer Springs and Stable Surfaces
Your printer needs a strong base to avoid shaking. Stiffer springs and a stable surface help absorb movement and keep the printer steady.
-
Why it works:
Springs that are too soft let the bed bounce. A wobbly table passes vibrations to the printer. Stiffer springs and a solid surface stop these problems. - Step-by-step instructions:
- Check your bed springs. If they feel loose or soft, replace them with stiffer ones.
- Place your printer on a heavy, flat table.
- Make sure the table does not wobble.
- Add weight to the printer base if needed.
Tip:
You can use concrete blocks or thick wood to make your printer’s base heavier. This helps absorb extra vibrations.
A stable setup is important for how to reduce ringing at high speed.
Add Damping Pads to Minimize Vibrations
Damping pads absorb vibrations before they reach the print head. You can use rubber pads, foam sponges, or even squash balls under your printer.
-
Why it works:
Damping pads isolate the printer from the table. They reduce noise and stop vibrations from causing ghosting. - Step-by-step instructions:
- Choose a damping pad type: rubber, foam, squash balls, or DIY damper feet.
- Place pads under each corner of your printer.
- Test the printer. If it rocks too much, add weight to the base.
Here is a table showing how different pads work:
|
Damping Pad Type |
Effectiveness Description |
|---|---|
|
Lamellar viscoelastic dampers |
Excellent vibration control in both lab and real-world tests. |
|
DIY damper feet |
Customizable for different printer models. |
|
Softer dampers |
Better isolation of vibrations and reduced noise during printing. |
|
Rubber pads |
|
|
Soft foam sponge |
Absorbs up to 77% of energy. |
Note:
Softer dampers give better vibration isolation but may let the printer swing more. You can balance this by adding weight to the printer.
If you want to know how to reduce ringing at high speed, try these pads for quick results.
Quick Fixes vs. Long-Term Improvements
|
Solution Type |
Example |
How Fast It Works |
|---|---|---|
|
Quick Fix |
Lower print speed |
Immediate |
|
Quick Fix |
Add damping pads |
Immediate |
|
Long-Term |
Tighten belts and pulleys |
Lasting |
|
Long-Term |
Use stiffer springs |
Lasting |
|
Long-Term |
Stable surface |
Lasting |
You can mix quick fixes and long-term changes for the best results. If you follow these steps, you will learn how to reduce ringing at high speed and get smoother prints.
Slicer and Firmware Settings
Slicer and firmware settings are important for print quality. They let you control how your printer moves and turns. These settings help stop shaking and ringing, especially when printing fast. Both new and skilled users can change these options to get better prints.
Adjust Acceleration and Jerk
Acceleration and jerk settings tell the printer how fast to start and stop. If these numbers are high, the printer moves too quickly. This makes more shaking and ringing. Lower numbers make the printer move smoother and give cleaner prints.
- First, lower acceleration and jerk in your slicer or firmware.
- Make small changes and see how your prints look.
- Most printers work well with these starting numbers:
|
Setting |
Recommended Value |
|---|---|
|
Acceleration |
500–1000 mm/s² |
|
Jerk |
8–12 mm/s |
If you use Klipper firmware, it has special ways to improve print quality. You can turn off slicer control for acceleration to stop problems.
Enable Input Shaping or Vibration Compensation
Input shaping is a feature in some firmware like Klipper or Marlin. It helps by changing motor signals to stop shaking. This lowers ringing and ghosting, even when printing fast.
When you turn on input shaping, your printer moves more smoothly. You will see fewer wavy lines and better-looking prints. To set it up, print a test shape and see where ringing happens. Use a tool like the TH3D calculator to find the right number. Put this number in your firmware settings.
Input shaping works best if your printer is set up well. Always check your belts and frame before using it.
Recommended Speed Settings for External Walls
Ringing shows up most on outside walls. You can fix this by lowering speed and changing wall settings.
- Set the speed for outside walls to 30–50 mm/s.
- Add more wall loops and make walls thicker for strength.
- Change the order so the outer wall prints first. This helps it cool and look smooth.
|
Wall Setting |
Recommendation |
|---|---|
|
Speed |
30–50 mm/s |
|
Wall Loops |
3 or more |
|
Wall Order |
Outer before inner |
High acceleration can make prints faster, but you need to balance speed and quality. Try different settings to see what works best for your printer.
You can use these slicer and firmware tips to help reduce ringing at high speed. Make small changes and check your prints to see if they get better.
Tuning and Troubleshooting
Test Prints for Ringing
You can find ringing by making simple test prints. These prints show how changes help your results. Print a small square with sharp corners. Look for wavy lines or ghosting at the edges. The Generalised Test Object is also useful. It has many shapes and directions. This makes it easy to see where ringing happens.
Tip: Always use the same filament and settings for each test. This helps you compare your results and see if things get better.
Step-by-Step Tuning Process
You can fix ringing by following easy steps. Start with simple checks and then try harder steps.
- Mechanical inspections: Look for loose screws, shaky frames, or worn belts. Tighten everything and make sure your printer sits on a steady table.
- Slicer settings adjustments: Lower print speed, acceleration, and jerk. Pay attention to outside walls and corners. Print another test object to see if ringing gets better.
- Advanced calibration techniques: Try input shaping or resonance compensation if your firmware lets you. Use an accelerometer to measure shaking and change settings in your firmware.
Here is a before-and-after example:
|
Step |
Before (Ringing Visible) |
After (Ringing Reduced) |
|---|---|---|
|
Loose belts |
Wavy lines on corners |
Clean, sharp corners |
|
High acceleration |
Ghosting on surfaces |
Smooth, clear surfaces |
|
Input shaping enabled |
Repeated patterns |
Minimal or no ringing |
Troubleshooting Persistent Issues
If you still see ringing after tuning, check these common problems:
- Belts might be too loose or too tight. Change them and test again.
- The frame or table may not be steady. Move your printer to a heavier or more solid table.
- Old or worn parts can make extra movement. Replace belts, pulleys, or bearings if needed.
- Firmware settings may not match your hardware. Check your acceleration, jerk, and input shaping numbers.
Note: Take pictures of your test prints before and after each change. This helps you see what works best and track your progress.
By following these steps, you can find and fix ringing. Your prints will look smoother and have sharper details.
Hardware Upgrades to Prevent Ringing
Upgrading your 3D printer’s hardware can make a big difference in reducing ringing, especially when you print at high speeds. You can focus on three main areas: the frame and motion system, belts and pulleys, and vibration dampers.
Upgrade Frame and Motion System
A strong frame keeps your printer steady. When you add weight to the frame, you help absorb vibrations. Think of it like a tuning fork: a heavier fork vibrates less. You can use metal brackets or add weight to the base. Some printers use the CoreXY system, which improves speed and precision. This design can reduce ringing by up to 92%. For example, the Sovol SV08 Max uses CoreXY and reaches a precision of ≤0.02 mm. This helps you get sharp edges and clear details.
Tip: Place your printer on a heavy, stable table. Add bricks or metal plates to the base if needed.
|
Hardware Upgrade |
Description |
|---|---|
|
Improve Frame Stability |
A stable frame absorbs vibrations and prevents movement. |
|
CoreXY Motion System |
Reduces ringing and improves print quality at high speed. |
Use Quality Belts and Pulleys
Belts and pulleys move the print head. If they are loose, you will see more ringing. Use high-quality belts and pulleys, and check their tension often. Make sure all belts have equal tension. This keeps motion smooth and layers even.
- Check belts for wear every month.
- Adjust tension so belts are taut but not too tight.
- Replace old or stretched belts right away.
|
Maintenance Task |
Why It Matters |
|---|---|
|
Equal belt tension |
Prevents misalignment and uneven layers |
|
Regular inspection |
Stops defects before they start |
Add Vibration Dampers
Vibration dampers help absorb small shakes from motors and moving parts. You can install rubber feet or special dampers under your printer. These upgrades reduce noise and stop vibrations from reaching your prints.
- Place dampers under each corner of your printer.
- Use motor dampers if your printer supports them.
- Combine dampers with a heavy table for best results.
Note: Modern printers use features like input shaping and resonance compensation to fight ringing. These work best when your hardware is already stable.
With these upgrades, you can print faster and still get smooth, sharp results.
You can make ringing less in high-speed 3D printing by tightening belts. Lowering print speed helps too. Damping pads also stop shaking. Changing acceleration and jerk in software helps a lot. Many people get smoother prints after doing these things. For example, the Sovol SV08 Max printer lowers ringing by 92%. This makes prints look much better.
Check your printer often. Print test models after each change.
Some mistakes are skipping maintenance or not slowing down at sharp corners.
Try these steps. You will get sharper and cleaner prints every time.
FAQ
What causes ringing in 3D prints?
You see ringing when your printer shakes during fast moves. Loose belts, high speeds, or a shaky table often cause this problem. Check your printer for these issues if you notice wavy lines on your prints.
Can input shaping fix ringing on any printer?
Input shaping works best on printers with supported firmware like Klipper or Marlin. You need to set it up correctly. Always check your hardware first. Input shaping cannot fix problems from loose belts or unstable frames.
How often should you check belt tension?
Check your belts every month. If you print often or at high speeds, check more often. Tight belts help prevent ringing and keep your prints sharp.
Do heavier printers have less ringing?
Yes, heavier printers shake less. A solid, heavy base absorbs more vibrations. You can add weight to your printer’s base or use a sturdy table for better results.
Should you always print slow to avoid ringing?
You do not need to print slow all the time. Lower the speed for outer walls and sharp corners. Use higher speeds for infill. This way, you get fast prints and smooth surfaces.


