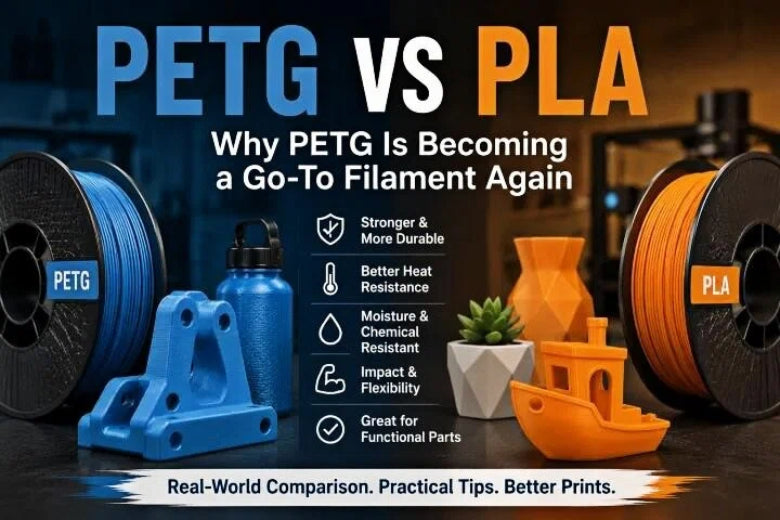
PLA used to be the default answer for desktop FDM because it was easy, predictable, and clean.
But a lot of experienced makers are quietly switching their “daily driver” filament to PETG—especially for functional parts that need to survive real use, not just look good on the bench.
This isn’t because PETG magically changed. It’s because the stuff around it did: printers got more consistent, slicers got smarter, and the community learned which PETG problems are real… and which are self-inflicted.
Why PETG feels easier now
PETG has always had a reputation for being “a bit finicky.” Most of that reputation comes from three failure modes: stringing/ooze, first-layer drama, and moisture.
Modern setups reduce the pain in practical ways:
- Better extrusion control. Direct-drive systems make it easier to tune retraction and manage ooze without going to extremes.
- More consistent first layers. ABL, flatter beds, and better build surfaces mean you can get PETG adhesion without gambling the whole print.
- More usable slicer workflows. Material profiles, calibration tools, and more transparent travel/retraction controls reduce trial-and-error.
If you’re using OrcaSlicer, SOVOL has a useful walkthrough on the settings that tend to move the needle in real prints: Improving Sovol printer results with OrcaSlicer settings.
PETG vs PLA: a decision table for functional prints
Here’s the cleanest way to decide without turning it into a materials-science debate.
|
If you care most about… |
PLA is usually the better pick |
PETG is usually the better pick |
|---|---|---|
|
A fast sanity-check rule for when to use PETG |
If it’s mostly cosmetic and stays indoors |
If it’s a functional part that may get bumped, flexed, or warmed |
|
Fast, clean printing with minimal tuning |
Yes |
Not usually |
|
Sharp cosmetic details, crisp text, easy sanding |
Yes |
Sometimes |
|
Parts that flex a little instead of snapping |
Sometimes |
Yes |
|
Impact resistance (drops, knocks, repeated handling) |
Not usually |
Yes |
|
Better chemical/moisture resistance |
Limited |
Often |
|
“Moderate heat” environments (not high-temp) |
Risky under load |
More forgiving |
Two nuance notes that matter for advanced users:
- “Strength” isn’t a single metric. PLA can show high tensile numbers but still fail in brittle ways. PETG often wins when the part needs to absorb impact or survive repeated stress. UltiMaker’s breakdown is a good reminder that you need to match the metric to the failure mode: PETG vs PLA vs ABS strength comparison.
- Temperature resistance isn’t one number either. We’ll cover Tg vs HDT (and why “it’s fine up to X°C” is usually misleading) later in the post.
Key Takeaway: If you print functional parts that get handled, bumped, or live in “warm-ish” environments, PETG is often the easiest upgrade from PLA—as long as you treat moisture and first-layer behavior as part of the process.
The 7 PETG best practices that actually matter
If you’re searching for PETG printing settings, this section will get you closer than any one-size-fits-all profile—because it focuses on the few variables that cause most PETG failures.
These are not “best PETG printing settings” as a one-size-fits-all profile. They’re the practices that consistently reduce failure across different printers.
1) PETG filament drying: do it first—before you touch retraction
Why it matters: A slightly wet spool can look like a tuning problem: stringing, fuzzy surfaces, random blobs, inconsistent extrusion.
How to do it: Keep PETG sealed when not in use. If a spool has been sitting out (especially in humid weather), dry it before doing any serious calibration.
What failure looks like: You keep tweaking retraction and temperature and nothing “locks in.” The same model looks different every run.
If you want a simple, no-drama workflow, a dedicated dryer box can make PETG more consistent: SOVOL large filament dryer box.
2) Use “enough” cooling, not “maximum” cooling
Why it matters: PETG can benefit from cooling for overhangs and small features—but too much fan can reduce layer bonding and make parts less durable.
How to do it: Start with lower fan for the first layers, then increase only as needed for geometry. Wevolver highlights the basic trade-off clearly: PETG temperature considerations: nozzle, bed, cooling.
What failure looks like: Overhangs look better, but the part feels weaker than expected or splits along layer lines.
3) PETG stringing fix: back off “heat + ooze,” not retraction
Why it matters: PETG likes to ooze during travel moves. Retraction helps, but aggressive retraction can create new problems (clogs, inconsistent extrusion, blobs at restart).
How to do it: Treat retraction as fine-tuning, not the first lever. Adjust temperature and travel behavior first, then retraction.
What failure looks like: Stringing improves a bit, but you start seeing under-extrusion, clicking, or random gaps after long travel sections.
4) Don’t “squish” the first layer like PLA
Why it matters: PETG tends to grab the bed hard. If you over-squish, you can get elephant’s foot, messy edges, or removal that risks the surface.
How to do it: Aim for a clean, even first layer without excess smearing. If your first layer looks like it’s being pressed into the plate, raise your Z offset slightly and re-check adhesion.
What failure looks like: The part is welded to the bed, the bottom looks over-compressed, and removal feels like you’re about to damage something.
5) Use a release layer when PETG bonds too well
Why it matters: PETG can stick too well on some build surfaces.
How to do it: If you’ve ever had PETG take chunks out of a surface, you already know. A simple release layer (like glue stick on the plate) can make removal predictable.
What failure looks like: You get great adhesion… and then you can’t remove the part without tools, stress marks, or surface damage.
6) Calibrate for function: walls and orientation beat “more infill”
Why it matters: For functional PETG parts, you’ll usually get better real-world durability from smarter geometry choices than from maxing infill.
How to do it: Add perimeters/walls where the part sees bending, and orient the part so layer lines aren’t separating along the main load path.
What failure looks like: You print 80–100% infill, but the part still fails where the shell should’ve been thicker or where layers were oriented poorly.
7) Clean transitions when you switch materials
Why it matters: PETG can leave residue that behaves differently when you go back to PLA.
How to do it: Purge adequately after a swap. If you see weird extrusion after switching back to PLA, cleaning filament or a cold pull can help.
What failure looks like: PLA prints suddenly look rough or inconsistent after a run of PETG—even though your PLA profile didn’t change.
Heat resistance without the marketing: Tg vs HDT vs real-world conditions
If you’ve ever seen a chart that claims one filament is “good to X°C,” treat it as a starting point—not a promise.
Here’s the maker-friendly way to think about it:
- Tg (glass transition temperature) is where a plastic begins to soften and lose stiffness.
- HDT (heat deflection temperature) is where a standardized test bar deforms under a specified load.
- Real-world performance depends on load, geometry, and how the part is printed.
That’s why two parts printed from the same PETG can behave very differently in heat: a thin clip under constant tension will creep sooner than a thick bracket that’s mostly in compression.
For a practical overview of the PLA vs PETG trade-offs (including why the same temperature can be fine for one part and a failure for another), Xometry’s comparison is a decent baseline: PETG vs. PLA: strength and printing comparison.
Pro Tip: When you’re designing for heat, start by asking “What load does this see?” If the part is under stress, HDT-style thinking is usually more useful than quoting Tg.
Quick troubleshooting: symptom → likely cause → first fix
|
Symptom |
Likely cause |
First fix to try |
|---|---|---|
|
Hairy strings between features |
Wet filament or too much heat/ooze |
Dry the spool first, then lower temp slightly |
|
Big blobs at travel starts |
Pressure build-up + restart behavior |
Reduce ooze (temp/travel), then tune retraction gently |
|
Part stuck too hard to the bed |
Over-squished first layer / no release layer |
Raise Z offset slightly; use a release layer |
|
Corners lifting |
Not enough first-layer grip / drafts |
Improve bed prep; reduce cooling early |
|
Ugly overhangs |
Cooling too low for geometry |
Increase cooling only as needed |
If you want a PLA vs PETG overview specifically written from a maker workflow perspective, SOVOL’s guide is a solid supporting read: PETG vs PLA: which filament should you choose.
FAQ
Is PETG “stronger” than PLA?
It depends what “strong” means. PLA can be very stiff and can score high on certain tensile tests, but it can also fail in brittle ways. PETG is often better when you care about toughness, impact resistance, and surviving repeated handling.
Does PETG always handle heat better than PLA?
Often, yes—but don’t treat it like a guaranteed service temperature. Compare Tg vs HDT, then consider the load and geometry of your specific part. A lightly loaded part can survive where a stressed part creeps.
Why does PETG string so much?
Because it tends to ooze during travel while it stays molten. Moisture makes it worse. That’s why drying the spool and reducing ooze is usually more effective than extreme retraction.
When should you keep using PLA?
When the part is mostly cosmetic, needs crisp detail, prints fast, and won’t see heat or repeated stress. PLA is still the easiest path to clean results.
Next steps
If you’re moving more projects to PETG, start with a repeatable workflow: dry the spool, get a clean first layer, then tune travel/ooze before retraction.
For slicer-side tuning that’s easy to apply across materials, revisit the SOVOL article “Improving printer results with OrcaSlicer settings” (linked earlier in this post).