


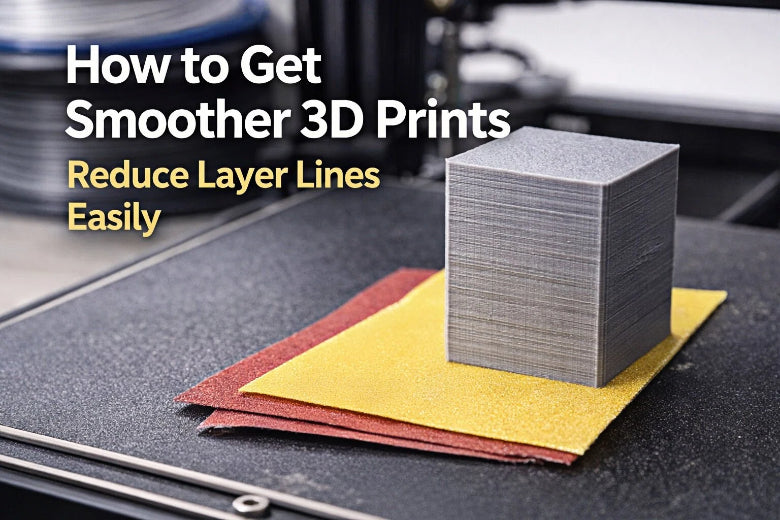
You might wonder how to get smoother 3D prints and make those layer lines less visible. Don’t worry! You can use simple steps and basic tools to improve your results. Try different settings and finishing tricks. Stay safe, have fun, and see what works best for your projects.
Key Takeaways
- Adjust your printer settings for smoother prints. Use a smaller layer height (0.1 to 0.2 mm) and slow down the print speed to 40-60 mm/s for better results.
- Invest in quality filament and check the print temperature. Proper temperature settings help layers bond well, reducing defects in your prints.
- Use sanding and priming techniques to hide layer lines. Start with medium-grit sandpaper and apply primer to fill gaps, repeating until the surface feels smooth.
How to Get Smoother 3D Prints with Print Settings
When you want to know how to get smoother 3d prints, you should start by looking at your printer settings. These settings can make a big difference in how your finished model looks. Let’s break down the basics so you can get better results right away.
Layer Height and Print Speed
Layer height is one of the first things you should check. If you use a smaller layer height, your printer lays down thinner layers. This makes the layer lines less visible. For most projects, try a layer height of 0.1 to 0.2 mm. You might notice your prints take longer, but the surface will look much smoother.
Print speed also matters. If you print too fast, your printer can shake or miss details. Slow down the print speed to around 40-60 mm/s. This helps the layers stick together better and gives you a cleaner finish. If you want to know how to get smoother 3d prints, always start with these two settings.
Tip: If you see rough edges or wavy lines, try lowering the print speed even more. Sometimes, patience pays off!
Print Temperature and Filament Quality
Temperature affects how your filament melts and sticks. If the temperature is too low, the layers might not bond well. If it’s too high, you could get blobs or stringy bits. Check the recommended temperature for your filament and do a small test print. Adjust the temperature in small steps, like 5°C at a time.
Filament quality matters, too. Cheap or old filament can cause problems. Good filament gives you better results and makes surface preparation easier later. If you want to know how to get smoother 3d prints, invest in quality filament and store it in a dry place.
Printer Stability and Slicer Optimization
Your printer needs to stay steady while it works. Place it on a solid table. Make sure nothing wobbles. Tighten any loose screws or belts. If your printer shakes, you’ll see more layer lines.
Slicer software lets you control how your printer works. Try different slicer settings, like wall thickness and infill. Thicker walls can hide layer lines. Use the preview feature in your slicer to spot problems before you print. If you want to know how to get smoother 3d prints, don’t be afraid to experiment with slicer options.
Note: Some slicers have a “vase mode” or “spiralize” setting. This can give you super smooth sides for simple shapes.
Removing Supports and Cleaning Prints
After printing, you need to do some surface preparation. Carefully remove any supports. Use small pliers or a craft knife. Take your time so you don’t damage the print. If you rush, you might leave marks or break small parts.
Once you remove the supports, check for little bumps or strings. You can use a hobby knife or fine sandpaper to clean them up. This step is important for how to get smoother 3d prints. Good surface preparation now makes sanding and painting much easier later.
Here’s a quick checklist for surface preparation:
- Remove all supports gently.
- Trim away any blobs or strings.
- Sand rough spots with fine sandpaper (start with 200 grit).
- Wipe the print with a soft brush or cloth.
If you follow these steps, you’ll see a big improvement in your prints. Remember, how to get smoother 3d prints often starts with careful surface preparation. Take your time, and you’ll get better with every project.
Smoothing 3D Prints: Priming and Sanding Techniques
When you want to start smoothing 3D prints, you might feel a bit overwhelmed. Don’t worry! You can use simple post-processing steps to hide visible layer lines and get a high-quality finish. Let’s walk through each step together so you can improve your prints at home.
Grinding and Filling Defects
Sometimes, your print comes off the bed with small bumps, holes, or rough spots. These defects make visible layer lines stand out even more. You can fix these problems with a few easy tools.
- Use a hobby knife or a small file to grind down any big bumps or blobs.
- For deep holes or gaps, try using a plastic-friendly filler. Many people use spot putty or a two-part epoxy. Just spread a thin layer over the defect and let it dry.
- After the filler dries, sand it smooth so it blends in with the rest of your print.
Tip: Always wear a dust mask when sanding or grinding. Fine plastic dust can be harmful if you breathe it in.
Filling and grinding are important post-processing steps. They help you get rid of the worst defects before you move on to priming and sanding. If you skip this step, you might see visible layer lines even after painting.
Priming and Sanding
Priming and sanding are the heart of smoothing 3D prints. You use these steps to hide visible layer lines and get a high-quality finish.
- Start with a primer made for plastic. Spray a light, even coat over your print. The primer fills in tiny gaps and makes it easier to see where you need to sand.
- Let the primer dry completely. Check your print under a bright light. You’ll see visible layer lines and rough spots that need more work.
- Sand the print with medium-grit sandpaper (about 200-400 grit). Move in small circles and don’t press too hard.
- Wipe away dust and spray another coat of primer if you still see visible layer lines.
- Repeat the sanding and priming steps until your print feels smooth to the touch.
Note: If you want a really high-quality finish, you might need to repeat priming and sanding several times. Patience pays off!
Priming and sanding are the most important post-processing steps for improving surface quality. You can use these techniques on almost any print, no matter what material you use.
Smooth PLA 3D Prints: Sandpaper and Micro-Mesh
PLA is one of the most popular 3D printing materials. You can smooth PLA 3D prints with just sandpaper and a little time. Here’s how you do it:
- Start with 200 or 400 grit sandpaper. Sand the whole print gently to knock down the biggest visible layer lines.
- Move up to finer grits, like 600, 800, and even 1000 grit. Each step removes smaller scratches and makes the surface smoother.
- For a super high-quality finish, try micro-mesh pads. These pads go up to 12000 grit and can make your print feel almost like glass.
- Always sand in a well-ventilated area and wear a mask.
You can use water with your sandpaper to keep dust down and get a smoother result. Wet sanding works great for smoothing 3D prints and helps you avoid overheating the plastic.
Troubleshooting: If you see white marks or scratches, you might be sanding too hard. Use lighter pressure and switch to a finer grit.
Smooth PLA 3D prints look amazing after this process. You can use these smoothing techniques on other plastics too, but PLA is the easiest for beginners.
Final Coating for Enhanced Finish
After you finish priming and sanding, you can add a final coating to your print. This step gives you a high-quality finish and protects your work.
- Use a clear spray sealer or a glossy paint to seal the surface. This makes the colors pop and hides any last visible layer lines.
- Some people like using epoxy for a glassy look. Using epoxy can fill in tiny gaps and give your print a strong, shiny shell.
- If you want a matte look, choose a flat clear coat instead.
A final coating is a great post-processing step for improving surface quality. It locks in all your hard work and makes your print look professional.
Tip: Always test your final coating on a scrap piece first. Some sprays can react with your paint or plastic.
You can also try using an air eraser for a unique finish. This tool blasts fine powder at your print and can help smooth out visible layer lines. It’s a fun way to experiment with different textures.
Safe Chemical Smoothing for ASA and PLA
Some people want to try chemical smoothing for a super high-quality finish. You need to be careful with this step, but it can work well for certain plastics.
- ASA can be smoothed with acetone vapor. Place your print in a sealed container with a small amount of acetone. The vapor melts the surface just enough to hide visible layer lines.
- PLA is trickier, but you can try using solvents like ethyl acetate. Always read the safety instructions and wear gloves and goggles.
- Never use chemical smoothing in a closed room. Open a window or work outside.
Using solvents is a powerful post-processing step, but it’s not for everyone. If you want to try it, start with small test prints and see how the plastic reacts.
Warning: Chemical smoothing can change the shape of your print if you leave it too long. Watch your print closely and remove it as soon as you see the surface start to shine.
You can combine chemical smoothing with other post-processing steps like priming and sanding. This gives you the best chance at a high-quality finish and helps you smooth PLA 3D prints or ASA models.
Smoothing 3D prints takes practice, but you’ll get better with every project. Try different post-processing steps and see what works best for your models. You can hide visible layer lines, improve surface quality, and create prints you’re proud to show off. Don’t be afraid to experiment with new smoothing techniques or tools. Every print is a chance to learn something new!
You can make your 3D prints smoother by changing some settings and doing easy post-processing steps. FDM printers do not take much time and are simple for people who are just starting. You can try sanding, priming, and adding a coating to get better prints. Be careful, try new things, and have fun while printing. Each print teaches you something new and helps you become more creative! 😊
|
3D Printing Technology |
Time Investment |
Results |
Post-Processing Requirements |
|---|---|---|---|
|
FDM |
Low |
Cheap, good for basic prototypes |
Not much, simple to do |
|
MJF |
High |
Strong parts, works very well |
A lot, needs skill |
|
MSLA |
Moderate |
Very smooth, lots of detail |
Very important, needs cleaning and safety steps |
FAQ
Why do I see layer lines on my 3D prints?
Layer lines show up because your printer builds objects one layer at a time. You can reduce them by lowering layer height and sanding the surface.
What is the easiest way to smooth a 3D print?
You can start with sandpaper. Use 200 grit first, then move to finer grits. Wipe away dust after each step for a smoother finish.
Can I use paint to hide layer lines?
Yes! Primer and paint help cover layer lines. Spray a thin coat, let it dry, then sand lightly. Repeat until you get a smooth surface.


