


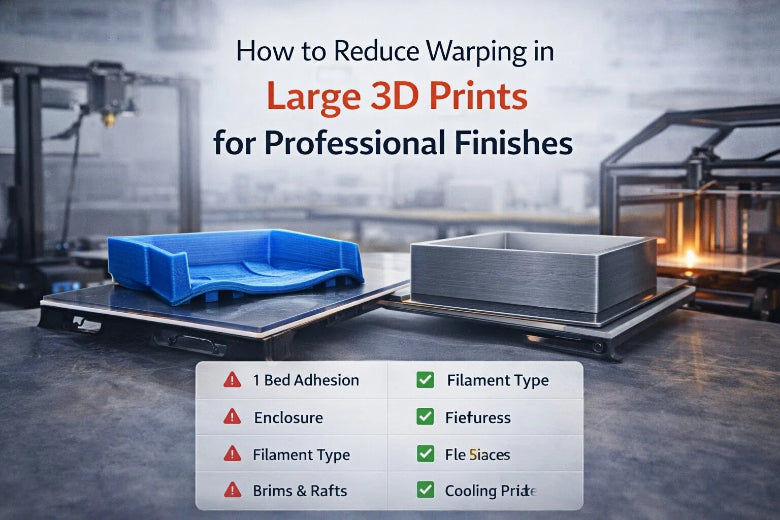
You can make your 3D prints look professional by learning how to reduce warping in large 3D prints. Warping causes corners to lift and surfaces to bend, which can ruin the appearance and strength of your project. To combat this, you should control the temperature and use careful methods. This approach helps keep your big prints flat and smooth. If you do things the right way, you can create parts that not only look good but also last a long time.
Key Takeaways
- Keep the temperature steady to stop warping. Use a heated bed and set it to the right temperature for your filament.
- Pick the best way to make your print stick. You can use glue sticks, brims, or rafts to help keep prints flat.
- Change the cooling fan speed. Start with a low speed for the first layers. This stops fast cooling and warping.
- Pick the right filament. PLA and PETG do not warp as much as ABS and ASA.
- Make sure the room stays the same. Keep the temperature and humidity steady to lower warping risks.
Warping in Large 3D Prints
Warping and Surface Finish
Warping can mess up the surface of big 3d prints. When warping happens, corners lift or curl. Layers do not stay flat. This makes the print lose its shape. The surface gets rough and uneven. Parts may not fit together right. Warping also makes the print weaker. The layers do not stick well to each other.
- Warping makes prints lose their correct shape.
- It hurts the surface quality, which matters for big prints.
- Warping affects how flat the first layer is and how well layers stick. To stop warping, keep the first layer flat and the surface smooth. This helps your prints look good and stay strong.
Thermal Contraction Explained
Thermal contraction is a main reason big 3d prints warp. When you print, hot plastic cools and shrinks. This shrinking causes stress inside the print. As the print cools, stress can make edges lift or bend. Some materials, like ABS, shrink more and warp more. Uneven cooling makes warping worse, especially in big prints. To stop warping, control how your print cools.
Note: Bigger prints have more temperature changes in different spots. This makes big 3d prints warp more than small ones.
Causes in Large Prints
Many things can cause warping in big 3d prints. These include temperature changes, bad design, and changes in the room. The table below shows types of warping, their causes, and ways to fix them:
|
Type of Warping |
Cause |
Solutions |
|---|---|---|
|
Deformation |
Material shrinks as it cools |
Use glue, heated covers, brim designs |
|
Lifting |
Temperature changes between layers |
Cover more area, use thinner layers |
|
Detachment |
Filament does not stick well |
Use stronger brim material with higher melting |
You can stop warping by controlling temperature, using smart designs, and keeping your workspace safe from drafts. Big 3d prints need more care because their size makes uneven cooling and stress more likely.
How to Reduce Warping in Large 3D Prints
Bed Adhesion Methods
You need strong bed adhesion to keep your large 3d prints flat and smooth. Good bed adhesion stops the corners from lifting and helps you prevent warping. When you use the right bed adhesion techniques, you give your print the best chance to stay stuck to the build plate during the whole process. You can choose from several bed adhesion methods. Each one works best for different materials and print sizes.
Here is a table that shows the most effective bed adhesion methods for how to reduce warping in large 3d prints:
|
Method |
Description |
|---|---|
|
Bed Adhesives |
You can use glue stick, painter's tape, or special adhesives like Magigoo to boost adhesion. |
|
Textured or PEI Build Plates |
These surfaces grip the print better and help reduce warping naturally. |
|
Heated Bed |
You need a heated bed for materials like ABS or PETG. The right temperature is key for success. |
|
Print a Brim |
A brim adds extra plastic around your print, making it stick better and stay flat. |
|
Print a Raft |
A raft gives your print a thick base. It handles thermal stress and keeps large 3d prints stable. |
You should always clean the build plate before starting. Dust and oil can make bed adhesion weak. Try different bed adhesion methods to see which one works best for your material and printer. If you print a large object, use a brim or raft to increase the contact area. This step helps you reduce warping and get a professional finish.
Tip: If your print still lifts, try combining two bed adhesion methods. For example, use a glue stick on a PEI plate or add a brim with a heated bed.
Heated Bed and Enclosure Use
A heated bed is one of the most important tools for how to reduce warping in large 3d prints. You need to set the bed temperature based on the filament you use. For PLA, set the bed to about 60°C. For PETG, use 80°C or a bit higher for big prints. For ABS, set the bed above 90°C. These temperatures help the first layers stick well and prevent warping.
Here is a table with recommended bed and enclosure temperatures for common filaments:
|
Filament Type |
Recommended Bed Temperature |
Enclosure Temperature |
|---|---|---|
|
PLA |
~60°C |
Below bed temperature |
|
PETG |
80°C |
+10°C for larger objects |
|
ABS |
>90°C |
40-50°C |
You should use an enclosure for large 3d prints, especially with ABS or PETG. An enclosure keeps the heat around your print. This step stops drafts and keeps the temperature steady. When you keep the chamber warm, you reduce the temperature difference between layers. This helps you prevent warping and get better results.
- Set your heated bed to the right temperature for your filament.
- Use an enclosure to keep the air warm and block drafts.
- For large ABS prints, keep the enclosure at 40-50°C.
If you do not have an enclosure, you can build one with clear plastic panels or even use a large cardboard box. Make sure the enclosure does not touch any hot parts of the printer. Always let your print cool down slowly inside the enclosure before removing it. This step helps you reduce warping and avoid cracks.
Note: If your print does not stick, try raising the bed temperature by 5°C. Watch for signs of overheating, like melted or shiny spots.
Cooling and Fan Control
Cooling plays a big role in how to reduce warping in large 3d prints. You need to control the cooling fan speed to get the best results. If you cool the print too fast, the layers can shrink quickly and pull away from the bed. This causes warping, cracks, or layer separation. If you do not cool enough, the print may sag, especially on overhangs.
You should set the cooling fan speed low for the first few layers. This helps the print stick to the bed and prevents warping. After the first layers, you can slowly increase the cooling fan speed. For PLA, use more cooling. For ABS and PETG, use less cooling or turn the fan off. This method helps you reduce warping and get a smooth finish.
- Start with the cooling fan off or at low speed for the first 5-10 layers.
- Increase the cooling fan speed slowly as the print gets taller.
- For large 3d prints, keep the cooling fan speed lower than usual to prevent warping.
- If you see corners lifting, lower the cooling fan speed or add a fan delay in your slicer settings.
Let your print cool down on the bed before you remove it. Quick removal can cause sudden temperature changes and make the print warp. Patience helps you prevent warping and keeps your large 3d prints flat.
Tip: If you print with ABS or PETG, try turning off the cooling fan for the whole print. This step can help you reduce warping and improve layer bonding.
By using these steps—choosing the right bed adhesion, setting the heated bed and enclosure, and controlling the cooling fan speed—you can learn how to reduce warping in large 3d prints. These methods help you prevent warping, reduce warping, and achieve professional results every time.
Slicer Settings to Prevent Warping
Layer Height and Print Speed
You can adjust layer height and print speed in your slicer to prevent warping in large 3d prints. Thicker layers hold heat longer. This helps each layer bond well and reduces the chance of corners lifting. Slower print speeds give each layer more time to cool evenly. This makes the print stronger and less likely to warp. You should also set the first layer height carefully. A thicker first layer improves bed adhesion and helps prevent warping right from the start.
- Use thicker layers for materials like ABS.
- Slow down the print speed for large 3d prints.
- Set a thicker first layer to improve adhesion.
Tip: Adjust the fan speed for the first few layers. Lower fan speed helps the print stick better and prevents early warping.
Infill Type and Percentage
Choosing the right infill type and percentage can help prevent warping in large 3d prints. The infill structure supports the outer walls and keeps the print strong. Simple patterns like grid or lines work well for most projects. You do not need a high infill percentage for strength. Too much infill can cause extra stress and increase warping.
|
Infill Percentage |
Effect on Strength and Warping |
|---|---|
|
0-60% |
|
|
60-70% |
Small strength gains, more material used |
|
Above 70% |
Little extra strength, much more warping and print time |
Pick an infill pattern that balances strength and print time. Lower infill percentages help prevent warping and save material.
Brims, Rafts, and Skirts
You can use brims, rafts, or skirts to prevent warping in large 3d prints. Each method has its own benefits.
|
Method |
Effectiveness in Preventing Warping |
Additional Notes |
|---|---|---|
|
Rafts |
High |
Best for small contact areas and tricky materials |
|
Skirts |
Moderate |
Good for priming, less support for warping |
|
Brims |
Moderate to High |
Increases adhesion, may waste some material |
- Use rafts for prints with small bases or high warping risk.
- Try brims to add more surface area and improve bed grip.
- Skirts help with temperature but do not support the print directly.
By tuning these slicer settings, you can prevent warping and get better results with large 3d prints.
Material and Environment Choices
Filament Selection for Large Prints
Picking the right filament helps stop warping in big 3D prints. Some filaments warp less than others. PLA and PETG are good because they stay flat. They stick to the bed well. ABS and ASA can warp more on big prints. Match your filament to your print’s size and shape.
- PLA does not warp much and is good for big prints.
- PETG sticks well and warps very little.
- ABS and ASA need extra care to stop lifting and cracks.
Tip: Try PLA or PETG first if you want fewer failed prints.
Room Temperature and Humidity
You need to keep your workspace steady to stop warping. Big prints change a lot with temperature and humidity. Stable air helps prints stay flat and strong. Use a heated bed and enclosure to keep heat steady. Watch the room’s temperature and humidity to avoid problems.
|
Factor |
Effect on Warping |
|---|---|
|
High Temperature (above 30°C) |
Can cause stress inside, leading to warping or cracks. |
|
Low Temperature (below 15°C) |
Makes plastic flow badly, causing layer problems and print fails. |
|
High Humidity (above 80% RH) |
Weakens layers and makes delamination more likely. |
|
Low Humidity (below 30% RH) |
Makes curing too fast, which can cause stress and delamination. |
- Keep your room between 18°C and 28°C for best prints.
- Try to keep humidity between 40% and 60% RH.
- Stop drafts and sudden changes in temperature.
Comparison Table: PLA, PETG, ABS, ASA
This table shows how much common filaments warp and where they work best in big 3D prints:
|
Filament |
Warping Tendency |
Best Use Cases |
Notes |
|---|---|---|---|
|
PLA |
Low |
Prototypes, models, big art |
Easy to use, warps very little |
|
PETG |
Very Low |
Parts, enclosures |
Sticks well, resists warping |
|
ABS |
High |
Mechanical parts, enclosures |
Needs heated bed and enclosure, warps easily |
|
ASA |
High |
Outdoor parts, UV resistance |
Like ABS, needs careful temperature control |
Troubleshooting to Reduce Warping
Step-by-Step Checklist
You can solve most warping problems in large 3D prints by following a clear checklist. Use this step-by-step guide to spot and fix common issues:
-
Check Filament Quality
Make sure your filament feels dry and clean. Moisture in filament causes poor extrusion and weak layers. -
Prepare the Build Plate
Clean the plate with isopropyl alcohol. Apply a fresh adhesive layer, such as glue stick or painter’s tape, for better grip. -
Level the Bed
Adjust the bed so it sits flat. A level bed helps the first layer stick and stay even. -
Set First Layer Settings
Increase the first layer’s extrusion width to 110-120%. Raise the first layer temperature by 5-10°C above normal. -
Control the Chamber
Keep the enclosure warm. For ABS or nylon, aim for 40-60°C inside the chamber. -
Add Support Structures
Use a 10-15mm brim or a 5mm raft to give your print more contact with the bed. -
Protect from Drafts
Enable a draft shield in your slicer. This blocks air currents that can cool your print unevenly. -
Monitor the First Layers
Watch the first few layers as they print. Fix any lifting or curling right away.
Tip: Always use advanced slicing software to fine-tune your print settings for large projects.
Persistent Warping Solutions
If warping keeps happening, try these advanced fixes:
- Use brims and rafts for extra stability on tricky prints.
- Apply bed adhesives like glue stick or painter’s tape for better adhesion.
- Double-check bed leveling before every print.
- Print inside a protective enclosure to keep temperature steady.
- Choose high-quality, dry filament to avoid moisture problems.
- Slow down the print speed, especially for the first few layers.
You can reduce warping in large 3D prints by following this checklist and using these solutions. This approach helps you achieve professional finishes and strong, reliable parts.
You can make your prints look great by using many steps to stop warping in large 3D prints. Clean the build plate before you start. Use a heated bed to help the print stick. Control how fast your print cools down. Pick the right filament for your project. Keep your workspace steady and safe. Try different slicer settings and add support structures. Follow the checklist to fix problems. Test your printer and materials to find what works best.
Remember: If you practice and make careful changes, you will get strong and smooth prints every time.
FAQ
What causes warping in large 3D prints?
Warping happens when the print cools unevenly. The edges shrink faster than the center. This pulls corners up and bends surfaces. You see this problem more with big prints and materials like ABS.
How can you prevent warping on the first layer?
You should clean the build plate and level it. Use a heated bed and apply adhesives like glue stick or painter’s tape. Set the first layer thicker and hotter. These steps help your print stick and stay flat.
Which filament is best for reducing warping in large prints?
PLA and PETG work best for large prints. They stick well and warp less. ABS and ASA need extra care, like a heated bed and enclosure. Choose PLA or PETG if you want fewer problems with warping.
Should you use an enclosure for big 3D prints?
Yes, you should use an enclosure for large prints, especially with ABS or ASA. An enclosure keeps the temperature steady and blocks drafts. This helps you reduce warping and get a professional finish.
What slicer settings help reduce warping?
You can lower print speed and use thicker layers. Add a brim or raft for better bed adhesion. Adjust cooling fan speed for the first layers. These slicer settings help you reduce warping in large 3D prints.


