It can be. But it also adds new failure points: more loading/unloading events, more purge waste, and more tuning.
This guide helps you decide (quickly) whether a multi-color box makes sense for your current printer—and what to check before you buy or build one.
Key Takeaway: A multi-color box is usually a filament switching system. If your printer and slicer can’t execute reliable tool changes and purge routines, multi-color will be frustrating—no matter which box you buy.
Key takeaways
- “Multi-color box” usually means a filament switching unit (multiple spools, one nozzle). Some alternatives splice filaments into one strand before printing.
- Compatibility is less about “will it physically connect?” and more about firmware + slicer toolchange workflow.
- Expect trade-offs: purge waste, longer print times, and a higher chance of mid-print interruptions.
- For many advanced users, the best results come from focusing on dry filament, low-friction filament paths, and clean tip shaping.
- If you print a lot of multi-colour parts every week, upgrading to a printer designed around a native multi-material system can be less painful than retrofitting.
Choosing a multi color box for 3D printer: what it is (and isn’t)
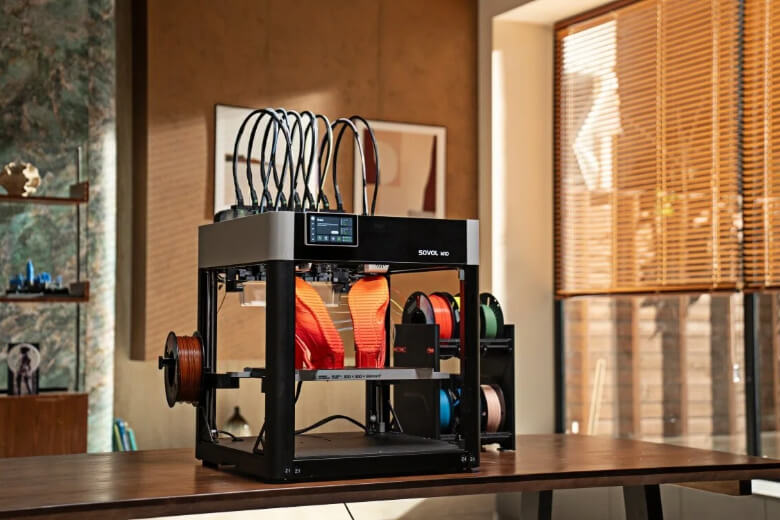
In most FDM circles, a “multi-color box” refers to a unit that manages multiple spools and automatically feeds one filament at a time into a single hotend. It’s the same basic idea behind common “AMS/MMU-style” systems.
These switching systems typically have:
- multiple spool lanes (often 4)
- motors to push/pull filament
- sensors to detect movement, runout, or loading errors
- a hub/buffer that merges lanes into one feed path
Bambu Lab’s own explainer of its Automatic Material System is a clear look at this architecture: spool lanes → hub → buffer → single toolhead (Bambu Lab, “AMS explained in detail” (2022)).
Switching vs splicing: the two ways to get “multi-color” on one nozzle
If you’re evaluating add-ons for an existing printer, you’ll run into two approaches:
- Switching (AMS/MMU-style): the system unloads the current filament, loads the next one, then purges.
- Splicing (Palette-style): the system splices filaments into one continuous strand before they enter the printer.
Switching is common because it’s conceptually simple and flexible mid-print—but it usually means more purge and more mechanical events.
Will a multi material unit for FDM printer work on your current setup?
Most “compatibility lists” you’ll see online are incomplete. The real question is whether your printer can perform the same set of actions, consistently, hundreds of times in a single job.
Use this checklist as a go/no-go filter.
1) Firmware and toolchange logic: can your printer reliably “switch tools”?
At minimum, you need a firmware + configuration that can:
- run a repeatable unload/load sequence
- pause, retract, and resume cleanly
- respond predictably to filament sensor events (if you use them)
Even on official ecosystems, matching firmware and toolchange expectations matters. Prusa calls this out directly for MMU3: keep the MMU firmware and printer firmware compatible, and don’t run incompatible G-code profiles (Prusa Knowledge Base, “MMU3 Compatibility” (2026)).
What this means for you: a “multi-color box” isn’t just hardware. It’s a workflow contract between firmware, slicer, and feeder.
2) Slicer support: can your slicer generate sane multi-color G-code?
You want a slicer that can:
- assign colours/materials to parts
- generate a purge/prime strategy (tower, wipe, or both)
- let you tune transitions so you don’t over-purge or under-purge
If your slicer can’t manage these basics cleanly, you’ll get either:
- colour bleed (under-purge)
- massive waste and longer prints (over-purge)
If you’re new to the mechanics of multi-colour workflows, SOVOL’s explainer is a good foundation: How does multi-color 3D printing work? (FDM explained).
3) Filament path friction: is your setup low-resistance enough to re-load reliably?
Switching systems live or die on friction.
Before you blame the box, check:
- long Bowden runs (more friction)
- tight bends in PTFE tubes
- sharp-edged tube fittings
- spool drag and tangled wind
If you’re running very long tubes, or you frequently print with “sticky” materials, you may spend more time tuning the path than printing.
4) Tip shaping and cutting: can your system consistently create a reloadable filament tip?
This is the part that surprises people.
Many failures happen when the system tries to reinsert filament with:
- a blobbed tip
- a “mushroom” shape from heat creep
- a chewed section from grinding
The more reliably your system can cut/shape the tip (or manage the unload temperature window), the less you’ll fight random load errors.
The trade-offs you should expect (so you’re not disappointed)
A multi-color box can unlock multi-colour prints on a printer you already own. But it’s not free.
Purge tower waste reduction starts with your transition settings
With filament switching, you’re flushing the previous colour/material out of the nozzle and melt zone.
The practical result:
- you’ll often need a purge tower (or wipe strategy)
- multi-colour prints can use noticeably more filament than single-colour prints
If you want to make switching systems less wasteful, SOVOL has a practical guide worth skimming: Reduce filament waste in multi-color 3D printing: 9 practical moves.
Reliability drops if your filament isn’t dry and consistent
Advanced users already know moisture is a silent killer—but multi-colour makes it worse.
Wet filament increases:
- stringing and ooze (harder transitions)
- brittle breaks during unload/reload
- inconsistent extrusion after a swap
If your “multi-color box” doubles as a drybox, that’s not a gimmick—it’s a reliability feature.
Some materials are simply harder to multi-material switch
Mixing very different materials (e.g., flexible + rigid, or abrasive blends) adds more variables:
- different retraction needs
- different temperatures and ooze behaviour
- different friction in the path
That doesn’t mean “don’t do it.” It means start with easy mode: PLA↔PLA or PLA↔PETG, then expand once your workflow is stable.
Multi color printing on a single extruder: a quick decision table
Use this to decide which approach fits your reality.
|
Your situation |
A multi-color box (switching) is a good fit if… |
It’s a bad fit if… |
|---|---|---|
|
You want occasional multi-colour models |
you can tolerate extra time and some waste |
you hate babysitting long prints |
|
You want multi-material (supports, mixed properties) |
your slicer can manage transitions and purge |
you need “set and forget” reliability on day one |
|
Your printer is heavily modded |
you’re comfortable tuning firmware/macros |
you rely on stock profiles and minimal tweaking |
|
You print long jobs overnight |
you’ve already solved dry storage and runout handling |
you frequently get random load/unload issues today |
Red flags that say “don’t retrofit”
If two or more of these are true, consider upgrading your printer instead of adding a box:
- you already struggle with inconsistent extrusion or jams
- your printer’s filament path is high-friction and hard to simplify
- you don’t want to touch firmware, macros, or slicer profiles
- you mostly print functional parts where multi-colour is rarely worth the waste
If that sounds like you, it may be worth looking at an open-source-friendly machine designed for heavier workflows (and future upgrades). For example, SOVOL Zero is positioned around open-source performance and mod potential.
(Note: whichever printer you choose, a multi-material workflow still needs dry filament and sane transition settings—native systems just reduce the number of fragile integration points.)
If you do retrofit: a first-week setup checklist
Keep it boring and methodical. The goal is repeatability, not “max colours” on day one.
- Start with 2 filaments (same material family).
- Shorten and straighten the filament path before tuning anything else.
- Dry your filament and clean dust off spools.
- Run a small multi-colour test with a purge tower.
- Tune transitions only after you’ve confirmed loading/unloading is consistent.
- Scale up to longer prints once you can complete a 2–3 hour multi-colour job without intervention.
If you want to explore the open-source side of these systems (and what makes them different), this overview is a solid starting point: What is an open source MMU in 3D printing?
Next steps
If you’re trying to make multi-colour more reliable (not just more colourful), these are worth reading next:
- SOVOL’s multi-color printing explainer (good for understanding the mechanics)
- SOVOL’s purge-waste reduction tips (good for making it practical)
And if you need manuals/firmware in one place while you’re planning upgrades, bookmark SOVOL Downloads.