- Size Matters for Direct FDM Printing: M6 (1/4 in) and larger are a conservative starting point for direct FDM printing with a 0.4 mm nozzle. Smaller threads may also work on a well-tuned printer, but they require careful clearance tuning and test prints.
- Tolerances Are Dynamic: A radial clearance of 0.10 mm to 0.20 mm (0.20–0.40 mm diameter difference) is a solid starting point for testing, but ideal clearance depends on nozzle diameter, line width, layer height, slicer flow rate, printer kinematics, and filament shrinkage.
- Orientation and Wall Count Matter: For clean circular thread geometry, printing the thread axis vertically is often a good starting point, though orientation should ultimately balance load direction and strength. Always use 3 to 5 wall perimeters so thread teeth are carved from solid extruded plastic rather than hollow infill.
- Material Choice Dictates Durability: Rigid PLA works well for static, low-stress caps; PETG provides ductility and impact resistance for structural parts; and ASA delivers UV resistance and higher thermal stability for outdoor housings. Practical service limits depend on load, exposure, and specific filament formulation.
- Know the Load Limits: 3D-printed plastic threads should never be used for high-load, high-temperature, pressure-critical, or safety-critical applications without rigorous physical testing.
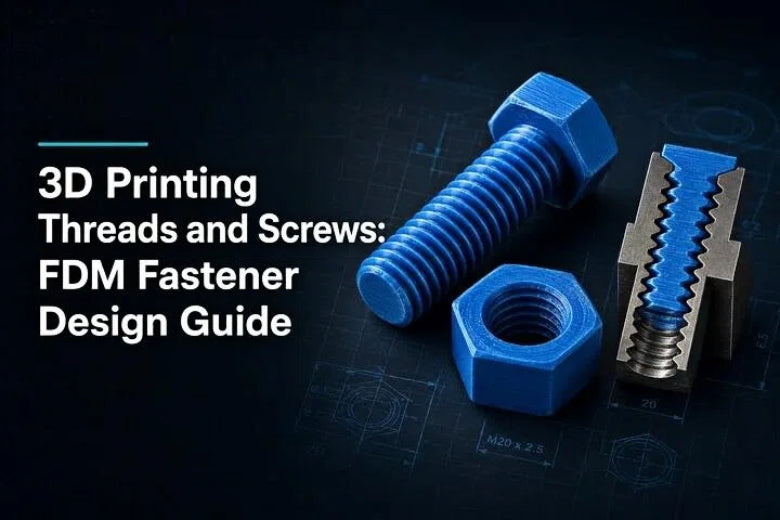
Designing functional, custom mechanical parts is one of the most rewarding capabilities of FDM (Fused Deposition Modeling) 3D printing. Whether you are assembling a custom electronics enclosure cover, an adjustable camera bracket, a dust-tight container cap, or an ergonomic adjustment knob, joining plastic parts with threaded fasteners is often essential.
However, many makers and engineers encounter frustrating failures on their first attempts: bolts that bind and seize instantly, internal threads that strip under light torque, or printed screws that snap cleanly along layer lines.
Achieving smooth, reliable 3D printed threads requires understanding how CAD geometry translates into molten plastic extrusions. This guide breaks down the engineering principles, material trade-offs, slicer settings, and troubleshooting steps needed to design reliable FDM fasteners.
1. What Types of Threads and Screws Can You 3D Print?
Not all thread profiles react equally to FDM 3D printing. Because FDM printers construct parts layer by layer using round nozzle orifices, fine geometry can easily blur or sag.
Standard Metric (60°) vs. ACME / Trapezoidal (29°/30°) Profile
Metric V-Profile: Sharp 60° crests/valleys → Harder overhangs at small scales
Trapezoidal/ACME: Flatter roots and crests → Superior layer bonding & lower friction
Standard ISO / Metric Threads (M6 and Larger)
Standard 60-degree V-shaped metric threads (ISO) are the most common fastener geometry in CAD programs like Fusion 360 and SolidWorks.
- Direct Printing Guidelines: Metric threads sized M6 and larger (typically with a pitch of 1.0 mm or greater) represent a conservative starting point for direct FDM printing with a 0.4 mm nozzle. Smaller threads can be printed on well-tuned machines, but require precise clearance calibration and test prints.
- Under M6 Threshold: Standard metric threads smaller than M5 (such as M3 or M4) feature thread crests and root radii that approach the physical extrusion width of a 0.4 mm nozzle. Printing an M3 internal thread directly often results in a rough or fused profile unless slicer settings and hole compensation are carefully tuned.
ACME and Trapezoidal Threads
Trapezoidal and ACME thread profiles feature flat crests, wide roots, and shallower flank angles (typically 29° or 30°).
- Why They Excel: The flat profiles eliminate sharp overhangs, allowing melted filament to rest securely on the layer below.
- Best Use Cases: Lead screws, heavy-duty clamp jaws, container caps, and high-cycle adjustment knobs benefit greatly from trapezoidal threads because the wider root withstands higher axial shear forces.
Custom Coarse and Rounded Threads
When designing custom enclosures, bottle lids, or tool brackets, you are not restricted to industrial hardware standards. Modeling custom coarse threads with a large pitch (2.0 mm to 4.0 mm) and rounded tooth roots reduces stress concentration points and creates buttery-smooth engagement even with lower-resolution print profiles.
2. Internal vs. External Threads: Key FDM Printing Differences

Internal (female) threads inside a nut or printed body behave differently during extrusion than external (male) threads on a printed bolt.
|
Item |
Detail |
|---|---|
|
Internal Thread Mechanics |
Slicer arc compensation pulls molten perimeter inward. |
|
Result |
Thread ID shrinks, causing tight or frozen fits. |
|
External Thread Mechanics |
Outer perimeter squish pushes plastic slightly outward. |
|
Result |
Thread OD expands, requiring negative CAD offsets. |
Internal Threads (Holes, Nuts, and Bosses)
When an FDM printer moves in a circular path to form an internal hole, surface tension and plastic memory pull the extruding filament inward toward the center of the arc.
- The "Hole Shrinkage" Effect: Internal holes and female threads almost always print slightly smaller than modeled in CAD.
- Design Strategy: Internal threads require positive sizing adjustments in CAD or slicer-level compensation (such as XY Hole Compensation or Hole Horizontal Expansion) to maintain the necessary minor diameter.
External Threads (Bolts and Threaded Studs)
External threads form the outer boundary of a part. Extrusion squish causes the plastic line to bulge slightly outward beyond the nozzle centerline.
- Design Strategy: Male threads require a negative offset applied directly to the thread flanks in CAD (push/pull face by -0.10 mm to -0.20 mm) or slicer-level XY Contour Compensation.
Eliminating "Elephant's Foot" on Thread Entries
The first layer of an FDM print is intentionality squished into the build plate for bed adhesion. If a threaded hole or screw starts directly on the build plate, this initial flare (elephant's foot) will jam the thread entry.
- The Fix: Always add a 45-degree chamfer (0.8 mm to 1.5 mm deep) to the starting face of both internal and external threads. A chamfer cleans up first-layer squish and acts as a self-aligning lead-in guide during assembly.
3. Critical Design Parameters: Clearance, Layer Height, and Orientation

Achieving a clean mechanical fit requires balancing CAD clearance against slicer resolution.
IMPORTANT: Recommended clearances vary significantly by printer kinematics, nozzle diameter, line width, filament shrinkage, and slicer flow rate. Never treat any clearance value as universal.
Thread Clearance and Tolerance Offset
Thread clearance refers to the intentionally designed physical gap between male and female thread flanks.
- Baseline Starting Point: A radial clearance of 0.10 mm to 0.20 mm per side (resulting in a total diameter difference of 0.20 mm to 0.40 mm) is a helpful starting point for testing.
- Why Tolerances Vary: There is no universal tolerance value for all setups. Ideal clearance depends heavily on nozzle diameter, line width, layer height, slicer flow rate, printer kinematics, and filament thermal shrinkage. Because these variables interact, clearance parameters should always be verified with a test coupon print before committing to large production models.
Layer Height and Thread Pitch
Layer height determines the vertical resolution of the thread helix.
- Recommended Range: Set layer height to 0.12 mm – 0.16 mm when using a standard 0.4 mm nozzle.
- The Pitch-to-Layer Rule: Your layer height should ideally be no more than 1/6th to 1/8th of the thread pitch. If your thread pitch is 1.2 mm, a 0.15 mm layer height provides 8 full layer steps per revolution, producing a smooth slope with minimal stair-stepping friction. For more insights on selecting resolutions, refer to our guide on choosing the right 3D printer nozzle size.
Perimeter Wall Count (Walls Over Infill)
Thread teeth are high-stress zones. If a thread tooth is backed by hollow sparse infill (like 15% grid), tightening a bolt will crush the thin outer shell into the cavity.
- Rule of Thumb: Increase wall count to 3 to 5 perimeters (or a minimum wall thickness of 1.6 mm to 2.0 mm). This ensures the thread teeth and root geometries are carved entirely from solid, continuous concentric rings of extruded plastic. Learn more about optimizing wall count vs wall thickness.
Print Orientation: Balancing Geometry and Strength
For clean circular thread geometry, printing the thread axis vertically along the Z-axis is often a good starting point. However, the best print orientation ultimately depends on load direction, support requirements, and whether dimensional accuracy or tensile strength is the primary priority for your assembly.
- Vertical Orientation: Produces accurate, circular XY thread profiles with consistent layer stacking. It works well for non-structural engagement, though tensile loads align directly with layer boundaries.
- Horizontal Orientation: Increases tensile strength along the screw axis because extruded strands span the length of the shank. However, it requires overhang support and produces stepped thread profiles that may require post-processing.
4. How to Improve 3D-Printed Thread Strength and Durability
If a printed fastener fails, it usually fails in one of two ways: thread stripping (tooth shear) or shank snapping (tensile/torsional cleavage).
Design Features for Higher Strength
- Increase Tooth Root Radius: Add a small fillet (0.2 mm to 0.5 mm) at the root of the thread tooth in CAD. Sharp 90° or acute internal corners act as stress concentrators where micro-cracks originate.
- Thicken the Screw Core: When modeling custom threaded studs, ensure the solid inner core (minor diameter) is thick enough to handle the applied tightening torque.
- Extend Thread Engagement Length: In metal engineering, 1.0 to 1.5 times the screw diameter in thread depth is standard. For 3D-printed plastic threads, design for 2.0 to 2.5 times the screw diameter in engagement depth to distribute clamping load across more teeth.
⚠️ Safety and Load Disclaimer: 3D-printed plastic fasteners exhibit lower tensile and shear strength than industrial metal hardware. Never use 3D-printed threads for high-load, high-temperature, pressure-critical (e.g., pressurized gas/fluid fittings), or safety-critical applications without thorough empirical load testing.
5. Material Selection: PLA vs. PETG vs. ASA for Printed Fasteners
Filament mechanics dictate how a printed fastener withstands torque, impact, ambient temperature, and continuous clamping stress. Note that thermal properties like Glass Transition Temperature ($T_g$) indicate material phase changes, not maximum continuous operating temperatures. Practical service limits depend on mechanical load, part geometry, exposure duration, and specific filament formulations.
|
Performance Dimension |
PLA (Polylactic Acid) |
PETG (Polyethylene Terephthalate) |
ASA (Acrylonitrile Styrene Acrylate) |
|---|---|---|---|
|
Tensile Stiffness |
Very High (Rigid) |
Moderate (Slightly Flexible) |
High |
|
Impact Toughness |
Low (Brittle) |
High (Ductile) |
High |
|
Typical Glass Transition |
~55°C – 60°C |
~75°C – 80°C |
~95°C – 100°C |
|
Resistance to Mechanical Creep |
Poor (Relaxes under tension) |
Moderate |
Good |
|
UV & Weather Resistance |
Poor |
Moderate |
Excellent |
|
Best Fastener Scenario |
Static covers, low-stress caps |
Functional brackets, clips, enclosure lids |
Outdoor hardware, heat-exposed housings |
PLA: Stiff but Brittle
PLA boasts high tensile strength and stiffness, making it easy to print with sharp thread detail. However, PLA is brittle; over-tightening a PLA bolt causes sudden tooth shear. Furthermore, PLA suffers from mechanical creep—under sustained bolt tension, the plastic slowly deforms over time, causing the joint to lose clamping force.
PETG: The Functional Workhorse
PETG strikes an ideal balance for internal utility parts. Its higher ductility allows thread teeth to deform slightly under torque rather than snapping. PETG generally offers better heat resistance than PLA, but its practical service temperature depends on filament formulation, applied load, and exposure time. Always consult the manufacturer's technical data sheet (TDS).
ASA: Thermal and Outdoor Durability
When functional parts face outdoor sunlight, UV radiation, or high ambient heat, ASA is a strong choice. ASA offers high thermal stability ($T_g \approx 95\text{–}100^\circ\text{C}$) and robust layer bonding when printed inside an enclosed 3D printer. For a broader analysis of material mechanics, consult our comprehensive filament guide for PLA, PETG, and ASA.
6. When to Use Printed Threads, Heat-Set Inserts, or Metal Screws
Choosing the right fastening method depends on your functional requirements, assembly frequency, and production scale.
Selecting the Right Fastening Method:
Need small sizes (M2-M5) OR frequent re-assembly? ------ → Heat-Set Brass Inserts
Need simple, permanent mounting for light parts? ------- → Metal Screws Tapped into Plastic
Need custom caps, knobs, or minimal extra hardware? ---- → 3D Printed Plastic Threads
Method 1: Direct 3D Printed Threads
- Best For: Custom container lids, adjustment knobs, large threaded rings (≥ M6), and quick functional prototypes.
- Advantage: Requires no additional hardware components; fully customized thread shapes can be integrated directly into CAD.
- Limitation: Tends to wear down over repeated assembly cycles compared to metal threads.
Method 2: Heat-Set Brass Threaded Inserts
- Best For: Structural electronics enclosures, high-stress mounting points, small metric sizes (M2, M3, M4, M5), and parts requiring frequent disassembly.
- How It Works: A knurled brass cylinder with internal machine threads is pressed into a 3D-printed boss using a hot soldering iron (~250–300°C). The surrounding plastic melts and flows into the knurling, forming a strong mechanical interlock once cooled.
- Advantage: Heat-set inserts generally provide more durable and reusable threads than printed plastic, though their actual service life depends on insert quality, boss geometry, material selection, installation technique, and applied load.
Method 3: Metal Machine / Self-Tapping Screws Driven into Plastic
- Best For: Light internal brackets, fan mounts, and permanent enclosure assemblies.
- How It Works: A smooth pilot hole is printed directly into the plastic. A metal screw cuts or rolls its own mating thread during first drive. Use the pilot-hole diameter recommended by the screw manufacturer; if no specification is available, validate the hole diameter with a small test coupon before printing final parts.
- Advantage: Simple and effective for permanent or low-cycle joints without specialized heat tools.
7. Printed Fasteners vs. Heat-Set Inserts vs. Metal Hardware

The following matrix compares key engineering trade-offs across the three primary fastening approaches:
|
Feature / Metric |
3D Printed Threads |
Heat-Set Brass Inserts |
Metal Screws into Pilot Holes |
|---|---|---|---|
|
Minimum Reliable Size |
M6 (Conservative baseline) |
M2 |
M2 |
|
Max Torque Capacity |
Moderate (Depends on geometry/material) |
High (Depends on boss design) |
Moderate |
|
Reusability / Service Life |
Lower (Wears under repeated friction) |
Higher (Durable brass interface) |
Moderate (Best for permanent/low-cycle joints) |
|
Additional Hardware Needed |
Minimal (Uses printed filament) |
Brass inserts + Soldering tool |
Metal screws |
|
Assembly Speed |
Instant (Out of printer) |
Requires heat-press step |
Fast (Direct drive) |
|
Best Application |
Caps, knobs, large rings |
High-load housings, reassembled enclosures |
Light internal mounting |
8. Common Thread Printing Problems and How to Fix Them
Problem 1: Mating Threads Are Too Tight or Fused Solid
- Root Cause: First-layer squish, over-extrusion, or insufficient CAD clearance.
- Solution: Adding a 45° entry chamfer may help clean up initial layer flare. Then tune thread clearance and slicer compensation in small increments using a test coupon; specific values like a -0.15 mm face offset or slicer hole expansion adjustments serve as testing baselines, not universal rules. Differing machine kinematics, materials, and slicer profiles require empirical verification.
Problem 2: Screw Binds Near the First Few Layers
- Root Cause: First-layer squish (Elephant's foot) flaring the entry hole.
- Solution: Add a 1.0 mm x 45° chamfer to the bottom entry face of the threaded part, and enable Elephant's Foot Compensation (0.15–0.20 mm) in your slicer.
Problem 3: Threads Strip Easily Under Light Torque
- Root Cause: Too few wall perimeters or printing with brittle PLA.
- Solution: Increase perimeters to 4 or 5 walls so thread teeth are solid plastic. Switch from PLA to tough PETG or ASA.
Problem 4: Cross-Threading and Misalignment During Assembly
- Root Cause: Sharp, damaged, or unguided thread starting edges.
- Solution: Model a lead-in chamfer on the tip of the screw and the mouth of the nut. Use a "dog point" (a short, unthreaded cylindrical pilot tip) at the end of the screw to align parts before thread engagement.
9. How to Print a Small Calibration Test Piece First
Before committing to a multi-hour print containing complex threaded features, always print a quick 15-minute calibration test coupon.
Step 1: Isolate the Thread Feature in CAD
Model a small test piece containing 2 to 3 full thread turns and a wall thickness that closely matches your final production part.
Step 2: Print with Final Slicer Settings
Use the exact layer height (e.g., 0.14 mm), wall count (4 walls), and material (PETG) planned for the final build.
Step 3: Test Fit & Measure
Hand-thread the mating components together.
- If the fit is too tight or binds: Increase CAD clearance offset or adjust slicer hole compensation in small incremental steps.
- If the fit is too loose or slops: Decrease clearance offset or increase thread engagement depth.
Step 4: Lock In Parameters
Once smooth engagement is achieved, apply these verified clearance values to your full production model.
When managing high-speed small-batch functional printing, maintaining a dedicated library of pre-tested thread clearance profiles saves hours of wasted filament.
Choosing the Right 3D Printer for Functional Fasteners
Consistently printing tight-tolerance mechanical threads requires a stable, rigid 3D printer with precise motion control and reliable extrusion.
Large-format, high-speed CoreXY machines—such as the Sovol SV08 (350x350x345 mm) and the large-scale Sovol SV08 Max (500x500x500 mm)—are engineered specifically for makers, engineers, and small businesses producing functional prototypes and production components. Featuring rigid open-source CoreXY kinematics, direct-drive planetary extruders, and precise bed leveling, these machines deliver the dimensional repeatability necessary for smooth, non-binding thread engagement across both small parts and large structural assemblies.
Frequently Asked Questions (FAQ)
Q1: What is the smallest thread size I can 3D print with a 0.4 mm nozzle?
While M6 (with a 1.0 mm pitch or larger) is a conservative starting baseline for reliable direct FDM printing with a 0.4 mm nozzle, smaller sizes like M4 or M5 can be printed on well-calibrated machines with precise clearance tuning. For heavy re-assembly or small metric fasteners (M2–M4), heat-set brass inserts or metal screws driven into printed pilot holes offer greater mechanical reliability.
Q2: Why are my 3D printed nuts and bolts binding or freezing up?
Thread binding is typically caused by a combination of uncompensated extrusion squish (over-extrusion), insufficient CAD clearance offset, or first-layer flaring (elephant's foot). Adding a 45° entry chamfer may help relieve entry binding. From there, tune thread clearance and slicer compensation in small increments using a test coupon; specific values like a -0.15 mm face offset are starting points, not universal settings.
Q3: Should I use tap and die sets to clean up 3D printed threads?
Tap-and-die post-processing can clean up sufficiently thick printed threads, but it removes plastic material and may weaken or oversize the thread teeth. Test on a sacrificial coupon first; hand tapping is a cleanup tool for micro-imperfections, not a substitute for correct CAD clearance.
Q4: How do I prevent 3D printed screws from snapping under torque?
Consider print orientation relative to load direction, increase perimeter walls to 4 or 5 so the shank is solid plastic, add fillets to thread roots to eliminate stress concentrations, and select a ductile or tough material like PETG or ASA over brittle PLA.