Three terms get mixed up constantly, so keep them separate. Nozzle diameter is the physical hole in the tip, measured in millimeters. Line width is how wide each extruded strand lands on the bed, usually set a little wider or narrower than the hole. Layer height is how tall each layer is, measured vertically.
Every number in this guide is a starting reference tied to specific conditions, not a rule. Your filament, hotend, and slicer profile decide what actually works, so test before you commit. By the end you'll know which size to pick for your next print, and what to re-check after you swap one. For most owners, 0.4 mm is still the size most printers are tuned around, which is why it ships installed.
Key Takeaways
- Nozzle diameter, line width, and layer height are three different settings; changing the nozzle only directly changes the first.
- 0.4 mm is a sensible everyday size because manufacturers tune their standard profiles around the supplied nozzle, though the best range depends on your setup.
- A bigger nozzle is not automatically faster; estimate speed by slicing your actual model, not by comparing nozzle area.
- Every figure here is condition-bound. Test on your own machine before trusting it.
After a swap, re-check flow, line width, and your first layer before running a long print.
What 3D printer nozzle sizes actually change
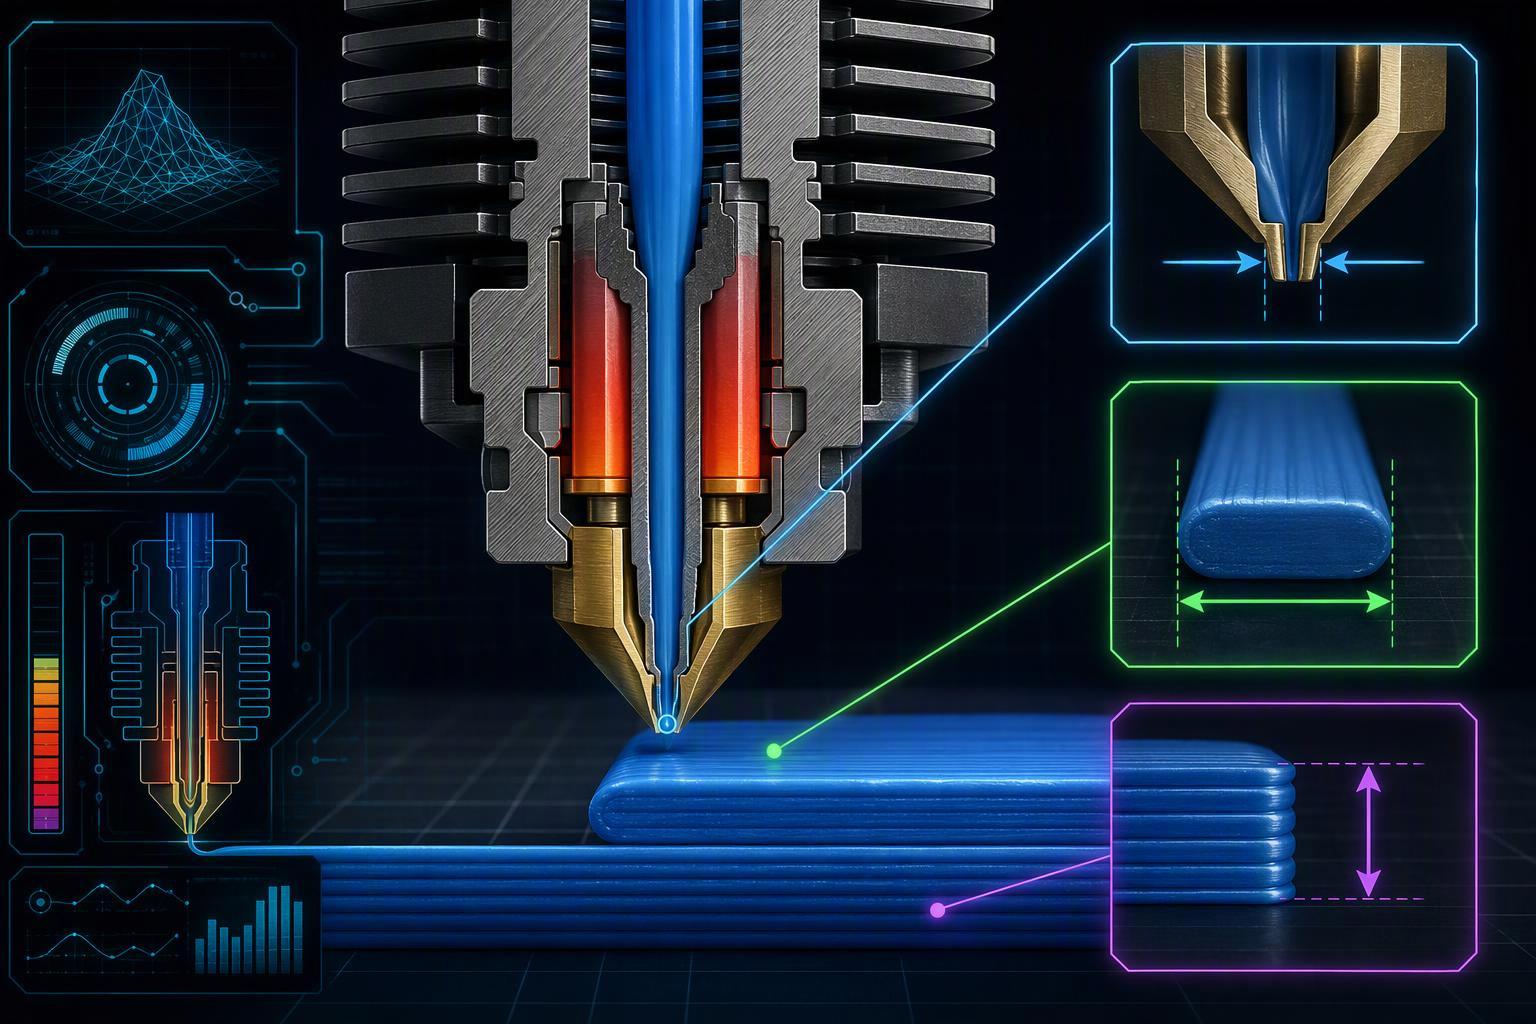
Think of the nozzle as the aperture at the end of a hose: it sets how much plastic can pass through and how wide each line lands on the part. Change the aperture and you change the print, but three different numbers get blamed for it, and they are not the same thing.
Nozzle diameter is the physical orifice in the hardware. A 0.4 mm nozzle may limit the reliable size of very small XY features, although the actual result also depends on line width, slicer settings, and model geometry (Bondtech's nozzle selection guide, 2022-03-29).
Line width is what the slicer plans for each bead in X and Y. It can differ from the nozzle by design: OrcaSlicer's line-width documentation notes that a 100% line width extrudes slightly narrower than the nozzle, then flattens to match the nozzle size once squished onto the layer below. As a starting reference, it suggests setting outer walls a little above the nozzle diameter, while warning that going far below 100% risks poor adhesion and going far above 150% causes over-extrusion, blobs or a rough surface. These values suit the Classic wall generator; Arachne adjusts line width dynamically to the model's geometry.
Layer height is the Z thickness of each layer, a separate setting again.
Key Takeaway: Nozzle diameter is hardware, line width is a slicer plan in X/Y, and layer height is Z. Tune them independently, and expect results to vary with your printer, material, nozzle design, cooling and slicer profile.
Quick answer: which nozzle size should you pick
If you want one answer: 0.4 mm is a sensible default for most everyday 3D printing. Manufacturers tend to tune their stock profiles around the nozzle they ship, and for many owners 0.4 mm stays a good all-round size (Smith3D). It is a starting reference, not a rule: your printer, hotend, filament and slicer profile decide the right fit. Go smaller (0.2 to 0.25 mm) when fine detail matters more than time. Go larger (0.6 to 0.8 mm) when you want thick walls, fewer perimeters and faster large parts.
Bondtech frames the choice around five criteria: the detail level you need, the part's mechanical requirements, build speed, your hotend's melt capacity, and your printer's kinematic capacity (Bondtech, 2022). The last two are the ones people skip, and they are why a bigger nozzle does not automatically buy you speed.
The tightest constraint sits at the small end. Because the orifice influences the smallest feature the nozzle can build reliably, a 0.8 mm nozzle generally makes very fine XY details more difficult to reproduce, so it may be less suitable for small text and miniature features.
|
Nozzle |
Detail |
Speed |
Typical use |
Main trade-off |
|---|---|---|---|---|
|
0.2–0.25 mm |
Highest |
Slowest |
Miniatures, fine text, small mechanical parts |
Long print times, higher clog risk |
|
0.4 mm |
Balanced |
Balanced |
Everyday functional parts and models |
The default you are probably already using |
|
0.6 mm |
Reduced |
Faster |
Brackets, enclosures, prototypes |
Visible layer lines, weaker fine detail |
|
0.8 mm |
Lowest |
Fastest on large parts |
Big panels, vases, draft parts |
Fine tolerances get harder; needs hotend flow headroom |
These values can be used as starting references, but the suitable range depends on the printer, hotend, filament, nozzle design, and slicer profile.
How nozzle diameter drives line width, layer height and flow
Nozzle diameter sets the opening, but three separate settings decide what actually comes out of it. Confusing them is the root of most "my printer under-extrudes when I speed up" problems.
Line width is how wide each bead lands, and it is normally set a little wider than the nozzle. OrcaSlicer's line-width documentation, for example, suggests setting outer walls above the nozzle diameter, with very low values risking poor adhesion and very high values pushing into over-extrusion. Those suggestions suit the Classic wall generator; the Arachne generator varies width per extrusion instead.
Layer height is the vertical thickness of each layer, and it lives inside a practical band. Prusa's own nozzle comparison puts a common ceiling at 80% of nozzle diameter: roughly 0.32 mm on a 0.4 mm nozzle, up to 0.48 mm on a 0.6 mm nozzle. Polymaker's guidance keeps layer height inside 25–75% of the nozzle diameter, with a 0.4 mm nozzle performing best between 0.1 mm and 0.3 mm. Raise3D puts the safe band at 25–75% of nozzle diameter, with 80% as the stated ceiling, and explains why layer height outside the band fails for specific reasons: too low brings extrusion inconsistency and fish-scale patterning, too high weakens layer bonding as the bead geometry becomes less stable. Treat these as reference ranges from those sources, not universal rules.
Flow is where the three meet. Volumetric flow rate equals layer height times extrusion width times print speed, and Polymaker's flow-rate worked example puts a 0.4 mm nozzle at 0.2 mm layer height and 100 mm/s at about 8 mm³/s. The same guide cites typical hotend ceilings of roughly 12 mm³/s for a standard V6, 25+ mm³/s for Volcano-style hotends, and 32 mm³/s for a Bambu Lab X1C. Here is what catches people out: as Bondtech explains, the hotend's melt capacity sets the usable flow ceiling, not the orifice diameter. Ask a modest hotend for far more flow than it can melt and you get under-extrusion or a temperature drop, not a faster print.
So the mechanism runs one direction: a bigger nozzle raises demand for flow, it does not raise supply.
Does a bigger nozzle make prints stronger or faster
Not automatically, and the two questions have different answers.
On strength, the nozzle diameter matters far less than wall thickness and material. CNC Kitchen's load-to-failure tests found a 0.4 mm nozzle and a 0.8 mm nozzle printed comparably strong parts at the same wall thickness. Part strength depends more on wall thickness, material, layer bonding, and print orientation than on nozzle diameter alone. Strength per gram barely changes; what a bigger nozzle can buy you is strength per unit of time.
On speed, the gains are real but they come from the vendor's own demonstration prints. Prusa reports print times up to twice as fast with a 0.6 mm nozzle, and up to 5 times faster at 1 mm, with no published slice-time breakdown for those models. The same source measured higher Charpy energy absorption with a 0.6 mm nozzle, though a commenter on that test noted the impact panels differed in width and height. Treat these as directional, not as a specification: a bigger nozzle is not automatically twice as fast, and the only reliable estimate comes from slicing your actual model both ways.
Warning: A larger nozzle does not bond layers better and does not reinforce the plastic on its own. If a part failed because it was too weak, adding nozzle diameter while keeping the same wall count will not fix it.
Choosing a nozzle material for the filament you print
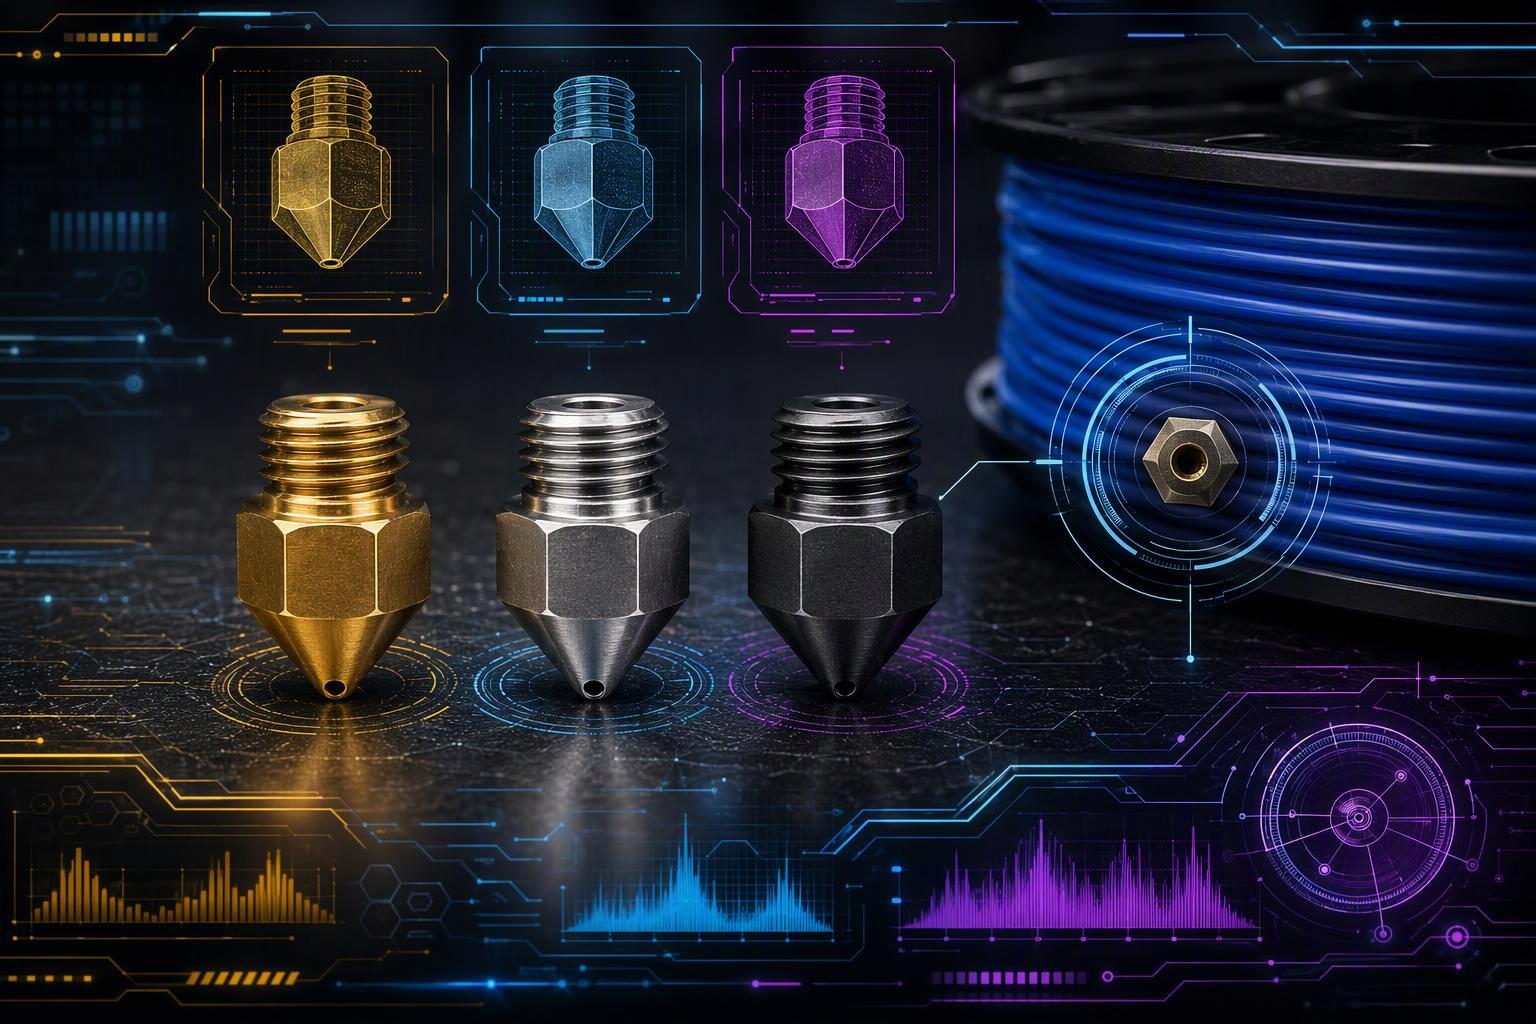
Match the nozzle material to how abrasive your filament is, not to the print quality you want. Practitioner guidance groups glow-in-the-dark, metal-fill, carbon-fibre and glass-fibre filaments as abrasive, and hardened steel is commonly recommended for those materials, while brass stays the default for standard PLA, PETG, ABS and TPU and should never run abrasives (3DBite abrasive filament guide, 2026). Stainless steel nozzles may be chosen for specific material or application requirements, but they are not automatically food-safe.
The trade-off is thermal. Brass conducts heat roughly three times better than stainless steel, at about 110 W/(m·K), and hardened steel sits mid-way between them (3DBite nozzle types, 2026). Hardened steel exceeds 60 HRC and is described as up to ten times more wear-resistant than brass, and it may benefit from a small nozzle-temperature increase depending on the material and hotend. Always check the correct material profile and thermal limits for your specific setup, and see which filaments a multi-material machine like the M1D is set up to run in our M1D material compatibility guide.
The table below summarizes the usual trade-offs. These values can be used as starting references, but the suitable range depends on the printer, hotend, filament, nozzle design, and slicer profile.
|
Nozzle material |
Thermal conductivity |
Wear resistance |
Abrasive filaments |
Typical note |
|---|---|---|---|---|
|
Brass |
≈110 W/(m·K) |
Lower |
Not recommended |
Good heat transfer; check the temperature limit |
|
Stainless steel |
Lower than brass |
Moderate |
Not recommended |
Chosen for specific requirements; not automatically food-safe |
|
Hardened steel |
Between brass and stainless |
Higher |
Commonly recommended |
May need a small temperature tweak depending on setup |
What to re-check after you swap a nozzle
Work in this order: slicer nozzle diameter, line width, layer height, first-layer calibration, flow, temperature, then the print profile. Each one has a symptom that tells you it is wrong.
Get the slicer nozzle diameter wrong and walls come out missing or weak, because the slicer still plans extrusion for the old aperture. Line width comes next: some slicer profiles, such as Vision Miner's, default it to a little above the nozzle diameter, with a wider first layer and a slightly narrower top surface. Leave it at the old value and small details smear or gaps open between walls. Layer height set too tall for the aperture causes under-extrusion; set too fine, it stretches print time for no gain. If you notice new stringing or whiskers after the swap, work through our 3D printer stringing troubleshooting guide before changing hardware.
Mixed diameters across toolheads are a different job. Prusa's own knowledge base calls mixed-diameter printing an experimental workflow that needs per-extruder nozzle diameter, per-feature extruder assignment, automatic extrusion-width calculation, and per-extruder min/max layer height limits, and warns that some combinations fail.
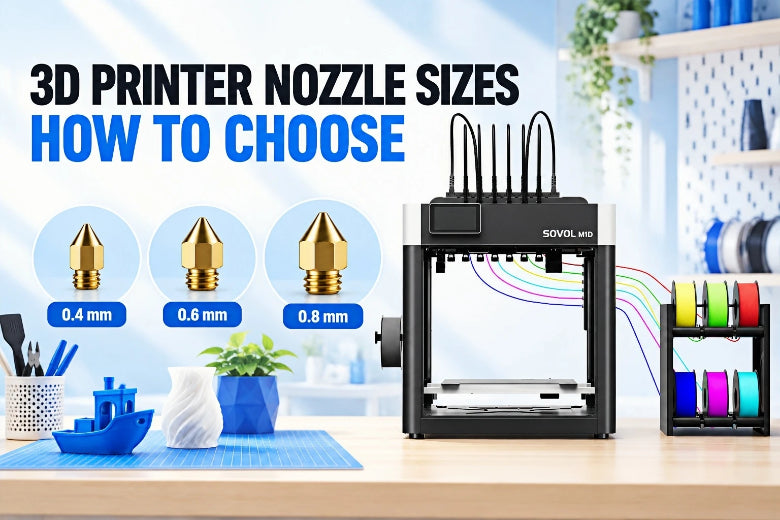
Tool-changing machines make this practical to test. The Sovol M1D supports optional 0.4 mm, 0.6 mm, and 0.8 mm nozzles, allowing users to select a setup for fine details, general-purpose printing, or larger functional parts. Always confirm the correct nozzle profile for each toolhead in the slicer before printing. If you are setting the machine up for the first time, our M1D first print setup guide walks through toolhead checks, filament loading, and slicer profiling. For long-term reliability across toolheads, see the tool-changing 3D printer maintenance guide.
Common mistakes and how to avoid them
The most frequent failure is treating nozzle diameter, line width and layer height as one number. They are three separate settings, and mixing them up causes most symptoms people blame on the nozzle itself.
Conflating diameter, line width and layer height. Diameter is the physical orifice; line width is how wide the extruded road lands; layer height is how tall it stacks. As a reference, some slicers suggest setting outer walls slightly above the nozzle diameter, so a 0.4 mm nozzle often prints a wall a touch wider than 0.4 mm. Set line width independently and confirm the range for your own slicer profile.
Pushing layer height past the ceiling. Prusa's nozzle comparison puts a common practical ceiling at 80% of nozzle diameter, roughly 0.32 mm on a 0.4 mm nozzle. Raise3D explains why going beyond the band can fail: the nozzle cannot press the layers together properly, so bonding weakens even though the print still completes. Treat these as starting references, not universal limits.
Commanding flow beyond the hotend's melt capacity. Polymaker's flow-rate worked example puts a 0.4 mm nozzle at 0.2 mm layer height and 100 mm/s at about 8 mm³/s. Ask for more and you get under-extrusion or skipped steps. As Bondtech explains, the hotend's melt capacity sets the usable flow ceiling, not the orifice diameter.
Running abrasive filament through brass. Practitioner guidance groups glow-in-the-dark, metal-fill, carbon-fibre and glass-fibre filaments as abrasive, so hardened steel is commonly recommended for them. Choose a nozzle material that matches how abrasive your filament is.
Assuming a larger nozzle automatically strengthens a part. CNC Kitchen's load-to-failure tests found a 0.4 mm nozzle and a 0.8 mm nozzle printed comparably strong parts at the same wall thickness. Part strength depends more on wall thickness, material, layer bonding, and print orientation than on nozzle diameter alone.
Warning: If a print fails after a nozzle swap, check these five causes in order before changing any hardware. Most failures trace back to a setting, not a worn nozzle.
Frequently Asked Questions
Is 0.4 mm really the best all-round size?
For most people, yes. It is the default on nearly every desktop machine because it balances detail, speed and reliability, and slicer profiles are built around it. Prusa's nozzle comparison puts a common layer-height ceiling at 80% of nozzle diameter, which for a 0.4 mm nozzle is about 0.32 mm, so it still covers the layer heights most models need. Move away from it only when a specific job demands finer detail or much faster output, and treat the ranges as starting references for your own setup.
0.4 mm vs 0.6 mm for a specific part, which one?
Choose 0.6 mm when the part is large, functional and does not need fine surface detail, because the wider line lays down more material per pass. Stay with 0.4 mm when the part has small features, thin walls or visible curves. As a reference, Polymaker's guidance keeps layer height inside 25% to 75% of the nozzle diameter, so a 0.6 mm nozzle is often run between 0.15 mm and 0.45 mm, while a 0.4 mm nozzle is often best between 0.1 mm and 0.3 mm.
Is a 0.8 mm nozzle worth it for large prints?
It can be, if the print is genuinely large and detail is secondary. A 0.8 mm nozzle moves far more plastic per second, but it also needs a hotend that can melt that volume. Raise3D's nozzle guidance sets a 25% to 75% band with 80% as the stated ceiling, which suggests a 0.8 mm nozzle is usable from about 0.2 mm up to 0.64 mm layer height. If hotend flow rate is your limit, a bigger nozzle will not help.
Does a hardened steel nozzle need higher temperatures?
Often only a small increase, and the exact amount varies. Brass conducts heat better than stainless steel, so hardened steel and stainless nozzles may run slightly cooler at the tip. A common starting point is a few degrees more for stainless and hardened steel, then adjust based on your material and hotend.
What should I do when a print fails right after a nozzle swap?
Re-check the basics in order before changing any settings. Confirm the nozzle is tightened at temperature and seated against the heat break, then re-run a first-layer calibration, because the new nozzle changes your effective Z offset. Update your line-width and first-layer values to match the new diameter too, then test a small print before committing to a long job. If new stringing appears, revisit retraction and temperature.
Conclusion
You can now read a nozzle size as one of three separate settings rather than a single number that decides everything. Diameter is the bore; line width is how wide each extruded strand lands; layer height is how tall each pass sits. Pick the diameter from the part in front of you, the filament going through it, and the flow ceiling your hotend can actually sustain.
That framing is the point of this 3D printer nozzle size guide. A bigger nozzle does not automatically print faster, and it does not automatically print stronger. Each one shifts a tradeoff, and the tradeoff only resolves once you test it on your machine.
Treat every figure here as a starting reference, and remember that the suitable range depends on the printer, hotend, filament, nozzle design, and slicer profile. Your hotend, your filament batch and your slicer profile decide where the real limit sits.
If you are still weighing hardware, see printer options that ship with swappable nozzle diameters, or learn more about matching a machine to the parts you actually print.